
We used to set alarms on antique table clocks back in the day. Before a significant event, it would be beneficial for us to get up on time. Today, you may set an alarm on your phone or computer, though. We’ll demonstrate how to set an alarm on a Windows computer in this article.
These days, setting an alarm may be used for more than just waking up. However, being reminded of a task or an event at a specific time also helps. While setting an alarm on a mobile device is a simple process, it might be challenging when using Windows 10 or 11. Particularly if you are not familiar with the latest features.
Also Read: Windows 11 Clock Time Wrong? Here’s the Fix! (7 Solutions)
Prerequisites before setting an alarm on a Windows computer.
The right time zone and the system date and time are required for setting an alarm or making any other modifications to the Windows Clock app. Your alarm won’t function properly if that isn’t set appropriately. Therefore, before you set an alarm on your computer, double-check that it adheres to the following requirements:
1. The date/Time and Time Zone should be set correctly
You must verify that the Date and Time or the Time Zone of your PC are set correctly before using the clock or setting an alarm. If not, you can change the date and time settings by following the instructions below:
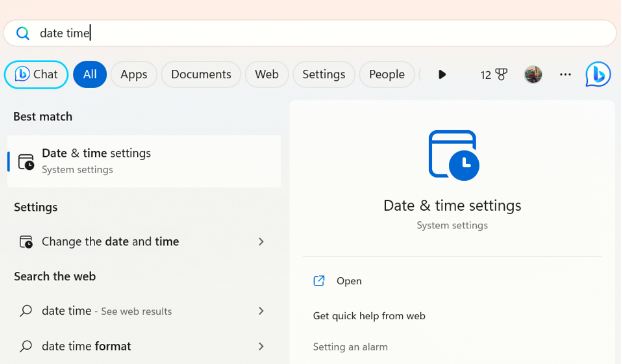
Step 1: Select Date & Time settings under Best Match after searching for “date” and “time” in the Start menu.
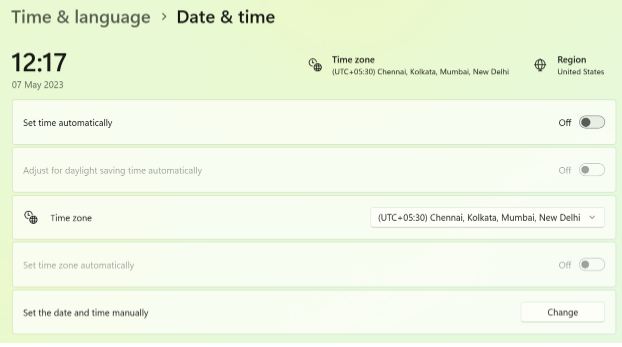
Step 2: This will launch the Settings app’s Time & Language settings page.
Step 3: Here, select Turn off Set time automatically.
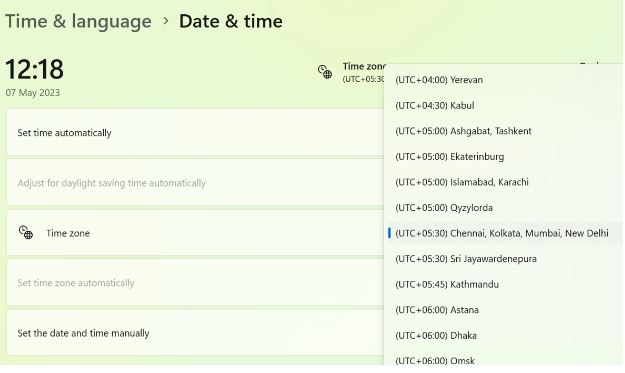
Step 4: Next, manually set the time zone by choosing the correct option from the drop-down.
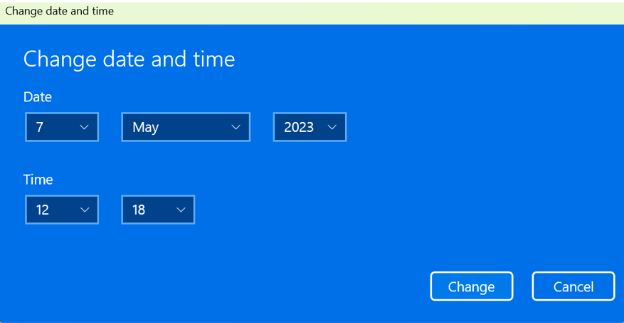
Step 5: Select the appropriate date and time by clicking Change next to Set the date and time manually.
Also Read: How To Change Windows 11 Lock Screen Image & Clock?
2. Disable Windows Sleep Mode
Additionally, make sure your Windows PC is in sleep mode. If so, it will stop the Clock app from sounding the alarm each time your computer goes to sleep. In this situation, disabling Sleep mode is required before setting the alarm in Windows. This is how:
Step 1: Launch the Settings app by pressing the Win + I buttons simultaneously.
Step 2: After that, hit the System tab on the left panel and click Power & Battery on the right.
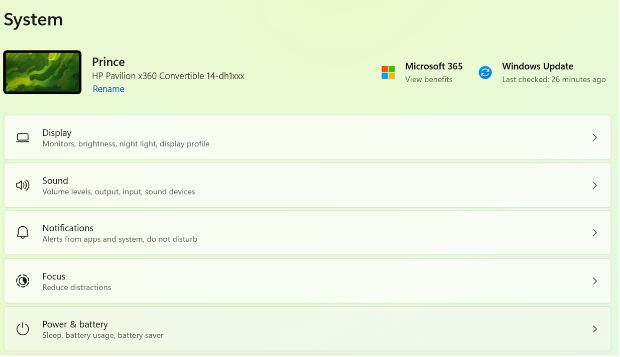
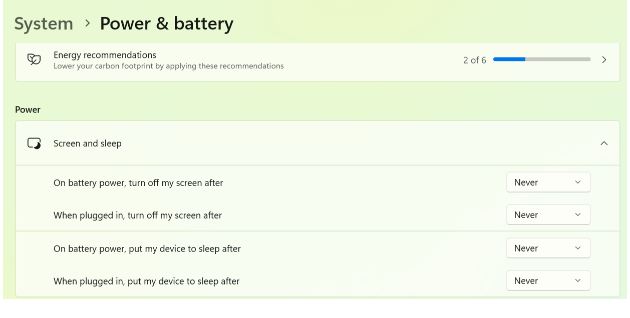
Step 3: Expand the Screen and Sleep area under Power on the following screen. Set every setting to Never in this area.
Also Read: How to Show Multiple Clocks on the Taskbar in Windows 11/10
3. Update Clock App
It’s crucial to keep the Clock app updated so that you can utilize all of its new features. Therefore, updating the Clock app to the most recent version is advised.
Also Read: Missing Seconds From System Clock Here Is How You Can Get Them
Setting an Alarm on a Windows 11 Computer.
Follow these instructions to set an alarm on your Windows computer. Additionally, we demonstrate how to set the Alarm name, Alarm sound, Days, and Snooze time:
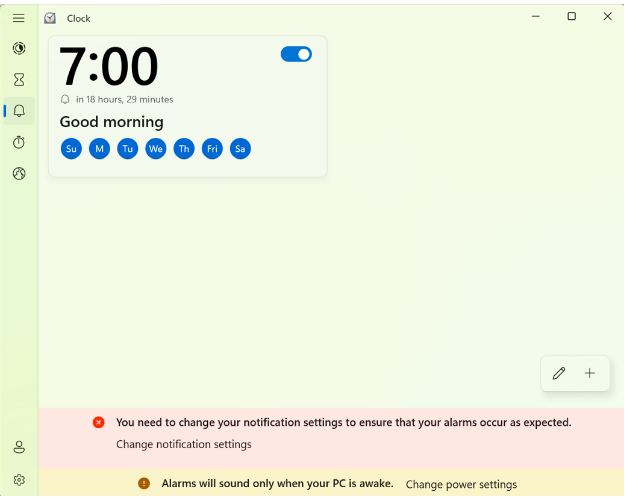
Step 1: Click the Alarm button on the left after opening the Clock.

Step 2: The Edit alarm window will then be displayed. Click on the default alarm and change the time by clicking the up and down arrows after selecting AM or PM.
Step 3: Then, you can provide a suitable name for the alarm in the Alarm Name section, such as Good Morning.
Step 4: Following that, you can choose the day using the day abbreviations below, and the Repeat Alarm box above will be automatically checked.
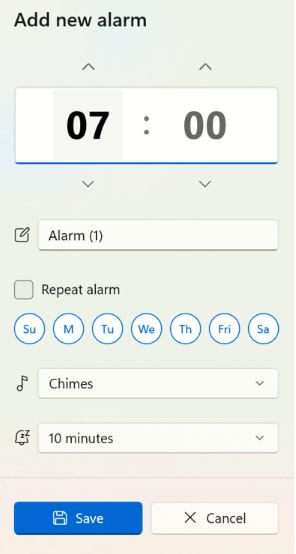
Step 5: Next, choose the alarm sound of your choice from the Alarm Chime area.
Step 6: If you’d like and when needed, you can also choose the Snooze Time.
Step 7: Press Save to save your modifications, and the alarm will now go off automatically.
You only need to set the alarm time, make any necessary changes, such as altering the alarm sound or snooze time, then click Save for the current day.
How to Turn Off/On Alarms in Windows?
You can slide the toggle to the right to make the alarm active if you’ve already set the alarm time and just want to turn it on.
Similarly, to stop the alarm from sounding, simply slide the toggle to the left.
How to Set Up a Windows Alarm?
Simply click on the “+” symbol in the bottom right corner if you want to add an alarm, say you already set one to wake you up and now you want to add one to remind you of an occasion.
Another Edit alert window with the same design will open. Following the procedures above, you can now create a second alarm for a different event, and it will be added to the list of alarms.
How to Remove a Windows Alarm
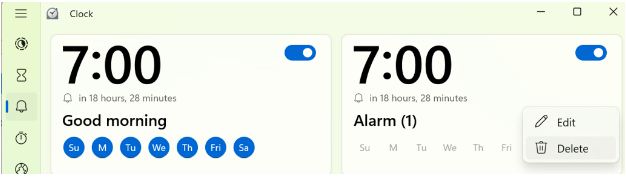
Simply select Delete from the context menu when you wish to erase an alarm by right-clicking on it.
The Final Word
A built-in alarm is included in the Clock app that is included with Windows 10 and 11. As a result, setting an alarm directly on your Windows PC is simpler for you if you have a deadline approaching.
Please let us know in the comments below if you have any questions or recommendations. We would be delighted to provide you with a resolution. We frequently publish advice, tricks, and solutions to common tech-related problems. You can also find us on Facebook, Twitter, YouTube, Instagram, Flipboard, and Pinterest.