
Windows has been bringing in new advancements in the realm of an operating system. One of its major iterations introduced with May 2019 Windows 10 update is Sandbox program. Basically, it’s a lightweight environment from your main installation to run suspicious executable files or for testing any third-party software.
To check potentially questionable apps, earlier developers used to create replicas of OS using images to run suspicious files in an isolated environment. While Windows 10 Sandbox is designed with the aim to help novices to perform testing without affecting the host PC or possessing any hardcore technical knowledge.

How does Windows 10 Update – Sandbox Works?
Sandbox program is a kind of Virtual Machine which uses Microsoft’s Hypervisor and Hardware virtualization to create an isolated environment or a separate solitary kernel from the OS image of the host system. Whatever tasks you perform within this sandbox session, it remains independent of the host system.
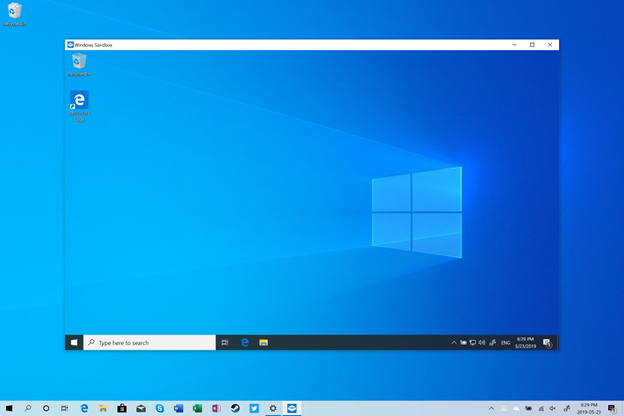
The best part of Windows 10 Update – Sandbox is its petite installation (merely 100 MB), integrated Kernel Scheduler along with a very efficient memory management system. Sandbox app is disposable in nature, as soon as you close the Sandbox Window, all the resources allotted are cleared. Users can test software and run executable files in this isolated environment. It will appear as a small window on your Desktop screen wherein you can copy the executable files from your host machine to Windows Sandbox Virtual Machine and install the software.
Specifications Required To Setup and Use Windows 10 Sandbox
Users having Windows 10 Home edition cannot take advantage of the Sandbox program, it will require Windows 10 Pro, Enterprise Insider build 18305 or later along with the following specifications:
- 64-bit Processor, capable of Virtualization
- Virtualization enabled in BIOS
- At least 4GB RAM (8 GB is recommended)
- At least 1 GB of free disk space (SSD is recommended)
- 2 cores of CPU
How To Setup Windows 10 Sandbox?
To setup the Sandbox app on your Windows 10, follow the straightforward method:
- Login to Windows with Administrator rights.
- Check the status of virtualization in your system whether it’s enabled or not. Open Task Manager using the search bar. Switch to the performance tab. It will be either Enabled or Disabled.
- If it is disabled, then you need to enable it by using PowerShell cmdlet (command-let). Type the following command in the command line:
| Set-VMProcessor -VMName -ExposeVirtualizationExtensions $true
|
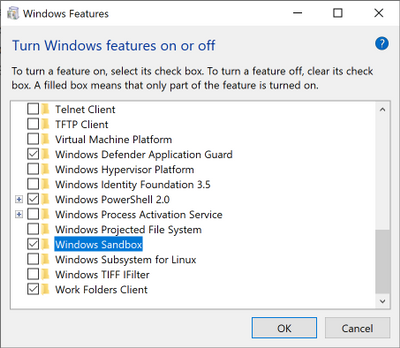
- Next, you have to enable Windows 10 Sandbox feature. To do so, launch Control Panel, head towards Programs and features option. Scroll to locate Windows Sandbox feature and check the box in front of it and hit the OK button.
5. The system will install the feature, reboot the system to complete the installation process.
Isn’t it quite easy to set up the Windows 10 Sandbox app? Making use of it is way easier than this.
How To Use Windows 10 Sandbox Feature?
Now that you have successfully installed the Sandbox program on your Windows, the next step is to know how to use it to start testing third party software.
- Run Windows Sandbox using the Start menu, followed by allowing the permissions.
- Select the executable file of the software you want to install and run in Windows Sandbox. To do so: copy & paste the .exe file in the Sandbox window.
- Install the software in Windows Sandbox.
- When you are done with the tasks you want to perform with the particular software, you can simply close down the Windows Sandbox program. You can check that none of the modifications you made in Windows Sandbox persists in your Host System.

Running Windows 10 Sandbox is a one-stop solution to install third-party software or open any other suspicious attachment in the virtualized container without affecting the host system.
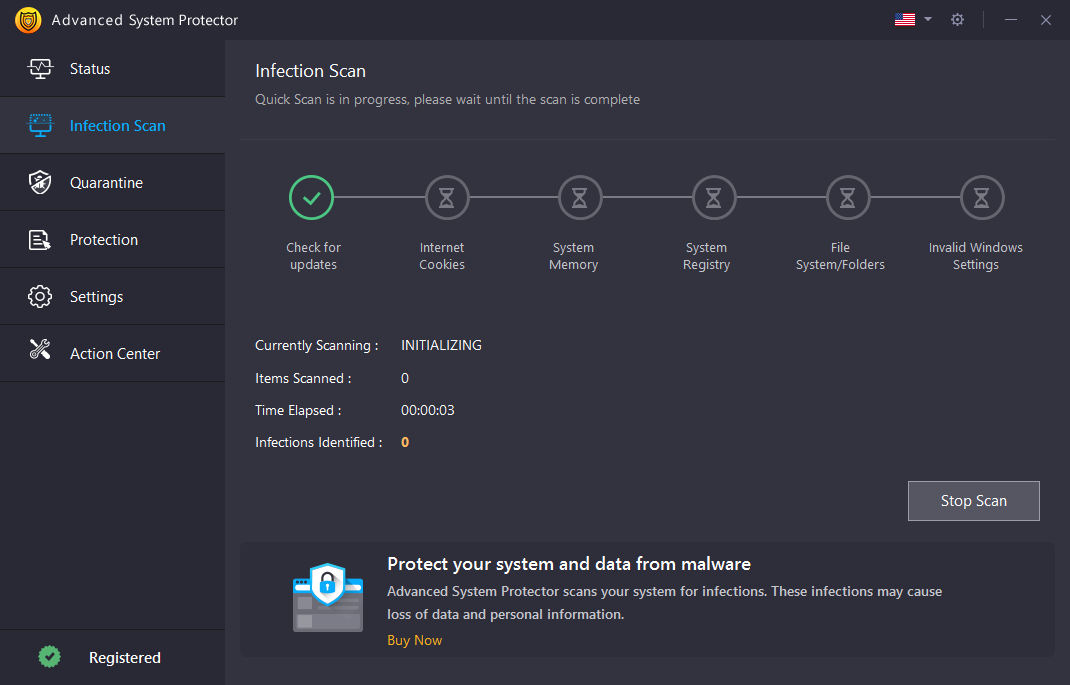
However, protecting your PC from other viruses and malware that might enter through your regular browser while installation, cause no harm. So, make sure you already have a powerful Antimalware Software downloaded on your PC.
RECOMMENDED CHOICE: Advanced System Protector
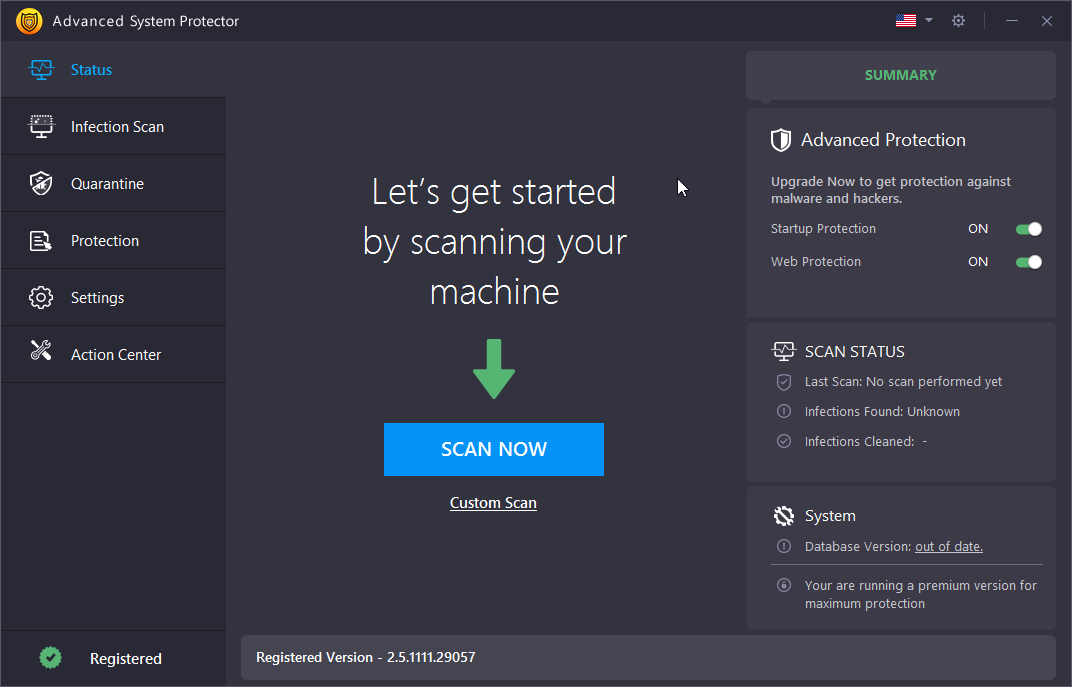
Advanced System Protector is a dedicated Windows utility to protect your system from viruses and other malicious content. The software is designed with an ideal combination of Antivirus, Antispyware & Antimalware techniques that proffer all-round protection to PCs. It just needs a few clicks to actively remove suspicious & unsafe threats that might damage your computer. The Windows application provides complete Web Protection, removing all the unwanted adware & spyware to ensure true safety while browsing. The application provides multiple scanning modes that clean your computer with blazing speed than other Antivirus software for Windows available in the market.
Unlike other software in the same category, Advanced System Protector’s database gets regularly updated so that no latest malware or threat can harm your PC.
You can read about its other features and benefits here!

We know how many times we think before running any suspicious executable file in our system. However, with Windows Sandbox you don’t need to worry about running any untrusted file on your system, as it allows users to run any software without modifying your host system. Windows 10 Sandbox is highly secure, efficient and disposable virtually imaged OS with minimal resources. It is always amusing to see what Microsoft might get in their next Windows 10 update.
Can it Be A Perfect Virtualization Alternative? Check out other options similar to Windows 10 Sandbox!