
Windows 11 is the latest operating system from Microsoft, bringing a host of new features and improvements to enhance the user experience. However, despite the advancements, users may still encounter audio-related issues, such as no sound, distorted audio, or problems with specific audio devices. These problems can be frustrating and disrupt your multimedia experience, whether you’re trying to enjoy music, watch movies, or participate in online meetings.
Fortunately, Windows 11 provides various methods to reset and troubleshoot audio settings, allowing you to restore proper sound functionality and ensure an optimal audio experience.
From adjusting volume levels and updating audio drivers to resetting audio services and performing system-level troubleshooting, we have covered all possible solutions. This comprehensive guide will walk you through step-by-step solutions for how to reset sound settings in Windows 11.
Also read: How To Fix Low Audio Issues in Windows 11/ 10 PC
What are the Common Audio Problems on Windows 11?
Before diving into the solutions, it’s essential to understand some of the most common audio problems users face on Windows 11:
- No Sound: This issue can occur due to misconfigured audio drivers, incorrect device settings, or software conflicts.
- Distorted or Crackling Audio: Low-quality or outdated audio drivers, hardware malfunctions, or interference can cause distorted or crackling sounds.
- Device-Specific Audio Issues: Problems with specific audio devices, such as headphones, speakers, or microphones, may arise due to compatibility issues or misconfigured settings.
- Audio Stuttering or Lag: Network-related problems, insufficient system resources, or software conflicts can lead to audio stuttering or lag during playback.
- Audio Mixer Issues: Incorrect volume levels or settings within the audio mixer can cause imbalances or unintended behavior.
By understanding these common issues, you can better identify the root cause of your audio problems and apply the appropriate solutions to reset and troubleshoot your audio settings effectively.
Also read: FIX: HDMI Audio not Working on Windows 11 (6 Solutions)
How To Reset Sound Settings In Windows 11
Method 1: Reset the Volume for All Devices
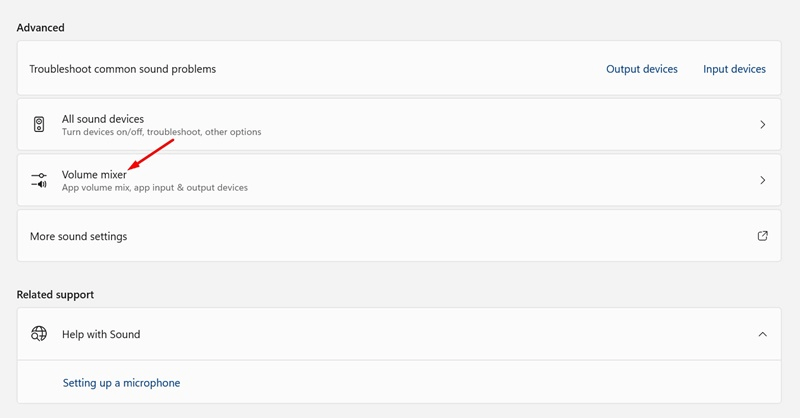
The Volume Mixer is a powerful tool in Windows 11 that allows you to manage and control the volume levels of individual audio devices and applications. In some cases, adjusting the volume levels within the Volume Mixer can resolve audio issues.
Here’s how to reset the volume for all devices using the Volume Mixer:
Step 1: Right-click the speaker icon in the system tray (bottom-right corner of the screen) and select “Open Volume Mixer.”
Step 2: In the Volume Mixer window, you’ll see a list of all applications and devices currently using audio.
Step 3: Locate the “Master Volume” control and ensure it’s set to an appropriate level (around 50% is generally recommended). Review the volume levels of each individual device and application, and adjust any that seem too high or too low.
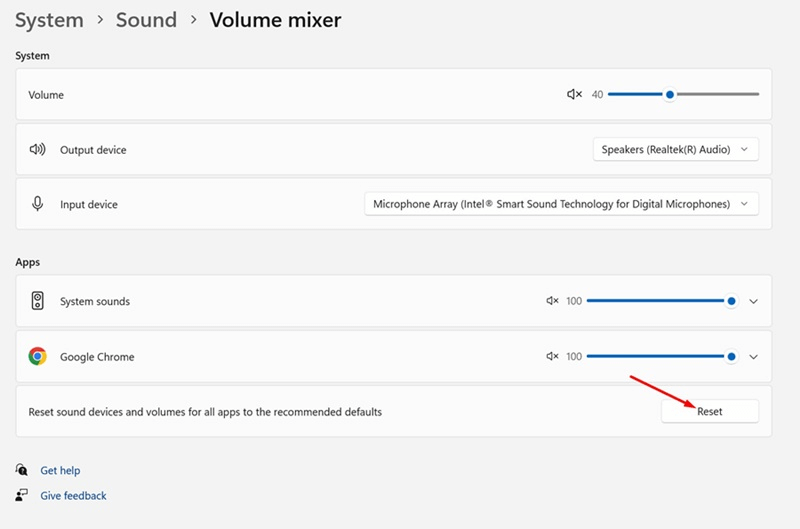
Step 4: If you encounter any device or application with an unexpectedly low volume level, try increasing it to a reasonable level.
Once you’ve adjusted the volume levels as needed, click “OK” to apply the changes and close the Volume Mixer.
By resetting and balancing the volume levels across all devices and applications, you can often resolve audio-related issues and ensure a consistent audio experience.
Also read: How to Add an Audio File in PDFs?
Method 2: Reset the Audio Driver in Windows 11
Outdated, corrupted, or incompatible audio drivers can significantly impact your audio experience on Windows 11. To manually update your audio drivers through the Device Manager in Windows 11.
Here’s how to reset sound settings in Windows 11:
Step 1: Press the Windows key + X and select “Device Manager” from the list of options.

Step 2: In the Device Manager window, expand the “Sound, video, and game controllers” category. Right-click on your audio device and select “Update driver.”
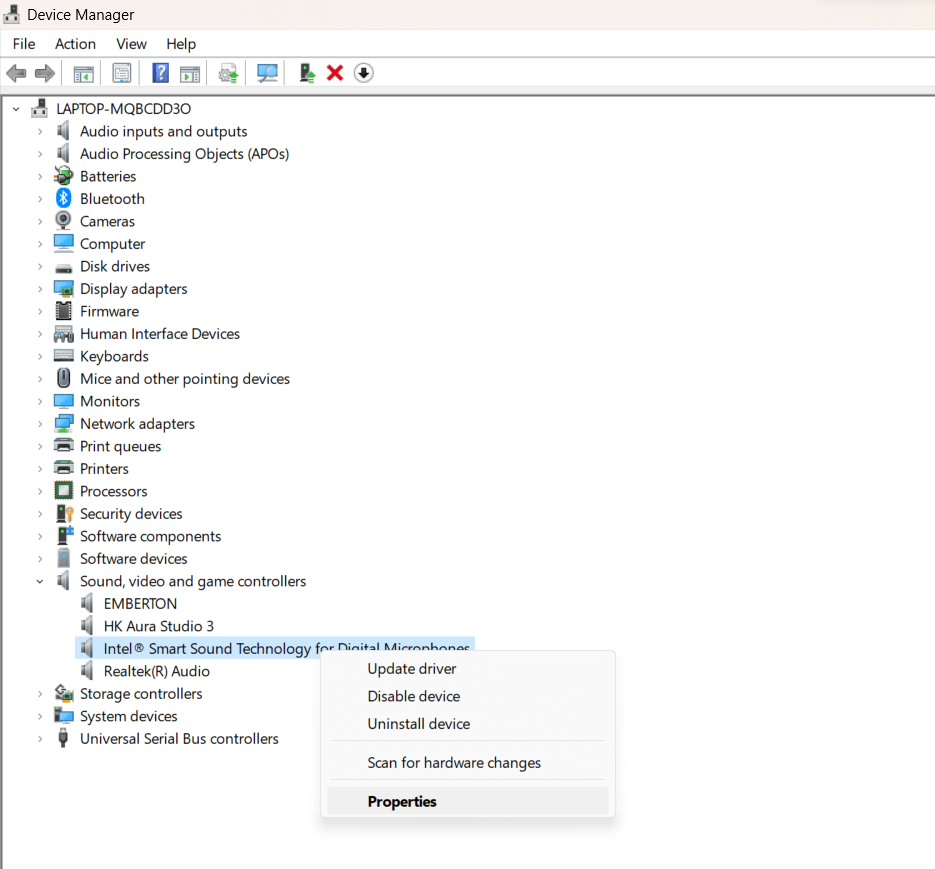
Step 3: In the Update Driver window, select “Search automatically for drivers.” Windows will search for the latest driver updates and install them automatically if available.
Step 4: If no updates are found, you can manually search for and download the latest driver from your audio device manufacturer’s website.
Once you’ve downloaded the driver, follow the on-screen instructions to install it manually.
After the driver installation is complete, restart your computer to apply the changes.
Download and Install Smart Driver Care to Automatically Update Drivers
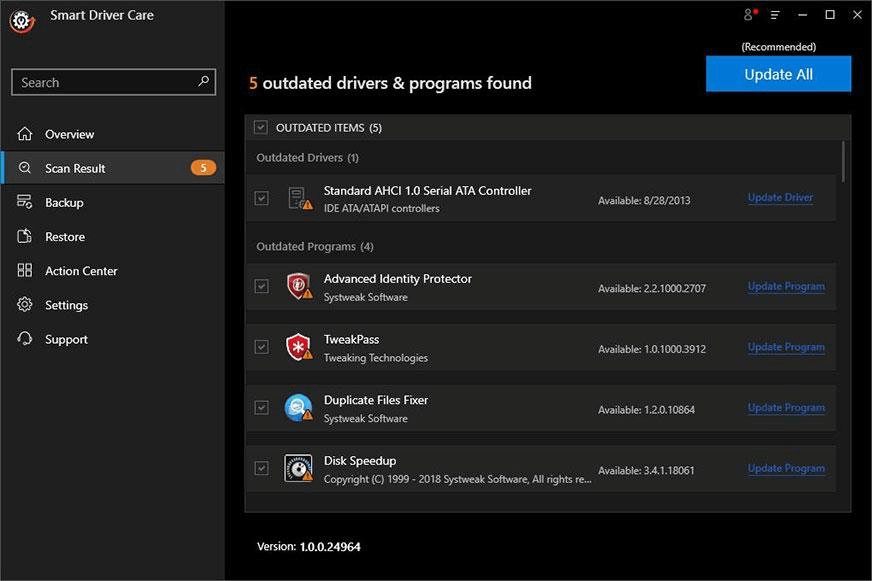
Alternatively, to resolve driver-related audio issues, you can use Smart Driver Care, a powerful driver management tool, to update, repair, or reinstall your audio drivers easily.
Smart Driver Care is a reliable and efficient solution that automatically scans your system for outdated or missing drivers and provides a streamlined process to download and install the latest driver versions. By keeping your drivers up-to-date, you can ensure optimal hardware performance, stability, and compatibility, thereby resolving potential audio problems.
By using Smart Driver Care, you can efficiently update or reinstall your audio drivers, ensuring that they are compatible with your system and functioning correctly. This can resolve a wide range of audio-related issues and provide an enhanced multimedia experience on your Windows 11 device.

Method 3: Reset the Audio Services on Windows 11
Windows 11 relies on several background services to manage and facilitate audio functionality. In some cases, these services may become corrupted or experience conflicts, leading to audio problems. Resetting the audio services can help resolve these issues and restore proper audio functionality.
Follow these steps to reset the audio services on Windows 11:
Step 1: Press the Windows key + R to open the “Run” dialog box. Type “services.msc” and press Enter to open the Services management console.
Step 2: In the Services window, locate the following services related to audio:

- Windows Audio
- Windows Audio Endpoint Builder
- Remote Procedure Call (RPC)
Step 3: Right-click each of these services and select “Restart” to restart them individually. If any of the services are not currently running, right-click on them and select “Start” to start the service.
Once you’ve restarted or started all the relevant audio services, close the Services window. Restart your computer to apply the changes and ensure the audio services are functioning correctly.
By resetting and restarting the audio services, you can often resolve issues caused by service conflicts or corruption, ultimately restoring proper audio functionality on your Windows 11 system.
Method 4: Perform a Clean Boot in Windows 11
In some cases, third-party applications, startup programs, or background processes can interfere with your audio drivers or settings, causing audio-related issues. Performing a clean boot in Windows 11 can help identify and troubleshoot these potential conflicts by temporarily disabling non-essential services and startup programs.
Here’s how to perform a clean boot in Windows 11:
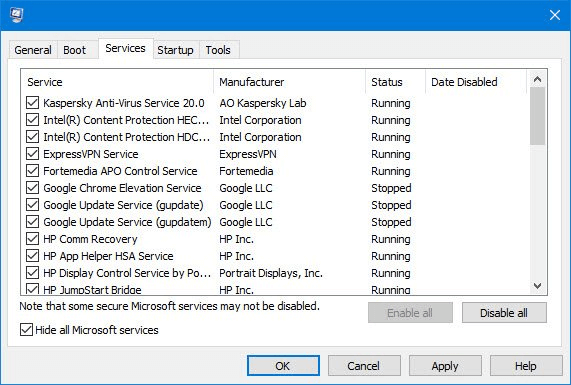
Step 1: Press the Windows key + R to open the “Run” dialog box. Type “msconfig” and press Enter to open the System Configuration utility.
Step 2: In the System Configuration window, navigate to the “Services” tab. Check the “Hide all Microsoft services” box to display only third-party services. Click the “Disable all” button to disable all non-Microsoft services.
Step 3: Navigate to the “Startup” tab and click “Open Task Manager.”
Step 4: In the Task Manager, navigate to the “Startup” tab. Select each startup item and click the “Disable” button to disable all non-essential startup programs.
Step 5: Close the Task Manager and click “OK” in the System Configuration window to apply the changes. When prompted to restart your computer, select “Restart” to initiate a clean boot.
Performing a clean boot can be an effective troubleshooting technique to isolate and resolve audio issues caused by external factors or software conflicts.
Also read: How To Record Audio From YouTube Video On Windows 11/10
Conclusion
Audio issues can be frustrating and disrupt your multimedia experience on Windows 11. Fortunately, there are several methods available to reset and troubleshoot audio settings, ranging from adjusting volume levels and updating drivers to resetting audio services and performing a clean boot or System Restore.
By following the outlined steps in this article, you can systematically troubleshoot and resolve common audio problems, ensuring an optimal audio experience on your Windows 11 system.
If you continue to experience persistent audio issues after trying these methods, consider seeking professional assistance or contacting Microsoft Support for further guidance and troubleshooting. Follow us on social media – Facebook, Instagram and YouTube.