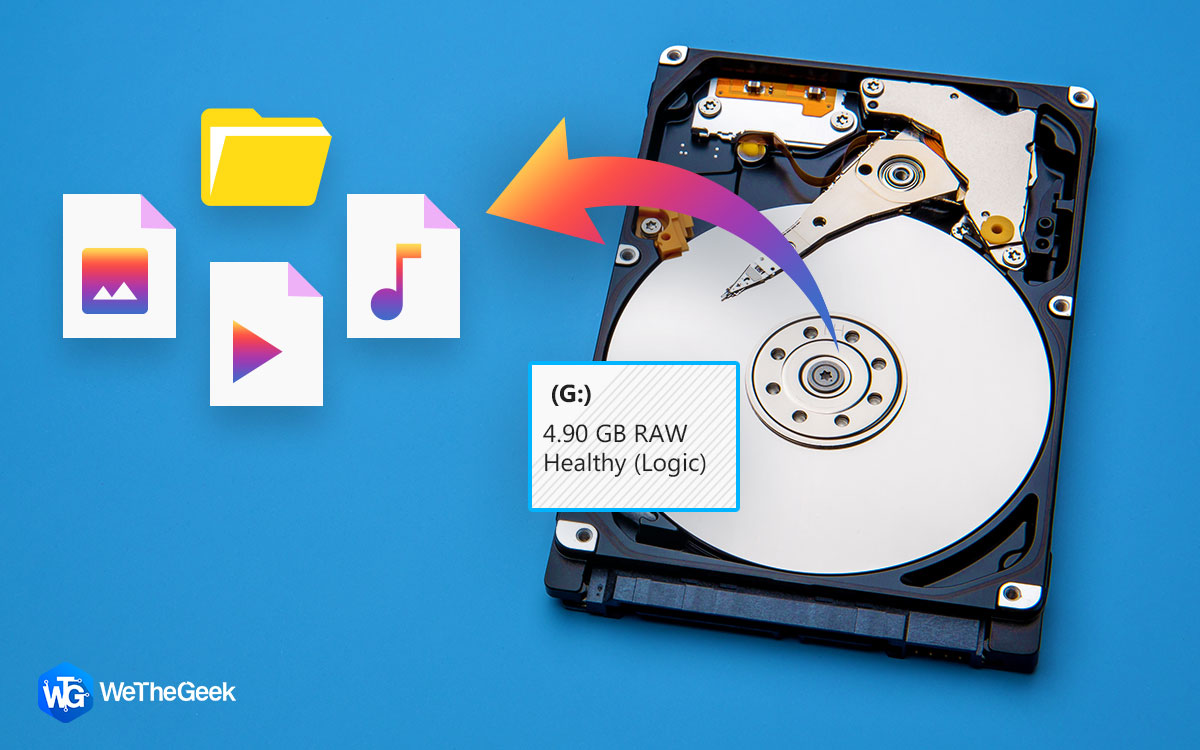
When a partition becomes RAW, it means it doesn’t have a file system. In case, if it’s a new partition, this situation may not worry you much. But, if your Windows can’t recognize a partition or drive, you might have to worry. For one, you will have to think of ways of recovering data from that RAW partition because on such a partition you can’t read data.
Needn’t worry! In this post, we will look at ways in which you can perform raw disk recovery or raw partition recovery. If you have received one such error, before you consider taking steps for RAW partition recovery, stop using the drive with the problematic partition first to avoid overriding files on the drive and any further corruption.
What Possibly Has Led To A Partition Becoming RAW?
- The drive was formatted incorrectly.
- Tampering with the Windows file system.
- Malware attack
- The drive hasn’t been in use for a long time.
- Power outage when the drive was plugged in.
- Some or the other form of hard drive corruption.
How To Recover Data From A RAW Partition?
Best Bet – Use A Data Recovery Tool
If you wish to recover data from a RAW partition, your best bet is a data recovery tool like Advanced Disk Recovery. The tool is capable of handling a variety of data loss situations, one of which is recovering data from a partition that has become RAW. It can recover accidentally lost data from both internal and external storage mediums such as hard disks, external USB drives, SSDs, memory cards, and more.
To know more about its feature, you can check out our review of Advanced Disk Recovery where we have covered its features, pricing, and other aspects.
How To Use Advanced Disk Recovery To Recover Data From RAW Partition In Windows 11/10?
Step 1 – Download, run and install Advanced Disk Recovery.

Step 2 – Click on the radio button next to Partitions under Select the areas to be scanned for deleted files and folders
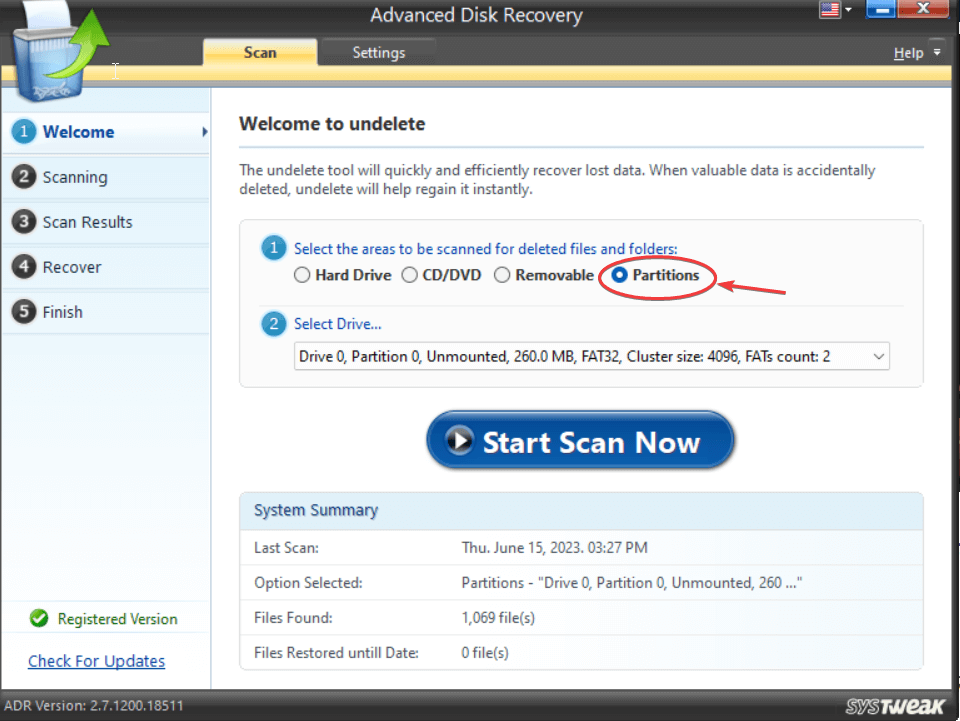
Step 3 – Select the partition that has become RAW and from which you intend to recover data.
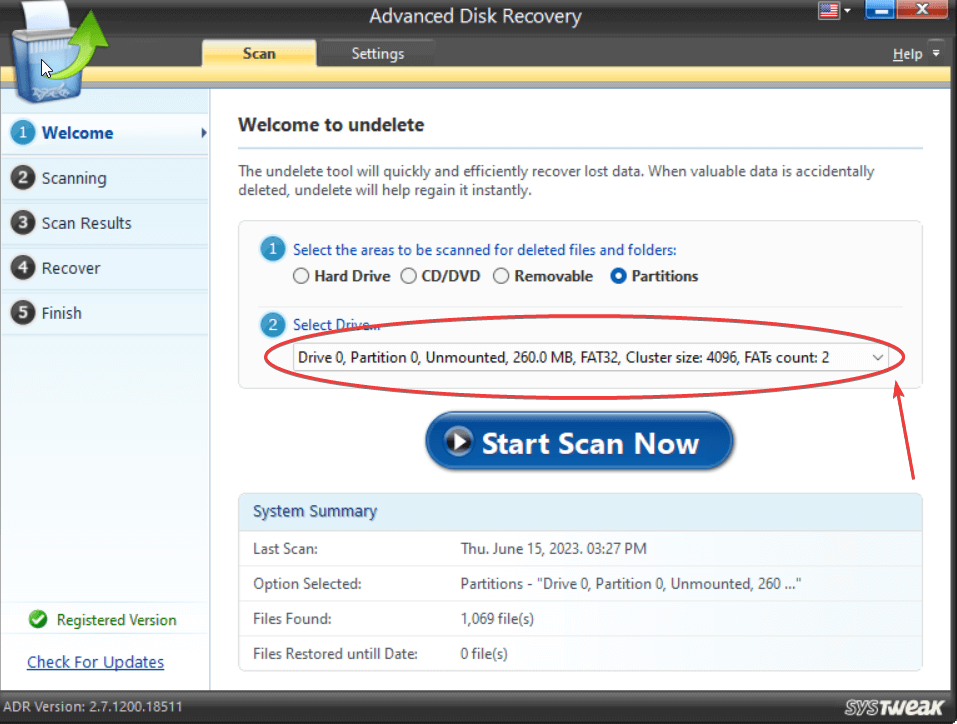
Step 4 – Click on Start Scan Now
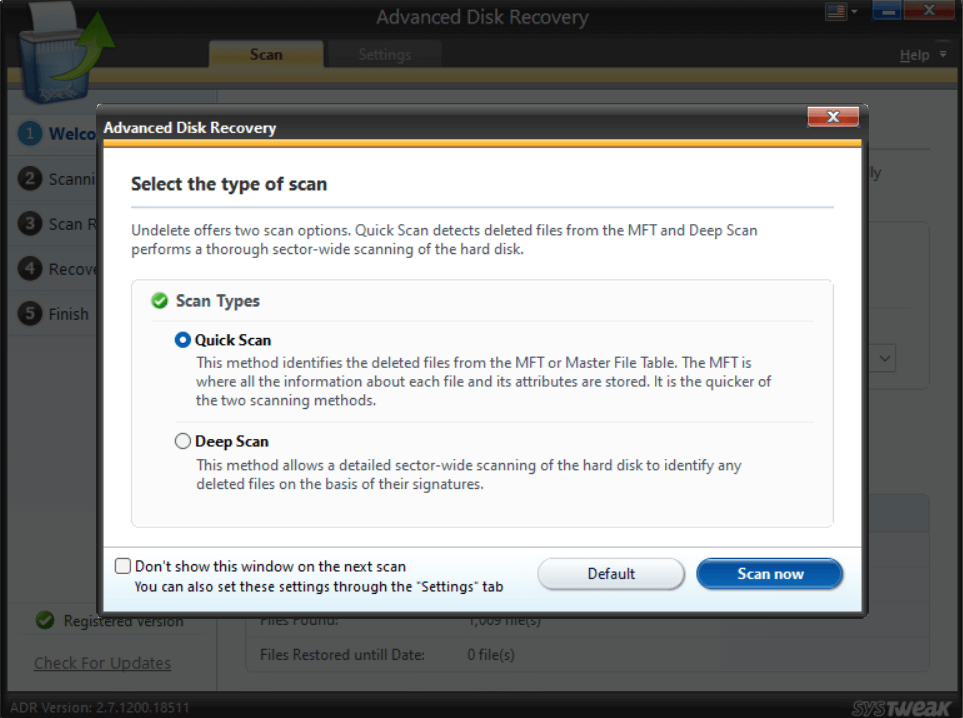
Step 5 –Choose the Scan Type and click on Scan Now. We recommend that you choose Deep Scan. This would conduct a detailed sector-wide scanning of the hard disk and find lost files based on their signatures.
Step 6 – Wait for the scan to get over. From the scanned results on the right-hand side, select the file or folder that you want to recover. To do that, click on the checkbox next to the file or folder’s name. You can even click on Preview to preview the contents of the file or folder.
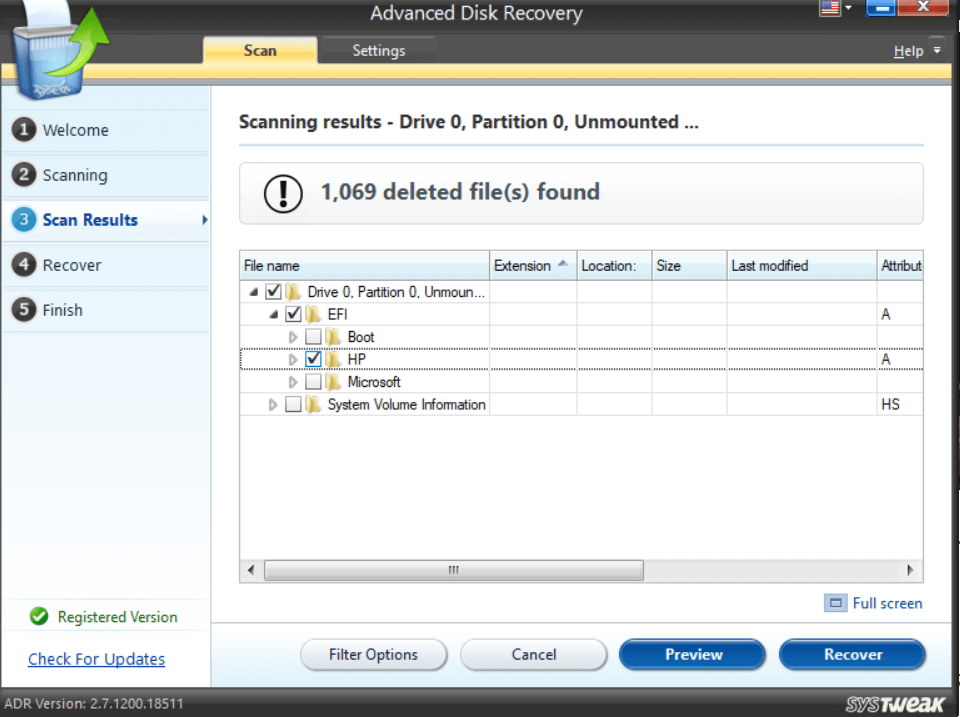
Step 7 – Click on the Recover button at the bottom right corner of the interface.
Step 8 – Choose a location where you would like to save the recovered files.
Please Note – You should save your recovered files at a location other than the drive from where they were lost originally. This will prevent overwriting of files.
Use CMD To Format Partition and Make It ready For Use Again
This method will fix the RAW partition by formatting it with a new file system and preparing the partition to be used with new data i.e. you can write new data on it. However, it won’t get back your lost data –
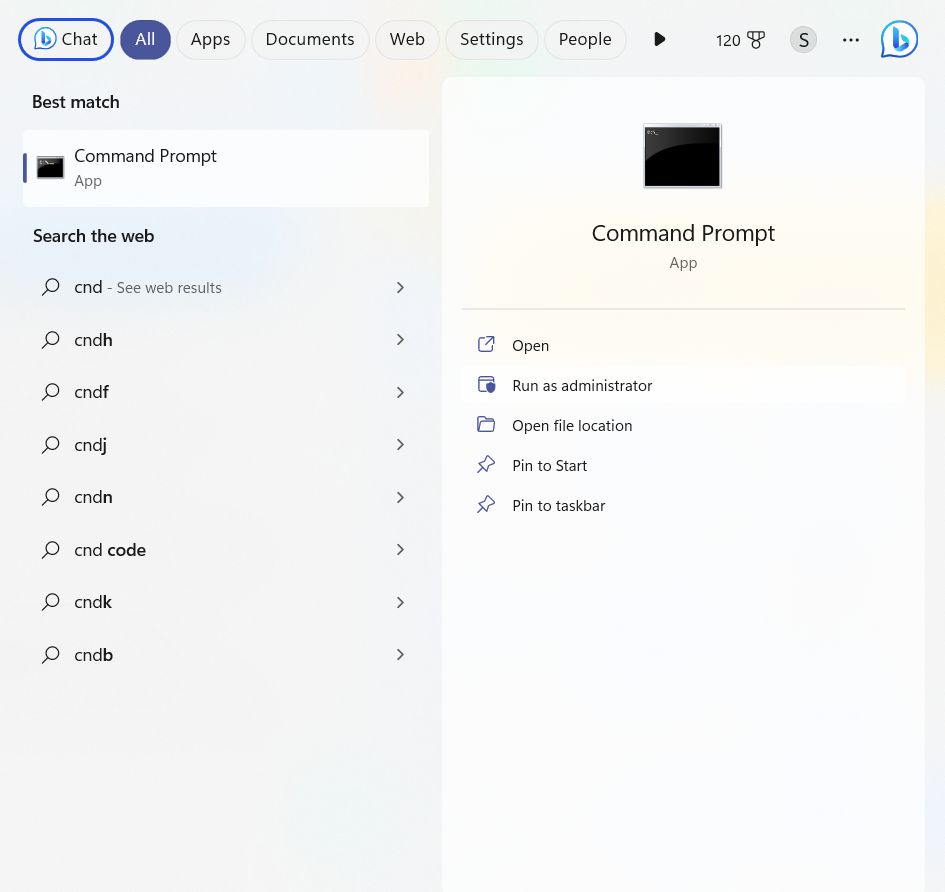
1. In the Windows search bar, type cmd and click on Run as administrator.
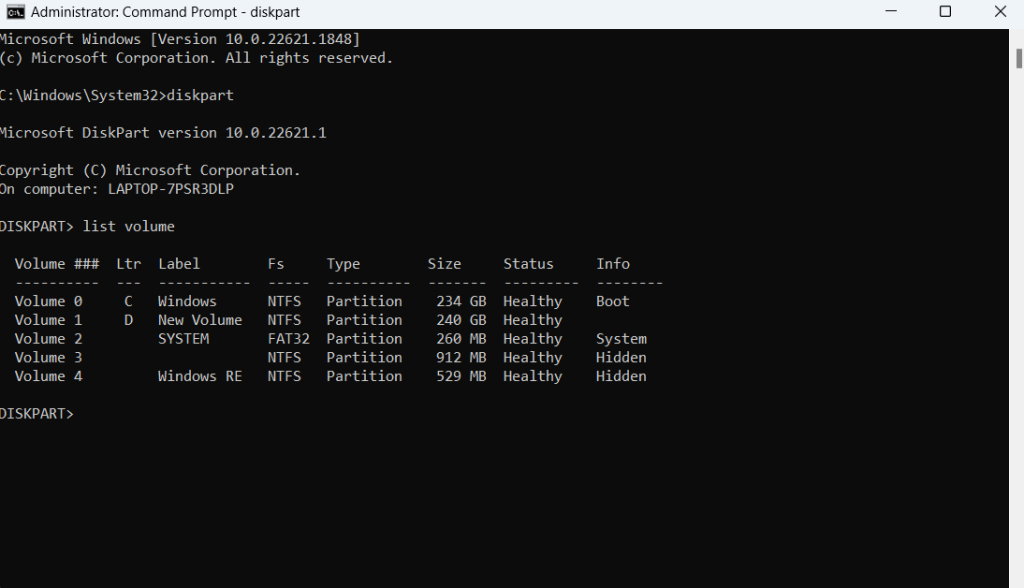
2. When the Command Prompt window opens, type diskpart and press Enter.
3. Next, type list volume and press Enter. Take note of the number of the volume that has become RAW.
4. Type select volume (volume number). So, for example, if volume number 3 has become RAW, then the command will be – select volume 3.
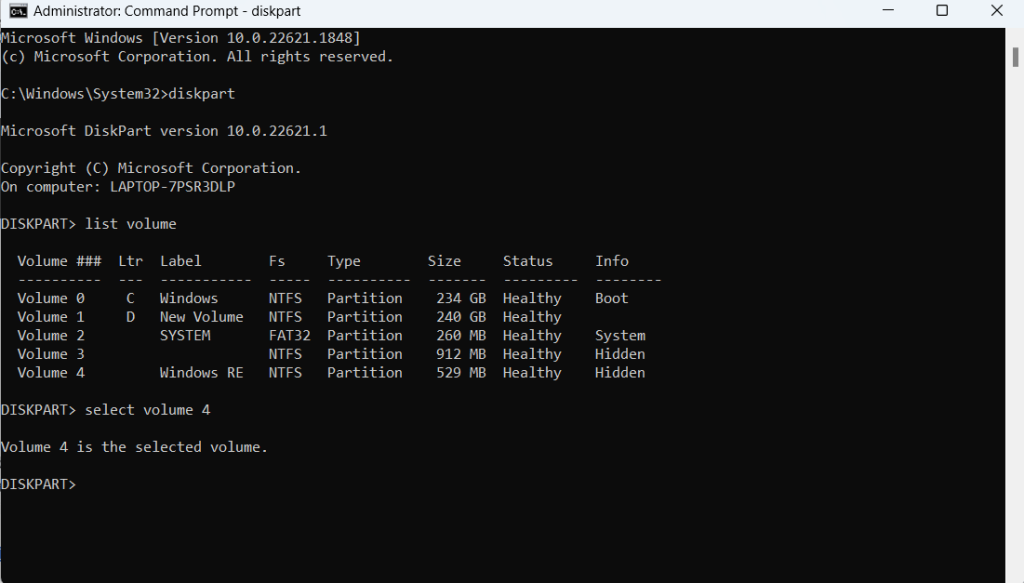
5. Press Enter.
6. Next type Clean and press Enter.
7. In the next line, type create partition primary and press Enter.
8. Type format fs=ntfs quick and press Enter.
9. Type assign and press Enter.
Were You Able to Recover Your Data Back?
Under any circumstance, we urge you to keep a data recovery tool like Advanced Disk Recovery handy. Since, even if you have formatted your hard drive using the “Quick Format” method, the data will still be there and you will mostly be able to get your precious data back. Do let us know, if you found this post helpful and if your raw drive recovery was successful. For more useful content, keep reading WeTheGeek. You can also find us on Facebook, YouTube, Pinterest, Twitter, and Instagram.