
In today’s digital age, our lives revolve around technology, and our data holds immense value. Whether it’s precious family photos, important work documents, or cherished memories, losing data due to a crashed Windows PC can be devastating. However, fear not! In this comprehensive guide, we will walk you through the step-by-step process of recovering data from a crashed Windows PC. By following these methods, you can salvage your valuable files and breathe a sigh of relief.
So, let’s dive right in!
But before we go ahead please check this out – Data Recovery Tips: Do’s & Don’ts While Performing Data Recovery
How to Restore Data from Crashed Windows PC?
Method 1: Safe Mode and System Restore
When faced with a crashed Windows PC, it’s often beneficial to start with the simplest solutions before diving into more advanced recovery methods. Two effective techniques to try are Safe Mode and System Restore:
1. Safe Mode: Safe Mode allows you to boot your PC with minimal drivers and services, which can help isolate and resolve software conflicts. Accessing Safe Mode varies depending on your Windows version, but it usually involves pressing a specific key during startup.
Read Also: How To Exit Windows 10 Safe Mode
2. System Restore: If your PC crashed after a recent software installation or update, performing a System Restore can help roll back your system to a previous stable state. Windows automatically creates restore points, which act as checkpoints in time.
- Switch on your PC/Laptop by pressing the power button.
- Now press the power button for around 4-5 seconds to turn off your computer as it begins to boot up. (As soon as you see your device logo or botting circle)
- Perform this process two more times and then the OS will enter its automated repair mode.
- The Automatic Repair screen will appear. Select Advanced Options from the menu.

- Now tap on Troubleshoot > Startup Settings.
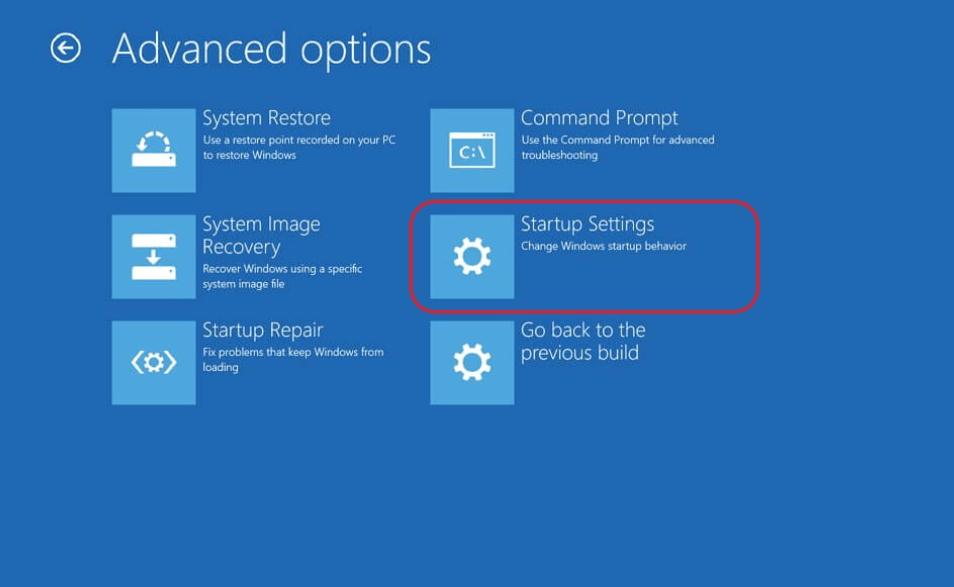
- On the Startup Settings page click on
- Now press the F5 function key to enter safe mode.

- Click on the Search bar icon and type Create a system restore point and tap on
![]()
- Click on the Create button under the Protection Settings
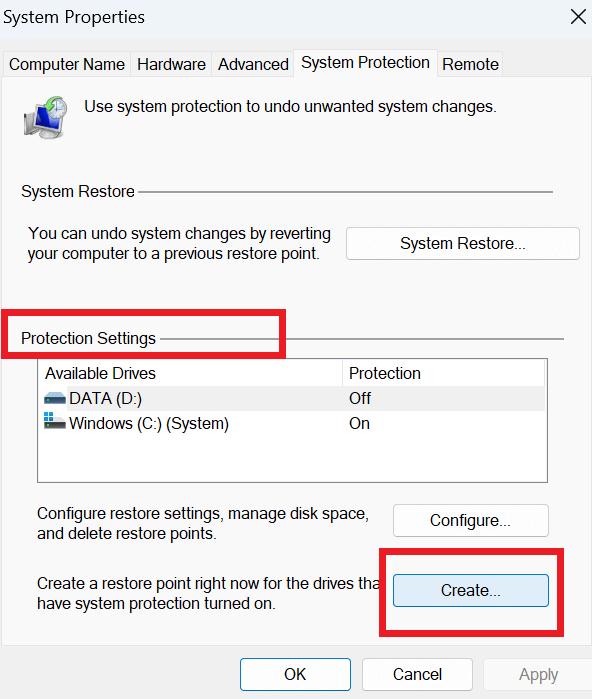
- Give the restore point a name that is appropriate; in this case, Before Crashing Windows and tap on Create

Read Also: How To Fix System Restore Not Working On Windows 11
Note: Starting with safe mode booting is crucial for implementing the mentioned method successfully. However, in case you encounter difficulties with that approach, there’s no need to panic. You can proceed to the next alternative method outlined below.
Method 2: Data Recovery Tool: The Savior of Lost Data
If the previous method fails to retrieve your valuable data, it’s time to explore specialized data recovery tools. These tools are designed to scan your hard drive and extract lost or deleted files. We recommend Advanced File Recovery.
Advanced File Recovery is a user-friendly data recovery tool designed to effortlessly retrieve your precious files, including vital documents, videos, images, and more, even if they were lost from various storage devices. This cost-effective solution boasts a straightforward interface, making it ideal for users of all levels, especially those new to the data recovery process.
Once you boot up your PC/laptop in safe mode follow the steps below to recover data from a crashed Windows PC.
- Download and Install the Advanced File Recovery from the button down below.

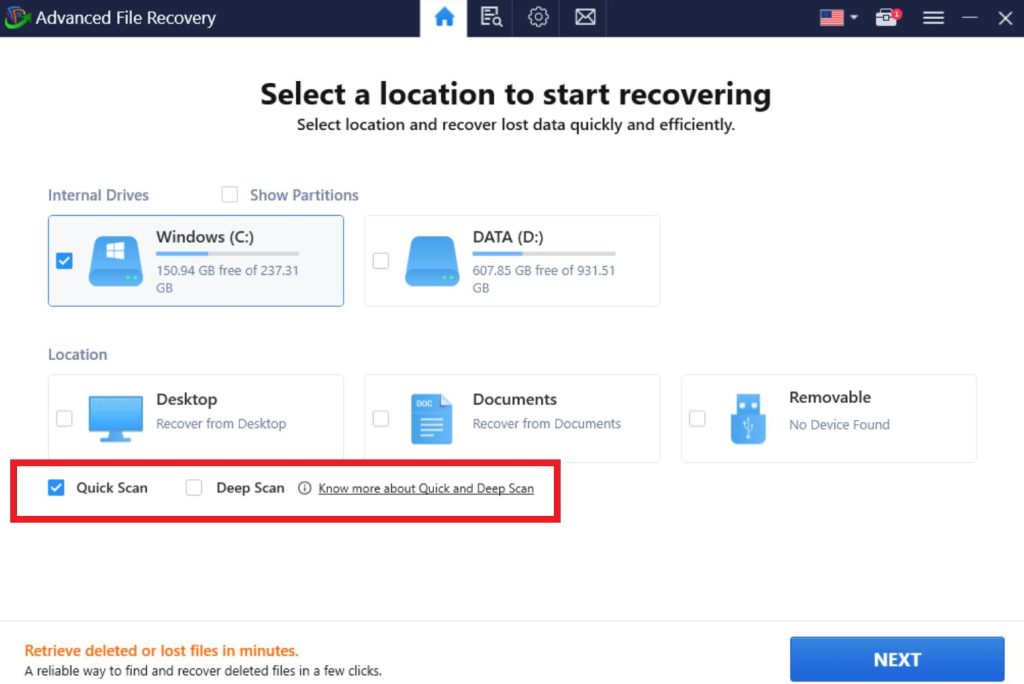
- Once you’re on the home screen, simply pick the location where your lost files were originally saved. From there, you can select either the Quick Scan or Deep Scan mode. After making your choice, proceed by clicking on the Next button.
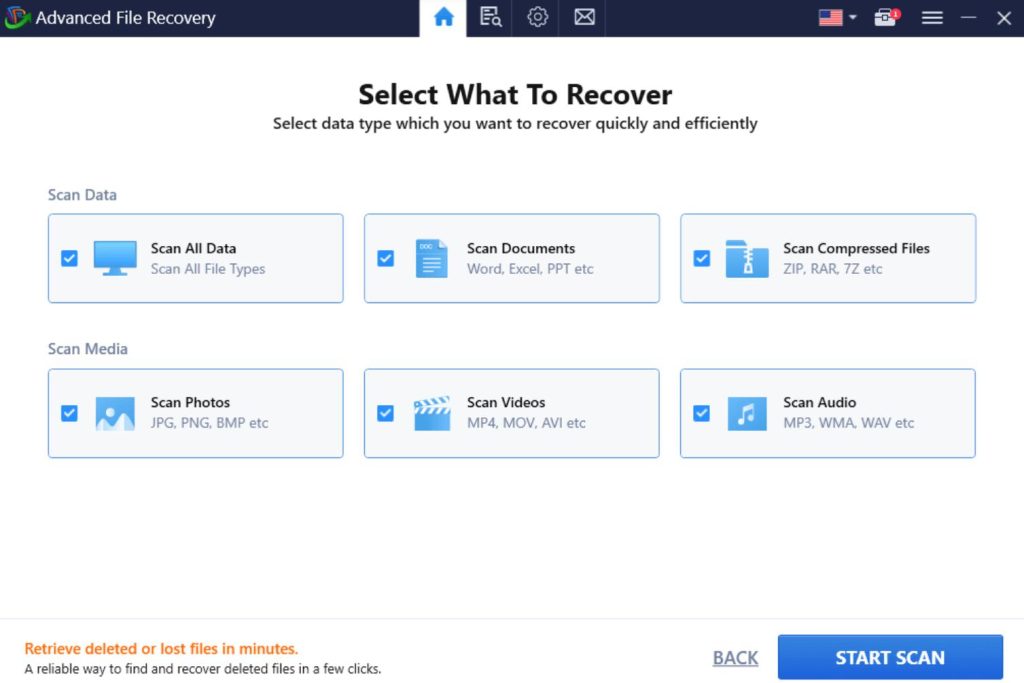
- Within this section, you’ll find a range of Scan Data types including Scan All Data, Scan Documents, Scan Compressed Files, Scan Photos, Scan Videos, and Scan Audio. Feel free to choose any of these options based on your specific needs. Once you’ve made your selection, simply click the Start Scan button to initiate the search for lost files.
- After the scan is finished, the next screen will display the results. You’ll be able to view the list of recovered files in two formats: Tree View and File Type. Select the format accordingly.
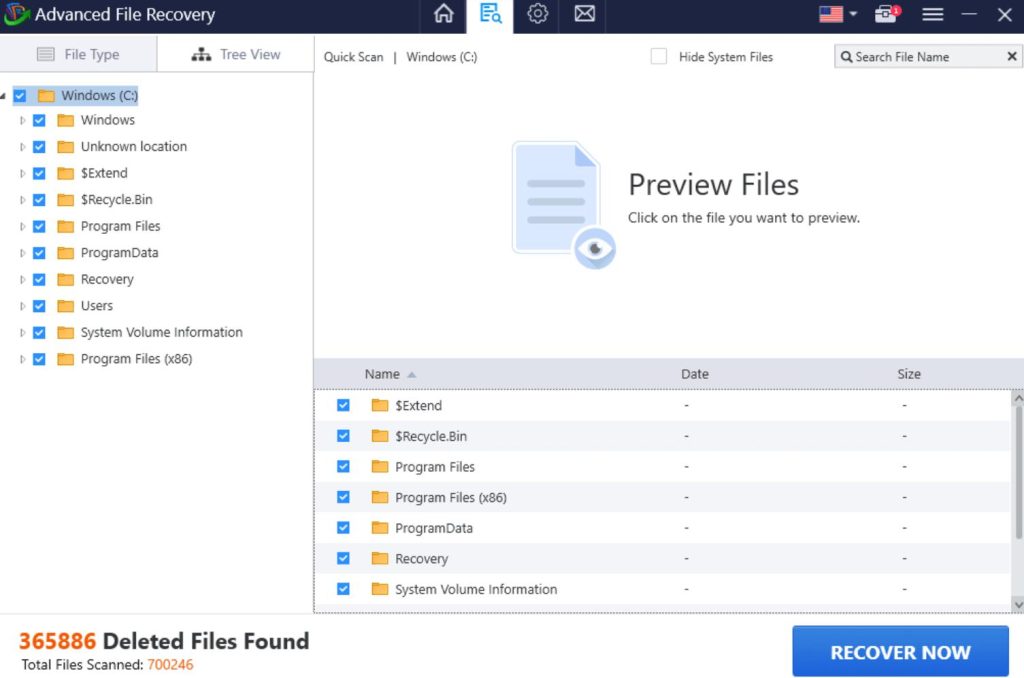
- Simply choose the files you wish to recover by selecting them, and then proceed by clicking the Recover Now
Important Note: To ensure the safety of your restored files and avoid overwriting any older data, it’s crucial to select a different location than the previous one for saving the files.
Read Also: How To Recover Hidden Files From Virus-Infected USB Drive
Unlocking Lost Data: A Comprehensive Guide to Data Recovery from a Crashed Windows PC
Experiencing a crashed Windows PC can be a stressful ordeal, but with the right approach and tools, data recovery is possible. By following the steps outlined in this guide, you can maximize your chances of successfully retrieving your cherished files. Remember, prevention is always better than cure, so make it a habit to back up your data regularly to avoid such unfortunate scenarios. Stay informed, stay prepared, and safeguard your digital memories!
For more such troubleshooting guides, listicles, and tips & tricks related to Windows, Android, iOS, and macOS, follow us on Facebook, Instagram, Twitter, YouTube, and Pinterest.
Next Read: