Windows and macOS are the two most popular OS of all time. But if we ask you which is better between Windows VS macOS, most users will have different opinions, and even after hours of debate, we won’t be able to conclude. Isn’t it?
But what if you want the best of both worlds? Wondering how to install Windows on Mac? Yes, that’s very much possible! Windows can be operated on your Mac device via Boot Camp Assistant. Boot Camp is one of Apple’s utility tools that allows you to install Windows OS on your Mac. Once you get Windows on Mac using the Boot Camp Assistant, you can easily switch between the two operating systems as per your need and requirement.
Also read: Why You Should Install Windows On Mac?
In this post, we have covered a step-by-step guide on installing Windows on Mac in quick and easy steps in the post.
What is Boot Camp?
Boot Camp is one of the most useful of Apple’s in-built utilities that allows you to install Windows on Mac quickly and easily. The Boot Camp Assistant is stored in the Applications> Utilities folder on macOS.
With the help of Boot Camp Assistant, you can easily install Windows on macOS and can switch between the two operating systems whenever you like. The Boot Camp creates a separate partition on Mac’s disk drive for installing and running Windows. Hence, it will put absolutely no load on your Mac’s speed and performance, and both the operating system can run simultaneously on your machine without any strain.
The Boot Camp Assistant will guide you through the rest of the installation process, at each step. Once the installation process is completed, you can easily switch between the two OS by simply rebooting your device.
Although, here’s a catch! Both Windows and macOS will run on your machine as standalone OS, and you won’t be able to transfer any of your data between the systems.
Let’s get started.
Getting Started: Things to Do
Before you use the Boot Camp Assistant on Mac, here are a few things that you should consider before installing Windows on Mac to prepare your device.
System Requirements and Compatibility
To make sure that the installation process doesn’t get hindered, check your device compatibility and minimum system requirements. Windows 10 is supported on the following Mac models:
- MacBook (2015 and later)
- MacBook Pro (2012 and later)
- MacBook Air (2012 and later)
- iMac (2012 and later)
- Mac Mini (2012 and later)
So, in case you’re trying to install Windows on Mac on any of the earlier versions, you may be out of luck here.
Free up Storage Space
Before you initiate the installation process, just clean up your hard drive to ensure that there is at least 55 GB of free storage space on your device.
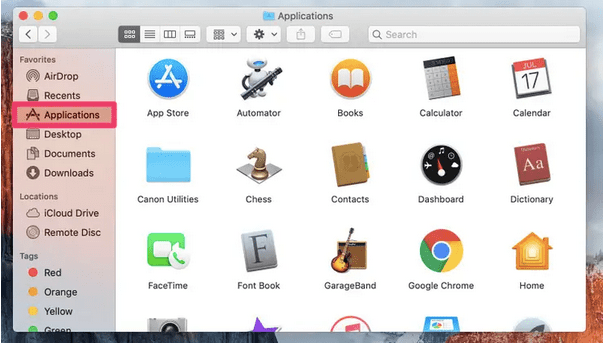
Head on to the “Applications” folder, uninstall all the items that you no longer use. Empty the trash bin, take a thorough look at the “Downloads” folder and delete all the files that are not important to free up storage space on your device.
Also read: How to Defrag a Mac? Do Macs Need Defragmentation?
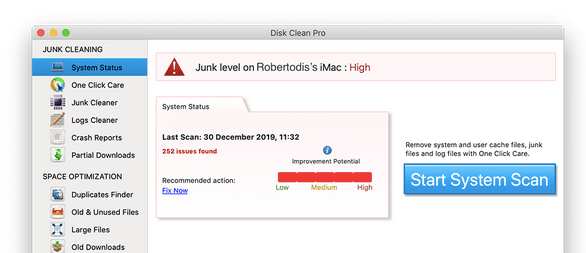
Although, if you don’t want to waste a couple of hours manually cleaning your device, you can download and install the Disk Clean Pro utility tool on your Mac. Disk Clean Pro is one of the best cleaner and optimization apps for Mac that removes junk files, cache files, user log files, redundant files, and other obsolete data from your device.
All you need to do is install the Disk Clean Pro tool on your Mac. Launch the app.
Run the scan. Sit back and relax until the tool gets the job done and recovers chunks of free storage space on your device by getting rid of unwanted items.

Backup your Device
And most importantly, don’t forget to backup your important files and data before you use the Bootcamp Assistant.
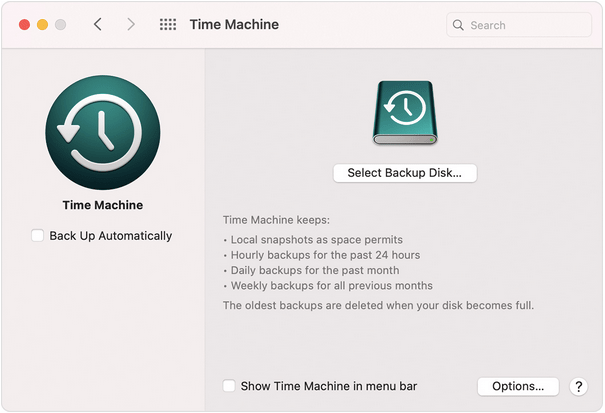
Here’s a step-by-step guide to backup your Mac device via Time Machine, iCloud, and using a third-party online backup tool.
Hence, creating a backup will minimize the risk of losing important data and files in case things fall out of place.
How to Install Windows on Mac using Boot Camp?
Step 1: Get the Windows ISO File
Visit Microsoft’s web page to download the Windows 10 disk image file.
Head on to the “Select Edition” menu and tap on “Windows 10”.
Tap on “Confirm” to proceed.
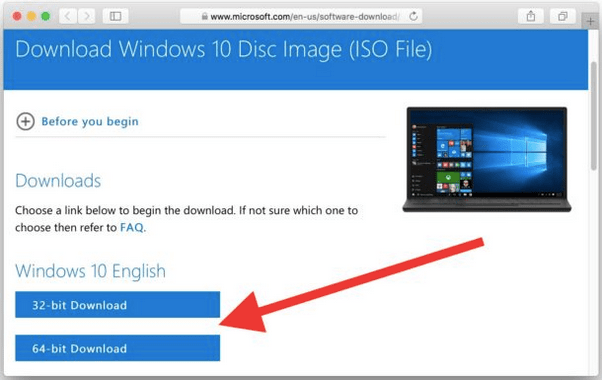
Select the installation language and hit the “Confirm” button.
Download the 64-bit version of the Windows ISO file and save it on your Mac.
Also read: How To Create A Bootable USB To Install Windows?
Step 2: Launch the Boot Camp Assistant
The next step to install Windows on Mac is to use the Boot Camp Assistant. Here’s what you need to do.
Open Mac Applications> Utilities.
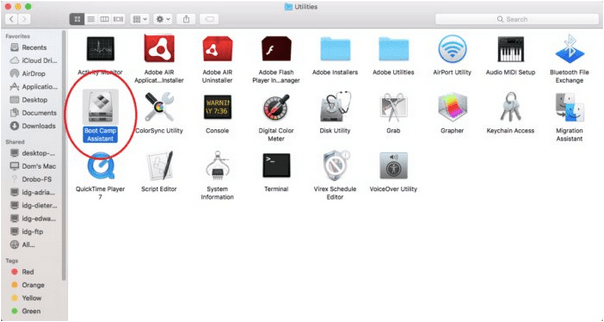
Tap on the “Boot Camp Assistant” option.
As soon as the Boot Camp Assistant will launch on your device, it will automatically locate the Windows ISO file that you downloaded in the previous step.
Also read: How to Remove a Windows Boot Camp Partition from Mac?
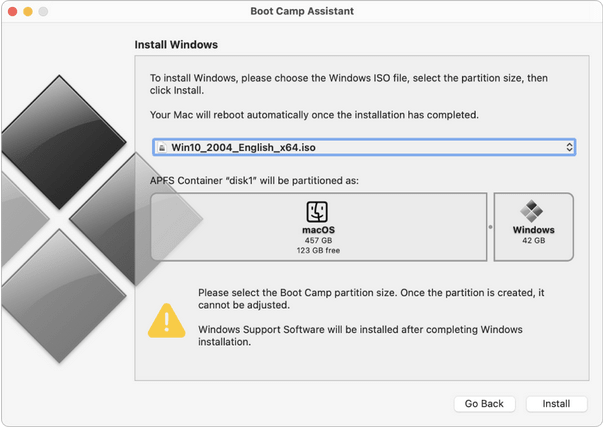
Step 3: Create a Partition
The next step in the installation process is to create a separate partition on your Mac to run and operate Windows OS.
Once the installation is about to begin and your device will reboot, your Mac will prompt a message to confirm where you want to install the Windows.
Select the “Boot camp partition” option and hit the “Format” button.
Step 4: The Installation Process
After setting up all the things, the installation process will begin at any moment. So, now all you need to do is, follow the on-screen instructions listed on the wizard. Follow the below-mentioned steps in the same order to install Windows on Mac using the Bootcamp Assistant.
- Select the Windows ISO file. Hit the “Install” button.
- Pick your desired language and tap on “Install now”.
- Enter the product key and if you don’t have the Windows product key, select the “I don’t have the product key” option.
- Select the Windows 10 edition whether you want to install Windows 10 Pro or Windows Home Edition.
- Click on Drive 0 Partition X: BOOTCAMP and hit the NEXT button.
- The installation process will begin shortly.
- Enter the username and password for your Windows account when prompted.
- And that’s it, fellas!
Step 5: Reboot your Mac
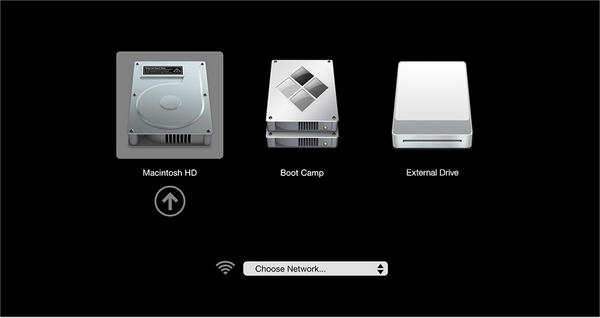
After the installation process, reboot your Mac. Whenever you restart your machine, by default it will boot to macOS. To switch to Windows OS, press the option key while booting Mac. Select the “Bootcamp” drive to load Windows OS on Mac.
Well, this is how you can use the Bootcamp Assistant to install Windows on Mac and switch between the two OS simultaneously on one machine.
FAQS
Can you install Windows on a Mac?
Yes, you can install Windows OS on a Mac by using the Boot Camp assistant. You can find it in Mac’s Application> Utility folder.
How do I download Windows on my Mac 2020?
You can follow the above-mentioned set of steps to download Windows OS on Mac. With the help of Boot Camp Assistant, both the OS can be installed on your Mac and you can easily switch between the two operating systems.
How can I install Windows on my Mac for free?
You can install Windows on Mac by using Apple’s in-built utility, the Boot Camp Assistant. The Boot Camp Assistant will follow you through the entire installation process and will allow you to install Windows on macOS for free.
Well, this wraps up our guide on how to install Windows OS on Mac. Was this post helpful? For any other queries or assistance, feel free to hit the comments box!