
Ever formatted a hard drive? Faced virus attack or came across a message like bootmgr missing or NTLDR missing when tried to boot it? If yes, the safest way to handle such situations is to reinstall Windows. But how?
This tutorial will show you how to create bootable USB to install Windows.
What Does Bootable Mean?
The word Boot means process carried out by the PC every time it is started and for this it needs a bootable storage device with boot loader files that has boot OS or Software.
Any media, used to boot your computer instead of the computer’s hard drive be it USB flash drive, CD, or DVD is called bootable. It works as an emergency repair kit that helps to install Windows in unforeseen circumstances.
Requirements to create bootable USB
- Windows install .iso or DVD
- USB flash drive with minimum of 8 GB space.
Note: To make it bootable we will format the USB therefore, make sure it doesn’t have any important files.
- Windows PC to format USB drive.
How to Create a Bootable USB Drive?
To create bootable USB to install Windows we will use Command Prompt. Here are the steps to create bootable USB drive as a Windows installation media.
- Connect USB drive with working Windows PC.
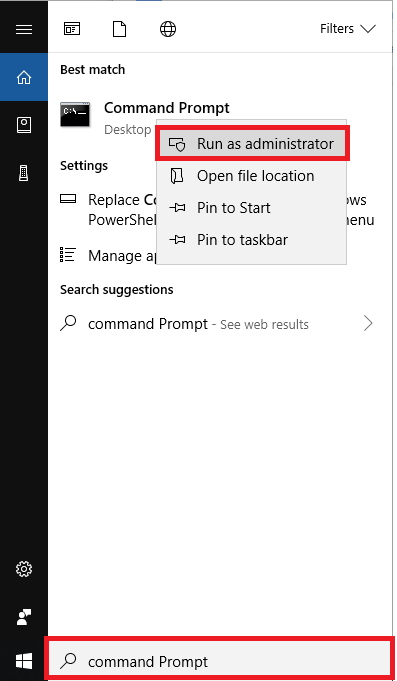
- Next type command prompt in the search bar, right click on it and select Run as administrator

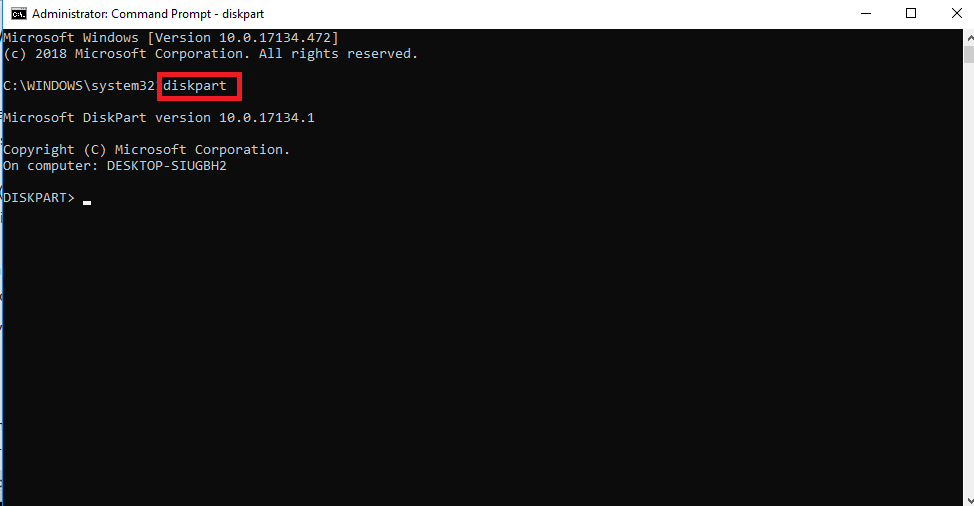
- Here, under Command Prompt window type diskpart.
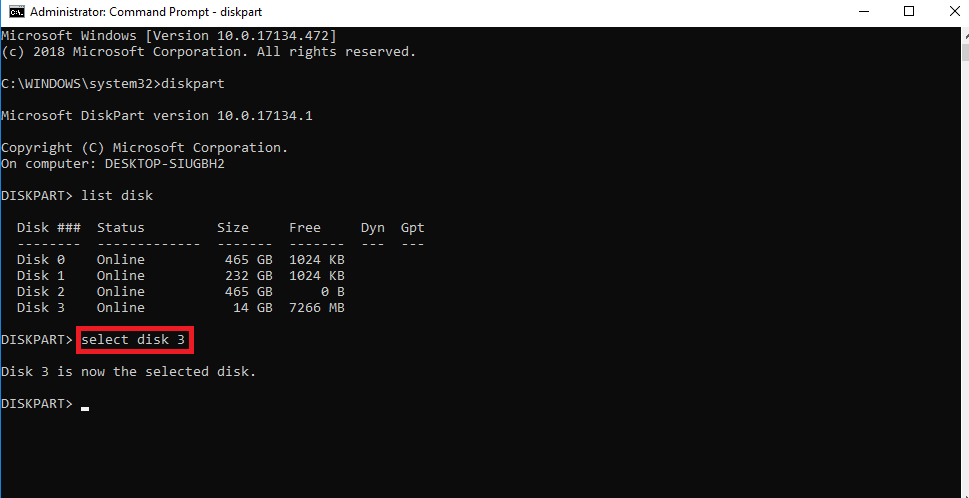
- Next, in the new command line, type list disk, and press Enter key to determine USB flash drive number or drive letter. This command will display all connected disks on the computer. Make note of the drive number or drive letter of the USB flash drive.

Note: If you are not sure about which one denotes your flash drive number, remove USB and run list disk command. Now plug back the flash drive and again run list disk command. You’ll now be able to figure out which one is your flash drive. Usually flash drive is at the bottom of the disk menu.
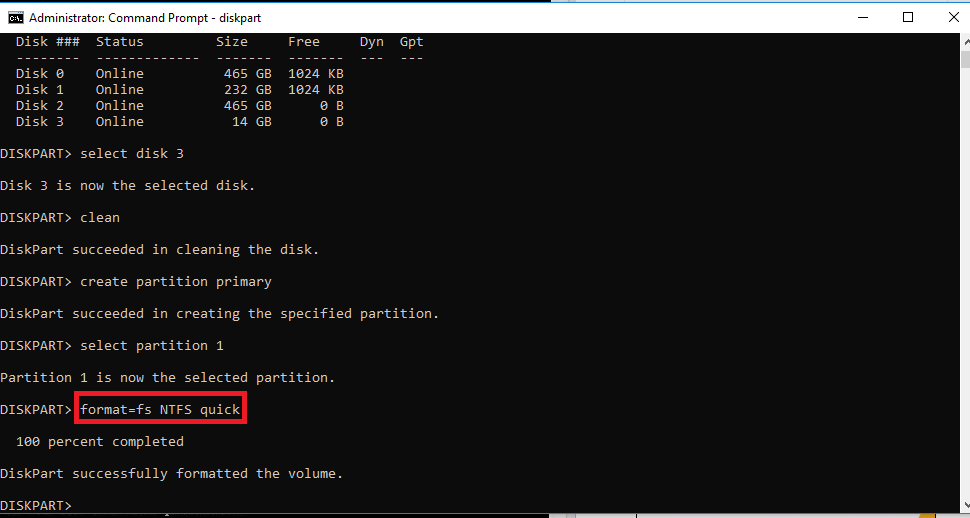
- Next type select disk followed by USB drive number or drive letter of the USB drive, and press Enter key.
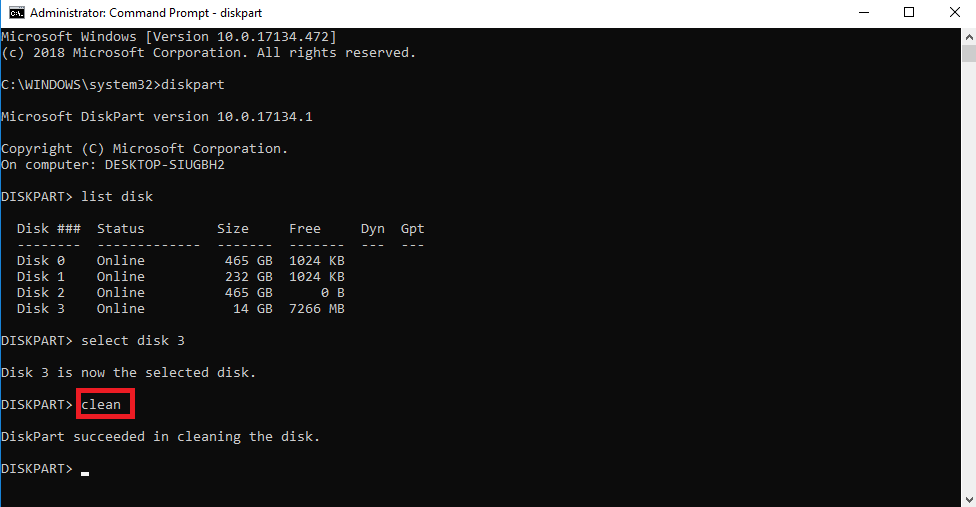
- Now, type clean to delete all the data present on the USB flash drive and press Enter Key.
- Next, create a new primary partition on the USB flash drive. For this type create partition primary press Enter key and type select partition 1 to select created disk partition.
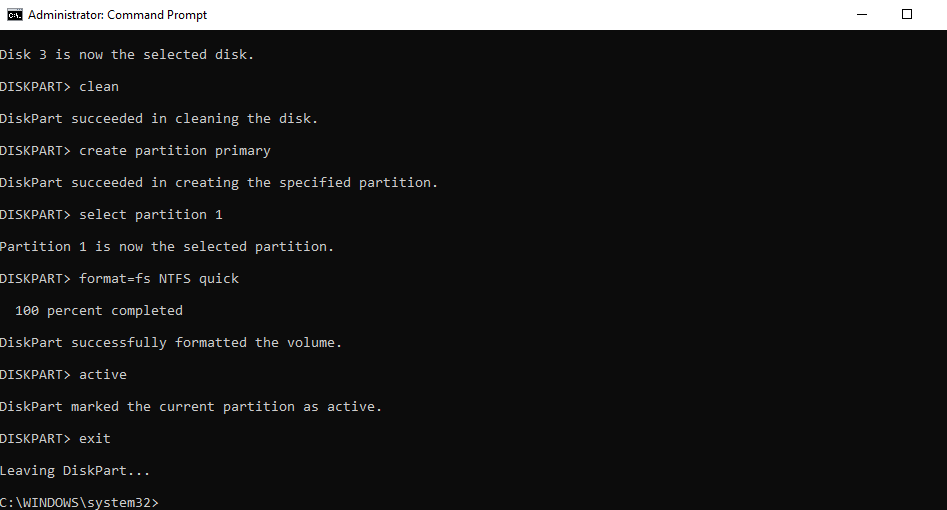
- Next, you need to format the partition, for this type format fs=ntfs quick, and press Enter key.
Note: If Unified Extensible Firmware Interface (UEFI) is supported by your server, format USB flash drive as FAT32 rather than as NTFS. To format the partition as FAT32, type format fs=fat32 quick, press ENTER key. - Now, type active and press Enter key.
- Type exit and press Enter key. Do not close Command Prompt as we will be needing it.


Step 2: Copying file manually from ISO image on PC to bootable USB:
Now that the USB is ready we need to copy ISO files to the USB, we will do this manually. Following steps will help you make USB drive bootable for Windows 10 and older versions.
However, if you have DVD you can copy the files to bootable USB using CMD. To do so, follow the steps below.
Let’s assume USB Drive is F: drive and DVD drive is G.
By default, Command Prompt’s active directory with Administrator permission is C:\Windows\System32>. Hence, we will need to change it to drive G DVD drive letter as it is the active directory.
Note: DVD should be there in the DVD drive.
- Type G: in the Command Prompt window and press Enter key. This will change the active directory to G.
- Here, type cd boot and press Enter key. The active directory is not changed to G:\boot>
- Type bootsect/nt60 f: and press Enter key. this will create a boot sector on F: (the USB drive).
- Next, type copy g:\*.* /s/g/f f: and press Enter Key. Double check the drive letter to avoid any confusion. Here, G is the driver letter for DVD and f is the driver letter for USB.
- Next type exit and press Enter key to quit Command Prompt window.
Now the flash drive is ready to be used as bootable media to install Windows 10. Wasn’t it easy to create a bootable flash drive to install Windows from an ISO file.
We hope you like the tutorial, please leave your feedback in the comments section below.