
Most common way to install an operating system or any other software is to insert a CD or DVD into computer’s DVD/Cd drive and let it take its course. This process is fine if you have a system with CD/DVD drive, but what will happen if the CD/DVD drive is not working or the system you are using doesn’t have it? In such cases, a USB flash drive with the installation files comes to rescue.
Here, we shall explain to you how to install pfSense using a bootable USB drive.
Before, we begin we need to have a certain thing:
Prerequisites to create bootable USB to install pfSense:
1. USB drive minimum of 2 GB
2. pfSense image
3. Downloaded Win32 Disk Imager
Once you have all the above things you are ready to create a bootable USB drive to install pfSense.
Cleaning the target disk
First, you’ll need to wipe the USB disk to avoid any problems. To do so follow the steps below:
1. Connect USB drive with working Windows PC.
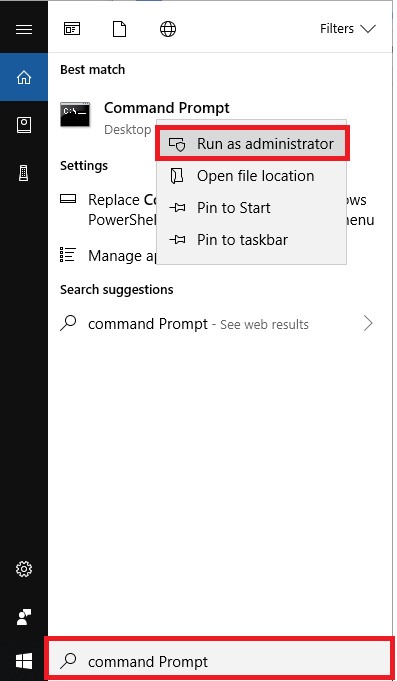
2. Next type command prompt in the search bar, right click on it and select Run as administrator.
3. Here, under Command Prompt window type diskpart.

4. Next, in the new command line, type list disk, and press Enter key to determine USB flash drive number. This command will display all connected disks on the computer. Make note of the drive number of the USB flash drive.
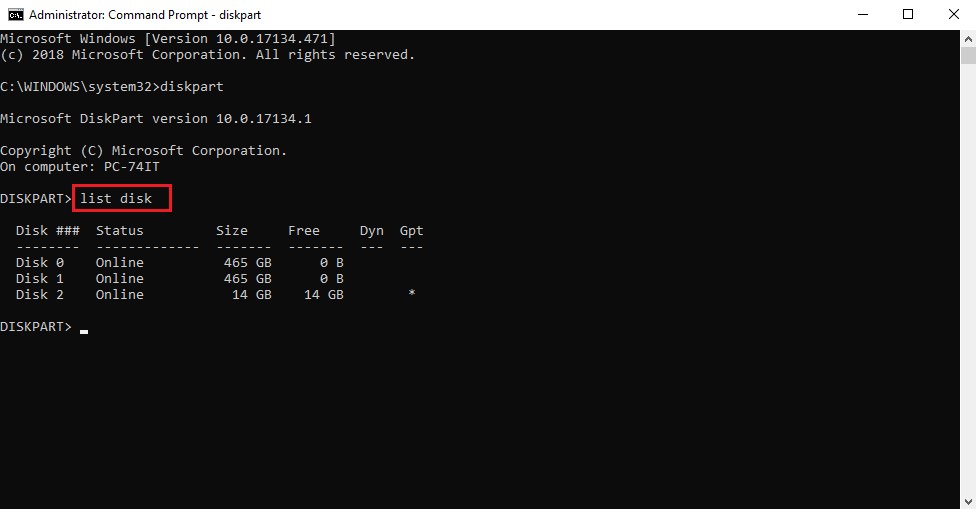
Note: If you are not sure about which one denotes your flash drive number, remove USB and run list disk command. Now plug back the flash drive and again run list disk command. You’ll now be able to figure out which one is your flash drive. Usually, flash drive is at the bottom of the disk menu.
5. Next type select disk followed by USB drive number or drive letter of the USB drive, and press Enter key.
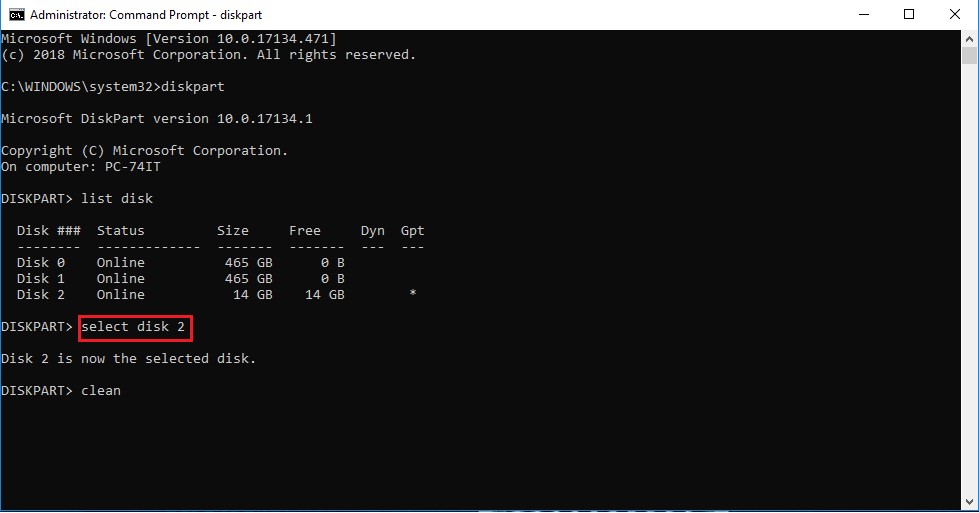
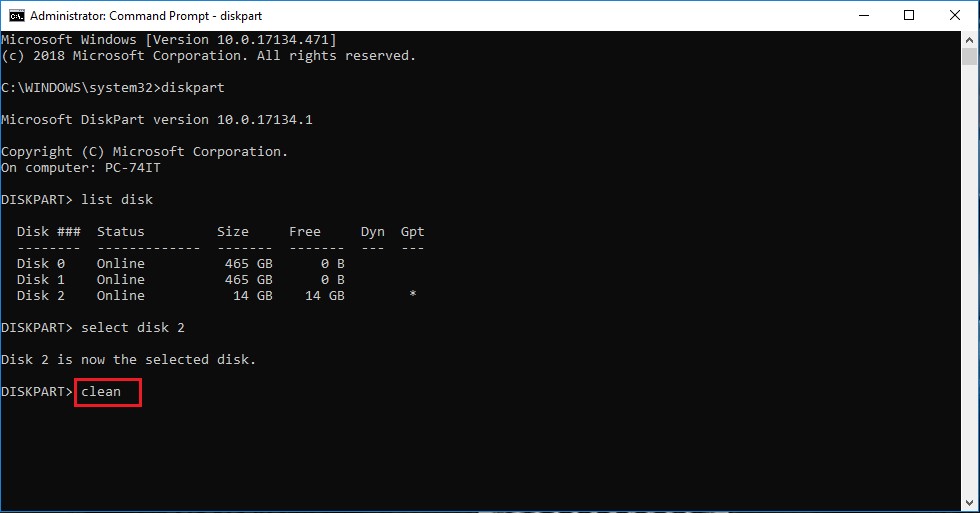
6. Now, type clean to delete all the data present on the USB flash drive and press Enter Key.
Now that the USB is clean we need to download pfSense memstick image.
 How To Create A Bootable USB To Install...Various tools are available in the market to create bootable USB drive, but sometimes we wish to do the process...
Downloading Image for USB Drive
Download pfSense image for USB drive according to the hardware you are using, you’ll be installing pfSense and USB stick version 32-bit or 64-bit.
Extracting Image File
The file you just downloaded is compressed therefore you will need to extract it before writing the image. For this, you can use WinZip, a free product to extract compressed files.
Writing Image file on the USB Drive
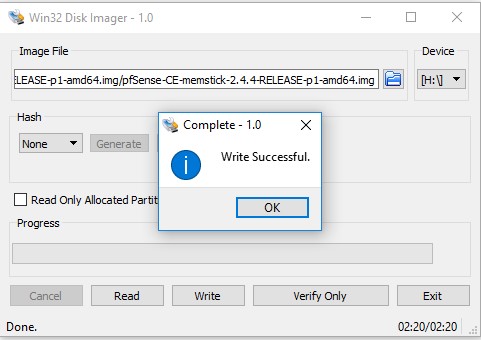
Once the image file is extracted you can write it to a USB drive. To write pfSense image on USB stick we will use Win32 Disk Imager.
Note: This process will remove all the content from the target drive, therefore, be careful while choosing the drive.
1. Download Win32 Disk Imager.
2. Next, extract the downloaded file using WinZip and then run Win32 Disk Imager.exe.
3. Now, click the folder icon in blue color and select pfSense-memstick.img from the location you saved the extracted file.

4. Cautiously choose the USB drive letter from device drop down box and click on write.

Booting from USB Drive
Now that we have pfSense image written on USB drive we are ready to install pfSense. But there’s one last thing that you’ll need to do. You’ll have to change BIOS settings to support booting from USB device.
Most computers have a hotkey to access boot device menu. Use that to the access boot menu and adjust BIOS. Once done plug in the USB. However, if there is no boot menu you can force your system to boot from USB.
Make sure USB drive is plugged in and then select option 3 from pfSense welcome menu.
Launching Installer
As soon as pfSense starts to boot from the USB drive you’ll see an option to enter recovery mode or installer mode. Press “I” to launch the installer.
Console Configuration
Next, accept default settings and select installation mode. As it is your first time run quick/easy this mode will automatically format first hard disk and install pfSense on it.
Note: Once you choose quick installer all the data on the hard drive will be wiped. Hence, make sure your hard disk has no important data on it.
However, if you want to customize settings select custom install option.
Now follow on-screen instructions to complete pfSense installation.
Once pfSense is installed you’ll need to restart the system. Make sure you remove the USB drive. First-time pfSense boots you’ll see a wizard using which you can define LAN and WAN interfaces. Follow on-screen instructions to assign interface, IP addresses. Once all this is done you’ll need to log into the web interface to use pfSense.
 How to Fix USB Device Not Recognized Error...Sometimes, when you plug your USB device like pen drive or external hard disk, you may receive the following error...
Using these steps, you can install pfSense using a USB drive. Hope you find the tutorial helpful leave us your feedback in comments sections below.