
IMPORTANT:
Before you follow the steps mentioned in this post, we urge you to take a backup of important data on your Mac so that you can at least retrieve data if something goes wrong. This also helps to keep your data secured when you have deleted something that you shouldn’t have. And, even if you have mistakenly deleted something important, you needn’t jitter, there is still hope and you can restore lost data using a data recovery app for Mac.
The “iCloud Storage Full” notification on your Mac appears when your iCloud storage space is running out or has reached its limit. When the storage space get full, certain iCloud services and features may get affected. For example, you may not be able to back up your devices to iCloud, sync data across devices, or upload new files to iCloud Drive.
Why Does My iCloud Say “It’s Full”?
Before we dive into ways to remove the “iCloud Storage is Full” notification, let’s quickly have a look at some common reasons why this issue surfaces in the first place:
- Some apps are using iCloud for storage and hence you are getting the notification.
- Duplicate photos or files in your iCloud drive.
- Your existing 5 GB storage is full and you may need to opt for more storage.
Now, let’s have a look at some ways you can fix “iCloud Storage is Full” notification error.
How To Stop iCloud Storage Full Notifications on Mac
If the “iCloud Storage is Full” notification doesn’t go away, here are certain things you can do –
Solution No. 1 – Manage iCloud Storage
One of the first things you can do if you are getting the “iCloud Storage is Full” notification is to manage your iCloud Storage and remove items you don’t need.
1. Open System Preferences.
2. Click on your Apple ID and select iCloud.
3. Select Manage.
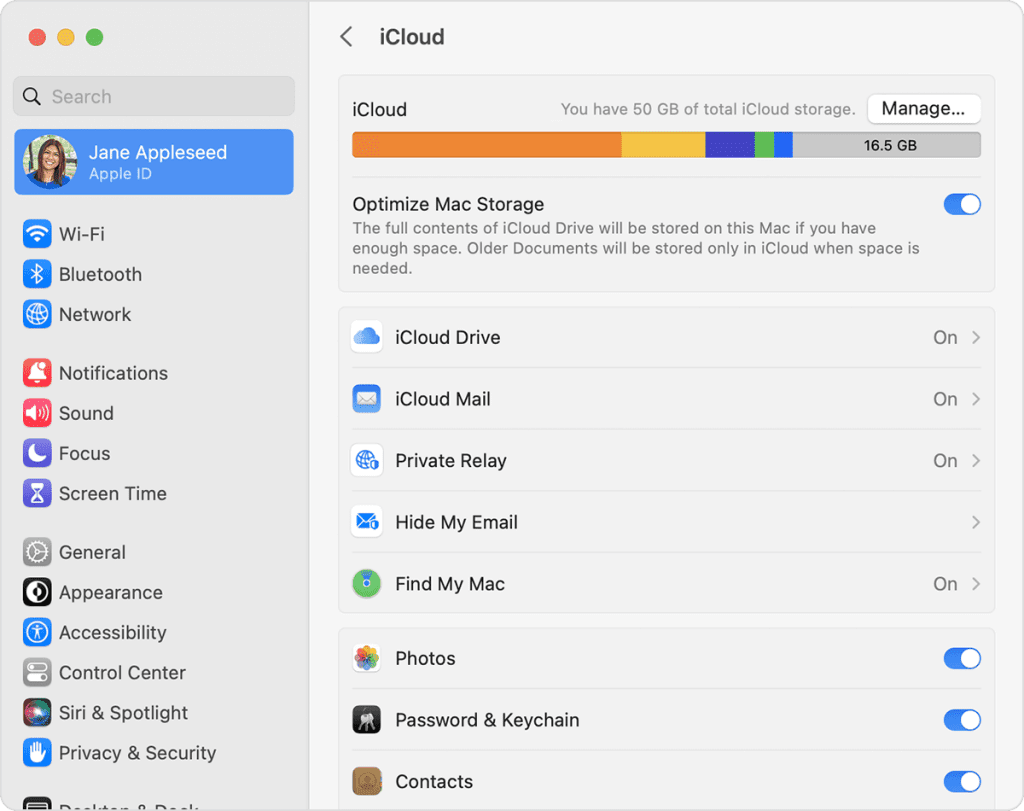
4. Go through all elements – the photos, previous backups, voice memos, and apps and see if you can delete unwanted things.
Additionally, you can also delete the iCloud Library
1. Open System Preferences.
2. Select iCloud.
3. Click on Manage.
4. Select Photo Library.
5. Select Disable and Delete.
Writer’s Tip – Get Rid of Duplicates In A Jiffy
Maybe there are tons of duplicate photos resting in your iCloud Drive. These unwanted duplicates eat up your storage space and, it should come as no surprise that it can result into iCloud says it’s full.
Solution – Chuck them out of your Mac, but, safely by using a duplicate image removal app. One such utility is Duplicate Photos Fixer Pro for Mac. Here is how you can remove duplicate photos from your Mac using Duplicate Photos Fixer Pro –
Step 1 – Download, run, and install Duplicate Photos Fixer Pro for Mac.
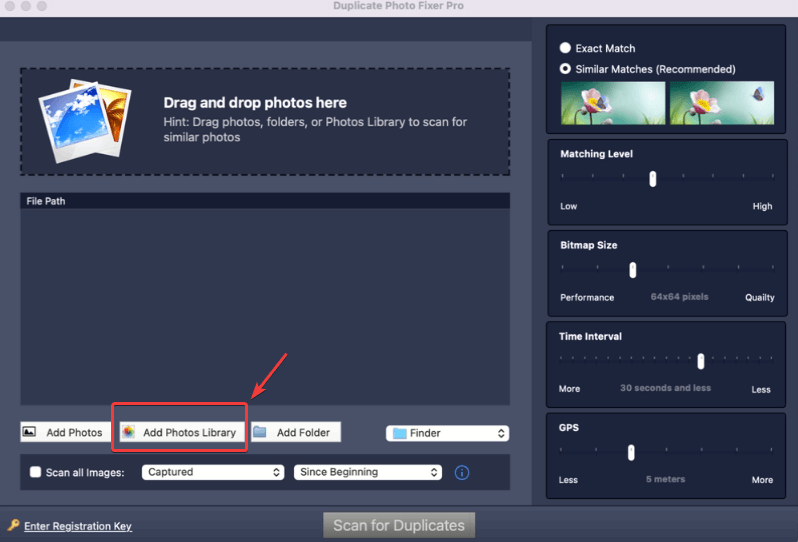

Step 2 – Click on Add Photos Library as shown below.
Step 3 – Click on iCloud Drive under Locations.
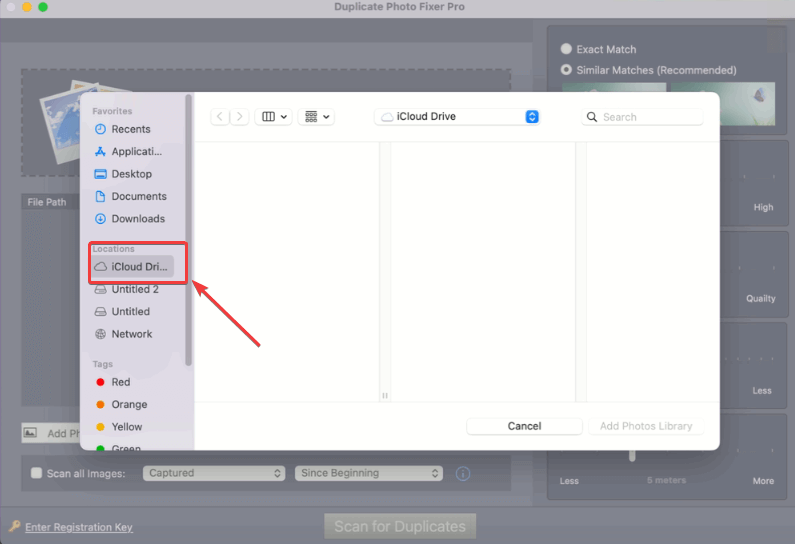
Step 4 – Once you have selected the iCloud Drive, select the photos. And, click on Scan for Duplicates from the bottom of the interface.
Step 5 – Click on Auto Mark to select the duplicate photo in each group.
Step 6 – Click on Delete Marked. That’s how easy it is to delete duplicate photos with Duplicate Photos Fixer Pro.
To know more about the wonderful features of Duplicate Photos Fixer Pro for Mac, check out our review.
Solution No. 2 – Disable Automatic Backup For Apps
When using apps on Mac, sometimes we set them to automatic backup. This takes up a significant amount of storage. So, one of the ways to stop the “iCloud is Full” notification is to disable automatic backup for apps. To do that follow the steps mentioned below –
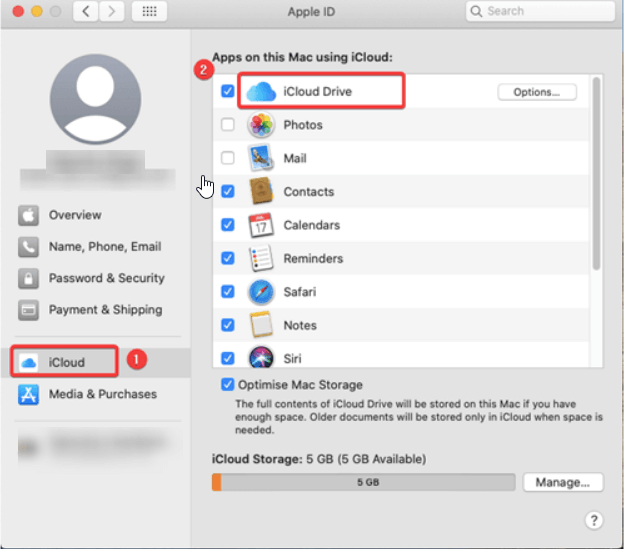
1. Click on the Apple menu.
2. Select System Preferences and then click on your Apple ID
3. Click on iCloud from the left-hand pane.
4. Uncheck the checkbox next to the apps whose backup you want to disable.
Solution No. 3 – Opt for Additional iCloud Storage
You can opt for additional storage space available in 50GB, 200GB, and 2TB variants. To know how much the plans would you cost in your country, you can refer to iCloud+ pricing mentioned on Apple’s website.
Solution No. 4 – Remove Photos From Recently Deleted
When you delete photos they are shifted in the Recently Deleted section for 30 days. But, if you constantly get the “iCloud storage is full” notification, you can check and delete unwanted photos from Recently Deleted. Here are the steps for the same:
1. Open Photos on Mac.
2. From the left, click on Recently Deleted.
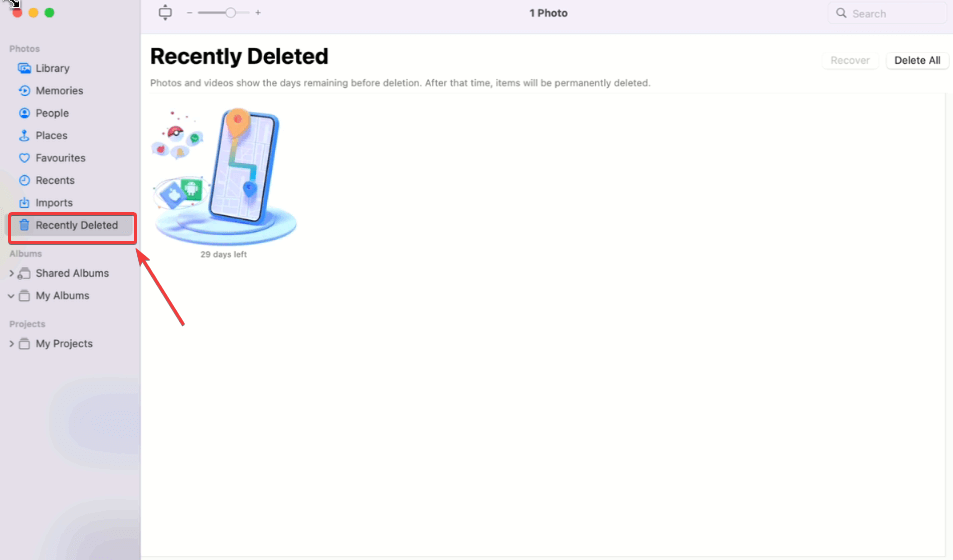
3. Click on Delete All from the top-right corner of the screen.
Get Rid of the “iCloud Storage is Full” Notification Once and For All!
Often users, ignore the “iCloud Storage is Full” notification by hitting the close button. But, if you wish to get rid of it permanently, you can try one of the solutions mentioned above. And, if you were able to fix the issue, do let us know which of the above solutions helped you get rid of the “iCloud Storage is Full” notification. For more such informative tech-related content, keep reading WeTheGeek.
You can also find us on Facebook, Twitter, Pinterest, Instagram, and YouTube.
