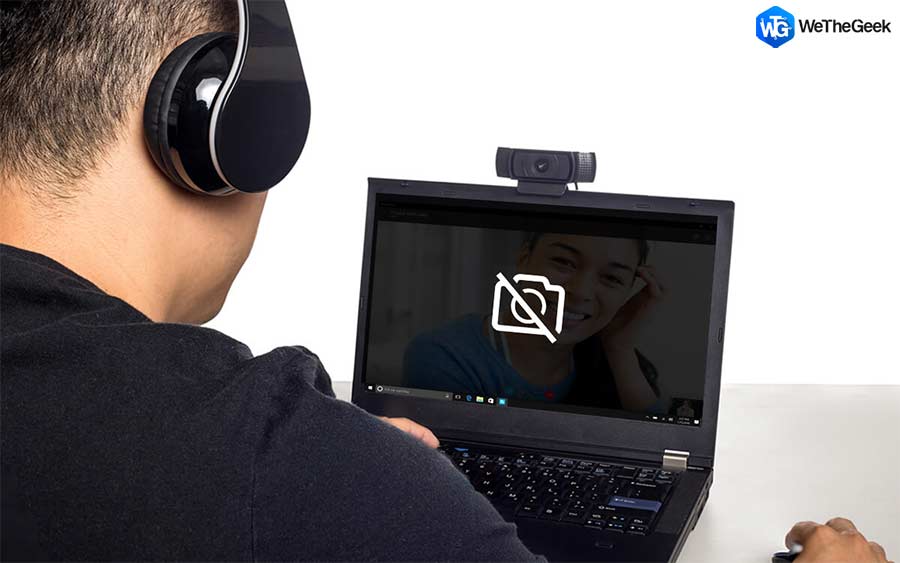
If you are here looking for how to fix webcam not working on Windows, we have solutions to fix the issue. The first instinct when your webcam fails to work is to check its hardware and cable connections. Later on, when everything is checked on the external front, you start with checking the settings of the webcam.
- Open the Settings> Privacy> Camera, look for the “Apps are allowed to use the camera” option is Turned on. If it is Off, turn it on, below you can see the list of the apps which can access the webcam.
- Open Device Manager> Camera> Integrated camera, and right-click on it. You will see if the device is disabled or enabled. If not change it to Enable it.
What To Do If Webcam Is Not Working?
As per the recent reports, a lot of webcams started giving trouble to its owners. The reason behind this was merely that they had updated their operating system. Since the updates sometimes don’t work in hand with the old hardware. They refuse to work as the system shows you an error while trying to use the webcam. This is possibly a case of a few faulty registry entries or outdated drivers.
We will discuss the way to solve the issue of webcam not working on Windows, by both these methods.
Method 1: Fixing the Registry entry
Disclaimer: Make sure you are familiar with working on your system and making modifications will not bring any harm to your system. Try to perform it in Safe Mode for safety measures. We do not suggest you modify any Registry entries without taking a backup. So, before you proceed to edit, take a backup, open Registry Editor and go to File->Export. Save the registry backup file on a preferred location.
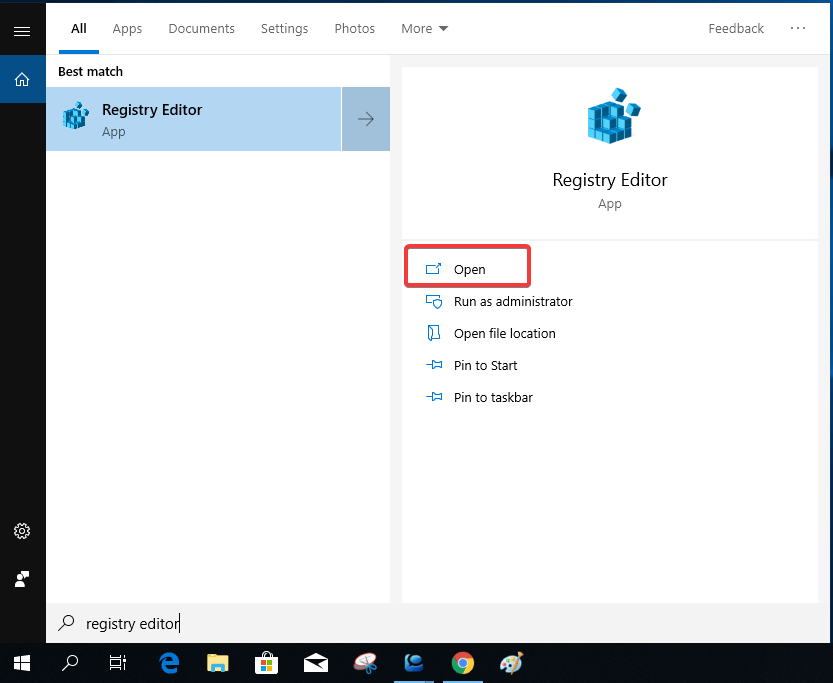
Step 1: Open Start menu, search Registry Editor and open it.
Step 2: Go to HKEY_LOCAL_MACHINE> Software> Microsoft > Windows Media Foundation> Platform.
Step 3: On the right panel, you will see a number of keys. Right-click on this side of the panel and click on New and then choose the DWORD (32 -bit) Value.
Step 4: Name the value – “EnableFrameServerMode”.
Step 5: Click on this value and assign the number 0 to it.
Step 6: Now go to HKEY_LOCAL_MACHINE> Software >WOW6432Node> Microsoft> Windows media Foundation> Platform.
Step 7: Repeat Step 3 to Step 5.
Remember to restart your computer to apply the changes.
Method 2: Updating driver using tool
Device drivers act as a medium between hardware and software as they help in communicating between two. If drivers stop to work, your hardware could stop working too. It is also a possibility that you have been using it for a long while and after a certain upgrade or update, the device drivers will not be aligned to the hardware. To fix corrupt or missing drivers, you need a tool, we recommend using Advanced Driver updater. upgrade or update. To perform the action needed for the system to work with the devices attached, you need to download it. Once you get the tool update the drivers present in your system and work smoothly.
Advanced Driver Updater is supported by Windows 10/8.1/8/7/Vista and Xp (both 32 bit and 64 bit) versions.
The steps below indicate how it will help you to fix webcam not working on Windows. Advanced Driver Updater will help update all the device drivers present on your system:
Step 1: Download the tool from the button below.

Install and run it successfully.
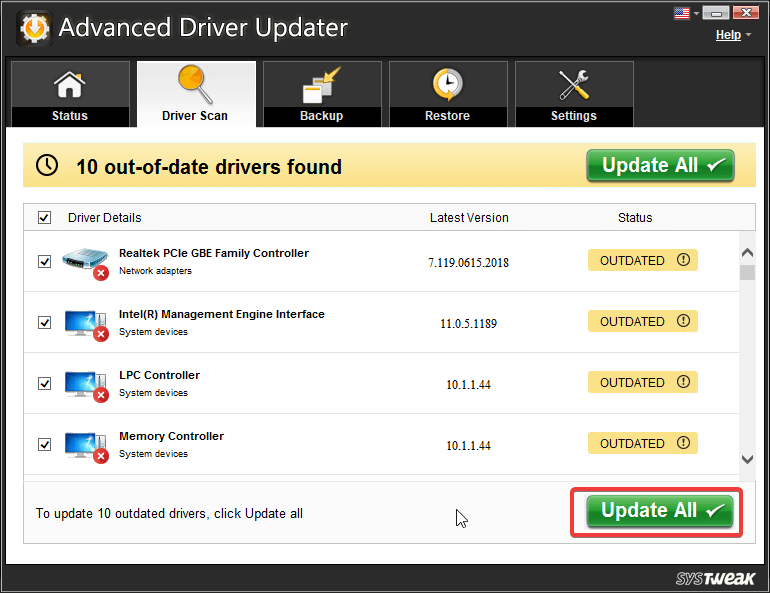
Step 2: Right after the successful installation of Advanced Driver Updater, you can see the status bar with the device drivers on your computer in the panel.

This will indicate the state of your device drivers on the present day, this is most likely to be Outdated. That means the Drivers are outdated, which is expected from Windows update of operating system or any corrupt files might be the reason. This can cause the problem of webcam not working on your system.
Click on Start Scan Now to check device drivers thoroughly in your system.
Step 3: Scan continues to look for the outdated device drivers. It will take a short time and will show results.

Scan for the existing drivers in your windows system will start immediately.
For the outdated device drivers, status will be shown as Outdated. Click Update all. It is recommended to keep your drivers updated for optimum performance of the devices.
Step 4: After all your drivers are updated, it prompts you to restart your computer. After restarting, it will show a message that all drivers got updated.
It allows roll back to option of going back to the configuration of the driver, possible with the tool because it keeps a backup of all system drivers.
ADU speeds up the computer and the devices will work effectively. Once you get the drivers updated, you can restart the computer and see that the webcam will start to function be working again.
You are ready to use your webcam for streaming on YouTube or to make a call online from Windows.
Conclusion:
This is how you fix your webcam not working on Windows. Most likely the case is of outdated drivers and you can easily update them with the help of Advanced Driver Updater. Subscribe to our newsletter to get regular updates on the tech world. Follow us on Facebook, Twitter, LinkedIn, and YouTube and share the articles.