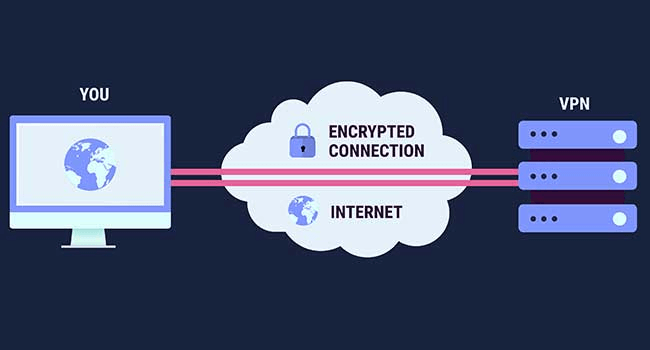
VPN, aka Virtual Private Network, is a must-have service to enhance your online privacy while browsing the web. Whether it’s about keeping your browning activities secure and untraceable or watching movies, TV shows that are blocked in your region, VPN can most certainly act as a boon in today’s digital age.
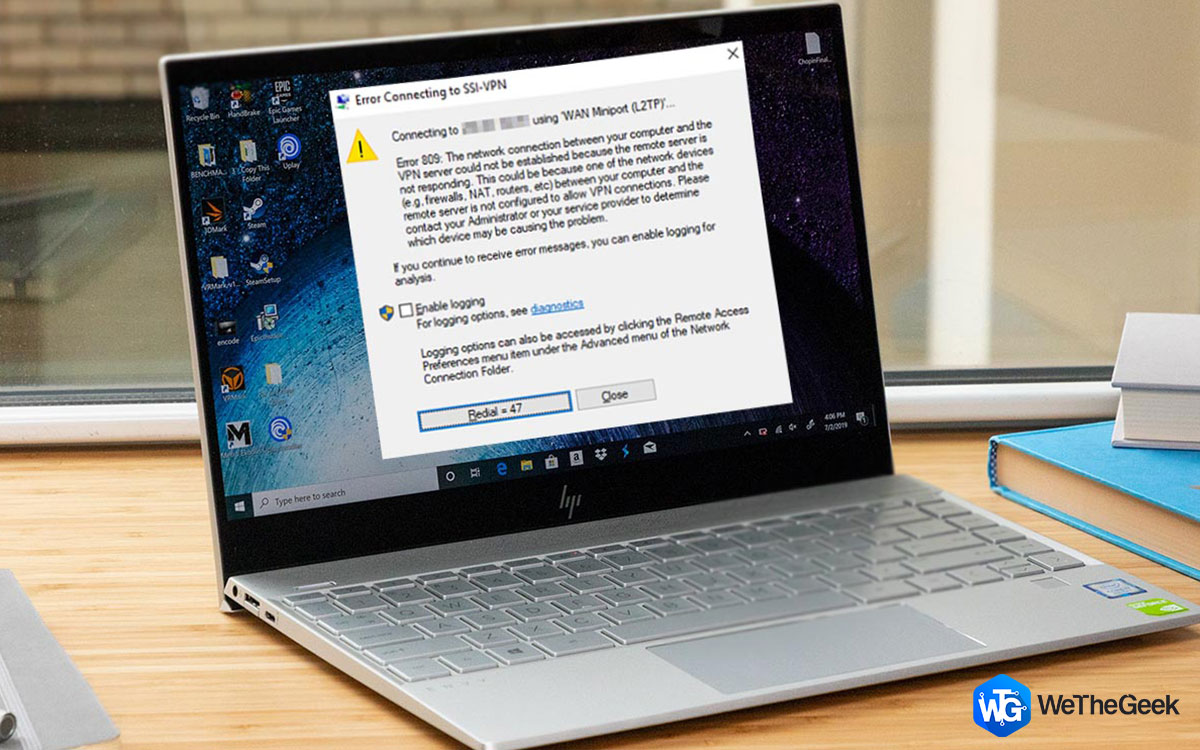
While connecting to the VPN, have you ever encountered the VPN error 809 on your Windows 10 PC? Yes, Error 809 is a common VPN error that doesn’t allow you to establish a connection between the device (local client) and the remote server.
Here’s everything you need to know about VPN error 809, why it occurs, and how we can successfully fix this issue to set up a secure connection without any hindrance.
Also Read: 4 Efficient Ways to Fix VPN Error 619
Let’s get started.
What is VPN Error 809? Why is it Caused?
The VPN Error 809 most commonly occurs when your device cannot connect to the VPN server, due to the presence of a Firewall that blocks the VPN ports.
Common Causes:
- Blocked VPN ports.
- Invalid value in Windows Registry
- Misconfigured PAP settings.
- Interference of third-party apps and services.
Also Read: How To Fix 504 Gateway Timeout Error
How to Fix VPN Error 809 on Windows 10
Here are a few useful solutions that will allow you to resolve Error 809 on Windows PC.
Solution #1: Edit Windows Registry
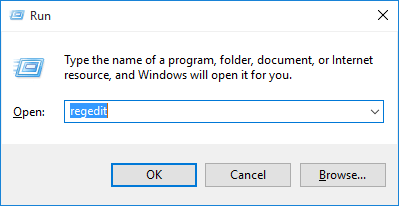
Press the Windows + R key combination to launch the Run box.
Type “Regedit” in the search box and hit Enter.
In the Registry Editor window, navigate to the following path:
HKEY_LOCAL_MACHINESYSTEMCurrentControlSetServicesPolicyAgent
Right-click on the file entry and select the “DWORD” (32-bit) value to create a new file.
Enter the following string as the Registry Value:
AssumeUDPEncapsulationContextOnSendRule
Tap on OK. Also, don’t forget the change the data value from “0” to “2”.
Close all the active windows, reboot your device to check whether you’re still experiencing any issues while connecting to the VPN service.
Solution #2: Configure PAP Settings
The next workaround to resolve “VPN Error 809” on Windows 10 is by configuring the VPN PAP settings on your device.
Tap the Start menu icon, and select the gear-shaped icon to open Settings. Alternatively, you can also press the Windows + I key combination to open Windows Settings.
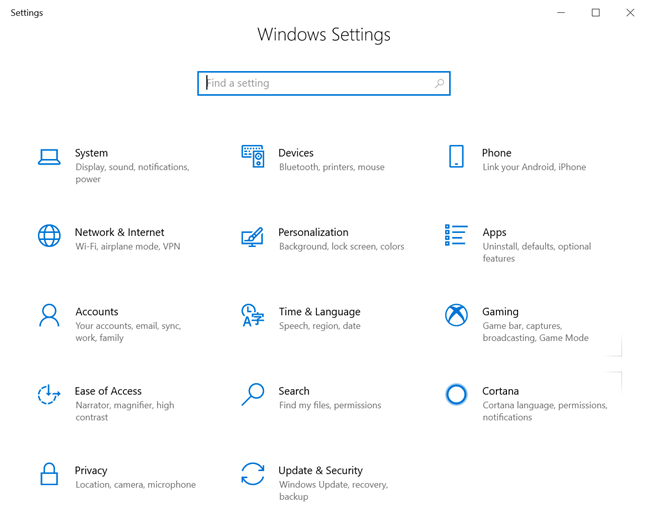
In the Settings, tap on the “Network and Internet” option.
On the left menu pane, switch to “VPN” and then tap on the “Add a VPN connection” option.
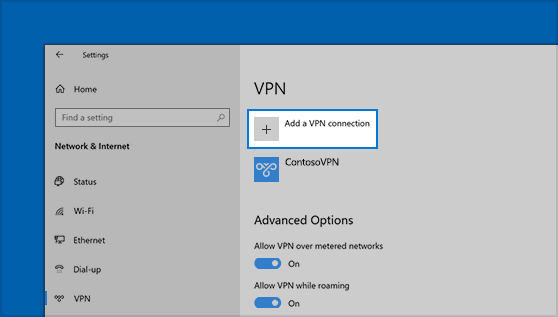
Fill in all the necessary information, including connection name, user ID, password.
Switch to the “Properties” tab and navigate to Security> Advanced Settings.
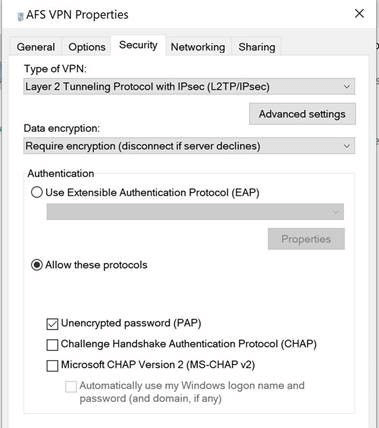
Select the “Allow these Protocols” and check on the “Unencrypted Password (PAP)” option.
Reboot your device to check whether the issue persists.
Solution #3: Enable Firewall Ports
As we mentioned earlier, VPN Error 809 occurs when the VPN Firewall ports of your device get blocked due to some reason. To resolve this issue, you need to follow these steps:
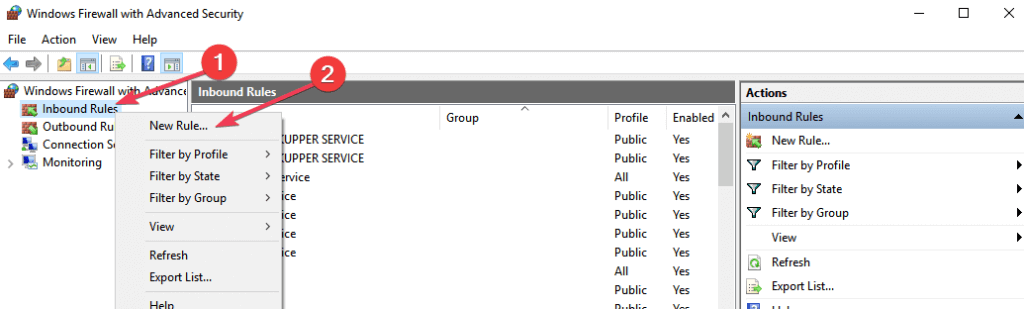
Head on to the Control Panel> System Security> Windows Firewall.

Tap on the “Advanced Settings” option placed in the left menu pane.
Right-click on the “Inbound Rules” option and select “New Rule.”
Enable the “Port” option and then tap on “Next.”
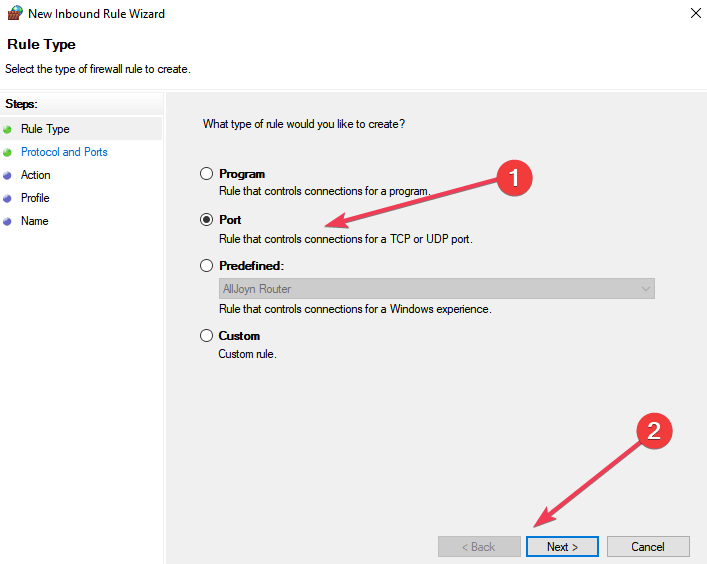
Image Source: Windows Report
Make the desired configuration changes to proceed further.
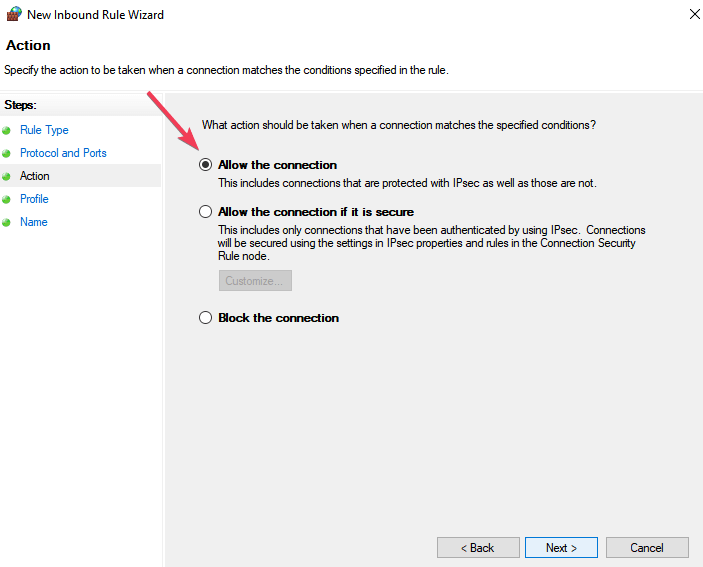
Select the “Allow the Connection” option and then hit the “Next” button.
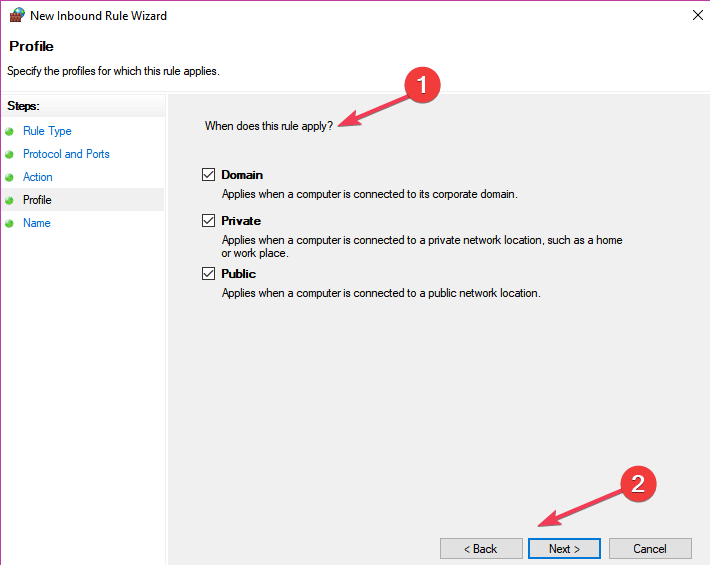
Pick the “Network Type,” whether it belongs to the Corporate domain, public or private.
Fill in a name for the rule you recently created and then hit on the “Finish” button.
The above-mentioned steps will open the VPN firewall ports on your device so that you can resume using the VPN services on your device.

Tried above-mentioned workarounds and still no luck? Well, maybe it’s time to switch to a new VPN service. Download Systweak VPN for Windows that offers you 100% anonymity and data privacy. It features more than 4500+ remote server locations in 200 different locations. Systweak VPN’s follow 256-bit military-grade encryption to offer you round the clock security when surfing the web.
Apart from this, Systweak VPN also comes with some useful security features, which include Kill Switch, public WiFi security, IP address masking, anonymous web browsing, and more.
We hope the above-listed solutions will help you to resolve VPN Error 809 on Windows 10 devices. For any other queries or assistance, feel free to write to us!
Jackie
I was looking for this solution! Thanks!James
Like the way you explain how to resolve VPN errorCHTN
VPN is something people have their reservations about… articles like this help us always. thank you