
If you are a Google Chrome user and have encountered a DNS server address that could not be found when accessing some sites, pay attention. Overlooking DNS server error is not the right thing to do. Hence, here in this post, we will discuss how to fix DNS servers that could not be found.
What Does A DNS Address Not Found On Windows 10 Mean?
Each online website has a numerical IP associated with a domain name; this IP address is used for a packet to packet communication. But if the DNS server is unavailable, it means the browser cannot connect to the server; hence the decoder fails to regain its address.

Reasons why you encounter DNS Server IP, Address Not Found?
- The domain you are trying to access is down.
- The local cache is returning the older IP address.
- Server Misconfiguration
- Outdated Drivers
How To Resolve DNS Address Could Not Be Found in Windows 10?
To fix DNS server error, follow the steps below:
1. Clear Host Cache
Sometimes due to host cache, you might face the error message. Therefore, we suggest cleaning the cache. To do so, follow the steps below:
- Press Ctrl + Shift + N keys altogether & open Google Chrome in Incognito mode
- Now in the address bar, type: chrome://net-internals/#dns and press
- Click the Clear host cache

- Afterward, in the Windows search bar, type Command Prompt. Right-click the search result and select Run as administrator
- Here enter ipconfig /flusdns > Enter.
- Next enter ipconfig /renew > Enter
- Ipconfig /registerdns > Enter

After this tries to access the website in Google Chrome, you should not face any problem.
2. Check and Update Drivers
Corrupt, outdated, and incompatible drivers can also cause server DNS addresses could not be found. Hence, the first step to ensure you are not running an obsolete driver is to run an automatic check on drivers. For this, you can use the Driver Updater module offered by Advanced System Optimizer. This is a powerful module and helps identify missing or outdated drivers. Not only this, it saves you from all the hassle of collecting information like make, model, OS details, etc.
To use the Driver Updater module of Advanced System Optimizer, follow the steps below:
1. Download and install Advanced System Optimizer

2. Launch the best PC Optimizer
3. Click Windows Optimizer from the left pane > Driver Updater.
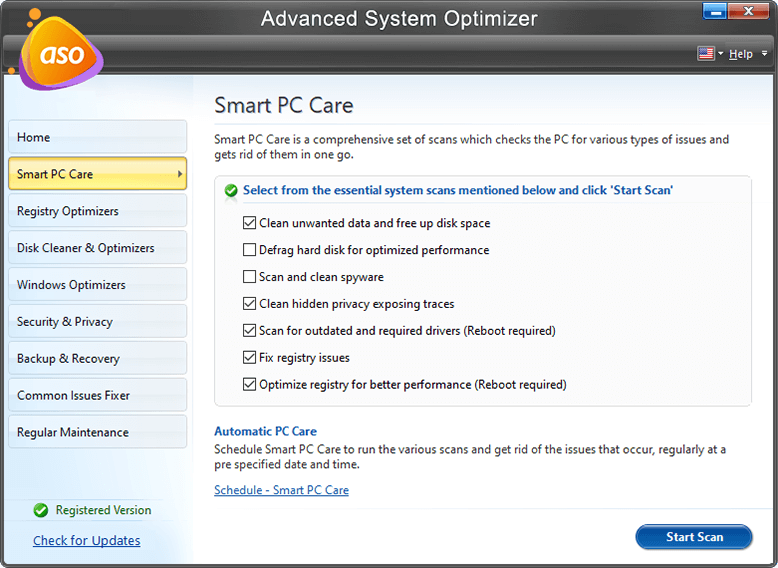
4. Run the scan, wait for it to finish, once done update all the outdated drives
5. Reboot Windows PC to save changes.
You should no longer face DNS addresses that could not be found on Windows 10.
However, if you want to check for driver updates manually, you can do that too. For this, head to the manufacturer’s site and search for the recent driver update. Download and install the latest driver.
Note: An incorrect driver update might harm your system. Hence, when downloading and installing drivers manually, make sure you are getting the right driver updater compatible with the Operating System you are using.
If this doesn’t help move, the next way to fix the DNS server could not be found.
3. Delete Files in ETC Folder
This fix doesn’t require much of your time. To use it, you just need to go to
C:\Windows\System32\drivers\etc
Here, select all the files and delete them.
Now exit Chrome and relaunch it to see if the DNS problem is resolved or not. If not, let’s move to the next option.
4. Reset Network Configurations
When network configuration is not correct, you might face a DNS server error. Hence, to fix it, you need to reset the network configuration. To do so, follow the steps below:
1. Type Command Prompt in Windows search bar
2. Right-click the search result and select Run as administrator
3. Now enter the following commands one by one. Make sure you press enter after each command.
netsh int ip reset
netsh winsock reset
ipconfig/release
ipconfig/renew ipconfig/flushdns
4. Once all commands are executed, open the browser and check if the problem persists or not.
If you still face a DNS address not found the problem, move to the next step.
5. Restart the DNS Service
There’s a possibility that DNS service might have been corrupted due to which you encounter DNS could not be found. To fix it, we need to restart DNS for this follows the steps below:
1. Press Windows + R
2. Type services.msc and press Enter
3. Now under the Services window, look for DNS client service.
4. Right-click it > select Restart from the list.

5. Once the service is up and running, Launch Google Chrome and check for the DNS not found error. It should be resolved.
6. Configure to Open New Page
Often, a harmful browser extension can cause DNS errors. Hence, we suggest configuring Chrome to Open the New Tab page. To do so, follow the steps below:
1. Launch Google Chrome
2. Click the three stacked dots at the top right corner > Settings.

3. Under startup, select Open the New Tab page.

4. Restart Chrome and check the error should be fixed now.
7. Change DNS Server Settings
Incorrect DNS server setting is also responsible for DNS server error. To resolve it, follow the steps below:
1. Press Windows + R and type Control Panel > Ok
2. Click View By and select Small Icons from the drop-down menu.
3. Select Network and Sharing Center > Change adapter settings.


4. Choose your connection > right-click > Properties

5. Pick Internet Protocol Version 4 (TCP/IPv4) > Properties

6. By default, Obtain DNS Server Address should be checked. So, you need to check to Use the Following DNS Addresses option and type 8.8.8.8 and 8.8.4.4 in the DNS server address.

7. Save changes and check the error should now be fixed.
Using these steps, you can easily fix DNS servers that could not be found. However, if none of the above steps work for you, we suggest reinstalling Google Chrome. This will help remove all the settings that are causing DNS problems. In addition to this, run Advanced System Optimizer to update driver, delete junk files, cache files, causing the DNS server not to be found an error.
Do let us know which method worked for the comments section.
FAQ
Q1. How do I fix a DNS server not found?
To fix DNS servers not found, check & update drivers. Clear Chrome’s Host Cache, change DNS Server Settings and refresh or clear DNS. All this will help fix DNS servers not found.
Q2. How can I find my DNS address?
To find the DNS address, you need to head to Network and Sharing option > select the network you are using > right-click Properties > Internet Protocol Version 4 (TCP/IPv4) > Properties. Here, you can see the DNS address.
We recommend using 8.8.8.8 and 8.8.4.4 as the DNS server address.
Q3. What does DNS server not found mean?
DNS server not found or DNS server not responding means your browser cannot establish a connection to the internet. In such a case, access to any site becomes impossible in the browser you are using.
“DNS address could not be found” after malware removal.
To fix DNS addresses could not be found after malware removal, Open elevated Command Prompt. For this type of command prompt in the Windows search bar,> right-click > run as administrator. Now type,- netsh winsock reset.
Reboot PC and check the problem should be fixed.
Dheeraj Manghnani
After fixing teh issue with these steps i was finally able to browse the internet. Kudos to the writer!Nkeet
a very descriptive and informative article on the server error.. thank you team