
The Evolution of Windows from XP to Windows 10 has been quite extraordinary. Whether the interface, the features or the native applications, everything has traveled its own journey to reach the apex. Every feature has its own story to tell!
Over the years, Windows Search has emerged as a powerful search tool. Whether you want to search something on the web or on your computer, you just need to tap a few keys and it is done!
Windows search can reveal more than what you want. However, if you want to exclude something from the area of searching, you can do so.
In this post, we will discuss how to declutter Windows search in Windows 10.
How To Declutter Windows Search in Windows 10
Also Read: How To Remove “Most Used Apps” From Windows 10 Start Menu
To make Windows search faster and that too in an effective manner (i.e. not to search the hidden and private folders), you need to tweak a setting. To adjust what folders Windows indexes on your PC, you need to edit some parameters. Follow these steps:
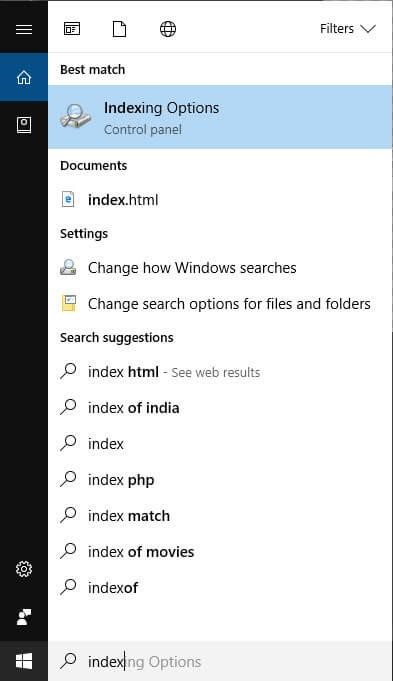
- Go to Start Menu and type Index to open Indexing Options.

- A dialog box will open, at the bottom left hand side, locate Modify.
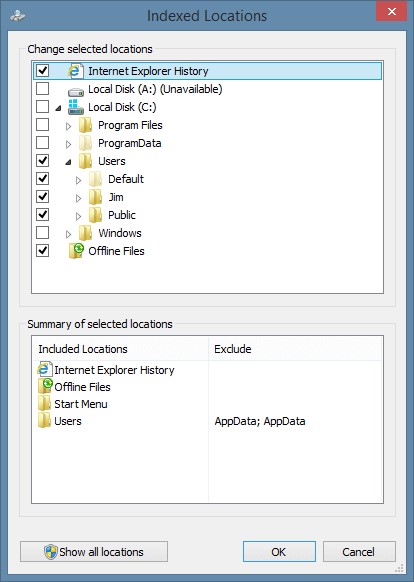
- It will open another dialog box, Indexed Locations.
- By default, the selected locations are your Desktop, Documents, Internet Explorer History and more.
- From the list, click on the arrow next to Local Disk (C:) to expand.
- Now navigate to Users folder, and expand it.
- Check anywhere you don’t want your Windows to search.
- Once, you are done with it. Click OK to close Indexed Locations.
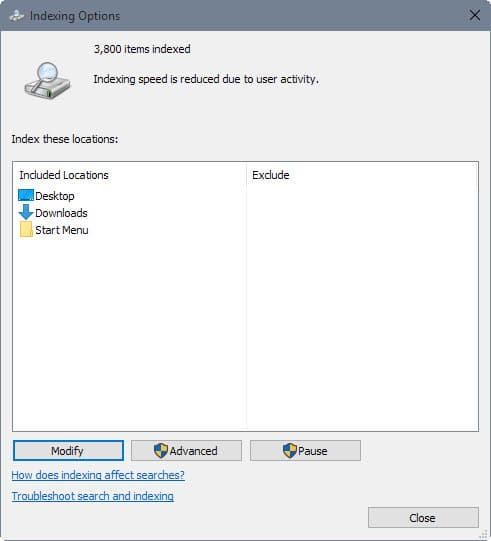
- Now click on Advanced on Indexing Options page.
- Click the Rebuild button in the Troubleshooting header to rebuild the index with your new preferences.


Also Read: A Trick To Convert Image Into PDF in Windows 10
Note: The process “Rebuild” could take several hours depending on your computer
In this way, you could declutter Windows search in Windows 10. What do you think? Have you modified default Windows indexing options yet? Let us know what changes you made in the comments section below!
Also Read: How to Increase Virtual Memory in Windows 10
Don’t forget to sign up to our Newsletters to get exciting tech updates!