Battery Saver is a crucial component of power management in laptops and tablets using Windows operating systems. By restricting notifications, turning down background processes, and marginally lowering performance, you may increase battery life. In today’s post, we’ll go over the many methods for enabling Battery Saver in Windows 11.
But keep in mind that when your computer is plugged in, Windows 11’s Battery Saver mode cannot be activated. In such a situation, Windows 11’s Power Saver option looks grayed out. You can activate Battery Saving once you unplug the AC power supply.
Also Read: How To Fix Missing Battery Time Estimate In Windows 11
3 Ways To Enable Battery Saver Functionality In Windows 11
Battery Saving can be activated in several different ways. Depending on the device’s battery level, you can utilize Quick Settings, the Settings app, or even set the OS to activate it automatically. Let’s take a closer look at these techniques. Hence, follow these instructions to make the Power Saving option in Windows 11 available.
Also Read: How To Fix Battery Saver not Working on Windows 11 Laptop
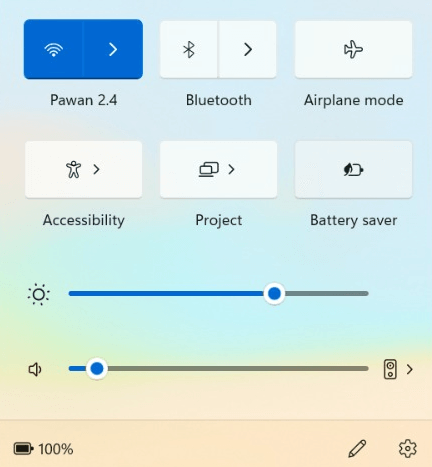
Method 1: Use Quick Settings
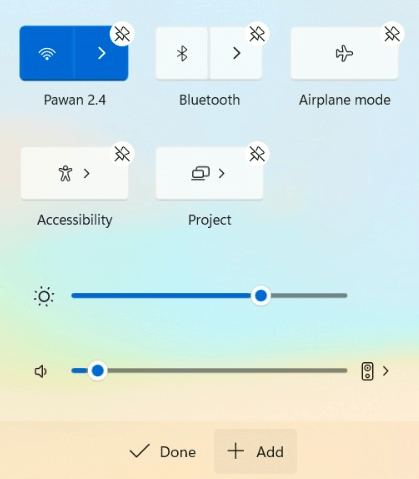
Step 1: Press Win + A to launch the Quick Settings menu.
Step 2: Click on the Battery Saver option and this will enable the Battery Saving mode on your PC.
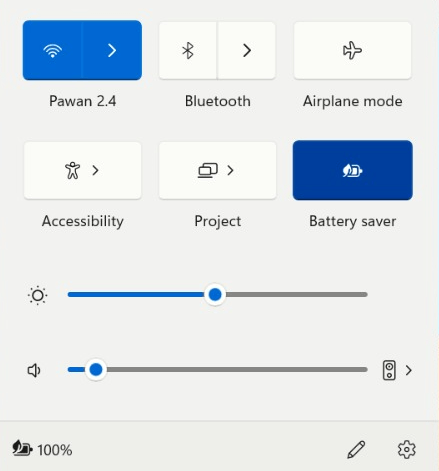
Step 3: If you want to disable the Battery Saving mode then follow the above steps again and click on the Battery Saver option. This will disable the Battery Saving Mode.
Note: If the Battery Saver option is not present in the Quick Settings menu then you can add this by following the steps mentioned below:
Step 1: Press Win + A to open the Quick Settings menu.
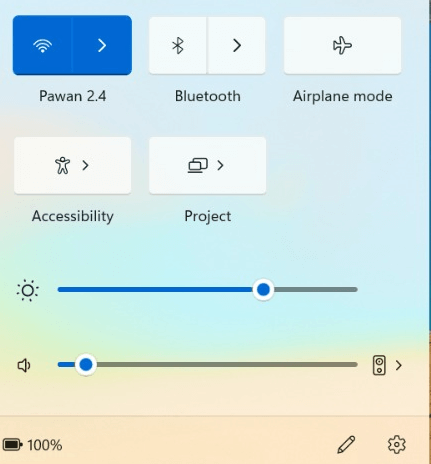
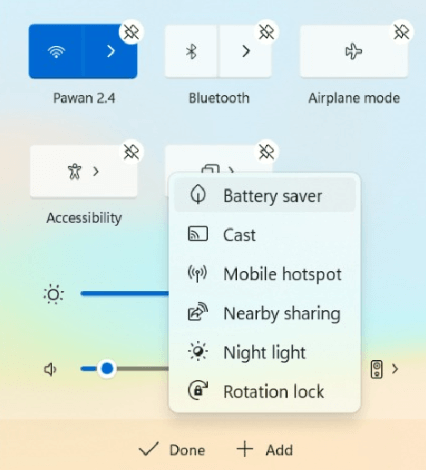
Step 2: Click on the pencil icon in the bottom-right corner to open the Edit Mode.
Step 3: Click on the Add option and choose Battery Saver from the list of options.
Step 4: Click on the Done option to add the Battery Saver option in the Quick Settings menu.
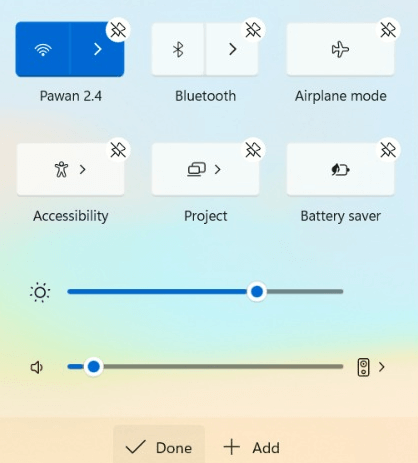
You can activate or deactivate Battery Saver using the Quick Settings menu without altering it.
Also Read: How To Fix No Battery is Detected Error on Windows 11 (6 Solutions)
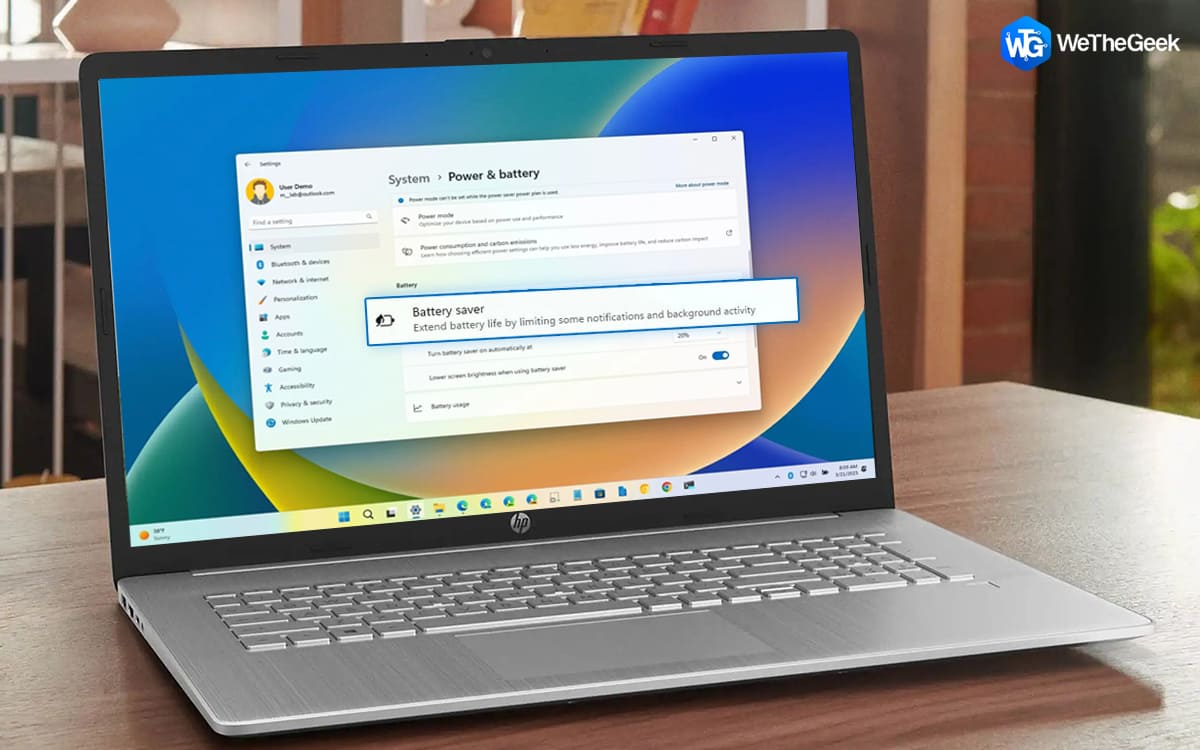
Method 2: Use Settings
As an alternative, you can use the Windows 11 Settings to enable or disable it. Other power-related settings can also be changed via the Settings app. Here are the steps:
Step 1: Press Win + I to launch the Settings app.
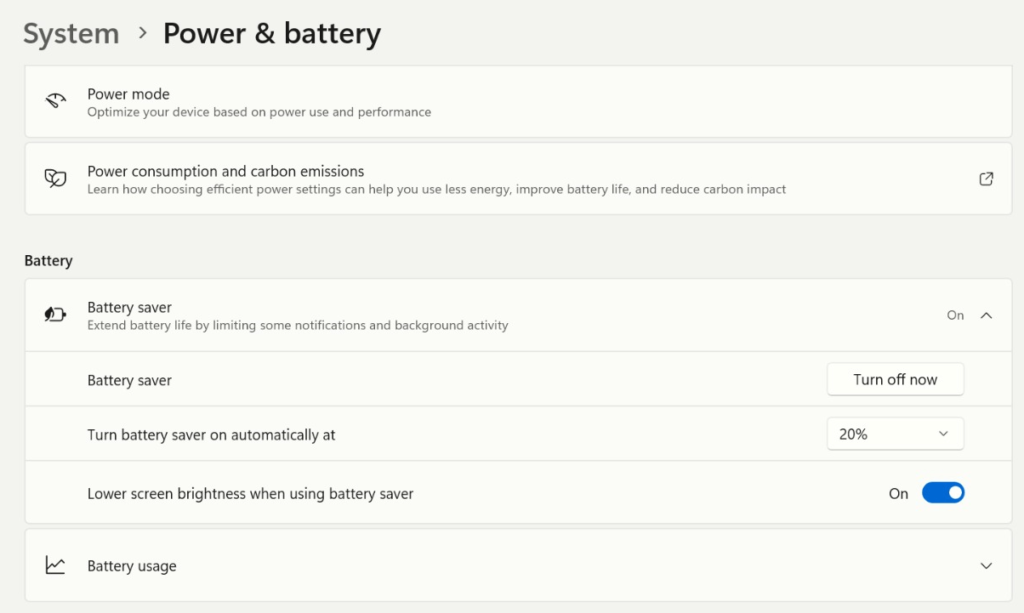
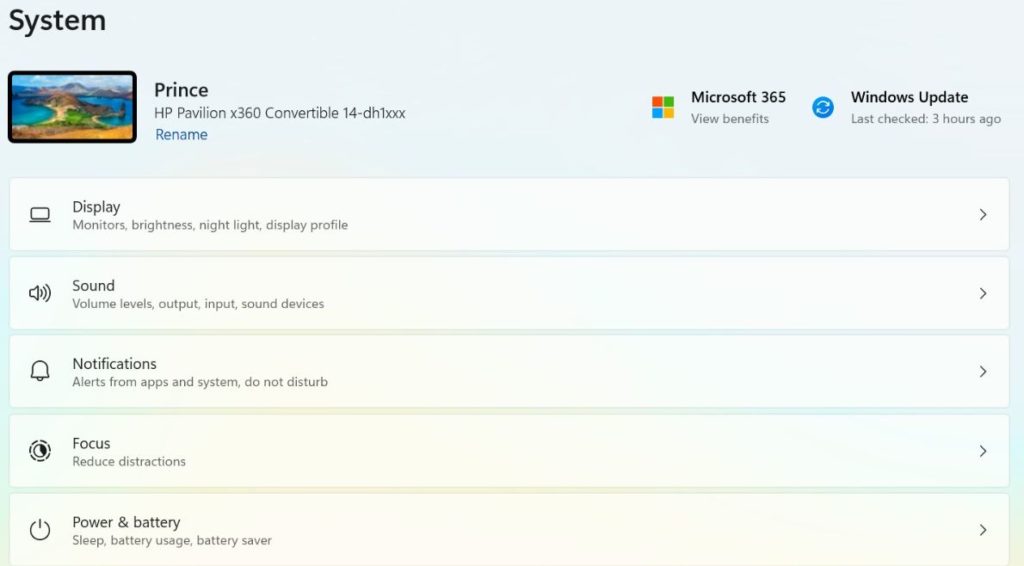
Step 2: Click on System in the left-hand panel and then click on Power & Battery on the right side.

Step 3: Keep scrolling until you locate the Battery Section.
Step 4: Click on the down arrow icon near the Battery Saver option.
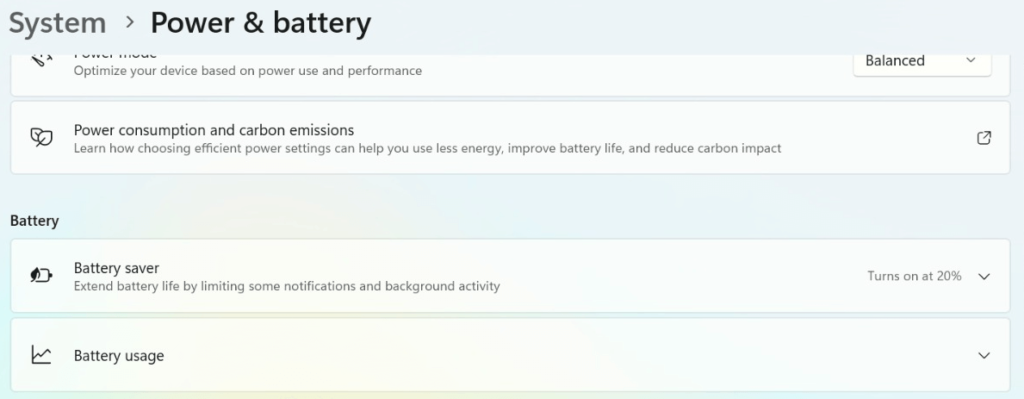
Step 5: Click on the Turn On Now option to enable the Battery Saver mode.
Also Read: 6 Best Battery Health Check Software For Windows 11/10 PC
Method 3: Use The Automatic Option
When the battery in your laptop or tablet reaches a particular level, you can configure Windows 11 to engage Battery Saving automatically. On a 20% charge, Windows 11, by default, activates Battery Saving. Some users might choose to lower that threshold or turn off automatic Battery Saving altogether because it restricts background activity and lowers performance. Follow these steps to turn on Power Saver in Windows 11 automatically.
Step 1: Press Win+ I to open the Settings app.
Step 2: Click on System on the left side of the Settings window followed by a click on Power & Battery on the right side.
Step 3: Click on the Battery Saver option and then locate the “Turn battery saver on automatically at” option.
Step 4: Choose the required percentage from the drop-down list.
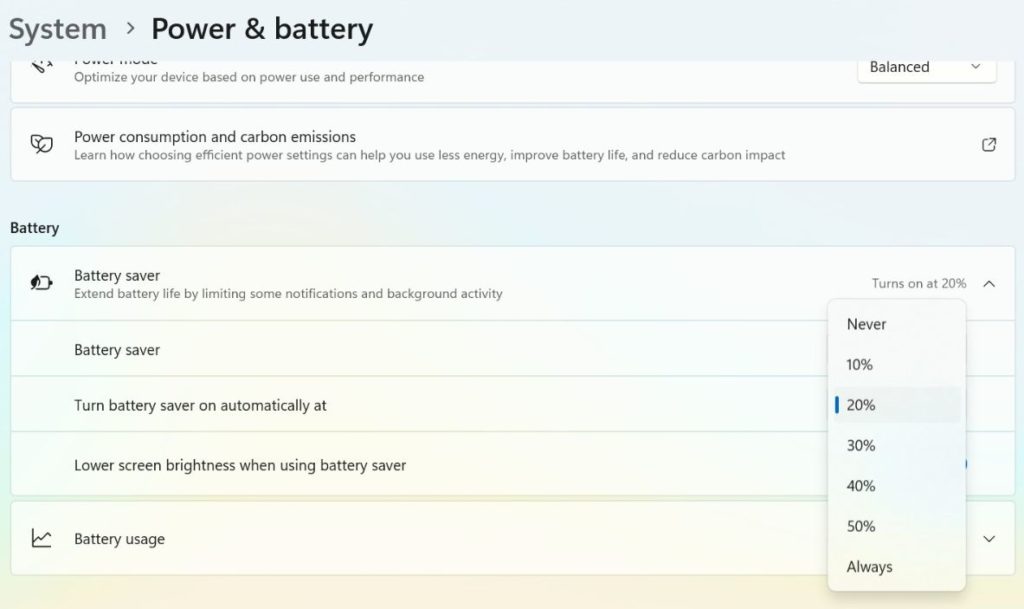
Note: To disable the Battery Saver option, you can select “Never” from the dropdown list.
Also Read: How To Optimize Your Laptop’s Battery Life
The Final Word On How To Enable Battery Saver In Windows 11
We hope you are an expert by now on how to enable the Battery Saver option on Windows 11 PC. If you simply want to enable or disable the Battery Saver mode, then the Quick Settings menu is the best option. But if you want to explore more options related to the Power options of your computer, then you need to use the Windows Settings app.
Please let us know in the comments below if you have any questions or recommendations. We would be delighted to provide you with a resolution. We frequently publish advice, tricks, and solutions to common tech-related problems. You can also find us on Facebook, Twitter, YouTube, Instagram, Flipboard, Pinterest