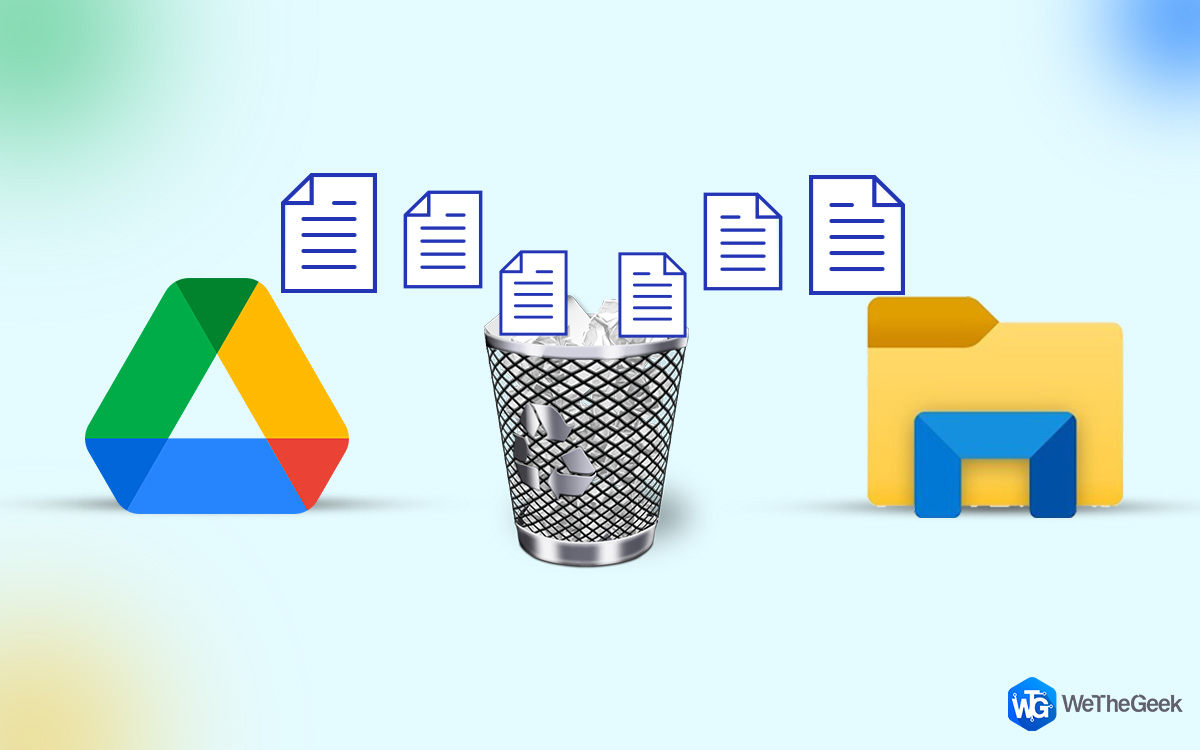
Folder duplication, identical copies of files is a very common problem and we all suffer because of it. Sometimes duplicates are created deliberately (e.g. to avoid the risk of losing data we save different versions of the same file at multiple locations) or inadvertently (copying the same file at different locations without realizing we already have them.) This not only makes organizing files difficult but also gigabytes of storage space is wasted. Hence, locating and removing duplicates from your Windows machine & Google Drive is important.
To help users with similar problems, we’ve already discussed several ways to recover space, delete duplicates, fix running out of storage space messages, and more. In addition to them, today we will discuss how to find duplicates from a specific location – Google Drive & PC.
Wait, if you think you can do it using Windows File Explorer, read – Can Windows 10 Explorer help find and remove duplicate files.
With that said, let’s learn how to find duplicate files stored in a specific location using Duplicate Files Fixer – a tool that helps find and remove repeating files in folders and sub-folders. This best deduplication application for Windows looks for duplicate documents, music, photos, videos, and other files on your hard drive, USB, external disk and on Google Drive.


You can use it on Windows, Mac, and Android.
Price: $39.95
Read More: Duplicate Files Fixer Review
How Duplicate Files Fixer helps locate duplicates stored in specific folders?
Duplicate Files Fixer not only scans internal and external storage but it also allows scanning Google Drive. This means you can have duplicate free data on both local and cloud storage. Using this professional tool, you can locate duplicate files, photos, audio, music, and other files stored in a specific location.
Here’s how to remove duplicate files from specific folders stored in PC & Google Drive.
If you are serious about finding duplicate files stored on your computer, your best bet is Duplicate Files Fixer, a duplicate detection software that comes with a simple user interface and power.
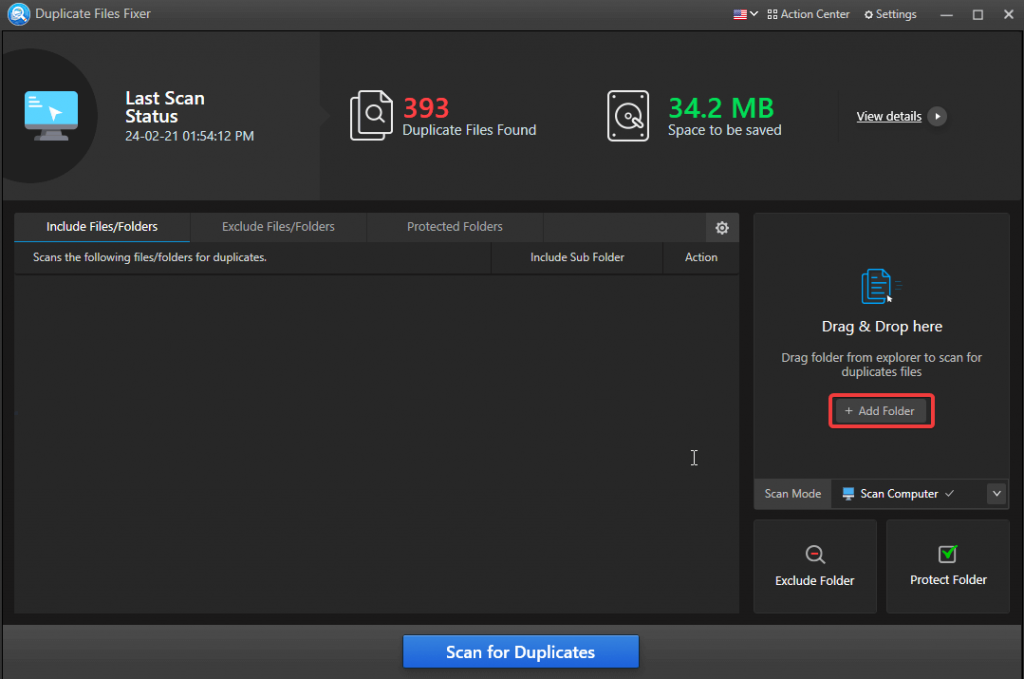
1. Download and install Duplicate Files Fixer
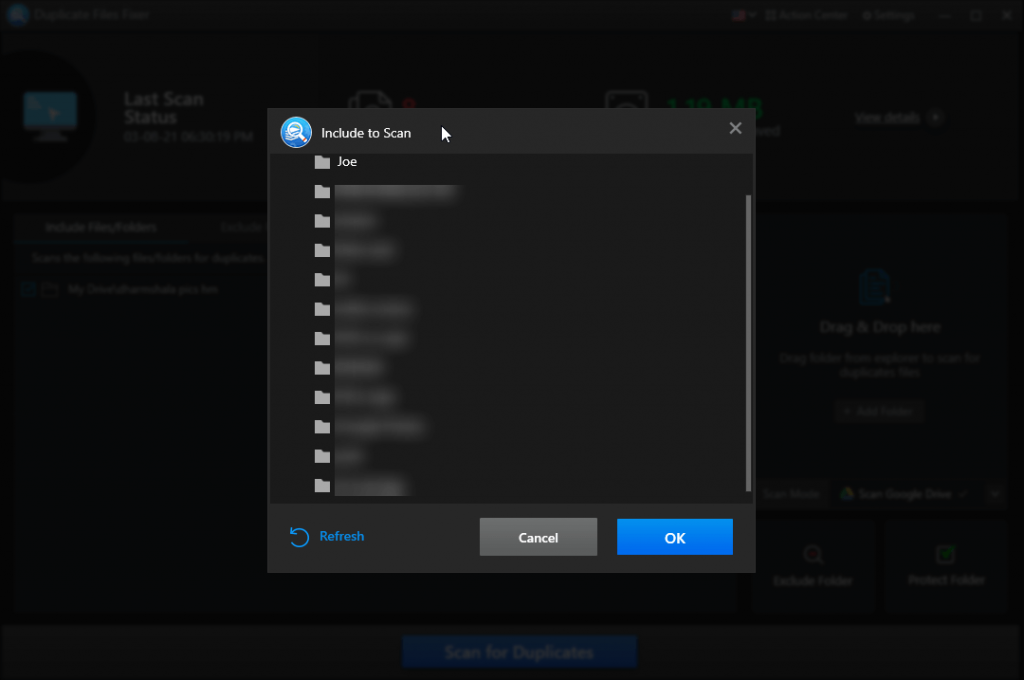
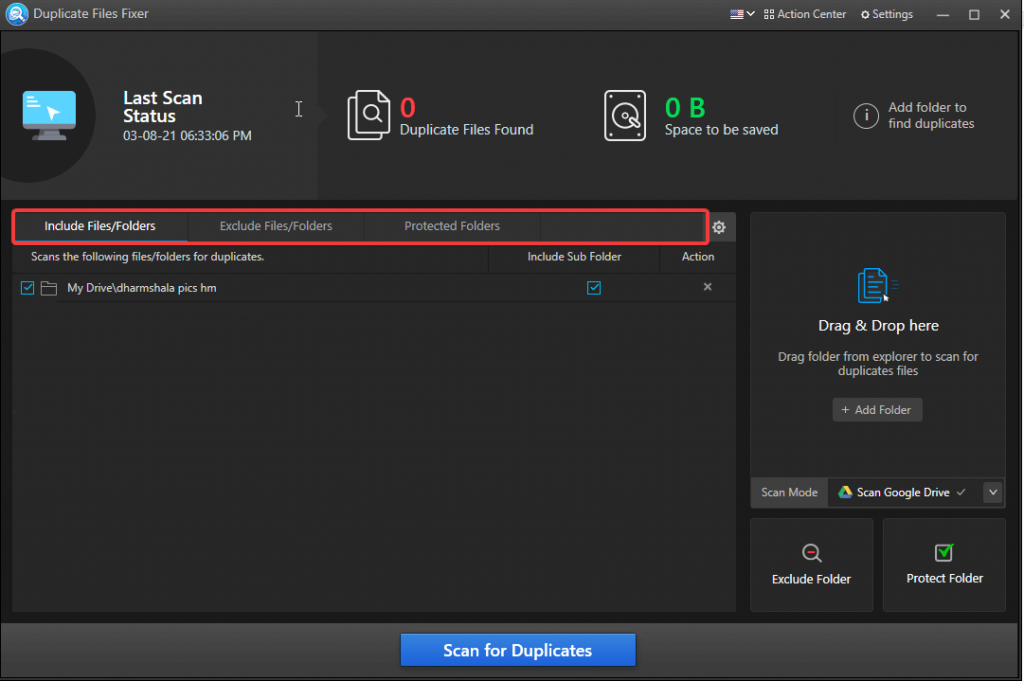
2. Next, you can Drag and Drop the specific folder to scan or can click on Add Folder and add the desired folder.
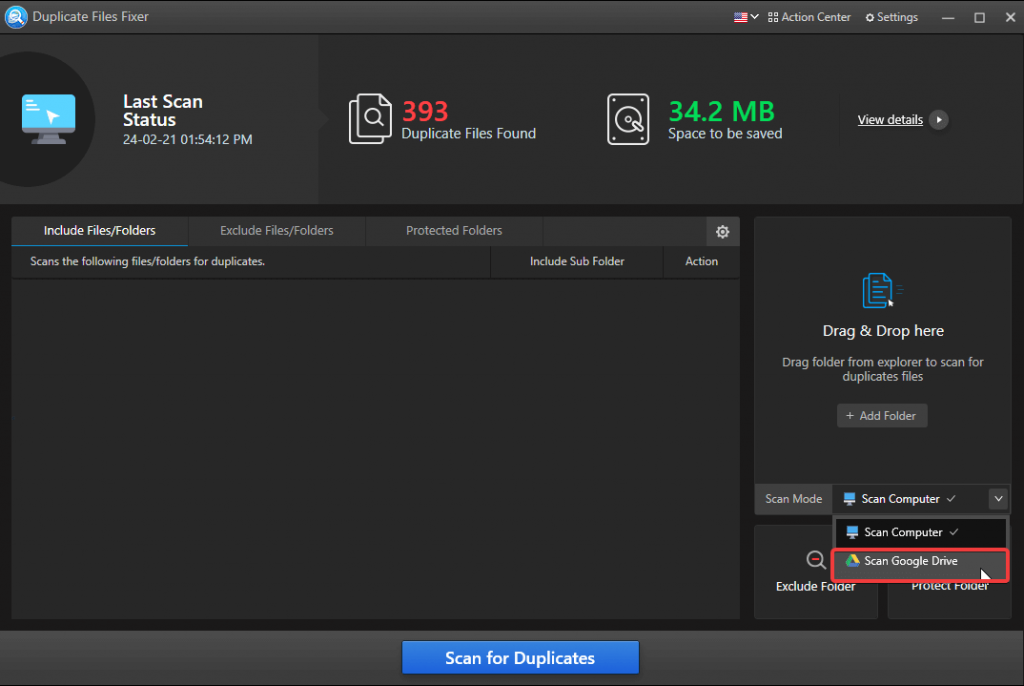
3. In addition to this, if you want to scan any specific folder stored on Google Drive you can do that too. For this, hit the down arrow next to Scan Mode and select Google Drive.
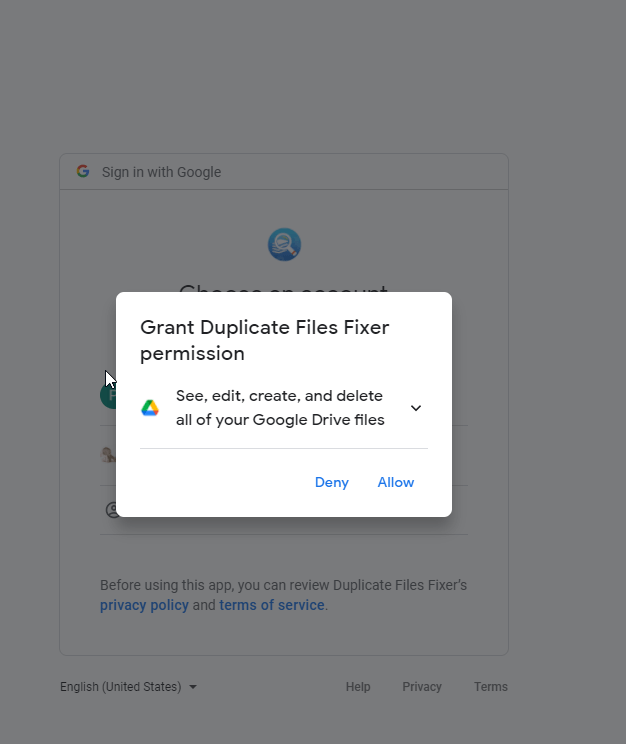
4. Thereafter, select the Gmail account and grant access permission. Once that is done, click Add Folder, hit Refresh, and wait for the program to show the folder.
5. Now hit Scan for Duplicates and wait for the process to finish.
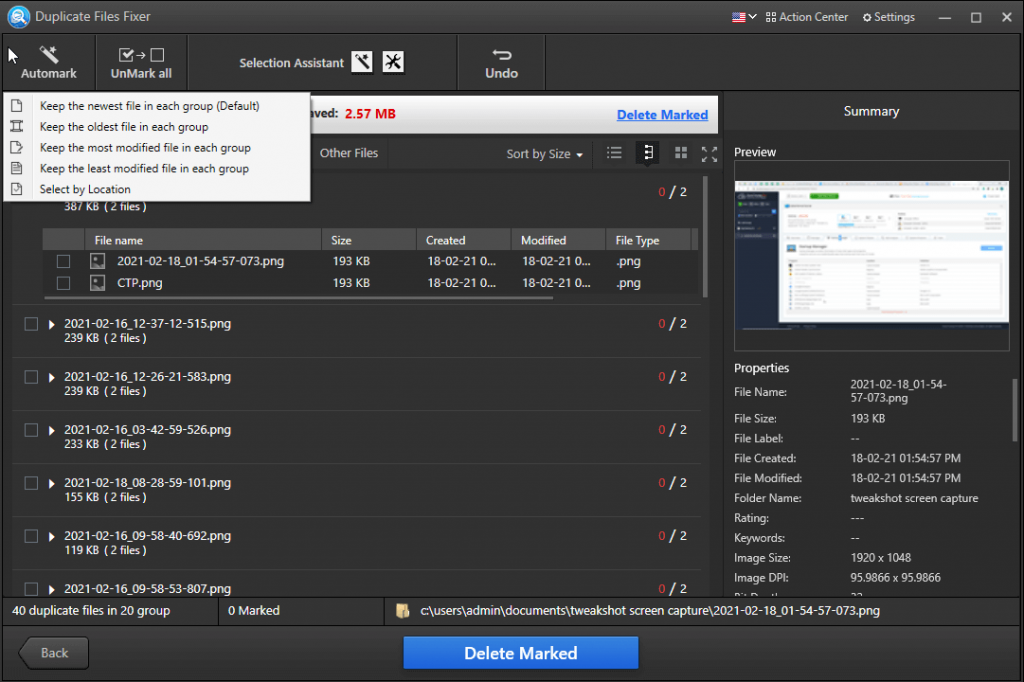
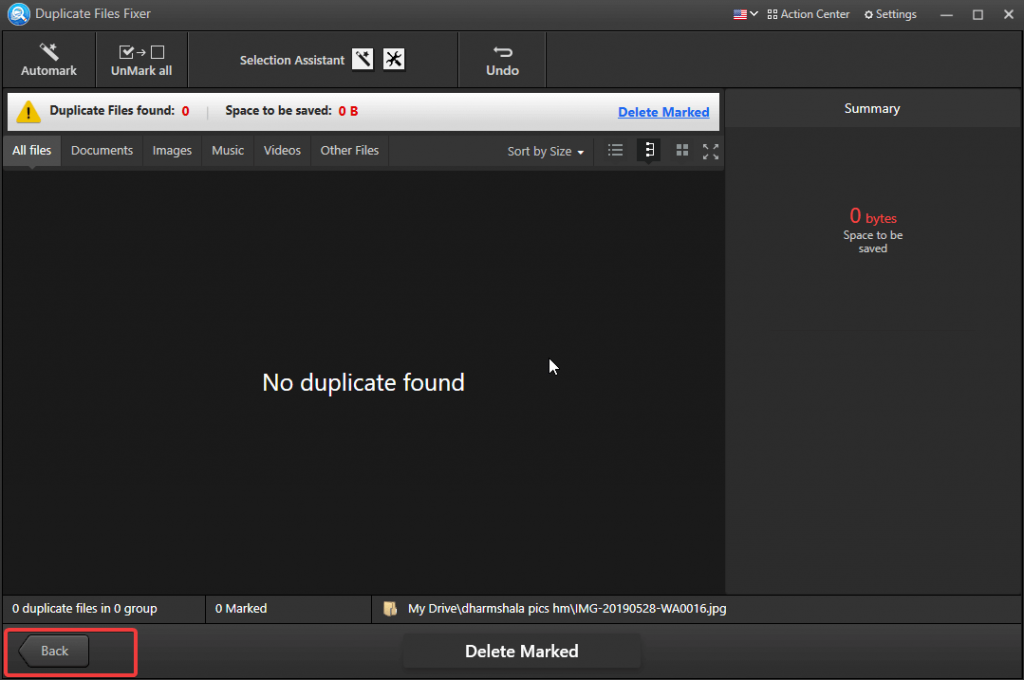
6. You’ll now get the scan results. Expand the search results to see the preview of detected duplicates.

7. To remove found duplicates, click Automark. This function helps select duplicates from each group leaving one in each unmarked.
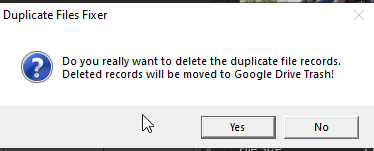
8. Now that the duplicates are selected, you can remove identical image files by clicking the Delete Marked button.
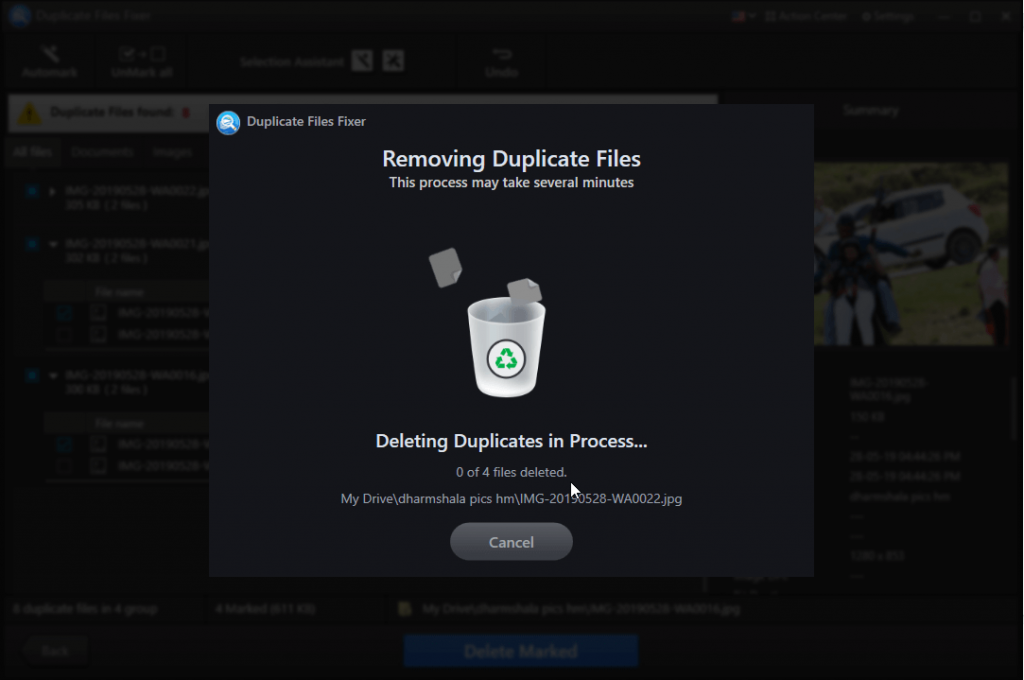
9. Click Yes, to confirm the action
10. Wait for the process to finish
11. Once successfully done, you will see a summary explaining the number of Duplicate Files Found, Duplicate Files Detected and Unique Files Retained.
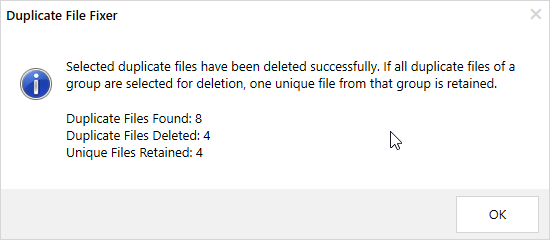
12. Click Ok.
To scan more files, hit the Back button and head to the home screen to add more folders and files and drop duplicates using Duplicate Files Fixer.
That’s it, using these simple steps in no time, you can get rid of tens of thousands of duplicate files stored on your Windows and Google Drive.
What makes Duplicate Files Fixer Unique?
By looking at the way it works, we can say this duplicate cleaning utility is intelligently designed to walk you through the process. It will not only help scan all the folders stored on connected devices, but also allows selecting folders saved on Google Drive.
By default, the Scan Computer option is selected but it can be customized as per the requirement. Moreover, by hitting the Exclude Files/Folder button, you can skip certain folders from scanning and can also Protect Folder. This means the folder will be scanned but none of the files stored in it will be marked for deletion.
Isn’t it a great way to see what’s eating up storage space yet giving you the control to decide what to delete and what not?
Note: By default, all the files you delete are moved to Recycle Bin. This infers, if you want to restore them, you can anytime before emptying the Recycle Bin.
Choose folders to scan
Duplicate Files Fixer allows adding a specific folder to scan and clean duplicate from both local and cloud storage (Google Drive). To add a folder hit, Add Folder or drag and drop it.
Preview Scan Results
To give you all the control over detected duplicates, this best duplicate file finder and cleaner allows previewing scan results. Once you are sure you want to delete them only then the duplicate files are deleted.
Exclusion List
As the name implies, it allows excluding specific files from being scanned.
Protected Folders
This is the USP of the product, here you can scan the folder but if it is added to a protected folder then none of the items saved in it will be marked for removal.
Automark
Don’t want to select detected duplicates manually? Worry not using the Automark feature you can automatically select duplicates to be removed. This feature keeps one copy in each group unchecked.
Moreover, the user gets different options to mark duplicates like:
- Keep the newest file in each group (Default)
- Keep the oldest file in each group
- Keep the most modified file in each group
- Keep the least modified file in each group
- Select by Location (should be used when you want to delete duplicates from a specific location.)
Selection Assistant
This feature helps decide how auto marking should work, here you can decide the priority and other options.
Using these amazing features and most importantly the Selection Assistant, you can decide how you want the Automark feature to work. Isn’t this a great and effective way to find and remove duplicates from specific locations? What are your thoughts?
Please do share the same with us in the comments section, this helps us know if you find the information useful or not.