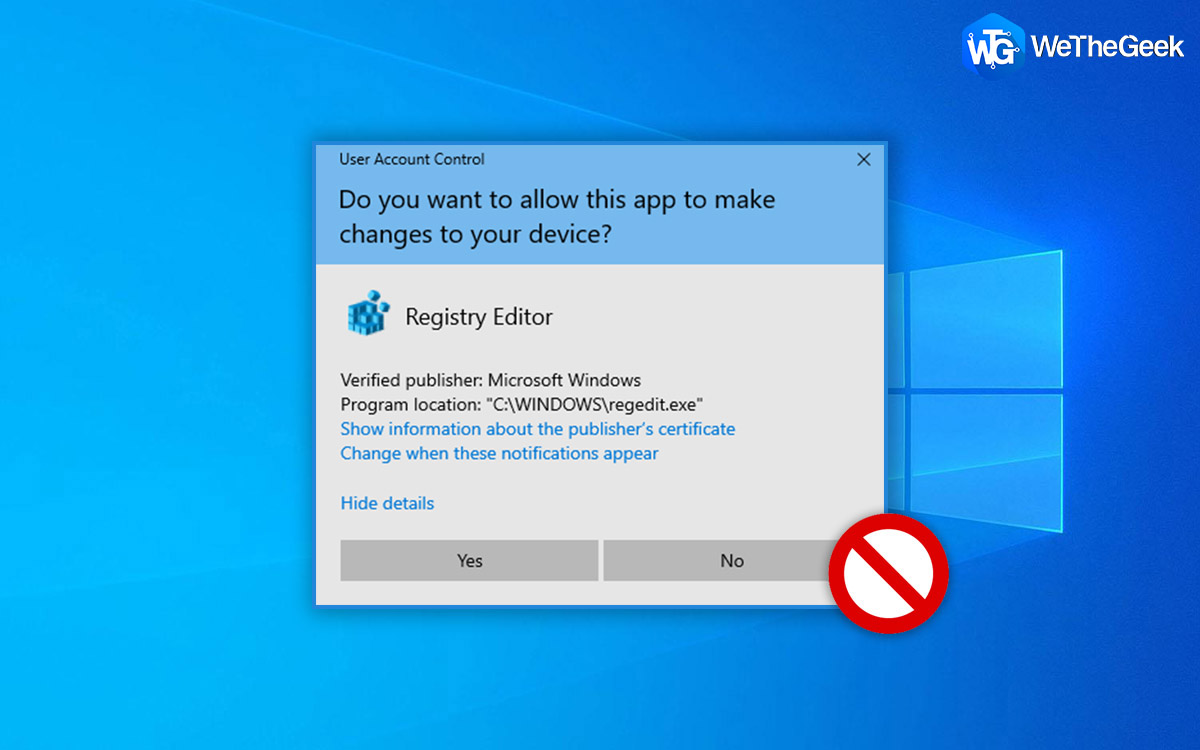
While using Windows 10 you must’ve come across the notification that says “Do you want to allow this app to make changes to your device” followed by two options: Yes or No.
Well, this is the primary role played by the UAC (User Account Control) that stops third-party apps from infecting your device with a hidden piece of malware or virus. UAC is quite beneficial from a security point of view. As soon as this notification pops up, UAC creates a secure environment on your device that prevents any third-party software from making any changes in your system’s settings.
Although, there are a few unfortunate situations where the UAC might prevent certain apps from running on your device, leaving you no fair choice but to disable the UAC.
Let’s learn all about what is UAC, how to disable it, and why it is important for your device’s safety.
What is UAC?
So, before we discuss a few ways to disable UAC in Windows 10, let’s get a basic understanding of this term. UAC (User Account Control) is a crucial component of the Windows security system. Any malware or virus that tries to enter your device, UAC prevents the third-party apps from making changes on your device. But if in rare circumstances, you feel the urge to disable this security component, you can easily do that by making a few changes in system settings.
How to Disable UAC (User Account Control) on Windows 10?
We will be listing four different ways to disable UAC in Windows 10.
#1 Via Control Panel
Launch the Start menu search box, type “Control Panel” and hit Enter.
In the Control Panel window, tap on “User Accounts”. Select “Change user account Control Settings”.
A new window will appear on the screen labeled as “User Account Control Settings”. Drag the slider towards the bottom where it says “Never Notify”.
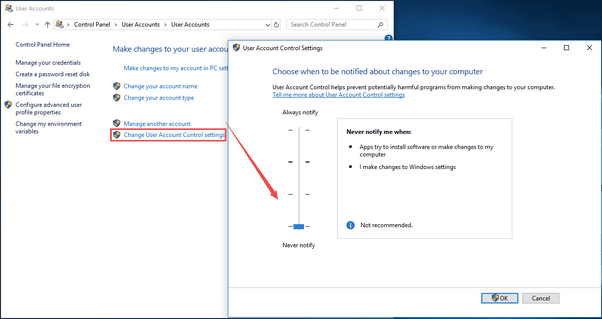
Hit the “OK” button to save the recent changes.
By disabling the User Account Control, you will never receive any alert notifications while using or installing any new third-party application.
#2 Via Command Line Terminal
Another way to disable UAC is via the Command Line terminal. Follow these quick steps to make the necessary security changes on your device.
Launch the Start menu search box, type “Command Prompt”, right-click on its icon, and select “Run as Administrator”.
In the Command Prompt terminal, type the following command and hit Enter to execute it.
reg.exe ADD HKLM\SOFTWARE\Microsoft\Windows\CurrentVersion\Policies\System /v EnableLUA /t REG_DWORD /d 0 /f.
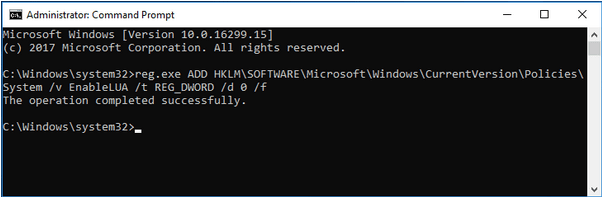
Once the command is executed, exit all windows and reboot your device.
#3 Via Group Policy Editor
The Group Policy Editor is a crucial component of Windows OS that allows you to control user account and related settings. To disable UAC in Windows 10 via Group Policy Editor, follow these quick steps.
Press the Windows + R key combination to open the Run dialog box. Type “Gpedit” in the textbox, hit Enter.
In the Group Policy Editor window, navigate to the following location:
Computer Configuration > Windows Settings > Security Settings > Local Policies > Security Options.

Scroll down on the window to look for “User Account Control: Run all administrators in Admin Approval Mode”. Double-tap on this file to open its Properties.
Tap on the “Disabled” option. Hit the OK and Apply button to save the recent changes.
#4 Via Registry Editor
Another way to disable UAC is by using the Registry Editor on Windows. By making some quick changes in the Registry, you can easily disable UAC in Windows 10.
Press the Windows + R key combination to open the Run dialog box. Type “Regedit” in the textbox, hit Enter to open the Registry Editor.
In the Registry Editor window, navigate to the following path:
HKEY_LOCAL_MACHINE\SOFTWARE\Microsoft\Windows\CurrentVersion\Policies\System
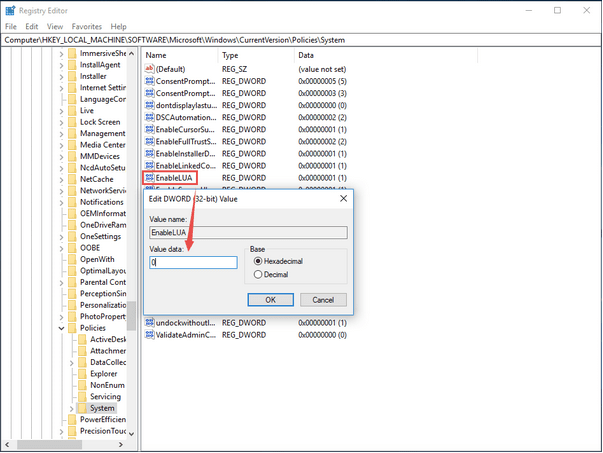
On the right side of the window, look for a file named “Enable LUA”. Double-tap on it. Under the value data textbox, set the value as 0. Hit on OK once done.
Exit all windows and restart your machine.
Also read: How To Backup, Restore And Edit Files Using The Registry Editor Windows 10?
Conclusion
Here were a few ways to disable UAC in Windows 10 via using Control Panel, Command Prompt, Group Policy Editor, and Registry Editor. You can use any of these methods to disable UAC on your device. For any other queries or assistance, drop your questions in the below-mentioned comments space!