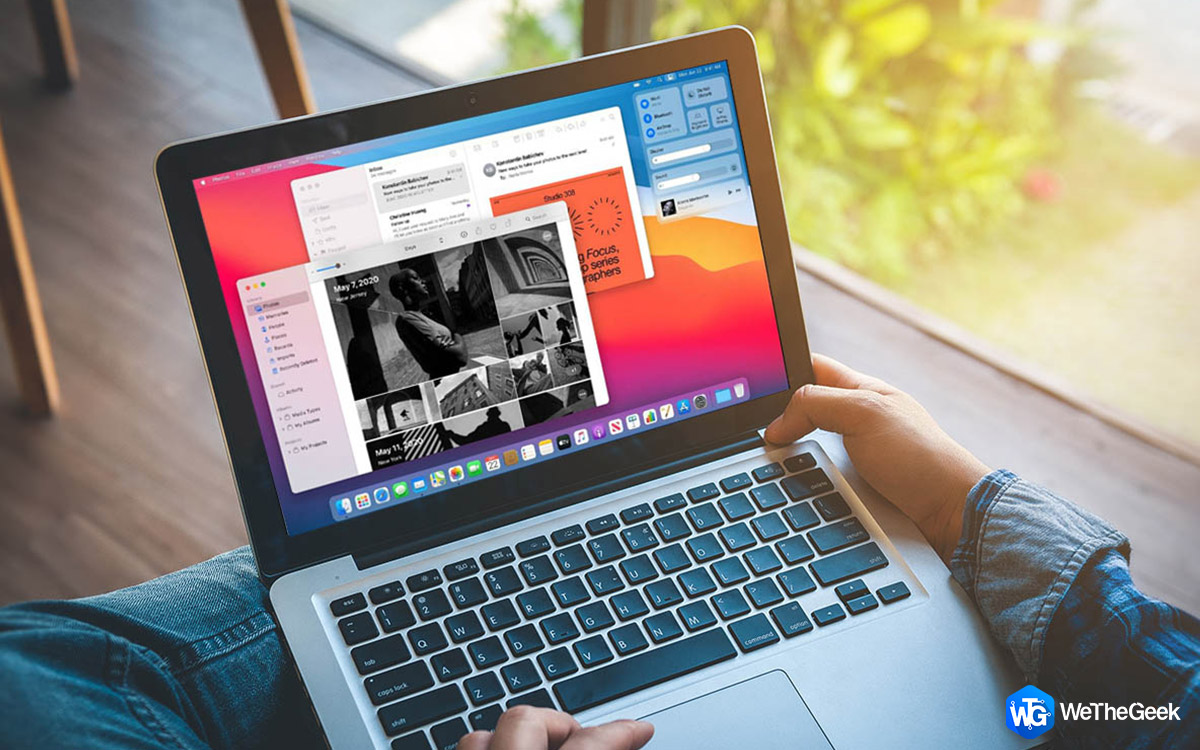
The latest update in macOS family gave birth to Big Sur which breaks the tradition of the OS X series and moves to the number 11. The changes in Big Sur are obvious and visible as compared to previous updates. Another exciting feature is that Apple has facilitated a lot of new customization options to personalize the operating system in different ways. This guide will help with the key features to customize macOS with ease.
Steps On How To Customize macOS Easily And Quickly?
First Step To Customize macOS: Control Center.
The control centre in Big Sur is better than its previous versions when it comes to the all-new look. Like its predecessors, you will not be able to customize certain features like sound, network, and display. For other changes, you need to click the Apple icon on the top left corner and select System Preferences and then Dock & Menu Bar.
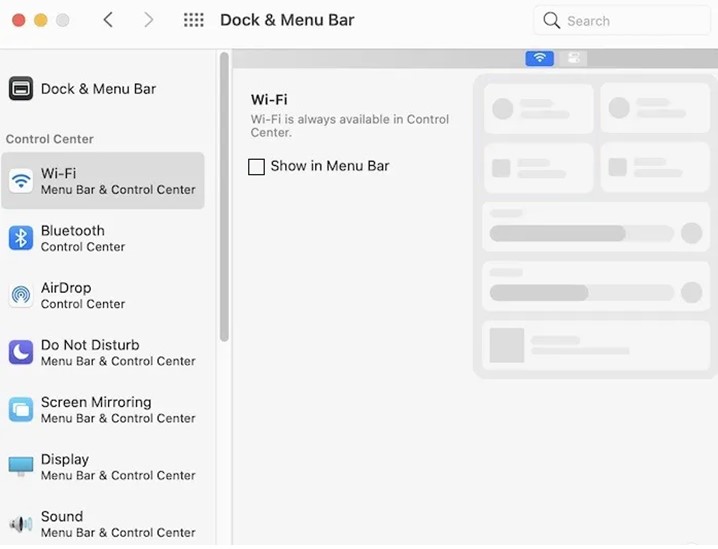
Once the window of Dock & Menu Bar opens, the left panel will list certain options under Control Center. The options include Wi-Fi, Bluetooth, AirDrop, Do Not Disturb, Screen Mirroring, Display, Sound, and more. Click on each option on the left and then check the right panel to find out the options you have to make the change. Most of the options have only one change labeled as “Show in Menu Bar” with a checkbox. If you wish to see that a particular in the Menu Bar, then check the box and if you want to remove an existing item from the menu bar, then remove the tick from the check box.
This way you can customize what you want to see in your Menu Bar.
Second Step To Customize macOS: Adding Widgets
Widgets are small floating shortcuts or applications that help access the application easily and at the same time provide the required information without having to launch the entire app. These widgets have become very popular and were first introduced in iPhones and have now been added to Big Sur as well. To access the Widgets, you need to click on the date and time on the top right corner of your screen and after scrolling down a bit you will see the Edit Widgets option.
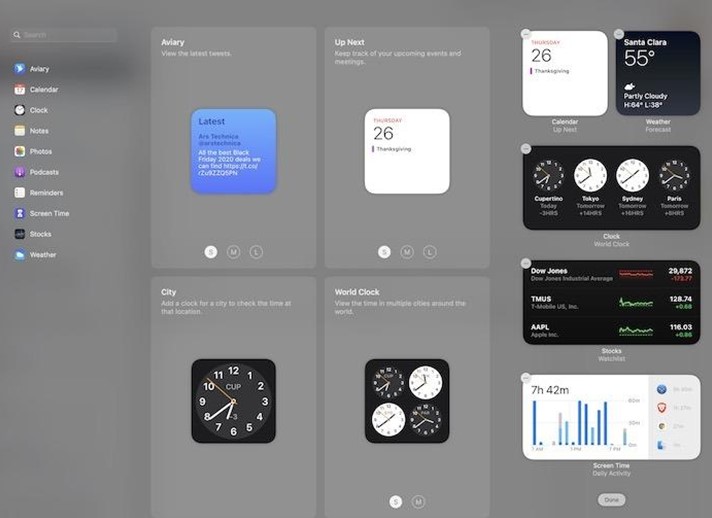
Once you click on the Edit Widgets option, you will see a grey screen displaying all the widgets available on your computer. This would be different for all as it depends on the apps you have installed. A simple Drag and Drop would activate the widgets and the size of the widget depend on the indicators displayed underneath like S for small, M for medium, and L for large.
Third Step To Customize macOS: Pin Conversations
One of the most noticeable changes in Big Sur is the fact that Apple users can finally pin any conversation at the top of their iMessage window. This will help you to find messages from your family and friends quickly and easily. The process to pin a message is also very easy where you just have to Control + Click any conversation in the left column and then click on Pin from the options. This will make that particular thread appear on the top of the conversations list and will remain pinned at the top.
Fourth Step To Customize macOS: Adding Wallpaper
Changing the wallpaper may not be one of the best customizations out there but it certainly helps to remove the default macOS wallpaper and replace it with your own. Before you select something from a third-party service like Wallhaven, Desktop Nexus, and Simple Desktop, it is worthwhile to check out Apple’s default dynamic wallpapers included in Big Sur. These dynamic wallpapers automatically change on a pre-set time basis. Here are the steps to quickly enable your customized and downloaded wallpapers in Big Sur:
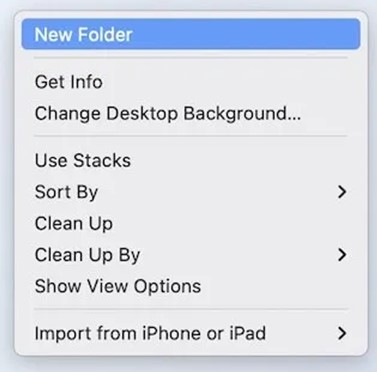
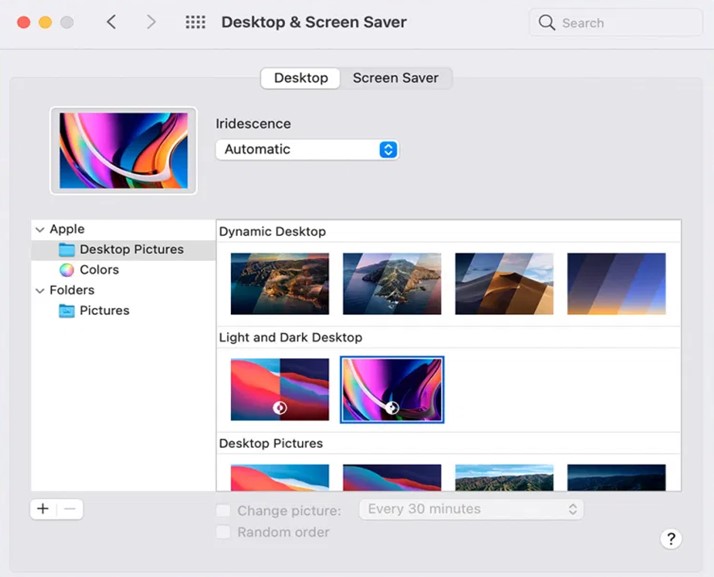
Step 1: Make a right-click on the desktop and from the context menu select, “Change Desktop Background…”. The new window that opens will have two tabs namely, Desktop and Screensaver.
Step 2: Click on the Desktop Tab and using the options on the left panel, navigate to the particular folder where you have stored the Wallpapers. The thumbnails of all the images stored in the folder will be displayed.
Step 3: Finally, click on any thumbnail from the right panel and that image will become your wallpaper automatically with immediate effect.
Fifth Step To Customize macOS: Dark Mode
The Dark Mode was introduced by Apple in macOS Mojave, something that had been in huge demand from all Apple users. Here are the steps to enable the Dark Mode in Big Sur:
Step 1: Click on the Apple menu at the upper left corner of the menu bar and choose System Preferences.
Step 2: Next, click on General and when the window opens, choose one of the options that are in the Appearance section on the very top.
Step 3: There are three options to choose from namely, Light, Dark, and Auto.
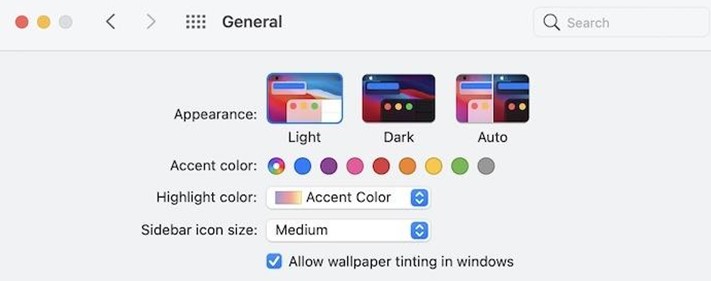
Light: This is the default option.
Dark: This changes your Big Sur to a dark mode.
Auto: This option automatically switches from light mode in the day to dark mode at night.
Note: Most apps enable their dark mode automatically if the system settings are set on to Dark mode. This includes apps like Safari, Maps, Mail, Notes, and many others.
Sixth Step To Customize macOS: Safari 14
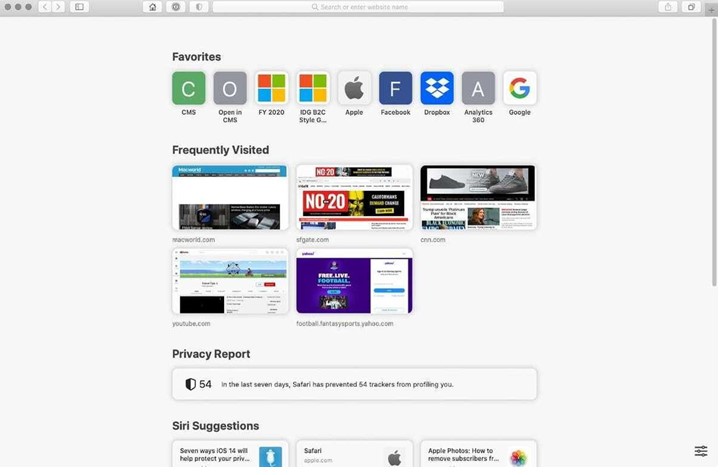
Safari 14 can finally be customized! Apple has decided to provide certain customizations to its Safari users which are similar to Chrome and Edge browsers. The first change users can do is to remove the standard grey background and replace it with something colorful. Also, there are certainly other options like adjusting favorites, tweaking the Reading List and iCloud tabs, and removing Siri Suggestions as well.
Seventh Step To Customize macOS: The Dock
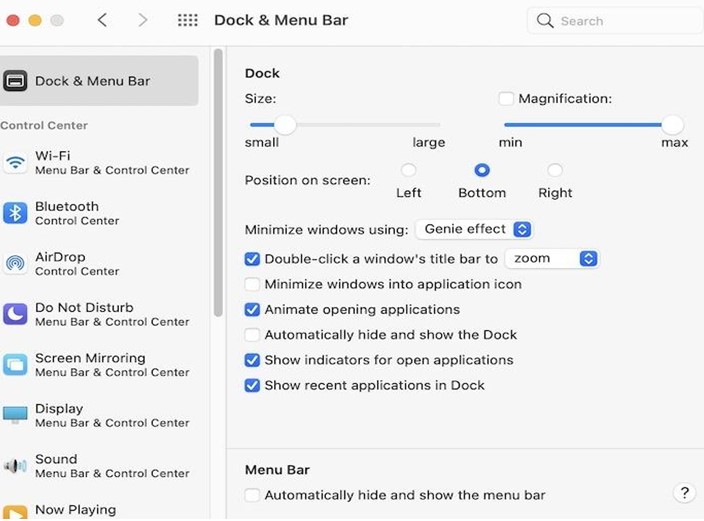
The final step to customize macOS is to change the default settings of The Dock. The all-new Dock is a translucent and floating bar that appears at the bottom of the screen. The default settings of the Dock can be customized by clicking on the Apple Menu > System Preferences >Dock & Menu Bar. This settings window provides options to tweak the dock’s position, size, magnification, and much more.
How To Optimize And Cleanup Your macOS?
Once you have customized your macOS, it is now time to optimize and clean up your system to ensure it delivers enhanced performance. Every machine requires maintenance and your computer is no different. Manual optimization of your system is almost impossible, and you would require a third-party tool to help you clean the computer. I suggest using Disk Clean Pro, a tool that I have been using for a couple of years and some of its features include:
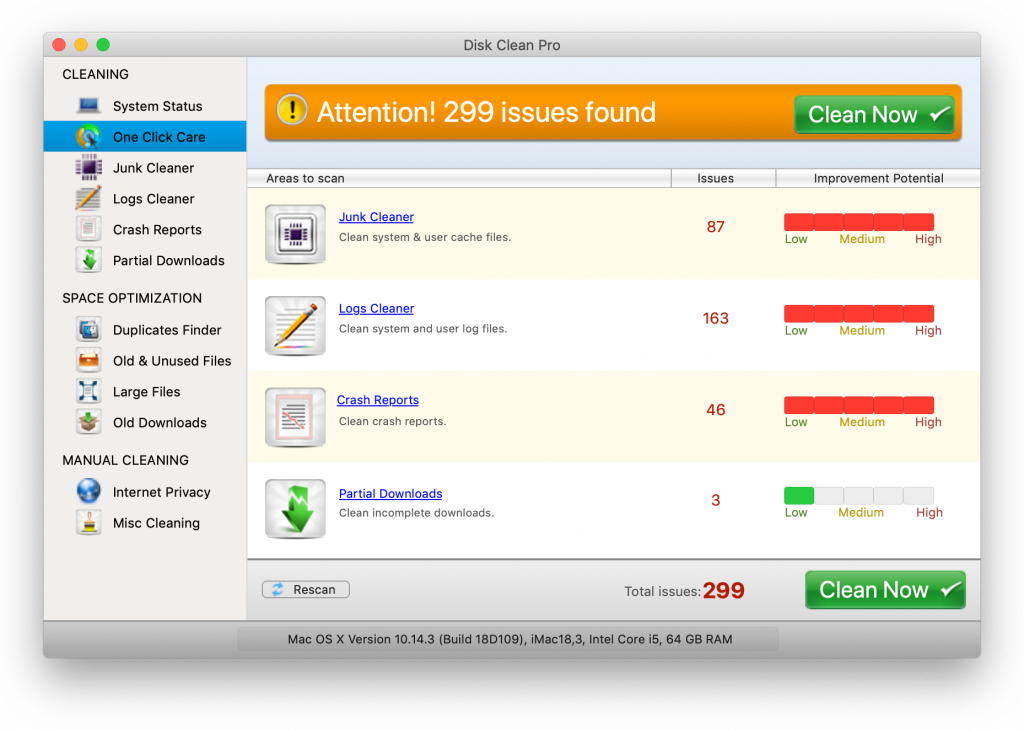
- Junk Files: This tool also helps in removing junk files and delete them thus freeing up space on your computer.
- Internet Privacy Protector: All browsers save cookies, cache & history about the user which can be easily deleted by this tool.
- Other Tools: Several modules that can help optimize your macOS like duplicate finder, logs cleaner, partial downloads and many more.
For a complete review on Disk Clean Pro, Please Read: Disk Clean Pro: #1 Mac App to Clean up Your Mac in 2021
Download Disk Clean Pro Now!

The Final Word On How To Customize macOS Easily And Quickly?
That concludes the steps on customizing Mac’s Big Sur and although these steps may not seem enough this is the first time Apple has empowered its users with so many customization options. You can try them one by one and keep changing weekly or fortnightly to enjoy a new different experience each time.
Follow us on social media – Facebook, Twitter, and YouTube. For any queries or suggestions, please let us know in the comments section below. We would love to get back to you with a solution. We regularly post tips and tricks, along with answers to common issues related to technology.
Mansi Vijay
Thank you for sharing this wonderful guide to customize Mac. I can personalize my desktop with some great widgets and more!