Adding recently used apps to your Start Menu helps you to access apps easily. If you have recently installed an app and it won’t show up in the Windows 10 Start Menu, you are at the right place.
Here, we will discuss how to get the shortcuts for apps in Windows 10 Start Menu. With the following steps, you will be able to get all your favorite apps on Start Menu. Read on!
Since by default, the Start menu for Windows 10 was developed to be a better version than its previous ones. So here are the simple tips to succeed in getting the most out of it. These steps can come in handy to all those who are looking forward to finding an easy way to locate apps.
We need a shortcut for everything and we need it in the first place we look at, so be it. We can now place all the apps we keep using the most on the Start Menu.
Method 1
Steps to follow:
1. Select the app on your desktop you wish to add to the Start Menu.
2. Right click on the app shortcut.
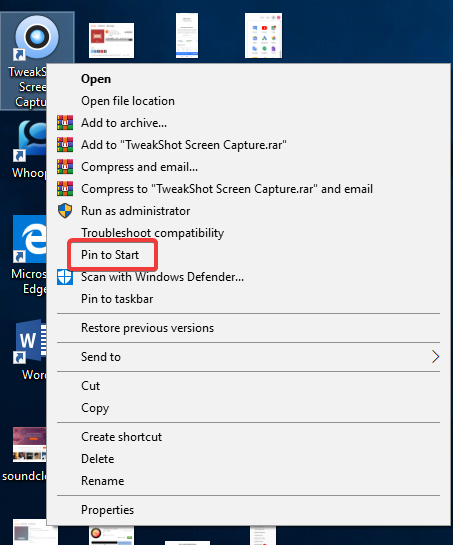
3. Choose “Pin to Start”
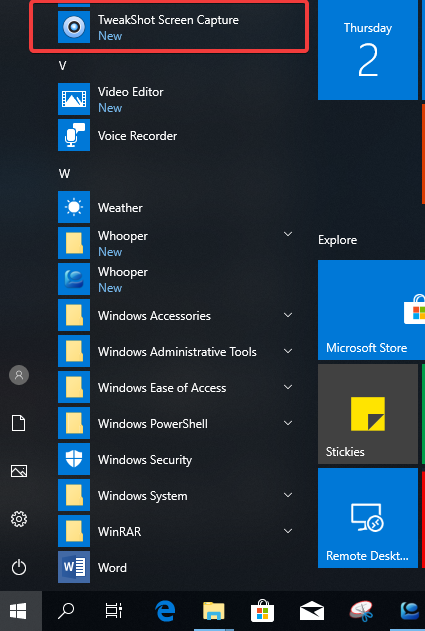
4. Open the Start Menu, you can see your App shortcut in it.
In this way, we can add shortcuts for apps in Start Menu for Windows 10. Try it and access your apps with ease.
When some of the apps are not able to register themselves such as very old apps or the portable apps, they do not appear in the “All apps” list.
Another method which works best to create a shortcut for apps to Start Menu for Windows 10 requires the App to be present on the desktop:
 How to Fix Windows 10 Start menu Not...With regular updates that Windows 10 brought this year, several issues were rolled out as well. Today we are solving...
Method 2
Steps to follow:
1. Press “Windows key + R” to open up the Run window.
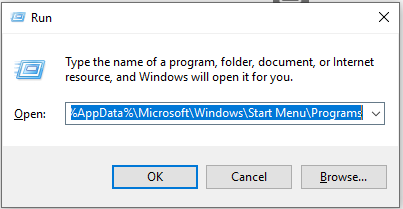
2. Type %AppData%\Microsoft\Windows\Start Menu\Programs on it and press “OK”.
3. Now press “Windows key + Right arrow” to shift the Programs folder tab to the right side on the desktop.
4. Press “Windows key + E” to open up the File Explorer.
5. Now, you need to look for the downloaded program which is in your Local Disk (C:)> Program Files (x86).
6. Here you can search for the One program you want to list in the Start Menu.
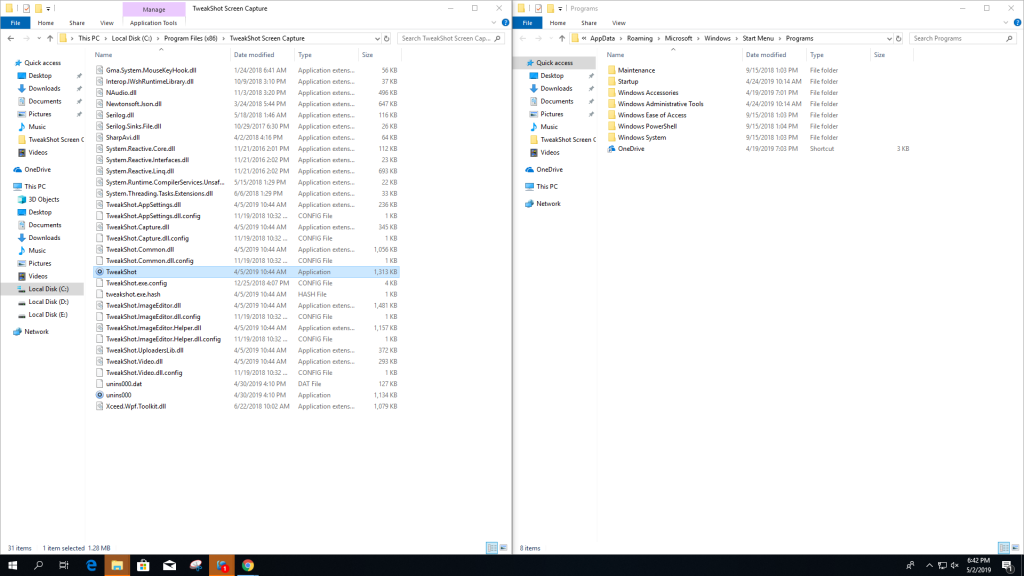
7. Open the Folder and click on the “Application file” to select it.
8. By right clicking you can drag the file and drop it in the Program folder opened on the right side.
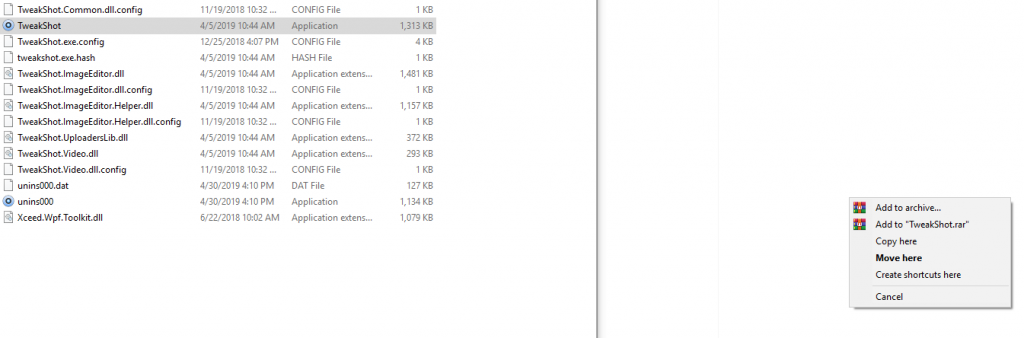
9. On the context menu, click on “Create shortcuts here”.
10. Rename the shortcut if you want, and it will appear in the “All Apps”.
11. Restart your computer to let the changes take effect.
You can do the same for all the apps you want to see in your Start Menu.
Conclusion:
These are the two methods which can be used to create a shortcut of your apps to be used with ease in Windows 10. When you see all your useful apps in the Start Menu itself, you are not required to keep looking for them in your computer each time their need arises. Hopefully, this article helps you with creating Shortcuts in your Start Menu. Let us know in comments how helpful this information is to you.