Although the world is going paperless, there are instances when printouts are a must. But if the printer is placed at a distance or you need to keep plugging a USB cable, things can get annoying. Hence, to improve the workflow and productivity when working from the office or home setting up a wireless printer is a great idea.
Once a printer is connected to Wi-Fi, you can unlock remote access and can print, fax documents quickly.
Let’s learn how to connect and set up a wireless printer on Windows 10.
How To Connect A Wireless Printer in Windows 10?
You are good to go. You have now connected to a wireless printer. |
Benefits Of Wireless Printing
- Can print from any device
- Makes document printing convenient and easy
- Print from anywhere using cloud printing solutions like Google Cloud Print and HP’s ePrint
- No need to deal with cords and cables
- Centralize printing thereby helping to save energy, paper, ink costs, etc
Step by Step Guide on How To Connect Printer To Wi-Fi
Below are step by step instructions for adding a Wi-Fi printer to print documents.
Modern printers have in-built Wi-Fi, this means you can use them to print documents wirelessly. However, if yours doesn’t, you can connect it to a router to make it work wirelessly.
How To Connect Printer To A Wireless Network on Windows 10
Adding a printer to a Wi-Fi network is the first step to connect a printer to Wi-Fi on Windows 10. To do so, follow the steps below:
1. Place your printer within the wireless router range.
2. Next switch on the printer. No need to connect it to the computer as we will be connecting it to the wireless network.
3. Now connect the printer to the wireless network. For this, you need to know the Wi-Fi name (SSID) and password. Since the connection process varies from printer to printer and its model number, you need to know about it.
Read More: How To Connect Canon Printer To Laptop? (Wired & Wirelessly)
| Note: Exact directions to connect a printer to the network are given in the user manual that came with the printer box. Generally, it is a straightforward process. |
4. Once all the instructions are followed, your printer will be connected to the Wi-Fi. In addition to this, you’ll need to connect the printer to the device being used for wireless printing.
In addition to this here, we will explain different options for setting up a wireless connection. You can also learn How to Set Up a Home Wi-Fi Network
WPS Pairing Button
You see this option when both printer and router are compatible with Wireless Protected Setup (WPS). To connect when prompted press the WPS pairing button on your router and equivalent button on the printer. This will help connect a printer to the network on Windows 10 and print documents wirelessly.
Wi-fi Auto-connect
This is the most common method and is available on almost all wireless printers if your computer is already set up on a Wi-Fi network you use this option. Select Wi-Fi Auto-connect let printer scan the computer on your network and connect to it to print wirelessly.
Now that we know about different wireless options let’s learn how to connect a printer to Wi-Fi on Windows 10.
1. Press Windows Key + Q and type printer in the search window.
2. Select and double click Printers & scanners option from the search window.
3. Power on the printer you wish to connect wirelessly.
4. To get detailed instructions to read the user manual you received with the printer. Remember, steps vary from manufacturer to manufacturer and from model to model hence check the user manual.
5. Click Add a printer or scanner option.
6. Select the printer you wish to connect.
7. Once you see, click Add device.
That’s all using these simple steps you can connect a printer wirelessly with Wi-Fi and print documents on Windows 10. Using the same steps, you connect a wired printer.
However, if you face any problem in finding the printer try the following steps.
Fix: Unable To Find Printer on Windows 10
Sometimes due to some unforeseen reasons, Windows 10 is unable to detect your printer. To deal with such a situation, try downloading the latest printer driver or connect the printer manually.
If the problem is related to a faulty or outdated driver you will need a driver updating tool that can detect the problematic driver and update it. For this, we recommend using Smart Driver Care. It is advanced and all in tool to backup old drivers and updates outdated drivers.
To use the tool download it from the link below:

To connect printer manually follow the steps below:
1. Type printer in the Windows search bar.
2. This will show different results click on Printers & scanners.
3. In the subsequent window, select Add a printer or scanner.
4. Let the scan run, once completed if you are still unable to see the printer click “The printer that I want isn’t listed” option.
5. This will open a new window here select Add a Bluetooth, wireless or network discoverable printer.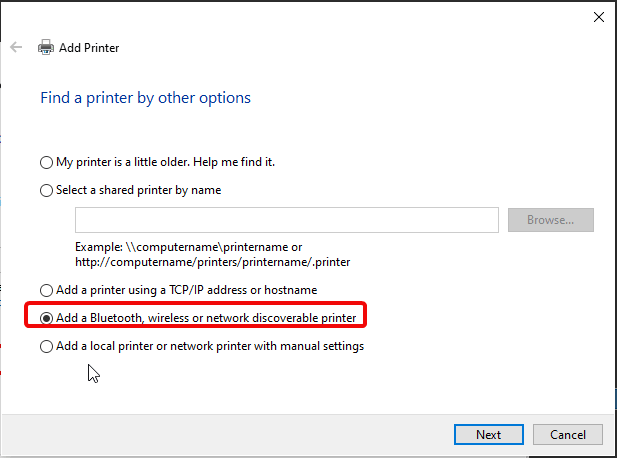
6. Select the connected printer.
This should help. In case the problem persists, check if the printer is powered on and it is connected to the same local network as Windows 10 PC you will use to print documents wirelessly.
Using these simple steps, you can connect your wireless printer in Windows 10 and can print documents wirelessly. In addition to this, if you want to change the default printer here are the steps.
Instructions To Change The Default Printer
Generally, the most used printer is set as the default printer by Windows. This helps the OS to remember which printer to use when switching networks. But not everyone likes this functionality. Therefore, if you want to change the default printer on Windows 10 follow the steps below:
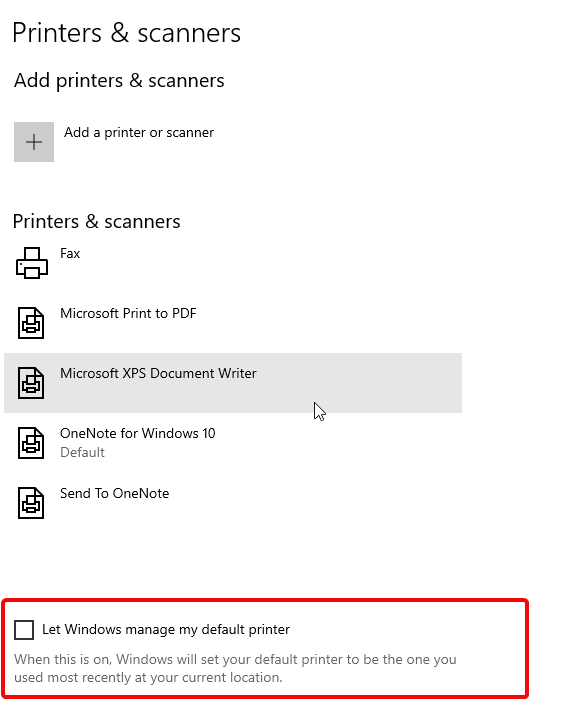
- In Windows search bar, type Printer & scanners.
- Double click the search results.
- Here, under Printers & scanners window uncheck “Let Windows manage my default printer.

- Select the printer from the list of devices to set as default.
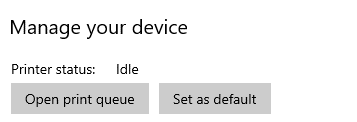
- You’ll now get three options: Open queue, Manage, and Remove device.
- Click Manage > Set as default.

This way, you can easily change the default printer.
We hope using these steps you will be able to connect to wireless printers in Windows 10. However, if you face any problem or have any questions, please leave them in the box below.
Also, if you found the article helpful, please share it with your friends, family members, and whoever needs help.