Blog Summary – Have you brought a new Canon printer or a new laptop? Are you having trouble establishing a connection between the two devices. To connect Canon printer to laptop you will be required to follow the correct procedure.
If you are looking for solutions on how to connect Canon printers to laptops, we are here with solutions. Whether it is wireless or wired, you will know what has to be done by the time you finish reading the blog.
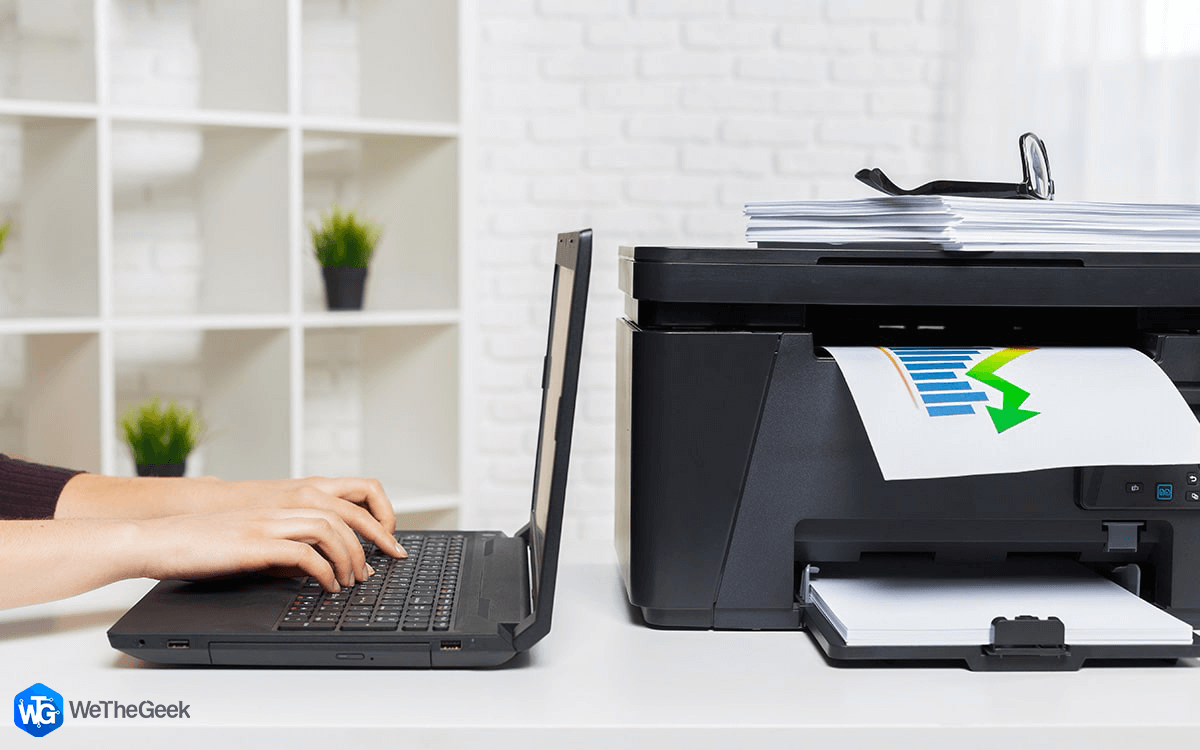
There is a need for a printer for office work or presentations for high school. Once you know how to connect a Canon printer to a laptop with a USB cable, you can sort things quickly & easily. Once the connection is established, you are ready with the printouts of your documents, spreadsheets, presentations, or anything.
Also Read: How To Fix Missing Network Printer Issue in Windows
How To Connect Canon Printer To Laptop With USB Cable ?
Let’s make communication between the two ends by connecting a Canon printer to the laptop using a USB cable.
Step 1: Turn the Canon printer off.
Step 2: Insert the USB cable’s one end to the printer and the other to the laptop.
Step 3: Turn on the printer.
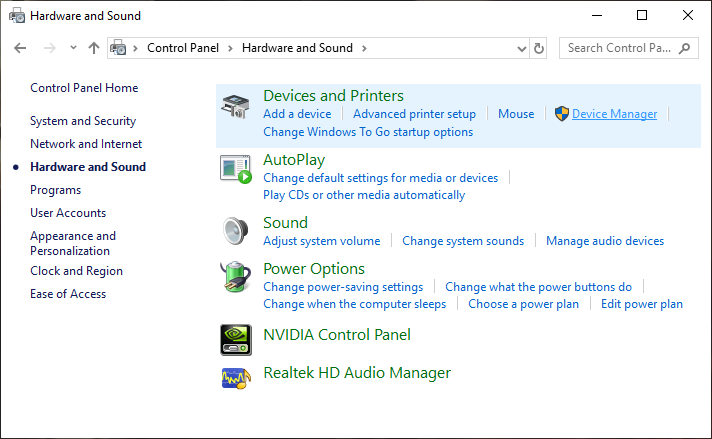
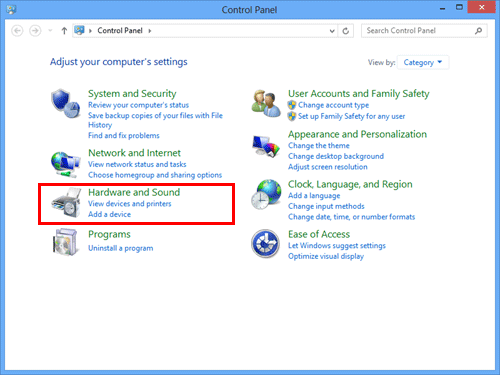
Step 4: Now click the Windows ‘Start’ button and go to ‘Control Panel’. Click on ‘Hardware and Sound’ > Devices & Printer > Add a Printer > Local Printer. Select the printer port for the required connection.
Step 5: Locate the ‘Canon’ printer option in the driver window and select the model. For example, if you are looking for how to connect a Canon Pixma MX490 to a laptop, select the name.
Step 6: Select ‘Next’ after giving the printer a name.
Step 7: Now choose if you want to share the printer with other devices, select ‘Next’.
Step 8: Decide if you want to set up your printer as a Default. Select ‘Next’.
And it’s done!
Also Read: How To Install Printer Via IP Address In Windows 10
How To Connect Canon Printer To Laptop Wirelessly?(Using Wi-Fi)
WPS setup or Wi-Fi protected setup can be done when you have a model with the same facility.
What has to be kept in mind is that the access point must have a physical WPS push button. Plus, the network must be using WPA security protocol.
Step 1: Turn the printer on. Press and hold the Wi-Fi button on the printer-top till the lamp flashes once.
Step 2: The lamp next to the WiFi button also flashes blue. After this, go to the access point and press the WPS button within two minutes.
As the connection between laptop and printer appears, flashing of Wi-Fi lamps and power will stop. This is how to connect the Canon printer to laptop using the WiFi connection.
Also Read : How to Download HP Envy 5540 Driver
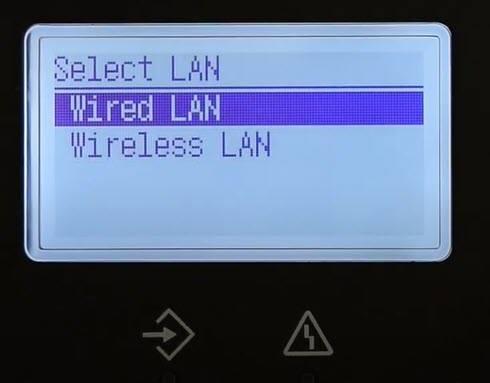
How To Connect Your Printer To Laptop Via A Wired Network?
With the help of a wired connection, multiple devices on the same wired network can access printers. All you need to have is an Ethernet cable and you can simply attach your printer to the router. Simply, follow the instructions stated below:
Step 1 = Get started by connecting one end of the Ethernet cable to the printer and the other end of the cable to your router.
Step 2 = Now, switch on the Printer and navigate to the Printer’s control panel to configure the network settings.
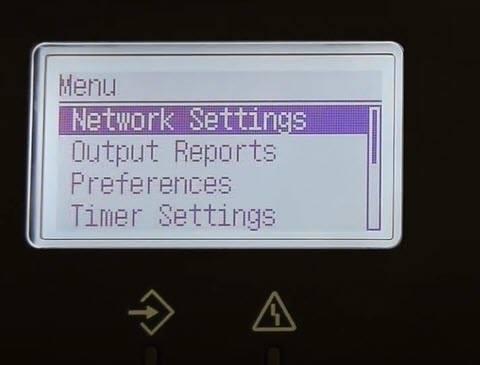
Note: Depending on your printer model, the steps to configure the network settings for the printer can differ. Hence, we advise you to refer to the respective device’s manual.
Step 3 = Select the Wired LAN option and you will have your Canon Printer connected to a wired LAN.
Next, you need to proceed with the process to install a printer driver on your computer so that it can communicate properly with the computer.
Steps To Install Correct Printer Driver:
Using the installation CD that comes with Canon printer Step 1: Switch off your printer and plug one end of the USB cable into the USB port of your printer and the other one into the computer. Step 2: Insert the Canon printer’s installation CD into the laptop or computer’s optical drive. Step 3: Click “Cancel” on the next prompt of the New Hardware Wizard. Step 4: Once the CD finishes loading, follow the on-screen prompts. In case the CD is not running the process automatically, click “Start”, go to Computer, and double-click on the CD/DVD icon to find the CD’s content. Then double-click on “Setup.exe” and run the program. Let the drivers get installed. Step 5: Turn on the printer only when the Printer Connection screen appears. Keep following the prompts. Step 6: Click the ‘Exit’ button once the wizard finishes. If you don’t have a disc, all you need to do is: Step 1: Navigate to Canon’s Support Website. Step 2: Type your product model and select the relevant result that appears from the search results. Step 3: Head towards the Drivers & Downloads section > select the Operating System you’re running on > Select the driver you’d like to download. Step 4: Hit the Download button > Yes > Next > Yes! If you are willing to connect your Canon printer via a USB cable, you need to choose the USB connection option. If you are using Wi-Fi or Ethernet to establish the connection, simply select the Network Connection option to proceed. 3. If you don’t have that amount of time to install the printer driver manually, you can instead do it automatically using a dedicated driver updater program. These nifty utilities will not only install all the PC drivers on their own. But it will also help users to resolve driver-related errors that might appear during the printing process or similar kinds of issues. |
How Do I Update The Drivers For My Canon Printer?
Printer-related errors can be quite frustrating; you may face issues when it stops responding to your commands, freezes, or shows annoying error messages. This usually happens when your printer driver gets corrupted or outdated. Thankfully, you can troubleshoot the problems by updating your printer’s driver to the latest and most compatible versions.
We have covered a brief guide on how to update drivers manually and automatically; you can check out the steps here to try out different methods on Windows 10/11. We prefer using a professional driver updater software since the entire process gets automated, saving our valuable time and efforts for updating bulk drivers. Additionally, it offers advanced tools to backup, restore and schedule scans for driver updates. So, it becomes pretty effortless to maintain a PC healthy by regularly updating multiple drivers. We’ve been using Advanced Driver Updater for a couple of weeks, and it has been working brilliantly to find faulty drivers and replace them with the correct ones.
Here’s what you need to do to update Canon Printer Driver using Advanced Driver Updater:
STEP 1: Install and launch the driver updater program on your Windows 11, 10, 8, 7, XP, or Vista PC. You can either visit the official website of Advanced Driver Updater or click the button provided below to get the latest version.

STEP 2: Get registered with the product to make the most out of Advanced Driver Updater. Though it offers a free edition, you can update outdated drivers one by one. In the premium or licensed version, you can update all the outdated drivers in one go.
STEP 3: From the main dashboard, hit the Start Scan Now button to initiate a comprehensive scan and let Advanced Driver Updater locate all the outdated, missing, incompatible, corrupted, and damaged drivers.

Wait for the scanning process to get completed!

STEP 4: As soon as the results appear, look for the faulty Canon Printer Driver and hit the Update button next to it to replace it with the latest and correct driver version.
Alternatively, you can hit the Update All button to install batch driver updates on your Windows PC.

Pretty convenient, right? Do not forget to restart your PC to implement the changes. You can also check out our list of Top 7 Driver Updater Software For Windows 11, 10, 8, 7 PC To Enhance PC Performance
Wrapping Up Our Guide On How To Add Canon Printer To Laptop!
Welcome my Canon printer home finally? Install it by reading the setup guide above and connect the two devices using any of the methods. Add a canon printer to the laptop smoothly then. We hope your query on how to connect the Canon printer to the laptop with or without a USB cable is done and sorted. Follow us on social media – Facebook, Instagram and YouTube.
Frequently Asked Questions-
Q1. Why Is My Canon Printer Not Connecting To My PC?
Changes to your wireless network (new router, password, or any other settings) can cause such issues. Turn off and unplug your printer for a few seconds and detach your router for at least 15 seconds before plugging it in. Once everything is fully initialized, try connecting it back to PC.
Q2. How Do I Fix Canon Printer Not Responding Error?
To resolve the intermittent issues with Canon Printer not responding to your commands, follow these workarounds:
- Restart your computer & printer.
- Check your printer configuration settings & make sure your peripheral is connected to a correct port.
- Update your system and associated drivers to the most compatible and correct versions.
- Run the built-in Windows troubleshooter to fix potential bugs and issues.
- Reset the Printer Spooler service to manage the communication between your printer & PC.
Q3. How Do I Reset My Canon Printer?
Follow the instructions stated below to hard reset canon Printers:
- On your Canon Printer, keep pressing the Stop button until you hear the alarm ring.
- After that, you need to press the Start button at least 19 times.
- This will bring your printer to its factory settings.
Related Topics-
How To Download Canon PIXMA MG3620 Driver?
How To Download & Update Canon MG3022 Driver?
Timaima Sigawalu
Didn’t find what I needed. It said it showed to methods, one with a USB and one without but I did not see any method that had no USBMary Helen Smith
I thought the Canon L100 Printer/Copier/Fax had wifi capability to access my computer. It appears it does not. I would just like confirmation that this is correct.Debra Sanders
I just brought Cannon Wireless Pixma G6020, usually it has something I can mail in or get on a website to register for warranty. This item did not have either, is it anyway I can register for warranty?ann pickett
i still need to connect the printer to my laptopPenney Prendergast
Fantastic site you have here but I was wanting to know if you knew of any discussion boards that cover the same topics discussed in this article? I’d really love to be a part of community where I can get responses from other experienced people that share the same interest. If you have any recommendations, please let me know. Cheers!Dottie Lindholm
I want to connect my Cannon PIXMA TR4500 printer to my lap top. UBS in both places. Went to HOW TO INSTALL on your web site. Could not get past Hardware & Sound. I am new at this. UGH. HelpRichard Williams
thanks it seems that i can save a few dollars by buying a wired by cable printer by canon. to connect to a toshiba laptop.Richard Williams
thanks once again. shipping is incredibly expensive.Louie Bugayong
how can I connect my PIXMA G2411 printer to my MAC?Mansi Vijay
Hey Louie, Follow the instructions stated below to connect your PIXMA printer to your Mac: 1. Click on the Apple icon and choose System Preferences. 2. Click on the Printers & Scanners module. 3. Hit the “+” sign to add the printer of your choice. 4. A new window will appear on your screen, where you need to hit the IP button and fill out the necessary information. That’s it! Add the printer to your Mac and within a few moments, it should appear under the list of printers!