|
Summary: If you are already familiar with different file systems – exFAT, FAT32, FAT, and NTFS, etc, then you must be knowing that it is a dedicated structure used by the OS for finding and organizing files on the disk. But all these file systems have certain limitations. For example: While you try to copy or move files (exceeding the default size – 4 GB) to the hard drive with the FAT32 file system, an annoying pop-up will appear: “File Is Too Large For The Destination File System”. In this article, we’ll be talking about this aforementioned error message, which is associated with the FAT32 file system limitations. Fortunately, it can be easily fixed by following certain solutions! |
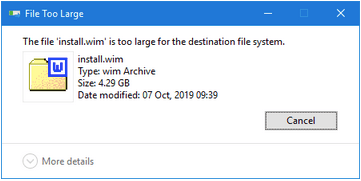
From the above summary, you must have understood that the issue appears due to crossing the limit of the maximum size of the destination drive of the file system. While copying or moving large files to a Flash Drive or any other external storage (with FAT file system), the operation will stop and you will the error message like below:
Why Does It Happen?
The “File Is Too Large For The Destination File System” problem occurs because of FAT32 limitations. Some other causes involve trying to transfer files that are greater than 4 GB.
Solutions To Fix “File Is Too Large For The Destination File System” Problem
To fix the problem “file is too large for destination”, you need to implement the following workarounds:
FIX 1 = Split & Compress The Large Files
By simply decreasing the file size via tools like WinRAR, you can easily fix the error message “file is too large for the destination file system” without formatting the drive. All you have to do is:
STEP 1 = Navigate the folder and right-click to select the “Add to archive” option.

No matter, if the folder includes movies, large videos, or several documents, the method will help you decrease the overall file size.
STEP 2 = To split a file or folder, you need to take the help of the feature “Split to volumes, bytes”. You just need to set the max. the file size you need for the output (compressed) file/folder and it’s done!
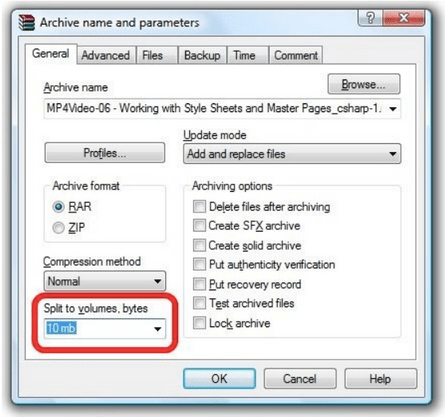
Hit the OK button and let WinRAR start the compressing process!
FIX 2 = Convert The FAT32 File System To NTFS
Well, you can also change or convert the file system of your external hard disk or USB Drive to NTFS (since it doesn’t have a limitation of 4 GB file size). It supports storing data up to 16 TB. We’ll be sharing two methods to complete the conversion process:
Automatic Way: Using A Professional Tool, AOMEI Partition Assistant
It’s an excellent program for newbies who have little or no technical expertise while dealing with hard disks and file systems. It features an easy-to-understand graphical UI, which makes the entire process of turning a storage device file system from FAT16/32 to NTFS effortless. All you have to do is:
STEP 1 = Install and launch AOMEI Partition Assistant.

STEP 2 = From the main dashboard, locate the FAT32 partition and right-click on it. Select the option Advanced and choose to Convert to NTFS > Hit the OK button!
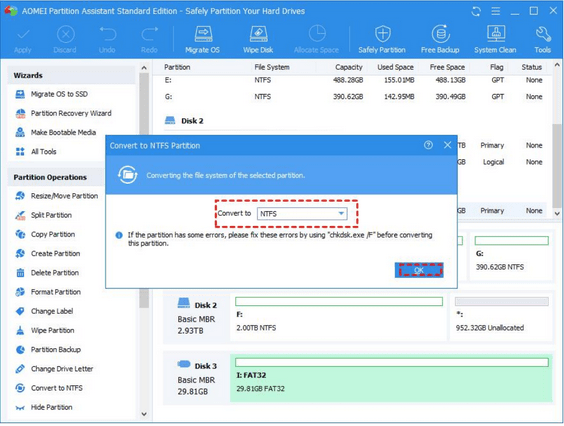
STEP 3 = Simply press the Apply button, located at the upper-left corner of the screen > Proceed to start the conversion process!
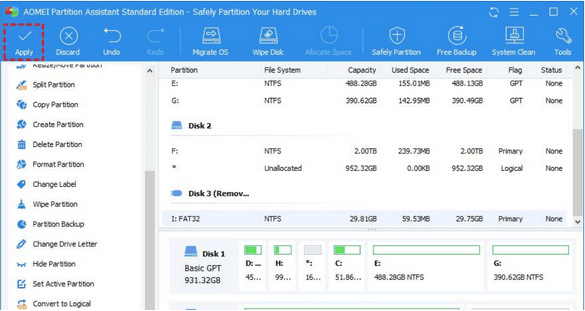
AOMEI Partition Assistant provides a three-step process to automatically convert the file system and resolve errors like “file too large for destination file system” on a USB flash drive.
Manual Way: Using Command Prompt
Don’t worry the method won’t erase any data and it will simply help in converting the file system of your USB Drive to NTFS. Follow the instructions carefully:
STEP 1 = Open Command Prompt & run as administrator.
STEP 2 = From the CMD window, execute the following command line:
convert G: /fs:ntfs /nosecurity (Here G is the driver letter of USB Drive, so you need to replace it with your current drive letter.)
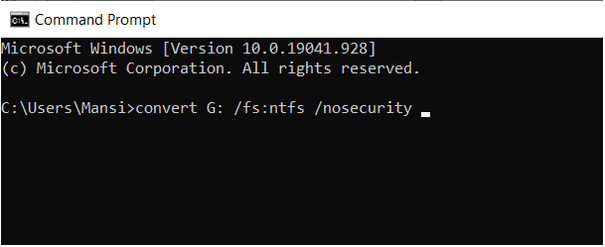
STEP 3 = Now just need to wait for some moments, Windows will convert your file system to NTFS.
Expectantly, you will be able to copy and move large files to your USB Drive and not witness the message “too large for the destination file system”.
FIX 3 = Format The USB To NTFS File System
Another great method to resolve “the file is too large for the destination file system” without formatting is mentioned below. You need to format the
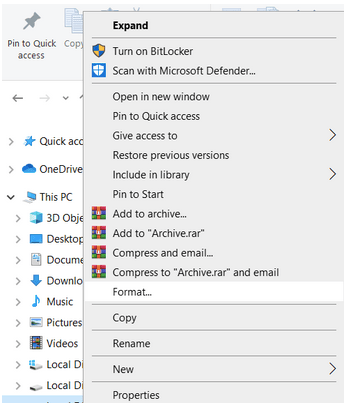
STEP 1 = Launch File Explorer on your system and locate the USB Drive.
STEP 2 = Simply right-click on the same and choose option Format.
STEP 3 = From the File System field, you need to select NTFS and check the box next to Quick Format.
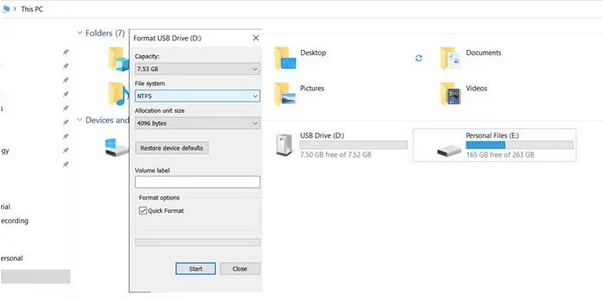
Now hit the Start button to initiate the formatting process. As soon as it ends, click on the OK button to confirm that you’ve successfully changed to NTFS file system.
In Case You Want To Learn: How to Change EXFAT to FAT32 Without Formatting?
FIX 4 = Switch To A Better Storage Option
We know that you have a lot of important stuff stored on your USB Drive, but since it is formatted with the FAT16/32 file system, you are witnessing the error message “file too large for destination file system” on the USB flash drive. Hence, the better alternative is to switch to another efficient storage option. You can also put your important files on the cloud. The market has a variety of options to go for!
Frequently Asked Questions –
Q1. How do I fix files too large for the destination file system without formatting?
Undoubtedly converting the FAT32 file system to an NTFS file system is probably the best bet to resolve the issue. There’s no need for formatting if you choose a professional utility like AOMEI Partition Assistant.
Q2. How do I fix a file that is too large to transfer?
Simply reformatting in Windows Explorer or Disk Management is the best solution to fix the “file is too large for destination” problem. We have already shared the steps to reformat in FIX 3 above. To reformat using Disk Management all you have to do is:
- Right-click on the Start menu and click on Disk Management.
- Now locate USB Flash Drive and right-click again to choose option Format.
- Simply change the current file system to NTFS and check the option “Quick Format”.
- Click OK to proceed!
Q3. How do I change NTFS to FAT32?
Using the Disk Management tool, you can easily convert NTFS to FAT32.
- Right-click on the Start menu and click on Disk Management.
- Find the Drive you wish to format or change.
- Select the Format option and hit Yes!
- You need to give a Name to the drive & using the drop-down menu, select the option “Change the file system to FAT32”.
- Click on the OK button to complete the process!
Q4. How do I change my flash drive from FAT32 to NTFS?
Follow the instructions below to change the USB from FAT32 to NTFS without formatting.
- Launch Command Prompt.
- Type the command line: convert E: /fs:ntfs (Replace E with the Drive you wish to change)
- Hit the Enter button to start the process!
Q5. How to fix a file that is too big for the destination file system?
There are four best workarounds to fix “this file is too large for the destination file system” error on Windows PC:
- FIX 1 = Split & Compress The Large Files
- FIX 2 = Convert The FAT32 File System To NTFS
- FIX 3 = Format The USB To NTFS File System
- FIX 4 = Switch To A Better Storage Option
Q6. Is there a limit to the size of a file?
Yes, the max. The theoretical limit of the size of a file is 16 EiB minus 1 KB.
Q8. What’s the maximum size of a file in NTFS?
NTFS can support volumes as large as 8 petabytes on the latest Windows versions.