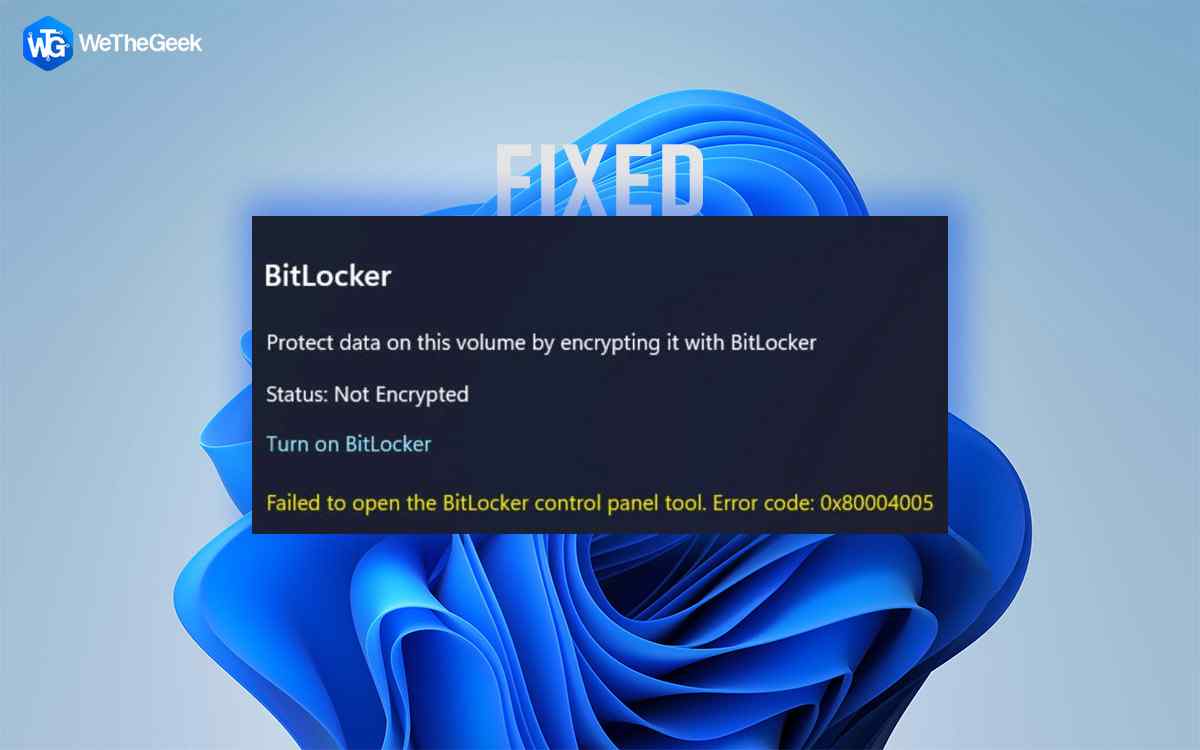
Windows users can manage the BitLocker protection on their drives using the BitLocker Control Panel utility. Some Windows 11 customers have recently voiced complaints about being unable to use the BitLocker Control Panel function on their computers. According to them, they are attempting to access the tool when the error code 0x80004005 appears. So, without further ado, let’s get to the primary solutions.
Verify The Support For Device Encryption
Check to see if the BitLocker Encryption is even supported by your PC before taking any action. Observe these steps:
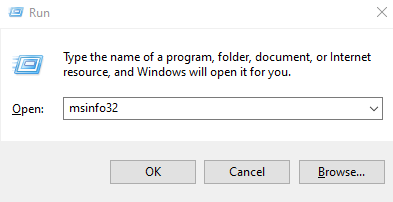
Step 1: Press the Windows key and R to open the RUN box.
Step 2: Type “msinfo32” and then hit the Enter key.
Step 3: Click on “System Summary” in the left-hand pane of the System Information page.
Step 4: Locate “Device Encryption Support” by scrolling all the way down the right-hand pane.
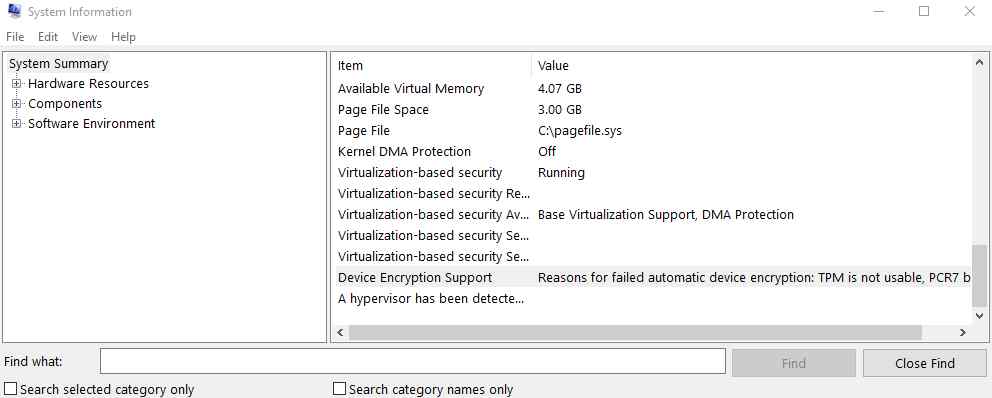
Step 5: Check the statement next to this field.
| Meets Prerequisites | BitLocker Encryption is fully supported on your PC and you can start working on the fixes mentioned below. |
| Reason for failed automatic device Encryption: PCR7 binding is not supported, Hardware Security Test failed and the device is not on Modern Standby.
|
BitLocker Encryption is not supported by your PC. |
How To Fix Failed To Open BitLocker Control Panel
Method 1: Use The Windows Registry Editor
Using the Registry Editor, you can manually modify the BitLocker Encryption protocol’s associated registry.
Also Read: Important Points to Take Care While Editing Windows Registry
Note: It is important to take a backup of your Registry before modifying it.
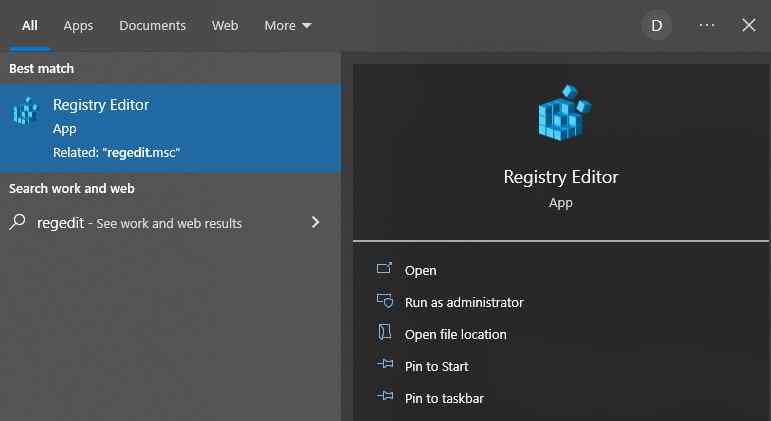
Step 1: Press Windows + S and type “regedit”.
Step 2: Next, select “Registry Editor” which is one of the crucial components of your computer.
Note: It is recommended to create a registry backup before making any changes.
Step 3: Navigate to the following path on your Windows Registry.
HKEY_LOCAL_MACHINE\SOFTWARE\Policies\Microsoft
Step 4: Make a right click on the Microsoft key and choose New Key. Rename this key as “FVE”.
Step 5: Make sure that the “FVE” key is now chosen in the left-hand window.
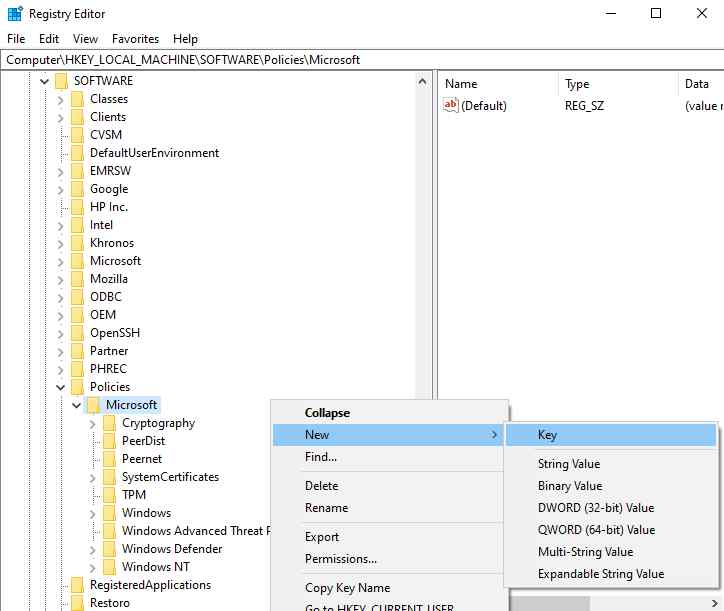
Step 6: Make a right click on the right-hand side and select “New,” and then select “DWORD (32-bit) Value.”
Step 7: Rename this key as “EnableBDEWithNoTPM.”
Step 8: To change this value, simply double-tap it.
Step 9: Reset the value to “1” at this time.
Step 10: To save the changes, click “OK.” You then need to generate another value.
Step 11: To create a new value, right-click on the same side, select “New,” then choose “DWORD (32-bit) Value.”
Step 12: Rename this key as “UseAdvancedStartup“.
Step 13: Double-tap the newly created key to alter the value.
Step 14: Modify the value to “1” after that.
Step 15: To save this modification, click “OK” after that.
Step 16: Next, create more keys and set the Value Data as listed in this table, using the same procedures.
| Name | Value data |
| UseTPM | 2 |
| UseTPMKey | 2 |
| UseTPMKeyPIN | 2 |
| UseTPMPIN | 2 |
Step 17: Close the Registry Editor page after creating each of the required values.
Step 18: Restart your PC after that. These changes are saved when your computer is restarted.
Also Read: How To Fix Registry Editor not Working on Windows 11
Method 2: Change The Group Policy
You can handle Bitlocker Encryption using group policy settings if changing the registry doesn’t resolve the problem.
NOTE: Windows 11 Home does not support Group Policy. You can enable Group Policy by following the steps mentioned here.
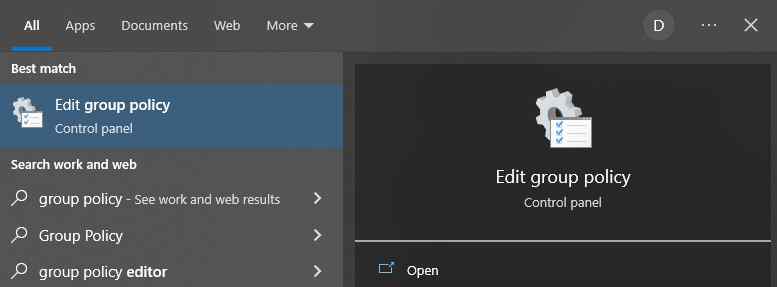
Step 1: Enter the term “group policy” into the search bar.
Step 2: Tap “Edit Group Policy” to open the Group Policy window.
Step 3: Navigate to the below-mentioned section of the Local Group Policy Editor.
Computer Configuration > Administrative Templates > Windows Components > BitLocker Drive Encryption > Operating System Drives
Step 4: Look for the policy that says “Require extra authentication at startup” in the right-hand pane.
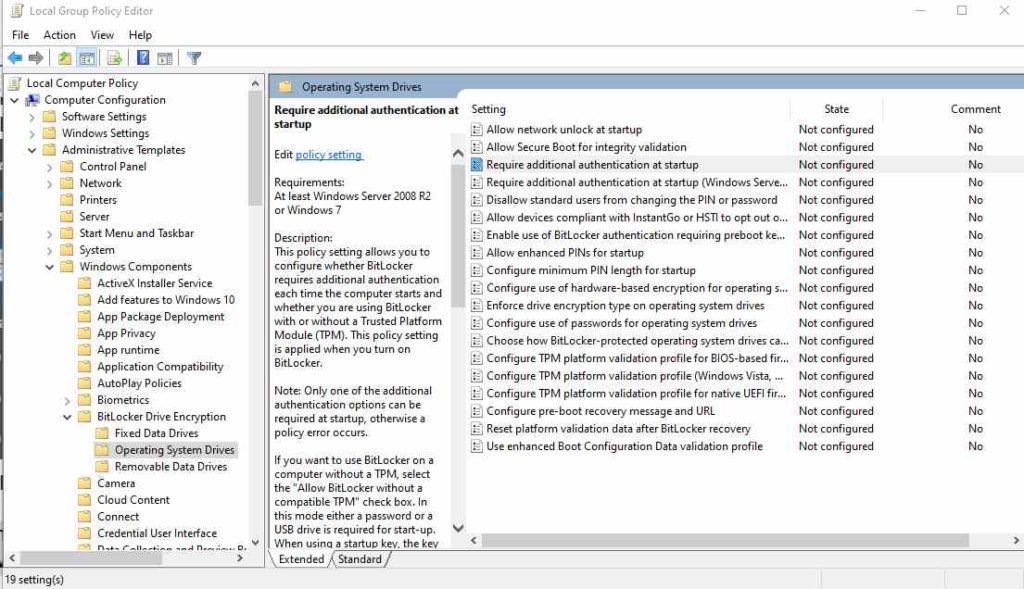
Step 5: After that, double-tap it to edit it.
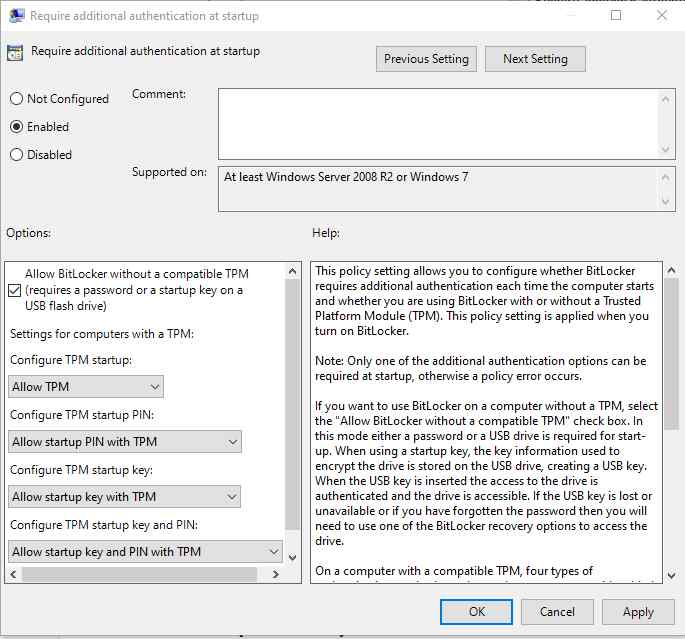
Step 6: Make sure to set the policy’s state to “Enabled.”
Step 7: Then place a checkmark next to the following option listed below:
Allow BitLocker without a compatible TPM (requires a password or a startup key on a USB flash drive)
Step 8: To save this change, tap “Apply” and “OK” afterwards.
Step 9: The system needs to be restarted before this policy change becomes effective. Try to launch the BitLocker Control Panel once more and test it after the computer has restarted.
Also Read: How To Remove User Account Control In Windows 11?
Method 3: Launch The BDESVC Service
While using any BitLocker functionality, the Drive Encryption service for BitLocker should be active.
Step 1: Press Windows + R to open the RUN box and type “service.msc” followed by the Enter key.
Step 2: Locate the BitLocker Drive Encryption Service in the Services window.
Step 3: Double-click it and a new window will open.
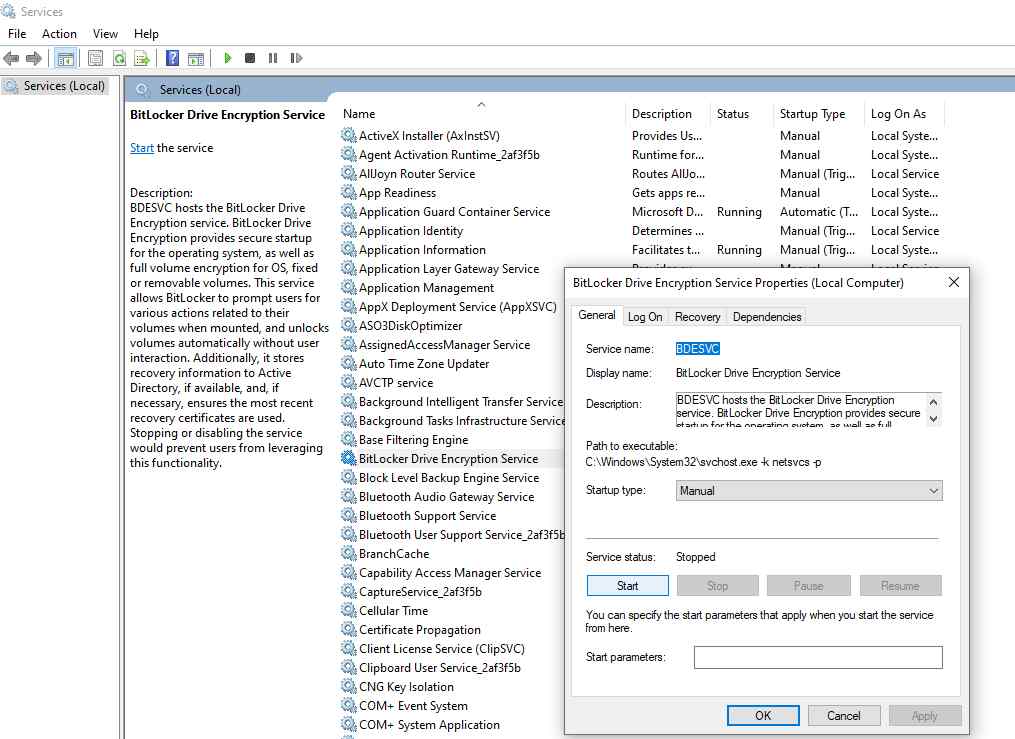
Step 4: After that, click “Start” to launch the service.
Step 5: Next, select “Apply” and “OK.”
Also Read: How to Fix Services.msc Not Opening in Windows 11
The Final Word
I hope you now know all the methods to fix the Failed To Open BitLocker Control Panel Error On Windows PC. However, it is important to check if the BitLocker Encryption feature is supported on your PC first, before carrying out the troubleshooting steps.
Please let us know in the comments below if you have any questions or recommendations. We would be delighted to provide you with a resolution. We frequently publish advice, tricks, and solutions to common tech-related problems. Don’t forget to follow us on Facebook, YouTube, Flipboard, Instagram.