
In Windows 11, you can enable spatial sound, sometimes referred to as “3D Audio.” It improves the experience by producing a more engrossing sound. A compatible device’s Spatial Audio feature gives the impression that the sound is coming from all around you rather than directly right in front of you. With spatial sound, you can sense the direction of the sound when watching a movie as well as enhance your gaming experience.
A competent output device that supports Spatial Sound in Windows 10 and 11 is required for a full panoramic sound experience before you enable Spatial Sound in Windows 11.
Also Read: Can Boom 3D Improve Sound Quality On Windows or Mac?
How To Enable Spatial Sound In Windows 11?
Listing out some of the quickest ways to activate spatial sound on Windows PC.
Use The Windows 11 Settings To Enable Spatial Sound In Windows 11.
Step 1: Press Win + I hotkeys to open the Windows Settings app.
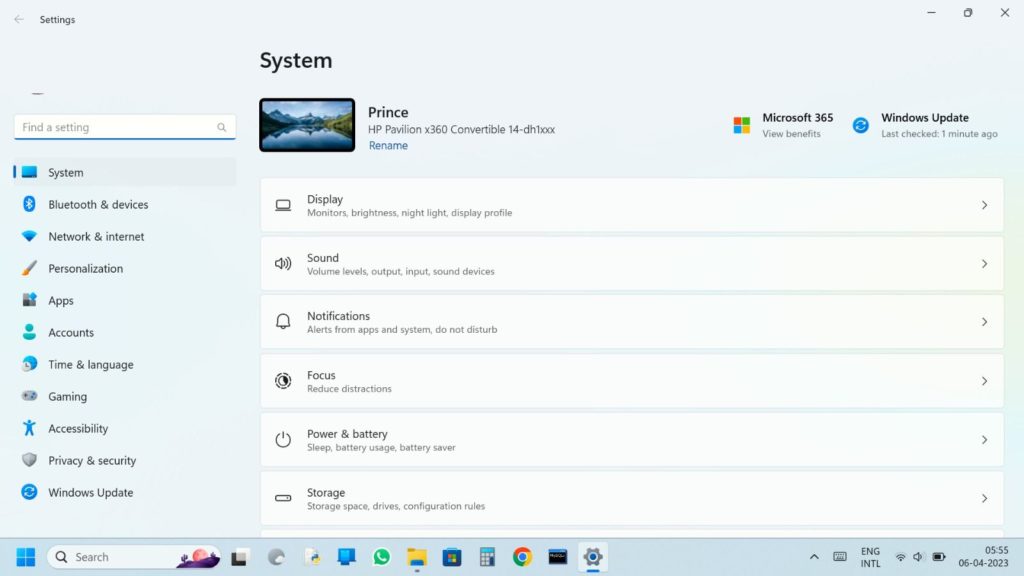
Step 2: Click on the System tab in the left panel and then click on the Sound option on the right side of the Settings App window.
Step 3: Choose the Speakers/Headphones on which you want to experience Spatial Audio.
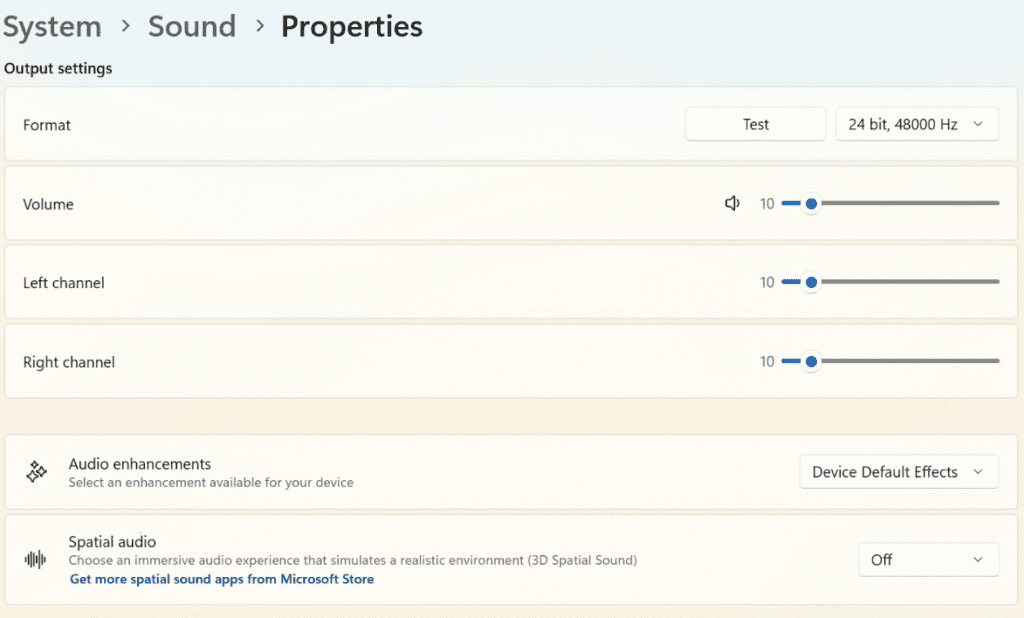
Step 4: Now, look for the Spatial Audio option and click on the drop-down menu.
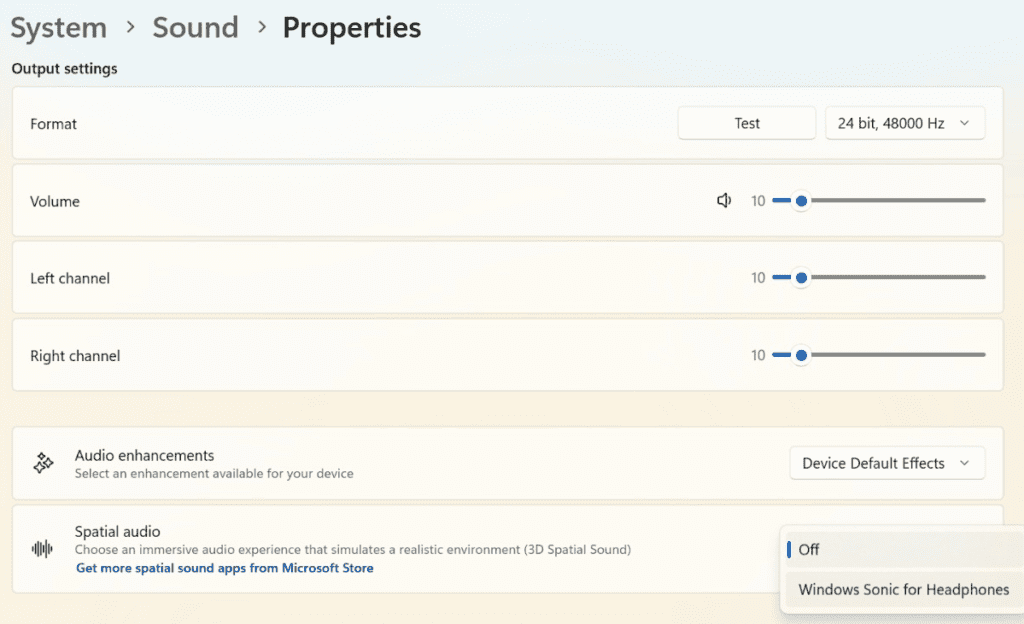
Step 5: Choose Windows Sonic For Headphones.
It’s crucial to keep in mind that various audio equipment (headphones, soundbars, audio systems, and entertainment systems) may call for additional 3D audio programs that are accessible in the Microsoft Store. For instance, Dolby Access may be required to enable spatial audio on a pair of headphones.
Click the link for “Get more spatial sound apps” next to the drop-down box if your device is not compatible with Windows Sonic for Headphones. Choose the correct app from the drop-down menu in the spatial audio settings after downloading it.
Also Read: Microsoft Introduces A New Windows 11 Volume Mixer
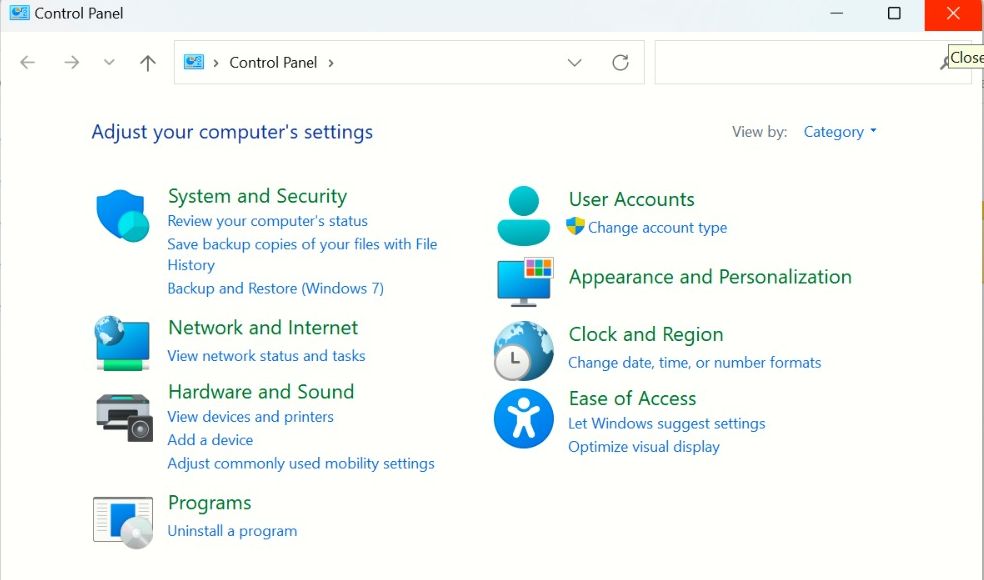
Use The Control Panel To Enable Spatial Sound In Windows 11.
If the Settings app is not accessible then you can always use the Control Panel app to enable spatial sound on a Windows 11 PC.
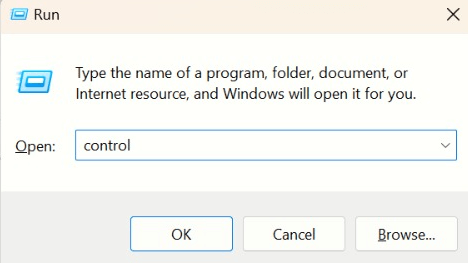
Step 1: Press Win + R hotkeys to open the RUN box.
Step 2: Type “Control” in the text space and then click on the OK button.
Step 3: Click on Hardware & Sound option. Then click on Sound on the right side of the control panel window.
Step 4: Choose the Playback tab, and locate your sound output device.
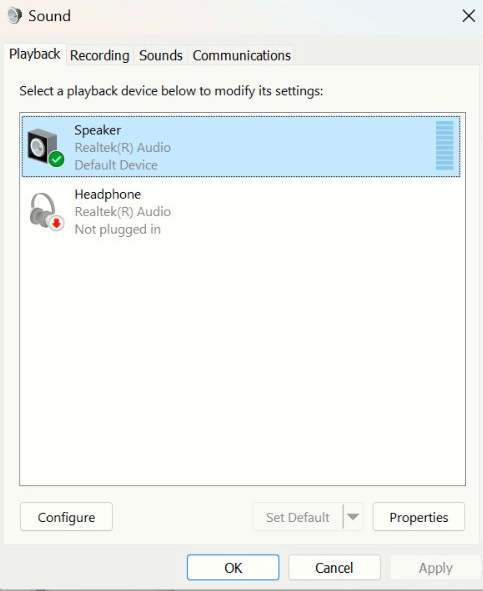
Step 5: Make right-click on your device and select Properties from the context menu.
Step 6: Click on the Spatial Sound tab.
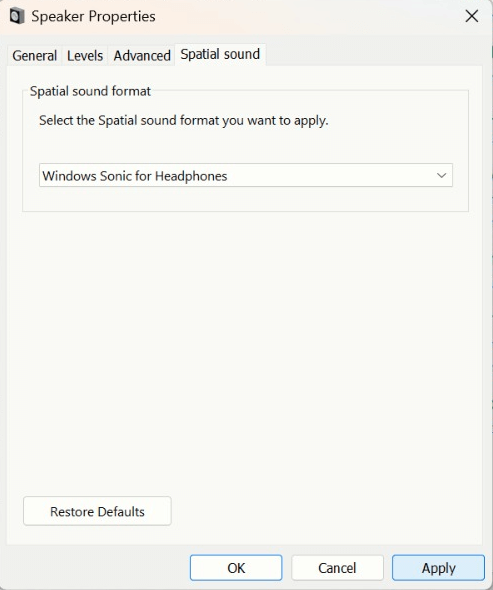
Step 7: Locate the Spatial Sound Format section, and choose Windows Sonic for Headphones from the dropdown section.

Step 8: Click on Apply and then on OK.
Also Read: Dolby Atmos Not Working on Windows 10? Here’s the Fix!
The Final Word On How To Enable Spatial Sound In Windows 11
Using Spatial Sound will enhance your gaming experience provided you have the appropriate hardware. Movie-buffs would also enjoy watching their favorite movies in a near cinema-like experience. I hope you can now turn on the Spatial sound on your PC and even guide others on how to do the same.
Please let us know in the comments below if you have any questions or recommendations. We would be delighted to provide you with a resolution. We frequently publish advice, tricks, and solutions to common tech-related problems. You can also find us on Facebook, Twitter, YouTube, Instagram, Flipboard, and Pinterest.
Suggested Reading