
No matter which device we use, whether our smartphone, laptop, or tablet, we are always in the constant urge of needing more storage space. Isn’t it? Yes, we just can’t get enough of it. There’s so much digital data around us in many forms including pictures, videos, audio files, documents, and more. Seeing the “Your device’s storage is almost full” alert on any device can be highly frustrating. We are never completely ready to get rid of our important files to make room for more storage space. We’ve all been there. Well, this is where file compression steps in as a savior.

File compression is the process of reducing the size of a file by encoding its contents more efficiently. So, have you folks heard about NTFS file compression? It is a unique file compression technique supported on the Windows OS that can be used to reduce the size of files to make more space.
In this post, we will be talking about NTFS compression, how to enable NTFS file compression, and everything else that you need to know.
Let’s get started.
Also read: 7 Best File Compression Software
What is NTFS File Compression?
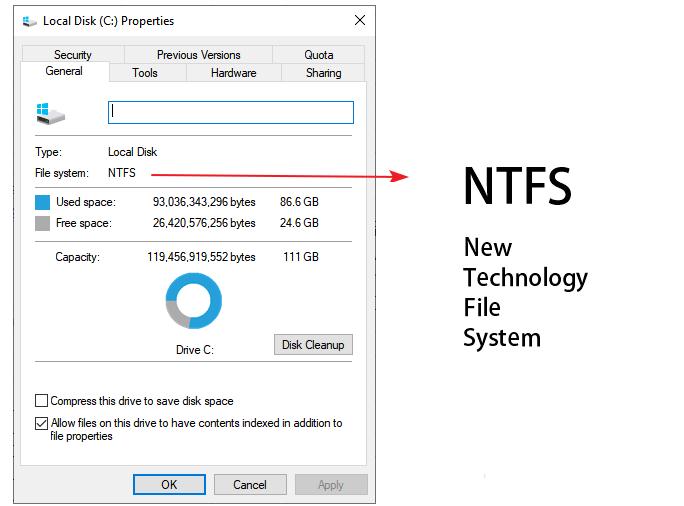
NTFS (New Technology File System) file compression is a feature of the Windows operating system that allows users to compress individual files or folders to save disk space. NTFS file compression uses a lossless compression algorithm to compress data, which means that no data is lost during the compression process. NTFS compression can be useful for files that are rarely accessed or files that take up a lot of disk space.
NTFS file compression is a secure and reliable process where no data is damaged or lost. As soon as this process starts, the operating system analyzes the contents of the file and then applies a compression algorithm to reduce the size of the file.
How to Enable/Disable NTFS File Compression on Windows 11
There are 4 different ways that you can adapt to enable NTFS file compression on Windows 11. Let’s discuss each of these methods in detail.
Method 1: Use the File Explorer App
You can enable the NTFS file compression on Windows by using the File Explorer app by following these steps:
Step 1: Open Windows Explorer and navigate to the folder or file that you want to compress.
Step 2: Right-click on the folder or file and select “Properties” from the context menu.
Step 3: In the Properties window, click on the “Advanced” button.
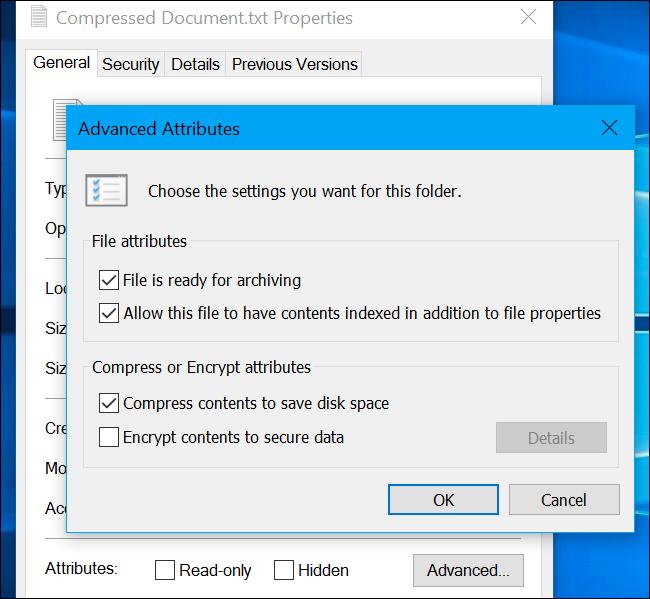
Step 4: Check the box next to “Compress contents to save disk space” and click “OK“.
Step 5: In the Properties window, click “Apply” and then “OK“.
Windows will then compress the folder or file using NTFS compression. Please note that compressing files can affect performance and may result in slower read and write speeds.
Method 2: Via Command Prompt
Yes, you can even use the Command Prompt app to enable NTFS file compression on Windows. Here’s what you need to do:
Step 1: Tap on the search icon placed on the Taskbar and type “Command Prompt”.
Step 2: Select the “Run as administrator” option to launch Terminal with admin rights.

Step 3: In the Terminal window, type the following command and hit Enter to execute it:
fsutil behavior set disablecompression 0
Step 4: Once you execute this command, your Windows PC will reboot to apply the recent changes.
Step 5: To disable NTFS file compression on Windows, run the following command in the Terminal:
fsutil behavior set disablecompression 1
Also read: How Do You Enable File Compression In Windows 11
Method 3: Use the Registry Editor
You can even use the Windows Registry Editor to enable or disable NTFS file compression on Windows. Follow these quick steps to get started.
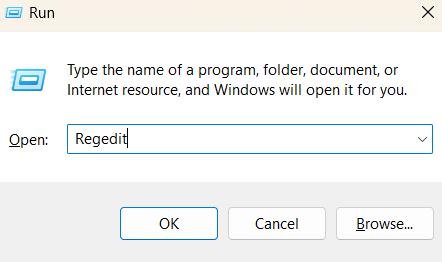
Step 1: Press the Windows + R key combination to open the Run dialog box. Type “Regedit” in the textbox and hit Enter.
Step 2: In the Registry Editor window, navigate to the following folder location:
Computer\HKEY_LOCAL_MACHINE\SYSTEM\CurrentControlSet\Policies
Step 3: Now, right-click on the Policies folder, and select New> D-WORD (32-Bit) Value.
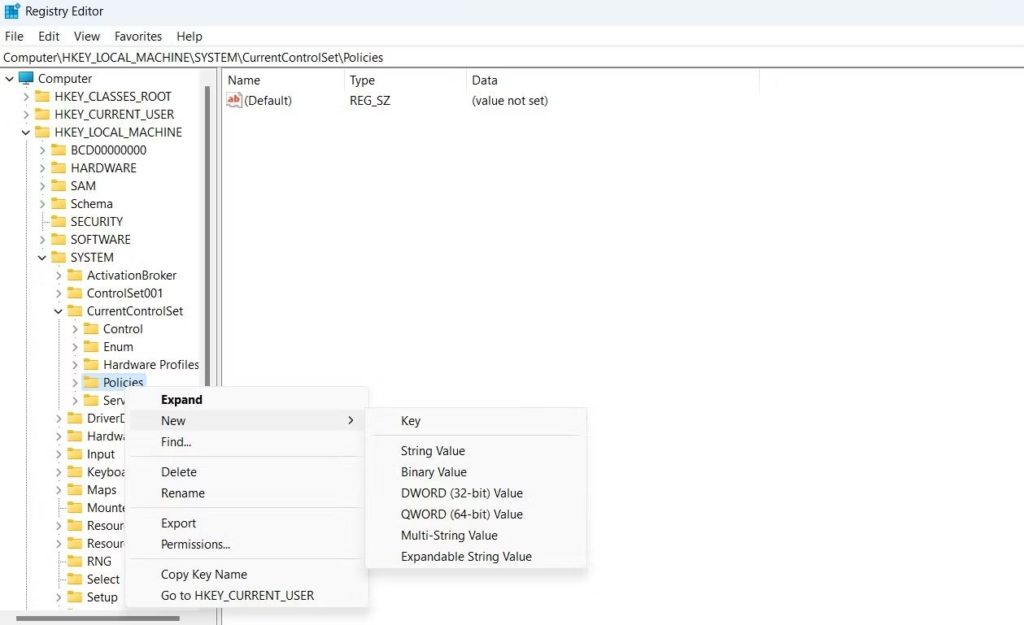
Step 4: Once the file is created, right-click on the newly created value and select “Rename”.
Step 5: Type “NTFSEnableCompression” in the name field and enter “1” in the Value Data field.
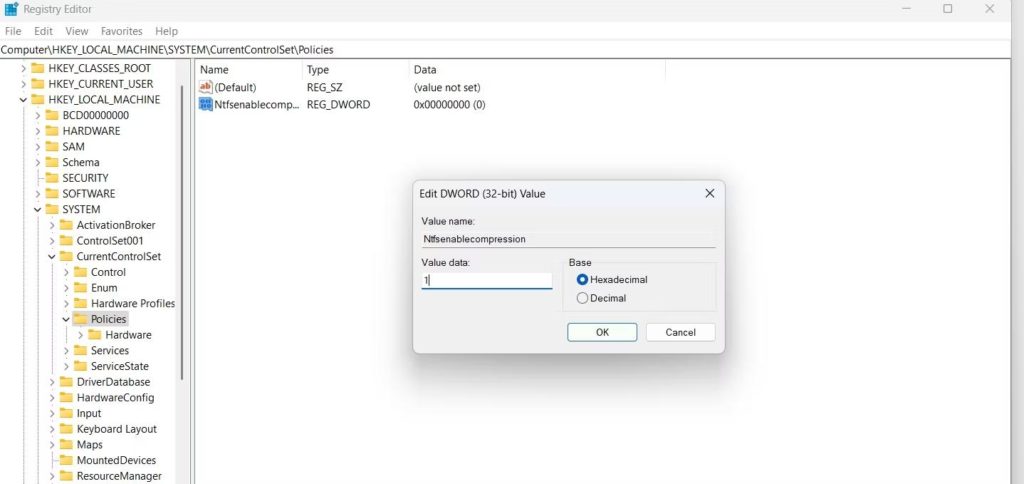
Step 6: Hit on the OK button to enable NTFS file compression.
Also read: Is it Safe to Use Windows’ Full-Drive Compression to Save Space?
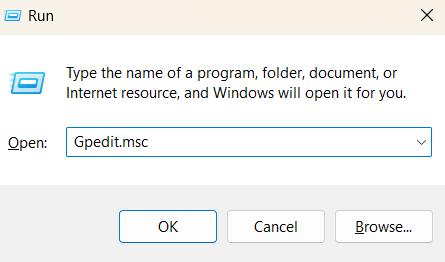
Method 4: Use the Local Group Policy Editor
Step 1: Press the Windows + R key combination to open the Run dialog box.
Step 2: Type “Gpedit.msc” in the textbox and hit Enter.
Step 3: In the Group Policy Editor window, navigate to the following path:
Computer Configuration\Administrative Templates\System\Filesystem\NTFS
Step 4: Now, double tap on the “Do not allow compression on all NTFS volumes policy” file placed on the right side of the window to open Properties.
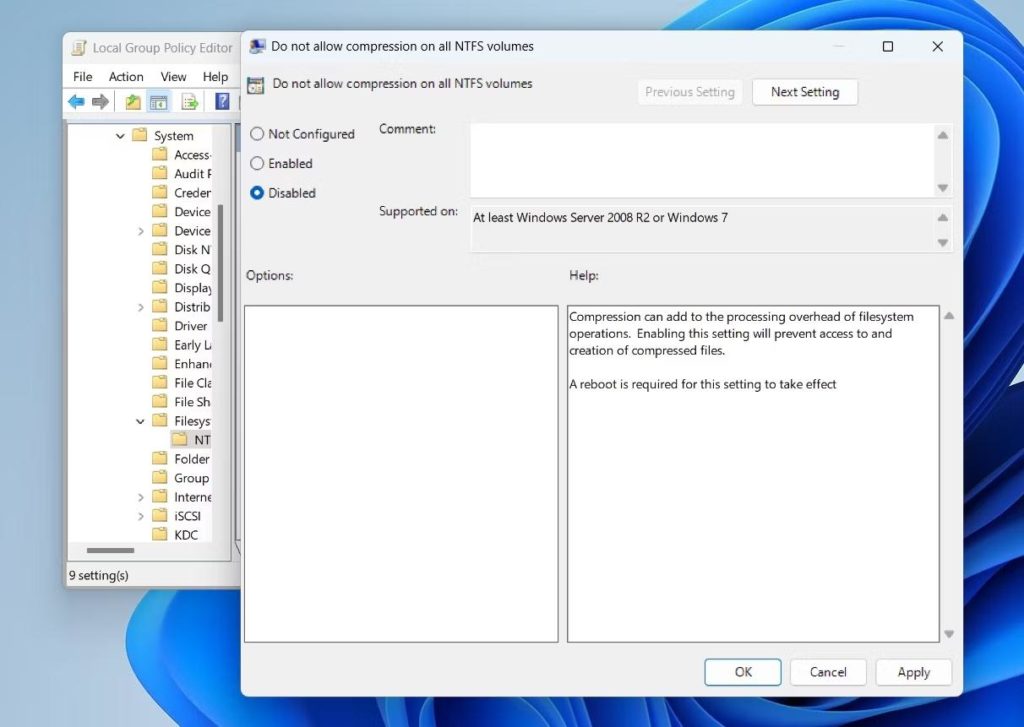
Step 5: Select the “Disabled” option. Hit on the OK and Apply buttons to save changes.
Step 6: To disable NTFS file compression on Windows, simply pick “Enabled” in the Properties window.
Also read: 11 Best Video Compression Software for Windows and Mac
Conclusion
Enabling NTFS file compression on Windows can be a great way to free up disk space and improve system performance. Whether you choose to use the built-in compression feature of Windows, or the command line interface, the process is relatively simple and can be done quickly. You can use any of the above-listed methods to enable NTFS file compression on Windows 11.
So, did you learn something today? Feel free to share your thoughts in the comments section.