When Microsoft released Windows 11, it stated that this would be the beginning of a new generation of operating systems. And it is trying to stick to its work by introducing new features every once in a while through updates. One of the latest features that will be available soon to all Windows 11 users in the Windows 22H2 version is the desktop stickers. However, if you run the Windows 11 Insider Preview, you can enable the stickers today with a small tweak.
Note: This tweak will work on Windows 11 Build 25162 or above PCs.
How to Enable Desktop Stickers in Windows 11?

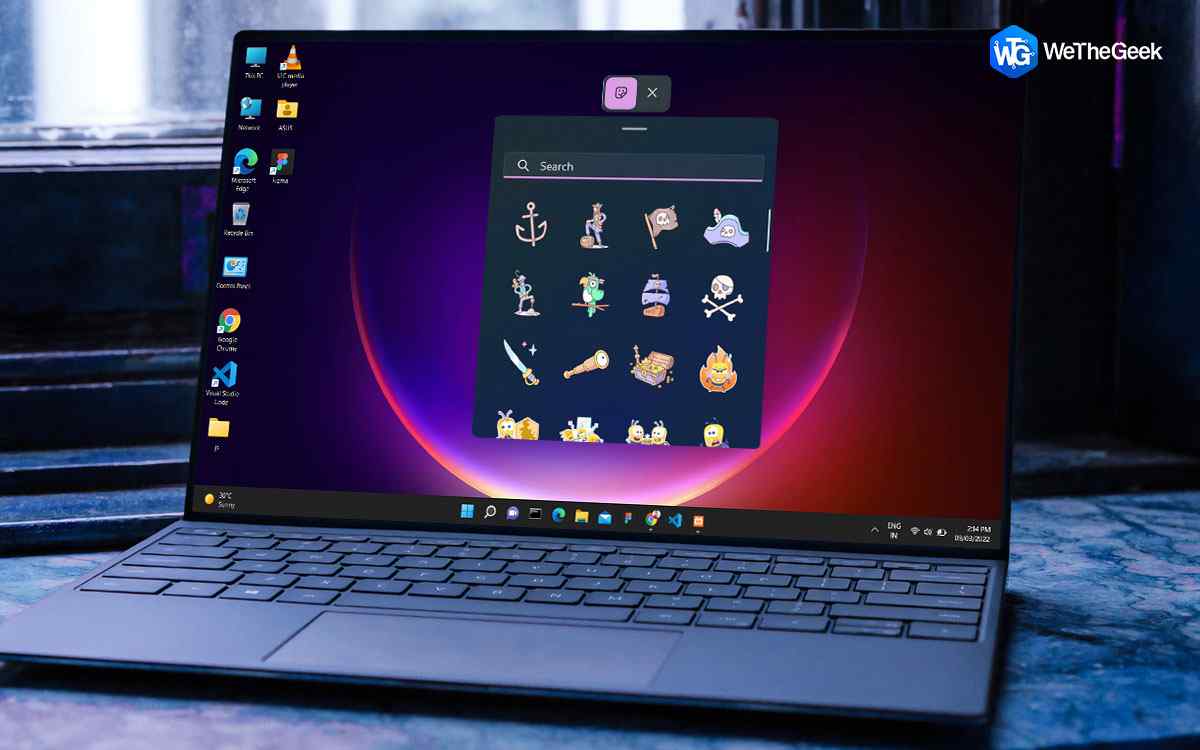
The Desktop Stickers feature introduced by Microsoft in Windows 11 allows users to set a sticker permanently on their desktop. Even if you change the wallpaper, the sticker will not disappear or shift its position. Once the Registry tweak is successful, you can see a new option in the context menu by making a right-click on your desktop labeled “ Add or edit stickers.” Without further ado, let us check the steps to enable Desktop Stickers in Windows 11.
Step 1: Press Windows + R on your keyboard to open the RUN box.
Step 2: Type regedit in the text box followed by the Enter key.
Step 3: The Windows Registry Editor will now launch on your Desktop.
Step 4: Navigate to the following path to reach the specific key in the Registry.
HKEY_LOCAL_MACHINE\SOFTWARE\Microsoft\PolicyManager\current\device
Step 5: Once you have located the “device” key, make a right-click on it and choose New followed by Key.
Step 6: Rename the Key created in Step 5 as “Stickers”.

Step 7: Next, make a right-click on Stickers and choose New, followed by DWORD (32-bit) Value.
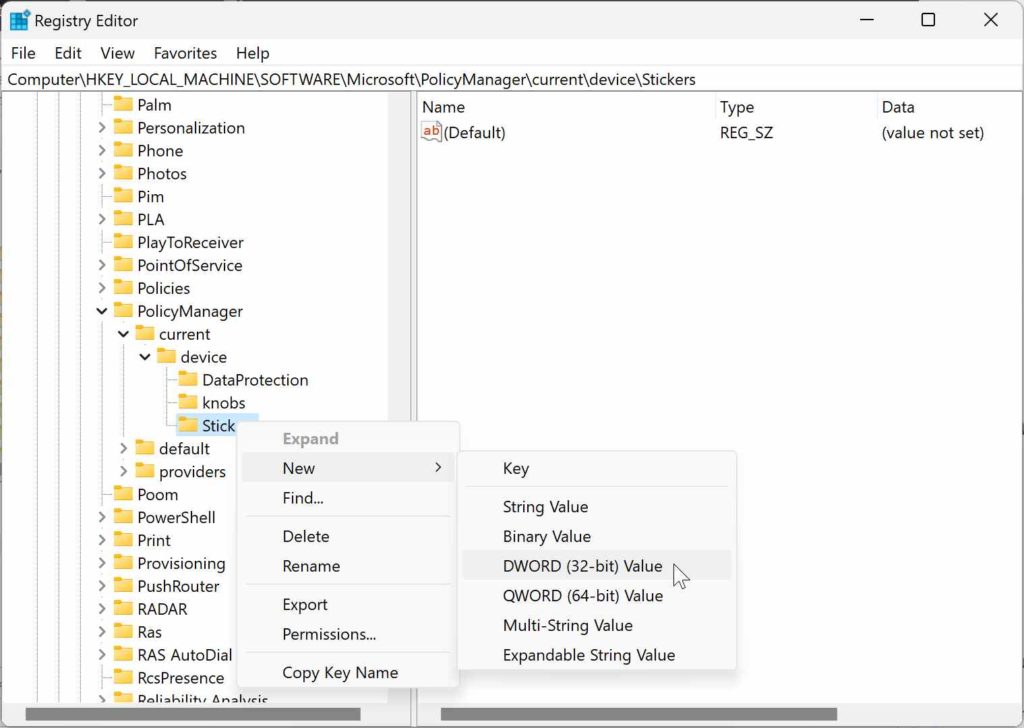
Step 8: Rename this Registry Entry as “EnableStickers”
Step 9: Double click on EnableStickers and set the Value data in the new box that opens as 1.
Note: If you wish to disable the stickers then you will have to change this value to 0.
Step 10: Reboot your PC to let the new changes take effect.
How to Add, Edit, or Delete Desktop Stickers in Windows 11
There is no limit on how many Stickers you can add for now. But it is evident that the more stickers you add, the more RAM resources will be consumed and possibly affect the performance of your PC. After you have added the Desktop Sticke on Windows 11 PC, you can change the location and size of the sticker. Here are the steps to manage your Desktop Stickers on Windows 11 PC.
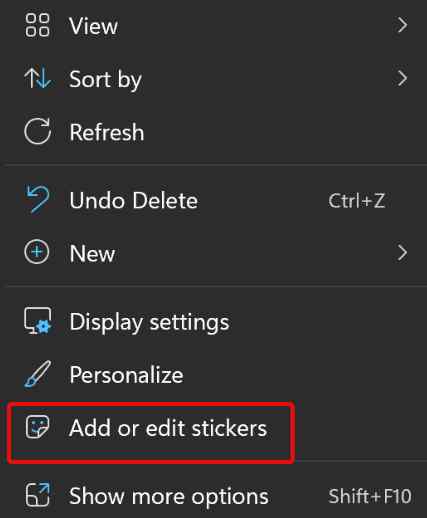
Step 1: Make a right-click on any space on your desktop and select Add or Edit Stickers from the context menu.
Or
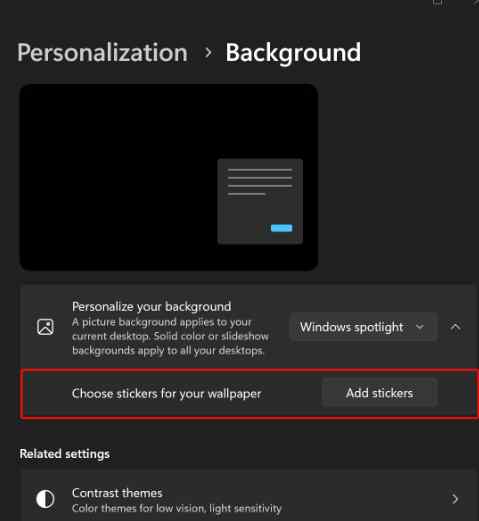
Step 1: Press Windows + I to open the Settings menu and select Personalization from the left panel, followed by Background. You will now see Add Stickers button in this section.
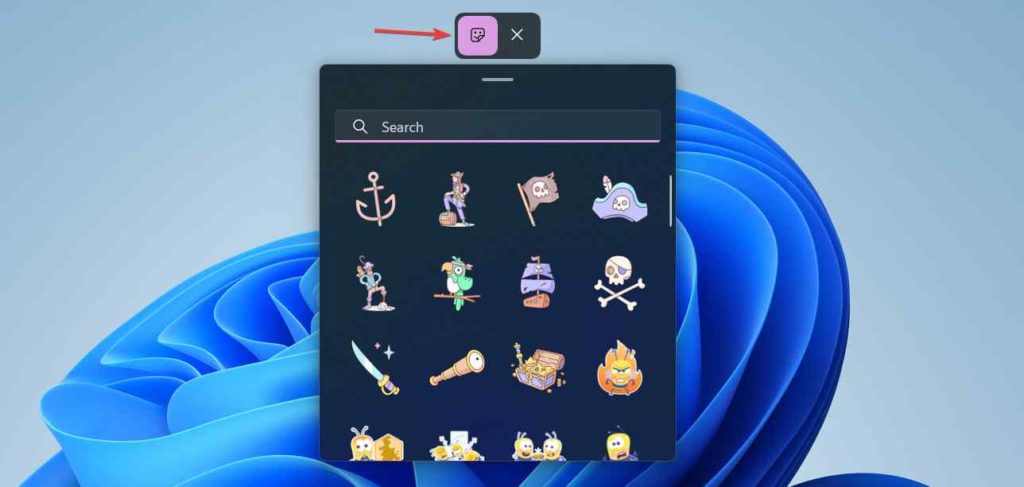
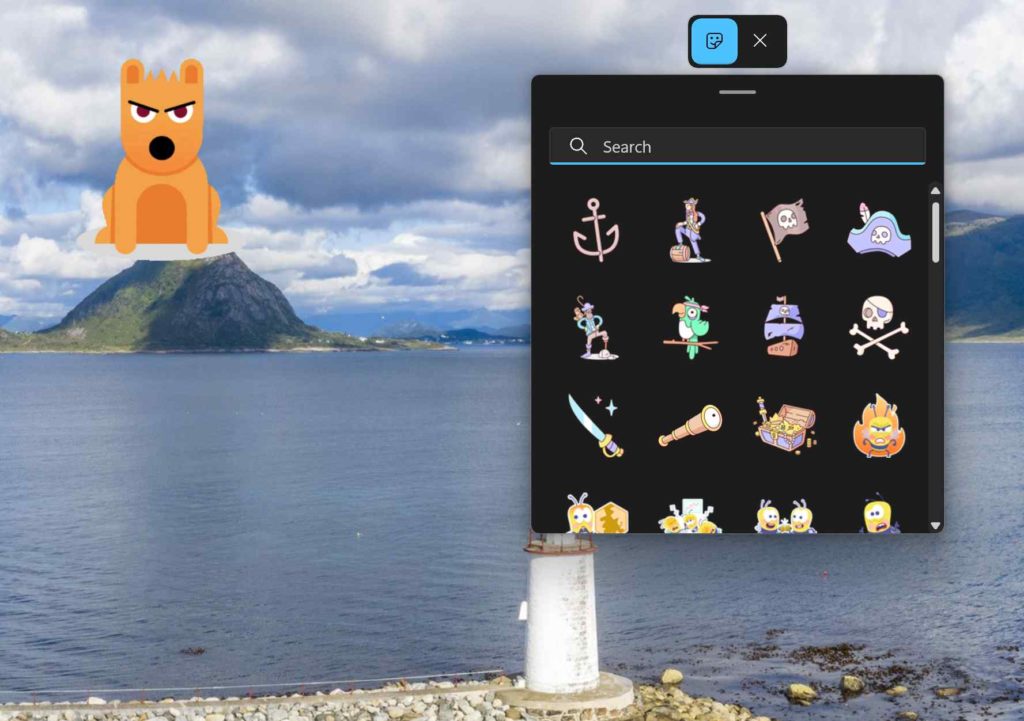
Step 2: You will get a new window known as the Sticker Editor, where you can choose your favorite sticker. You can manually scroll down or use the search option to search for a sticker.
Step 3: Click on the Sticker of your choice, and it will be added to your desktop.
Step 4: Once the sticker is added, make a right-click on the desktop and choose to Add or Edit Sticker option. The Sticker Editor will open again and present you with options to delta it or resize it by dragging the corners.
Step 5: You can also drag the sticker in this mode to any section of your desktop and then click on the X icon to exit the editor.
Step 6: To delete the Desktop Sticker in the Editor mode, click on the Recycle Bin Icon, and this sticker will be deleted.
| Bonus Tip: Advanced PC Cleanup.
The Advanced PC Cleanup is a fantastic optimization tool that helps users remove junk and unwanted files. It also has a special module to empty the contents of your Recycle Bin in case you cannot do it usually by using the right-click context menu. |

The Final Word On How to Enable Desktop Stickers in Windows 11

Although many would consider Desktop Stickers a significantly important feature, it adds fun to life. While working on your PC for hours can be tedious, a few stickers on your desktop would lighten up your mood and remind you of your favorite cartoon characters.
Follow us on social media – Facebook, Instagram, and YouTube. Please let us know of any queries or suggestions in the comments section below. We would love to get back to you with a solution. We regularly post tips and tricks and answers to common issues related to technology.