A new Windows feature called Auto Color Management enhances the color quality of digital images and gives them a more realistic appearance. It almost feels like you always have access to a personal color guru on-site. If you don’t yet have the Windows 11 25309 release, you can still utilize a third-party app called ViveTool since this amazing tool is included in it. To activate Auto Color Management for programs in Windows 11, refer to the set of instructions explained below.
Also Read: How To Enable RGB Lighting Controls In Windows 11
How To Enable Auto Color Management For Apps In Windows 11
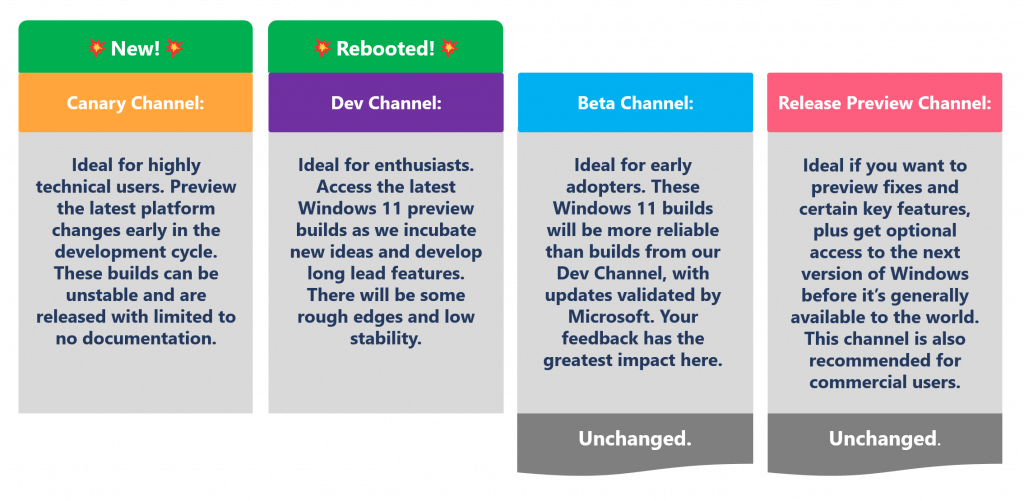
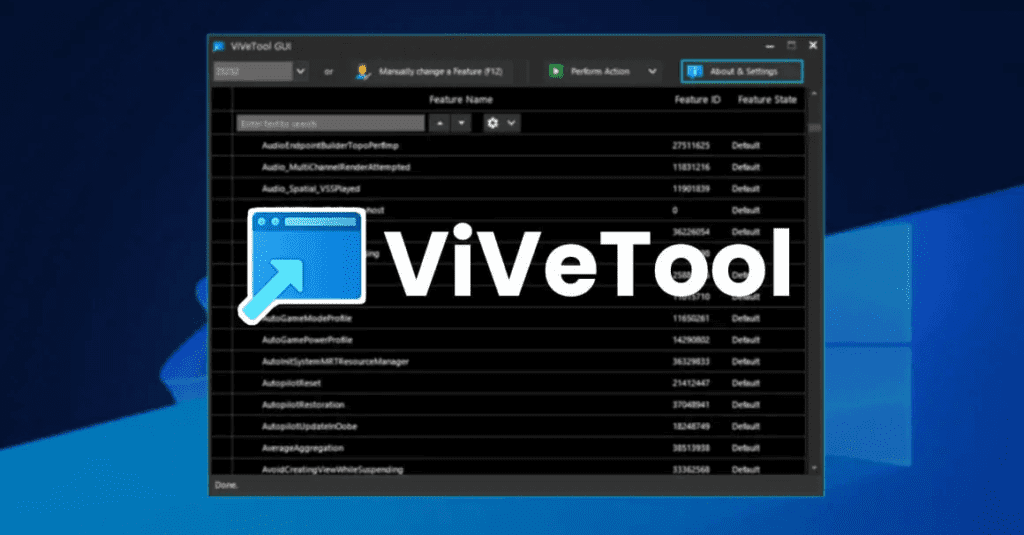
The Auto Color Management function is currently under Beta testing. Only Windows Insider builds 25309 and higher have access to it. You must first update to the newest Canary channel build in order to enable this functionality on your PC, after which you must download ViVeTool from the GitHub page.
Also Read: How To Enable “End Task” Option On The Windows 11 Taskbar
Quick Steps On How To Join The Canary Channel?
Press Win + I to open the Settings App on Your PC.
Click on the Windows Update tab in the left panel of the Settings window.
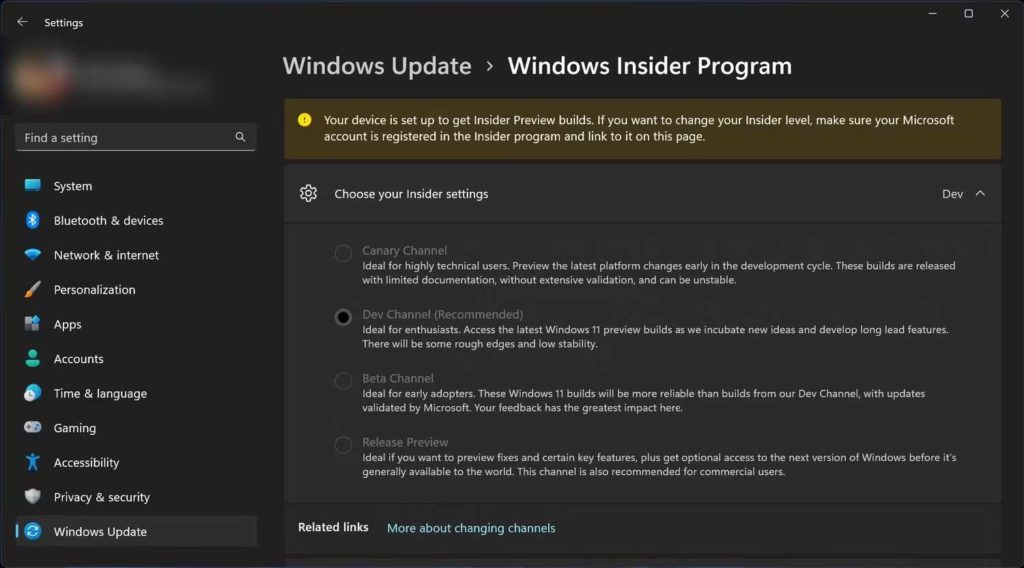
Scroll down and locate Windows Insider Program on the right panel of the Settings window.
Next, click on Get Started.
Enter the Microsoft account that is associated with this PC.
Locate the Canary Channel and click on the Continue button.
Step 1: Press WIN + R to open the RUN window.
Step 2: Type CMD in the text box and then press Ctrl + Shift + Enter.
Step 3: The command prompt window will now open in Admin mode.
Step 4: Type the following command in the command prompt window:
Cd C:\Path
Step 5: The ViveTool should be downloaded and extracted in the C:\ drive.
Step 6: Now type the following command:
cd C:\ViveTool
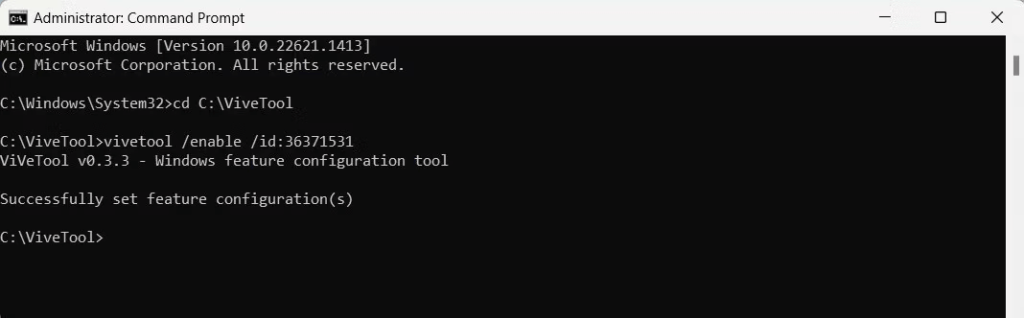
Step 7: Next, type this command:
vivetool /enable /id:36371531
Step 8: You will get a message “Successfully set feature configuration(s)”. Reboot your PC.
Step 9: Press Win + I to open the Settings App.
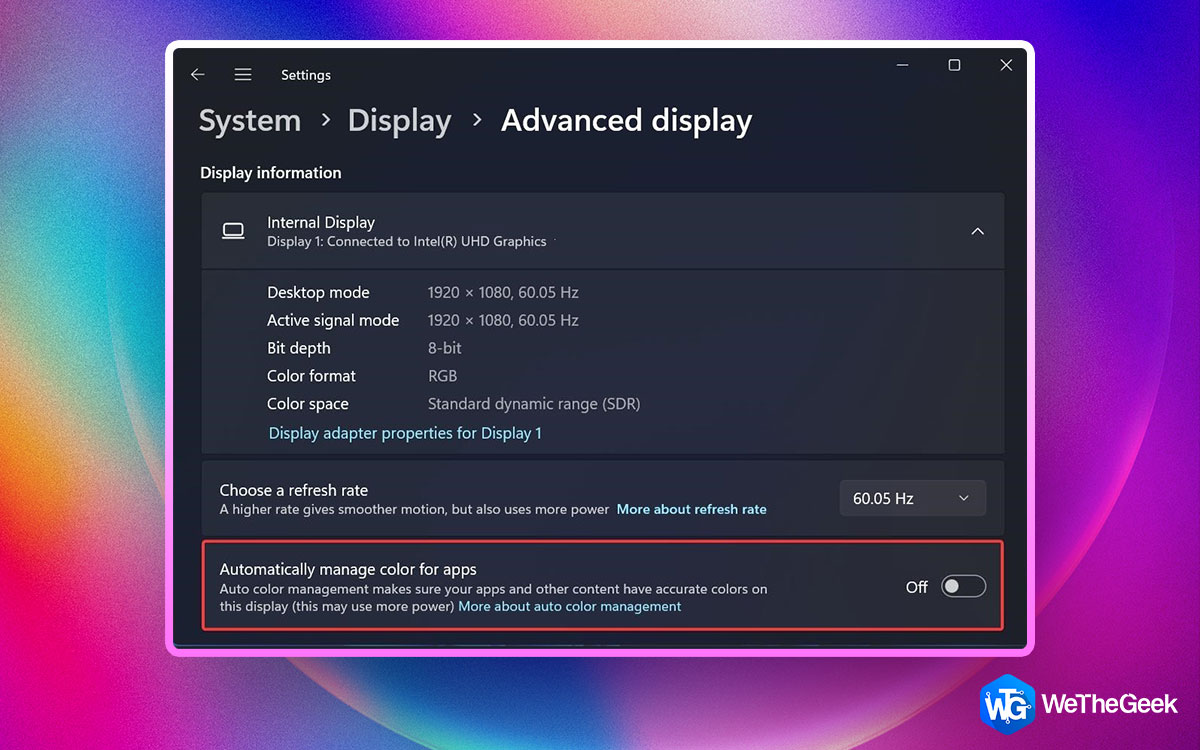
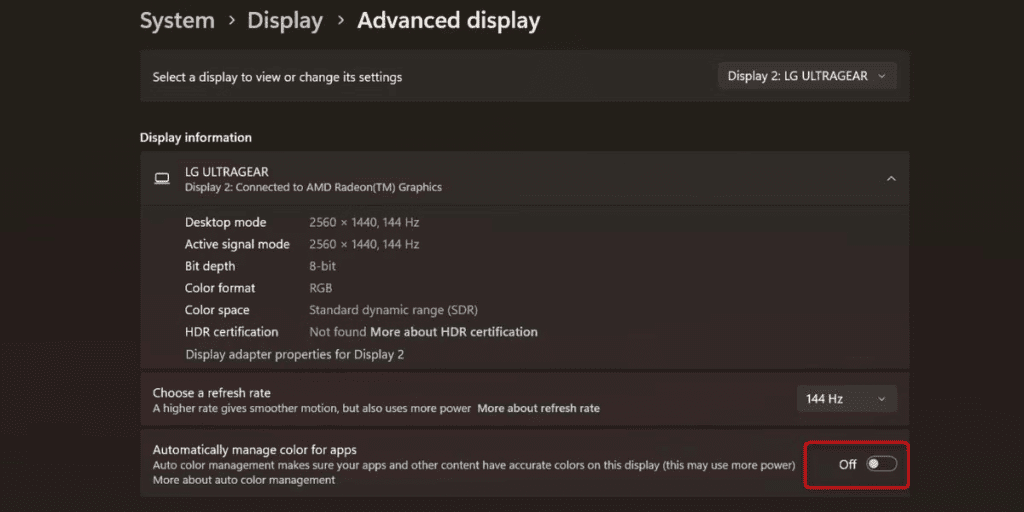
Step 10: Click on System in the left hand panel and then on Display in the right side panel.
Step 11: Scroll down and locate Related Settings and then click on Advanced Display.
Step 12: Toggle On the button Automatically manage color for apps.
Also Read: Microsoft Introduces A New Windows 11 Volume Mixer
The Final World On How To Enable Auto Color Management For Apps In Windows 11
You will get a new option called the Auto Color Management feature in your Windows settings with the release of Windows Insider build 25309. It can be used for a variety of tasks, including graphic design and photo editing.
Please let us know in the comments below if you have any questions or recommendations. We would be delighted to provide you with a resolution. We frequently publish advice, tricks, and solutions to common tech-related problems. You can also find us on Facebook, Twitter, YouTube, Instagram, Flipboard, and Pinterest.