
Windows has always provided users with a security app. Windows 10 also comes with Windows Defender Antivirus, which protects your PC from viruses, malware, and other infections. Well, it is a trusted application which works well in protecting your system. However, it might label a trusted file or folder malicious.
If you don’t want Windows Defender Antivirus to point out your trusted files and folders, the software provides you with an option to create an exclusion list which can contain different files and processes that you don’t want to be scanned.
In this post, we will help you with the steps to create an exclusion list on Windows Defender.
Exclude Files From Being Scanned by Windows Defender:
To exclude files, folders, and processes from Windows Defender scans, follow these steps:
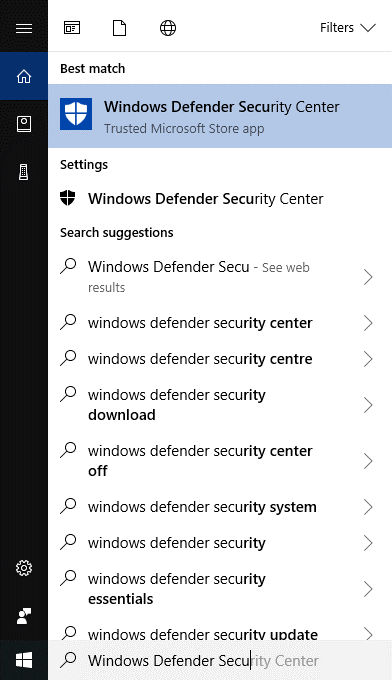
1. Type Windows Defender Security Centre in search bar and press enter to launch Windows Defender Security Centre.
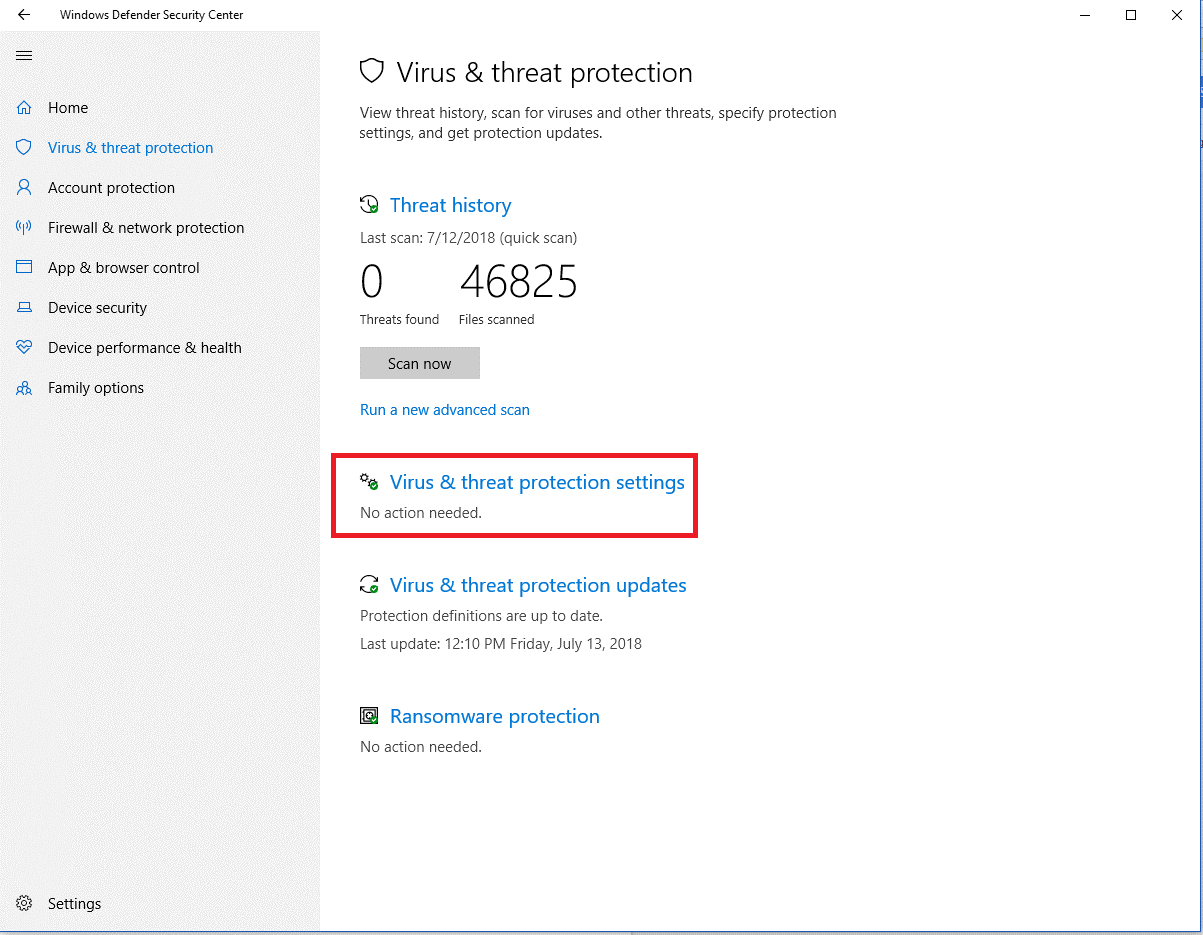
 2. Click on Virus & threat protection.

3. Select Virus & threat protection settings.
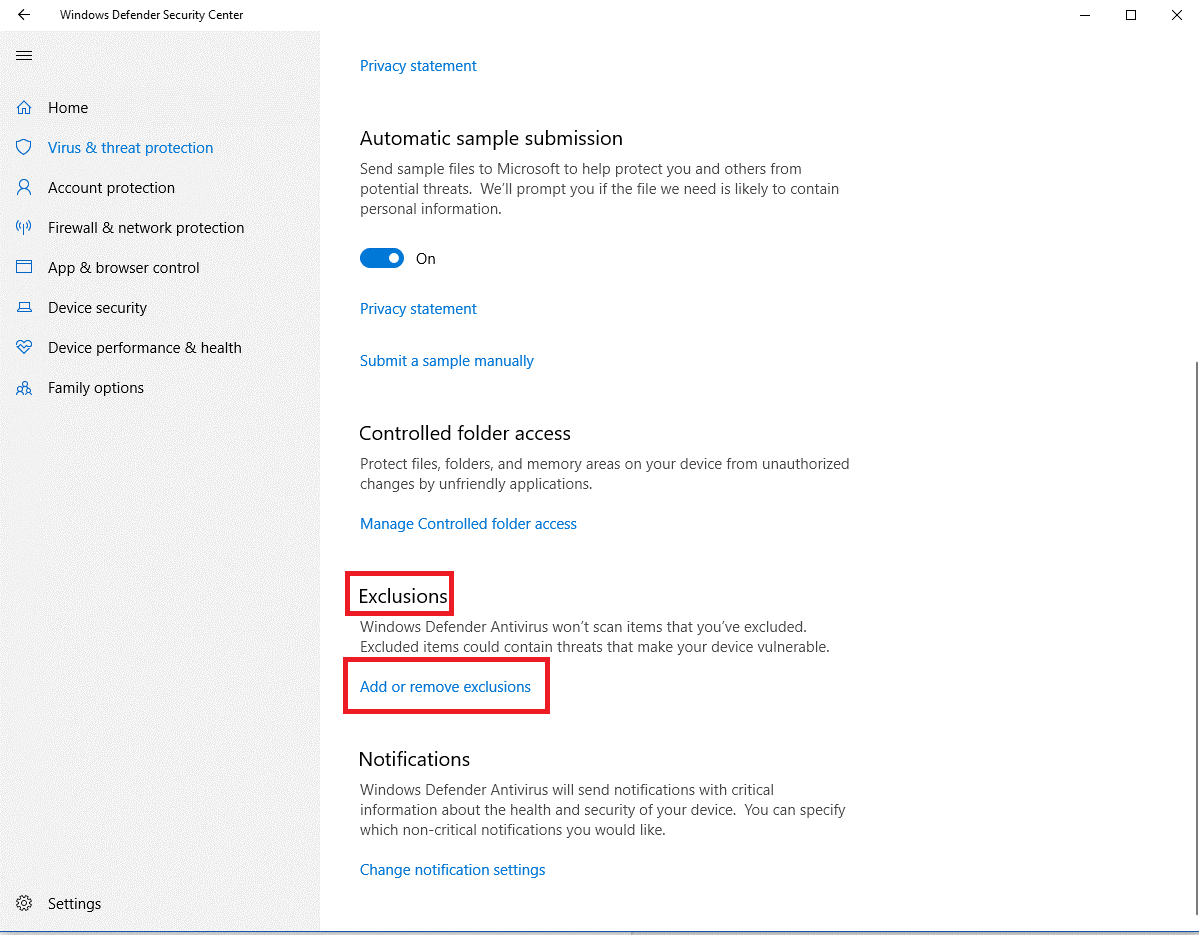
 4. Under these settings, locate “Exclusions,” click Add or remove exclusions link.
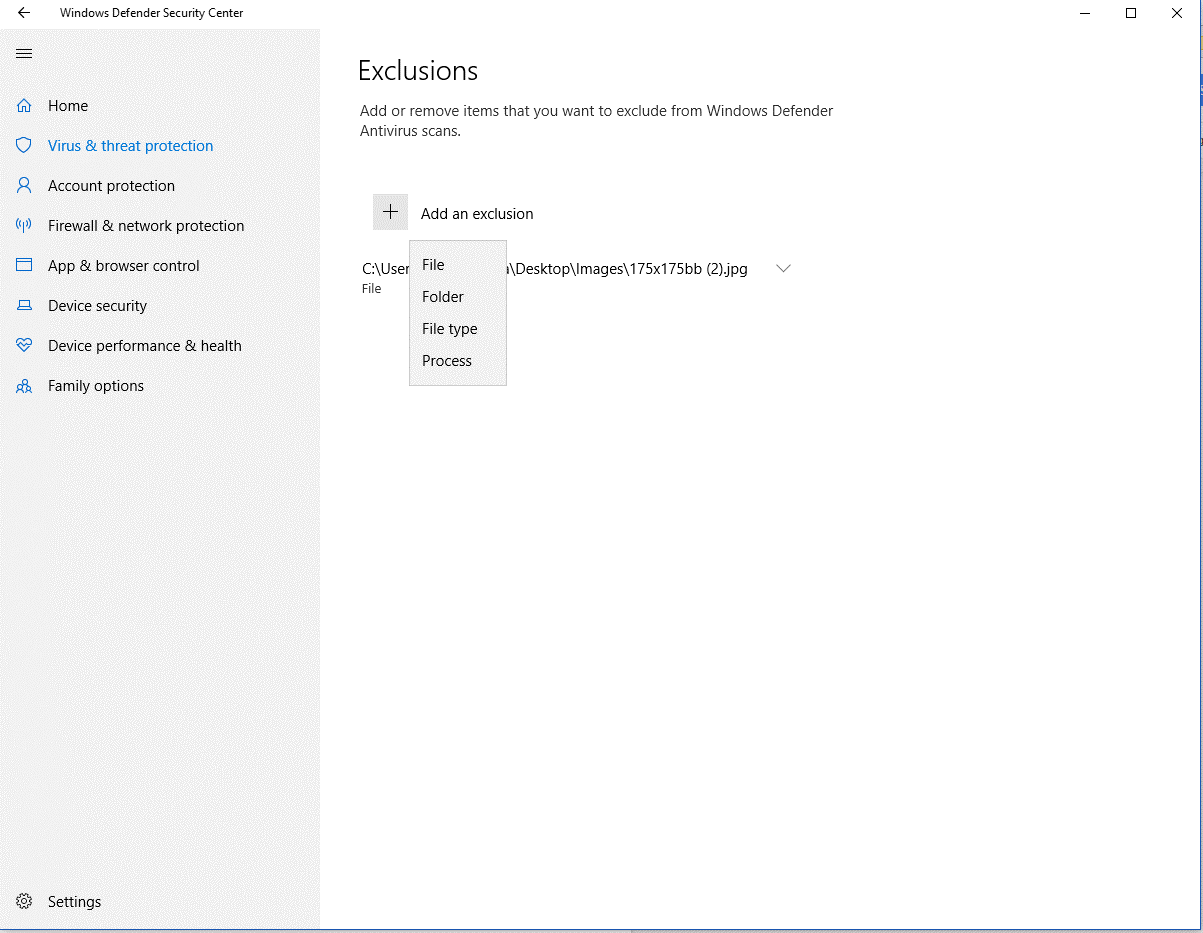
 5. Click + button beside Add an exclusion. Once you click on it, you will get a drop-down menu to select the file, folder, file type, or process.

- File: Exclude specific file
- Folder: Exclude specific folder and its subfolders
- File Type: Exclude a file extension irrespective of the location of the file.
- Process: Prevent any background process from being scanned.
 Select the file, folder or other to exclude and follow the instructions to complete the process.
 Select the file, folder or other to exclude and follow the instructions to complete the process.
Note: For a file, select the file that you want to exclude. If you have selected folder, then you can choose folder and its content to be excluded. For file type, select extension of files that you want to exclude. If you want to add process for exclusion, choose Exclusion and add process name in the following window and click Add.
In this way, you can add file, folder or process to the exclusion list. You can repeat the process to add more items to exclusion. If you have ever wanted to remove an item from the list, you can follow the instructions, skip step 5. Instead of that, check the exclusion list and click on an item which you want to remove and click Remove button.
