
The iCUE is a backend software developed by Corsair Hardware to manage the components and peripherals of your PC. This application can help customize the function of supported products like adjusting the RGB lighting and create various custom profiles to suit your mods and tasks on the computer.
For example, if you wish to play games, then the lighting for your Mouse, Tower case, Keyboard can be dynamic. Whereas if you wish to relax listening to music, then the lights would auto transform into a soothing effect. iCue Corsair also helps you to remap buttons and switches as well as create macros that can help running long and complex instructions with the click of a button. This guide has been designed to help fix Corsair iCue not working in Windows 10.
How To Resolve Corsair iCUE Not Working In Windows 10?
The first troubleshooting step to fix any problem is to Restart Your Computer and check if the issue has been resolved. If not, then the problem is a bit more complicated than it seems and would require you to carry out one of the following methods described below:
Method 1: Rebuild Config Files
The Corsair iCUE relies on Config files that are stored on your hard disk. If these files are accidentally deleted or corrupted, then this can hamper the functioning of this application. There is no real explanation as to why this happens but can be fixed by following the steps mentioned below:
Step 1: Exit the Corsair iCUE application and ensure it is not running in the background.
Step 2: Make a right-click on the space of your taskbar and click on the task manager from the context menu.
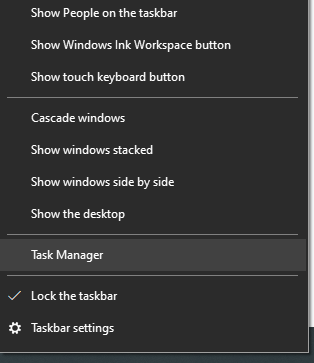
Step 3: Once the Task Manager window opens, locate the iCUE process under the Processes tab and make a right-click on it followed by selecting the End Task option.

Step 4: Once you are sure that the Corsair iCUE is no longer working on your computer, press Windows + R to invoke the RUN box.
Step 5: Type %appdata% in the search box and click on OK.

Step 6: A list of folders will open in the File Explorer window where you have to locate the Corsair folder. Cut this folder and paste it on your desktop as a precautionary backup.
Step 7: Restart Corsair iCUE application and it will start generating new Config files. This process will take time but will ensure that you have a new copy of Config files.
Step 8: Check if the Corsair iCUE not working in Windows 10 issue has been resolved.
Method 2: Update Windows
Windows Updates have been known to fix many issues and errors and hence it has been recommended by tech experts to keep your Windows OS updated at all times. Here are steps to initiate the Windows update process:
Step 1: Press Windows + I on your keyboard to open the Settings window.
Step 2: Select Updates & Security option and click on it.

Step 3: Now click on the Check For Updates button to initiate the process. Once the updates have been done, click on this button again to assure that no updates are remaining or skipped until you receive the message “You’re up to date”.
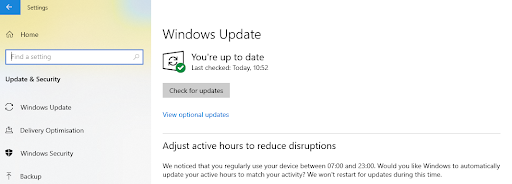
Note: This process will take some time as Windows OS will contact the Microsoft Servers to search, download and install drivers on your computers.
Method 3: Reinstall Corsair iCUE
If you are still facing issues after updating your windows and building new Config files, then you could try to uninstall and reinstall this application. Here are the steps:
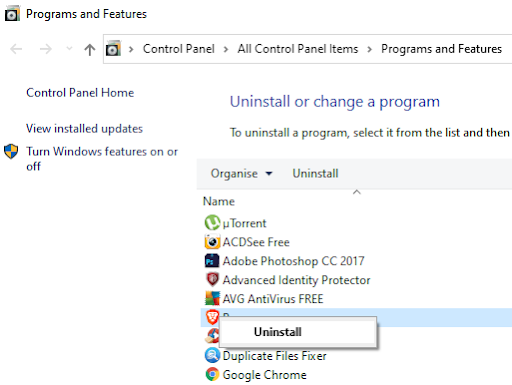
Step 1: Press Windows + R to make the RUN box appear and type ‘appwiz.cpl’ in the text box.

Step 2: A list of all the software installed in your system will appear on your screen. Locate Corsair iCUE and make a right-click on it followed by selecting Uninstall.
Step 3: Wait until the Uninstall process completes and restart the PC.
Step 4: Now open any browser and navigate to the iCUE download page to download the latest and stable version of Corsair iCUE.

Step 5: Download and Install Corsair iCUE and check if the issue has been resolved.
Method 4: Update Drivers
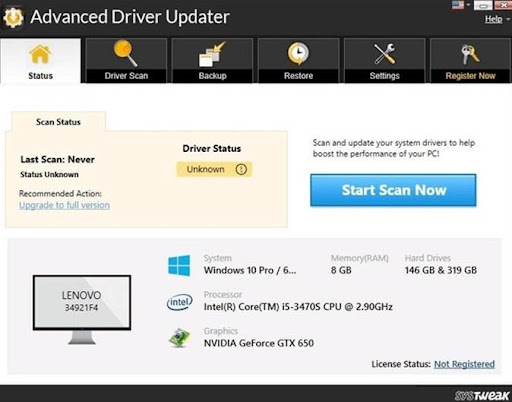
Reinstalling Corsair iCUE generally fixes the issue for many as per the gaming forums. However, if the issue persists, you need to update the drivers of all the devices that are compatible with Corsair iCUE. A manual update of all drivers would be time and effort-consuming with no 100% assurity that you find legitimate and compatible drivers for all your hardware. Hence, it is recommended to use driver update software like Advanced Driver Updater to sort all your driver issues.
Step 1: Download and Install Advanced Driver Updater on your PC using the button provided below:

Step 2: Once the installation process is completed, use the shortcut created on your desktop to open the app.
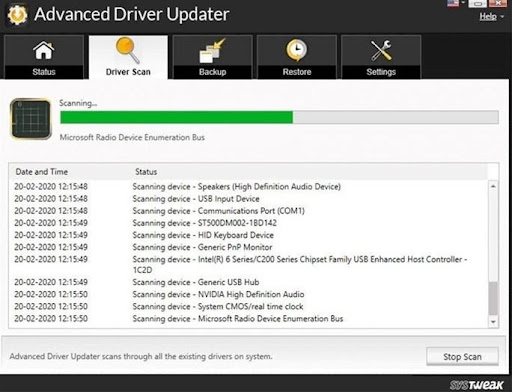
Step 3: Click on the Start Scan Now button to begin the scan.
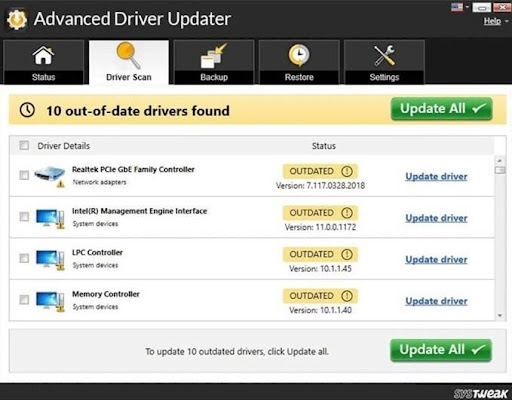
Step 4: A list of driver issues/errors found on your system will be visible on your screen.
Step 5: Locate the devices compatible with Corsair iCUE and click on the Update Driver link next to them.
Step 6: Once the drivers have been updated, restart your PC for changes to take effect.
The Final Word On Corsair iCUE Not Working on Windows 10.
The Corsair iCUE is an amazing application to manage the aesthetics of your PC and Peripherals. With it, you can enjoy your PC more than ever and use this program to remap your keys for comfort. The above method will help you fix the Corsair iCUE not working in Windows 10 issue in no time. The Advanced Driver Updater can fix all your driver anomalies and ensure that you do not face any issues caused by outdated and missing drivers. Follow us on social media – Facebook, Instagram and YouTube.