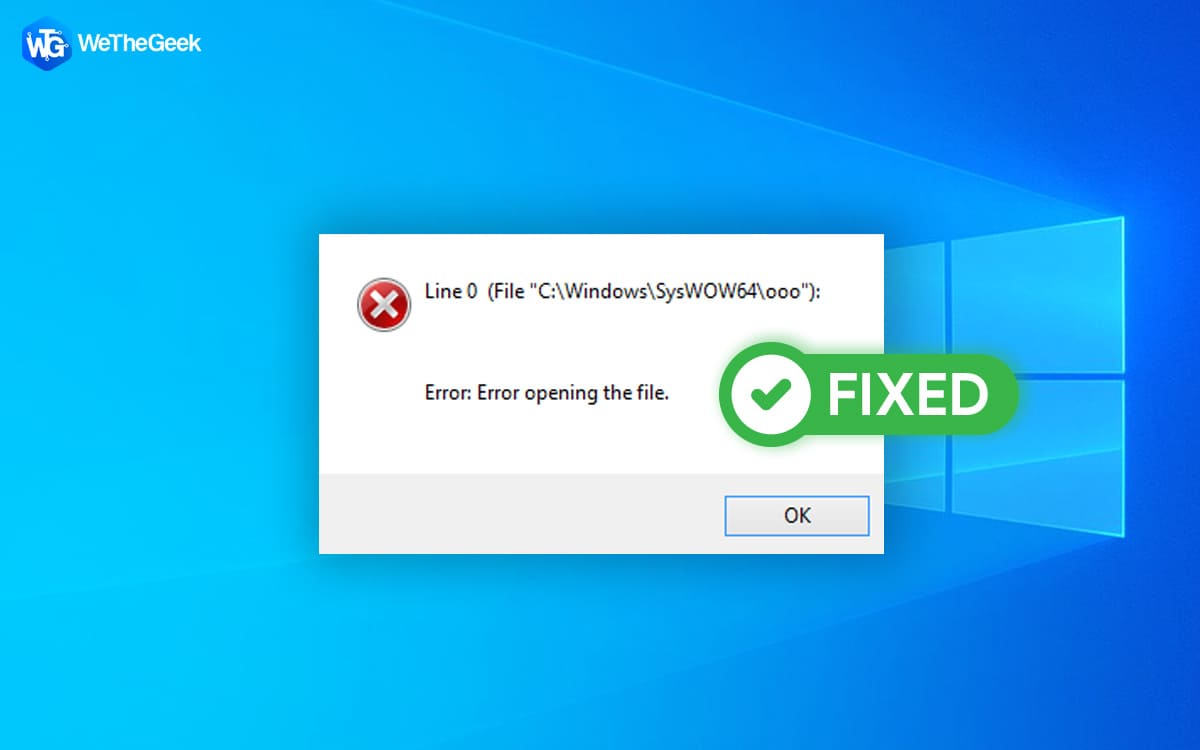
The AutoIt Error could appear when your system starts up. When you shut the window, the error generally disappears, but sometimes, it does not go away that easily and will irritate you. This error arises due to numerous reasons, and the probable reason is malware infection.
Additional causes include conflicts with third-party apps and autorun tasks planned by applications no longer in use. Fortunately, by disabling the problematic services and running a virus check, you can resolve the AutoIt Error Line 0.
Also Read: Autorun.inf File Corrupt or Missing? Here’s the Fix!
How To Fix The AutoIt Error Line 0 Startup Error On Windows
Method 1: Uninstall The AutoIt App
Getting rid of the AutoIt application from your computer is a simple solution to solve this error. Check the installed apps section of the Control Panel to see if there are any remnants of the software. To remove AutoIt:
Step 1: Open Run by pressing Win + R.
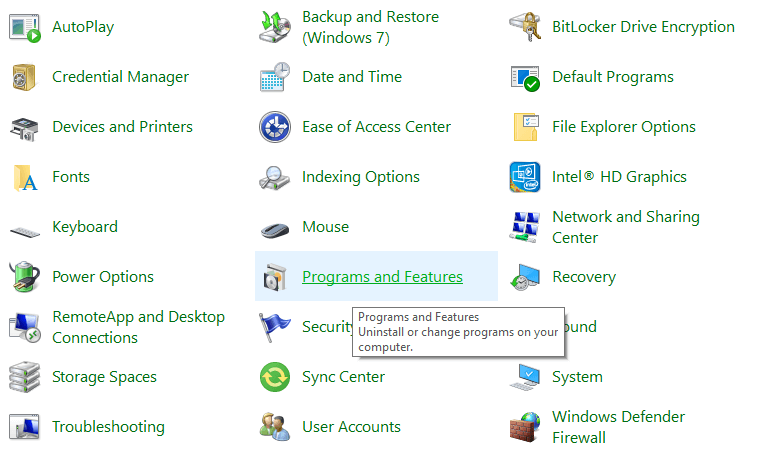
Step 2: To launch Control Panel, enter control and press OK.
Step 3: Then select Programs and Features from the menu.
Step 4: The AutoIt app can be found by searching. If it’s there, choose the program and choose Uninstall.
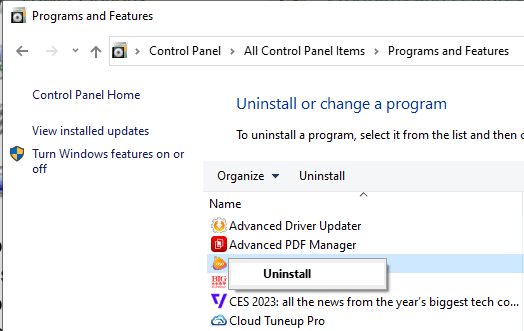
Step 5: To proceed with the program removal, click Yes to approve the action and then adhere to any on-screen directions.
Step 6: Reboot the machine after completing all the instructions and check if the error has been fixed.
Also Read: Prevent Malware Infections With Windows Malicious Software Removal Tool
Method 2: Scan Your PC For Malware
A malware-infected file that activates autorun and tries to change various Windows services is a common source of the AutoIt error. To be safe, run a thorough malware check on your computer to look for any adware or other malicious files. If you use antivirus software from a third party, make sure the virus definition is current. If not, do a complete scan using Windows Security to find any harmful files.
To carry out a thorough scan using Windows Security:
Step 1: For Settings to open, press Win + I.
Step 2: In the left pane, select the Privacy & security tab.
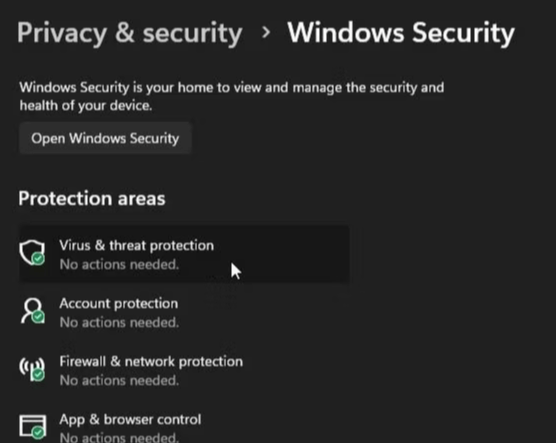
Step 3: Next click Virus & threat protection to launch Windows Security.
Step 4: Choose Scan options.
Step 5: Choose Full scan and then click on Scan now.
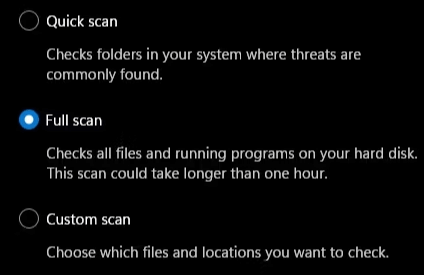
This can take longer than an hour to complete depending on the size of your files. Take the advised action if a threat is discovered.
T9 Antivirus is one of the most recent antivirus apps that offers real-time protection for your PC. The most widely used antivirus solutions available today lack this peculiar function. T9 Antivirus continuously scans your computer for malware and finds it as soon as it infiltrates using upgraded protective shields. Here are some of its characteristics:
- Security from malware and exploits.
- Security in real-time.
- Turn Off needless startup applications.
- Set the ad blocker to on.
Also Read: T9 Antivirus: Is It A Good Antivirus? (Full Review)
Method 3: Run The SFC & DISM Tools
The tools System File Checking (SFC) and Deployment Image Service and Management (DISM) can be used to repair the computer if the problem continues. A system repair should work if a malware infestation has harmed your Windows image or other system files..
Run each of the following instructions sequentially in an elevated Command Prompt to fix a faulty Windows installation:
Step 1: Press Win + R to open the RUN box.
Step 2: Type CMD in the text space and then press Ctrl + Shift + Enter on your keyboard to open the Command Prompt in an elevated mode.
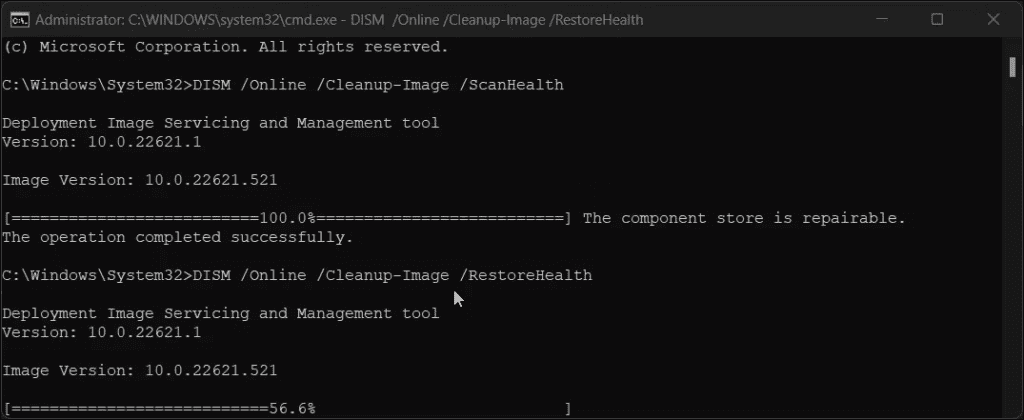
Step 3: Type the following command to run the SFC scan first followed by the Enter key.
sfc /scannow
Step 4: Next, type the following DISM command to fix issues with your PC and hit the Enter Key.
DISM /online /cleanup-image /RestoreHealth
Step 5: Reboot your PC and check if the issue persists.
Also Read: 5 Ways to Resolve the Dism.exe 1392 Error on Windows 10
The Final Word
The AutoIt issue is frequently caused by malware that has infected your computer and introduced an autorun service. By running a complete system scan, you can resolve the issue. If the problem continues, manually locate and uninstall the autorun service using Windows Autoruns.
Please let us know in the comments below if you have any questions or recommendations. We would be delighted to provide you with a resolution. We frequently publish advice, tricks, and solutions to common tech-related problems. You can also find us on Facebook, Twitter, YouTube, Instagram, Flipboard, and Pinterest.