
SUMMARY: PuTTY is an open-source SSH and Telnet client, initially designed and developed for Windows Operating System; it enables users to connect to a computer remotely and securely transfer data. Keep reading to learn about the installation & its how-to-use process!
But What Is PuTTY?
PuTTY is a serial console, terminal emulator, and network file transfer application that is an entirely free and open-source Telnet & SSH client. PuTTY was initially designed for Windows users, but since then, it has been adopted by various other Operating Systems. Certified ports are provided for specific Unix-like systems, including task ports onto Classic macOS and unofficial ports to Symbian and Windows phones. It has a graphical user interface that makes connecting and configuring available servers a hassle-free task.
Unlike, PuTTY for Windows, it doesn’t have support for copy-paste functionalities. Thus performing some activities (such as passwords) can be difficult.
What does the acronym PuTTY stand for?
The phrase “PuTTY” has no meaning, while the term “TTY” is commonly attributed to Unix terminals as an abbreviation for “TeleType.”
Purpose of PuTTY: If you wish to connect to a Unix and another multi-user system from a PC, PuTTY will come in handy.
Must-Read:
How to Get and install PuTTY on Mac?
One may need to use Homebrew (a package manager for Macs that makes installing multiple kinds of software like Git, Ruby, and Node a simpler process) to install PuTTY; this does not include the GUI element of PuTTY.
To download PuTTY for Mac, here’s what you need to do:
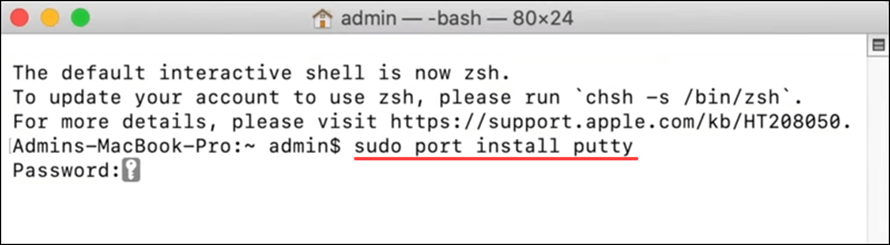
STEP 1 = Launch a terminal (Finder > Go > Utilities > Terminal) and type:
sudo port install putty
STEP 2 = Enter a password and confirm by pressing Enter.
STEP 3 = When prompted, if you wish to proceed with the installation, type y, and press Enter.
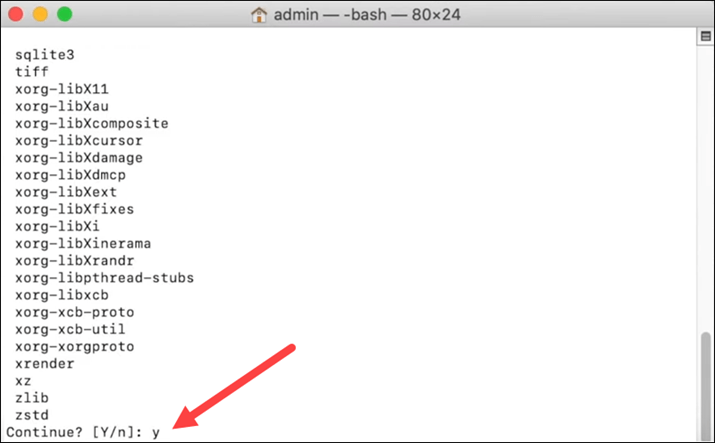
STEP 4 = Allow the installation process to complete. When it’s done, make a PuTTY shortcut by running the command line:
cp /opt/local/bin/putty ~/Desktop/PuTTY
You may run PuTTY in two ways after installing it:
- In the terminal, type putty as a query and hit Enter.
- Drag the Desktop shortcuts icon twice.
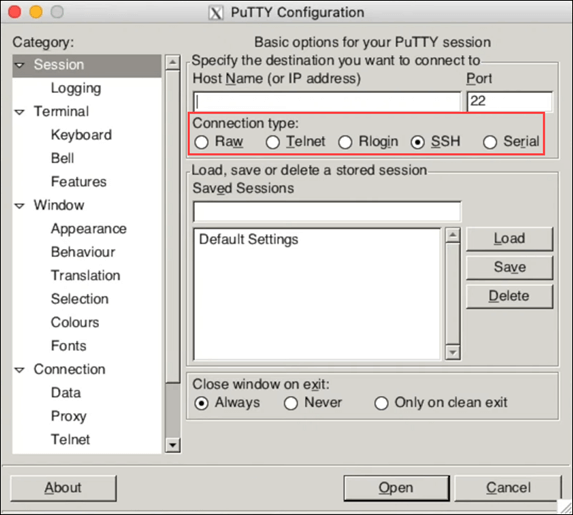
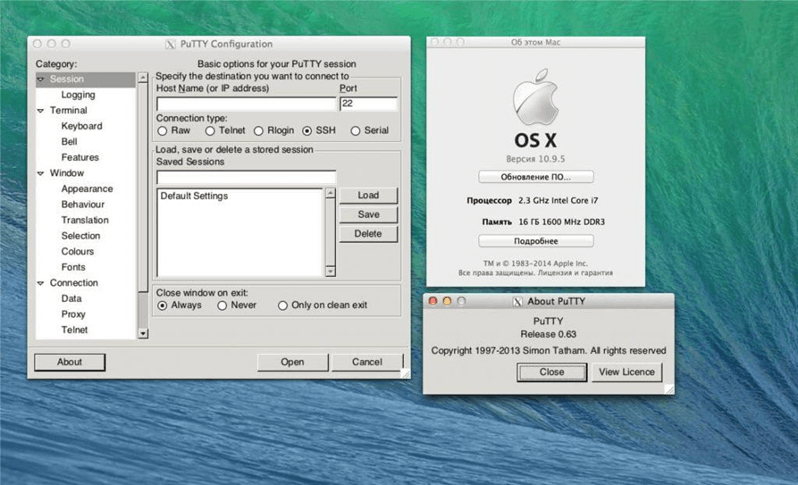
A configuration box appears, allowing you to select the network connection and other parameters for the PuTTY session. There might be a little lag between launching the message and the program. It is most likely associated with PuTTY’s need to begin the XQuartz backend; hence you should ignore it.
You can also use Automator to build an application that will run within the Applications folder. Once MacPorts is installed, just run the following command: Sudo port installation of putty and create a desktop shortcut,
cp /opt/local/bin/putty ~/Desktop/PuTTY
You might want to read: Interesting Ways To Decrypt Your Old DVD Collection On Mac
To access a remote server, type its IP address or Domain Name into the appropriate box.
- Telnet, SSH, and Rlogin are distinct protocols with different advantages. Still, you will use SSH as the default most of the time. PuTTY sets the port by the connection, and If the server is being used as a non-standard port, you can supersede it.
- When you finish the configuration, click the Open link to your preferred server.
- PuTTY’s most distinguishing feature is its Configuration interface. Its Stored Sessions feature essential if you are often connected to several sites. They can save all connection-specific setup things such as the connection type, server, terminal behavior, look, etc.
When you’ve made the configuration changes you want,
- Select a usual session from the Saved Sessions list, or enter a name for one in the text box.
- Click the Save button.
You can load a saved session by selecting it by clicking Load and the list.
Wrapping Up The Guide On How To Download PuTTY For Mac
PuTTY provides a great way to connect to computers remotely, access ports, and detect and resolve issues.
To be honest, installation and use of PuTTY in macOS is a little complex process, but following the aforementioned guide will make the procedure a bit simpler. PuTTY can customize the integrated terminal emulator and save your settings. It lets you quickly identify between various wireless links, which may help your productivity.
Must-Read: Steps To Customise Your Mac Terminal & Increase Productivity
To know more about PuTTY, leave a comment or reach out to us!
FAQs: Guide How To Install PuTTY On Mac
Q1. Is it possible to use PuTTY on a Mac?
PuTTY is an SSH and Telnet client first built for Windows before being converted to a one for macOS. The client lets users connect to a computer remotely and securely transfer data.
Q2. What is the Mac counterpart of PuTTY?
OpenSSH, mRemoteNG, MobaXterm, and KiTTY are excellent alternatives to Putty for Mac. Putty for Mac is primarily a Terminal Emulator, although one may use it with SSH Clients and Remote Desktop Tools.
Q3. Is PuTTY indeed required on my Mac?
A Mac version can be highly beneficial. Additionally, PuTTY lets you customize the integrated terminal emulator and store your settings as a part of a session. This allows you to quickly identify between various remote connections, which might also help productivity.
NEXT READ: