Dealing with flickering icons, small and unreadable text, and blurry screen can be irritating. Let’s fix Windows 11 display scaling issues.
Are the visuals on your Windows laptop’s or desktop’s screen distorted or blurry? Do you notice a difference in display quality between your monitors, where one has crisp graphics but the others don’t? Chances are you are dealing with scaling issues on your Windows 11 PC.
In this post, we will have a look at all the various ways in which you can troubleshoot scaling issues on High DPI Monitors. But, before we get into the fixes, let’s understand what high DPI monitors/screens are.
What Are High DPI Screens/ Displays?
DPI stands for Dots Per Inch. It means that the density of pixels on the display is high. If we consider the latest 4K screens, the pixel density can be incredibly high, causing the controls and icons to appear too small.
To bring things into perspective let’s say you have added multiple monitors so that you can enjoy gaming on one and work with productivity apps on the other and you run into display issues where app icons are small or visuals are blurry.
Why Are There Scaling Issues On My Windows 11 PC?
Let’s quickly have a look at some of the common reasons why scaling issues are occurring on your PC –
- You are using monitors with varying resolutions.
- The display configuration on one PC differs from the other.
- Your app or external monitor doesn’t support High DPI scaling.
- Outdated graphics drivers.
Best Ways To Fix Windows Scaling Issues On High DPI Displays
These are some of the tried and tested solutions for Windows 11 DPI fixing.
Solution – 1: Adjust DPI Scaling for Individual App
One of the first workarounds to fix scaling issues for individual apps is to adjust the DPI scaling for a particular app. The steps for the same are mentioned below –
- Locate the app whose DPI settings you want to change.
- Right-click on it and click on Open file location.
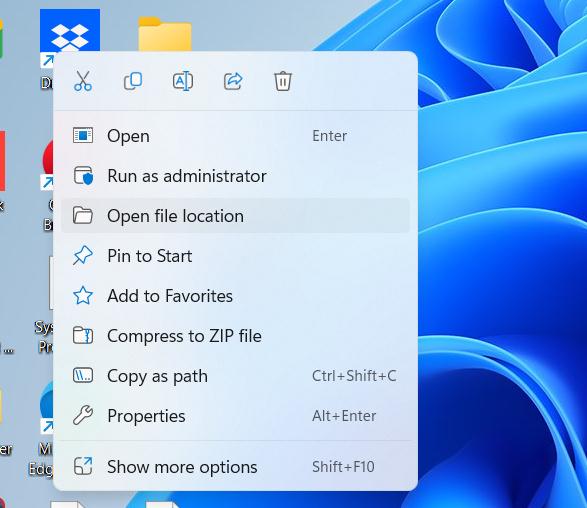
- Right-click on the app’s shortcut and click on Properties.
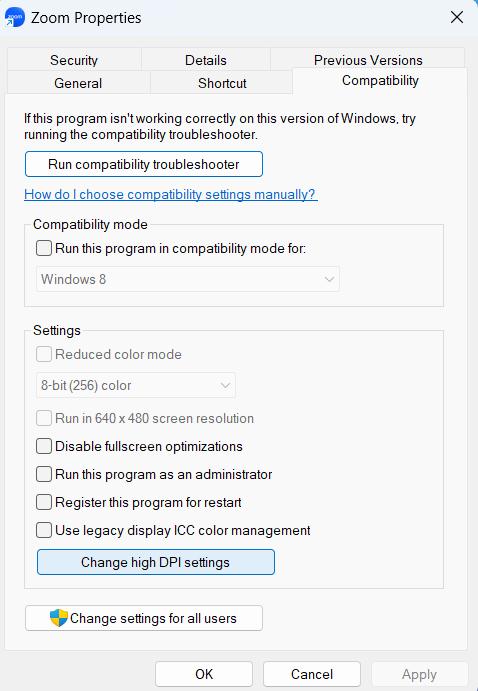
- Head to the Compatibility
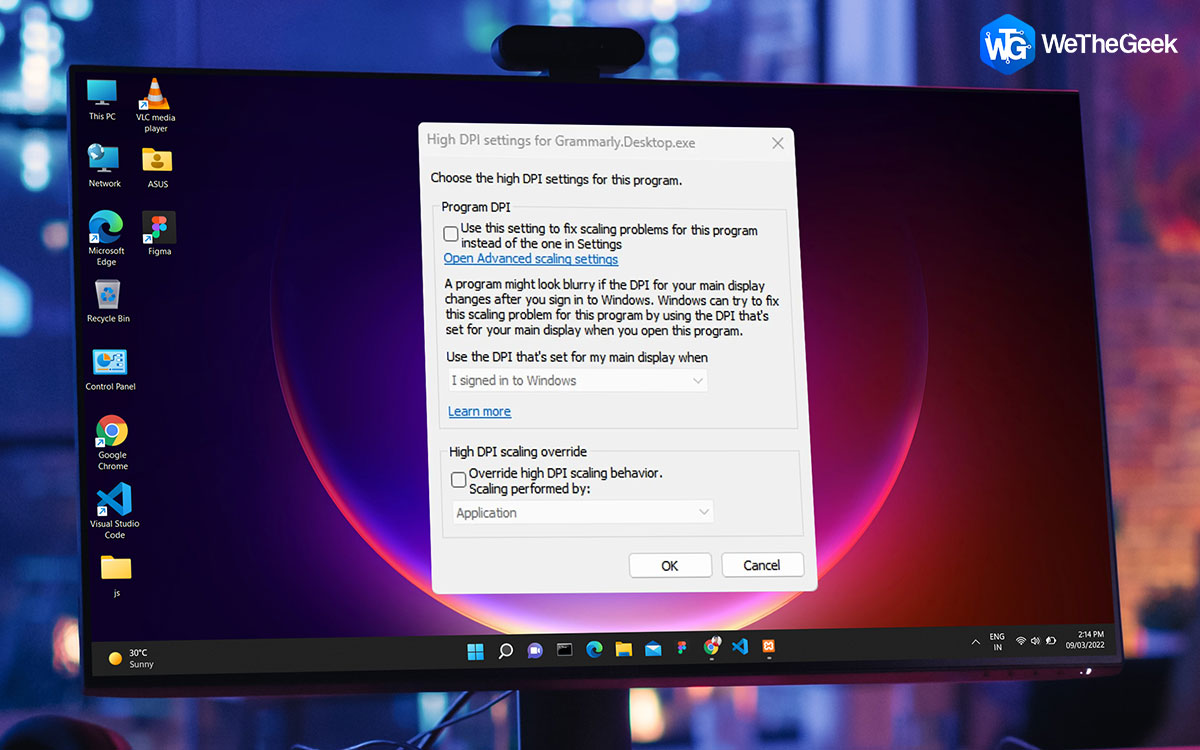
- Under Settings, click on Change high DPI settings.
- Click on the checkbox Override high DPI scaling behavior. Scaling performed by under High DPI scaling override.
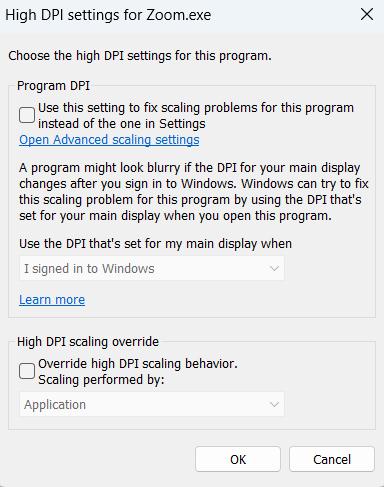
- Select System (Enhanced).
- Click on OK
Restart the app and see if the issue persists or not.
Solution – 2: Change Your Screen Resolution
As we’ve discussed above, in case you are using multiple monitors, there could be a mismatch in the resolution of one of the monitors. You can adjust the screen resolution and adjust the tone accordingly until the visuals are crisp and clear. Here are the steps –
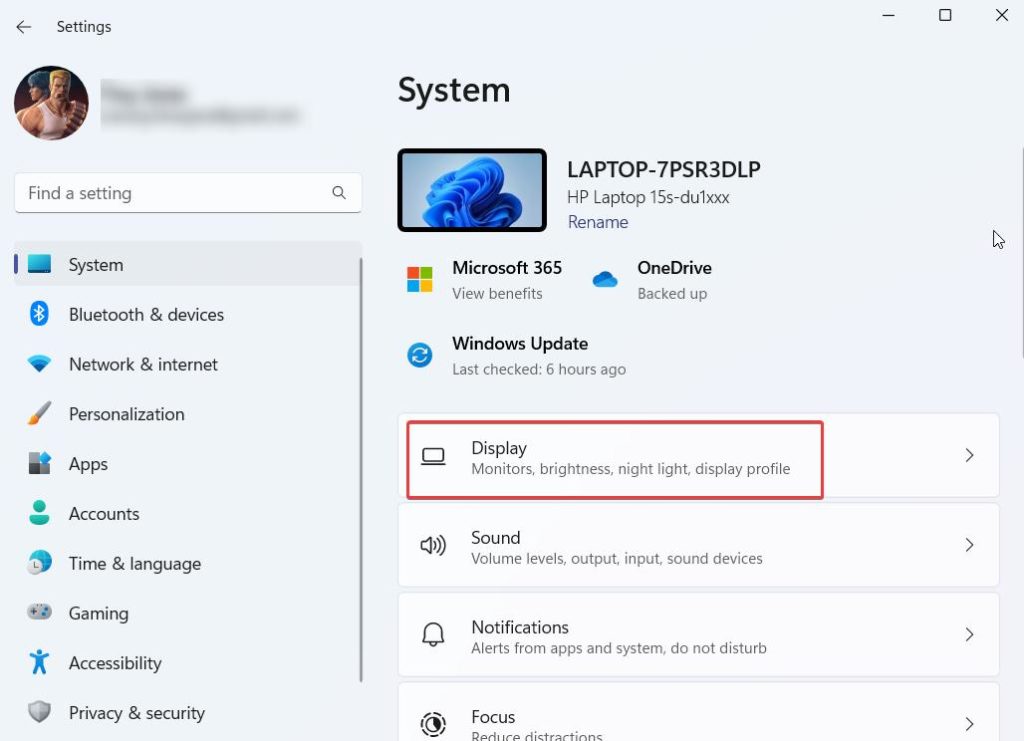
- Open Settings by pressing the Windows key + I.
- Click on System from the left-hand side of the screen.
- Click on Display from the right
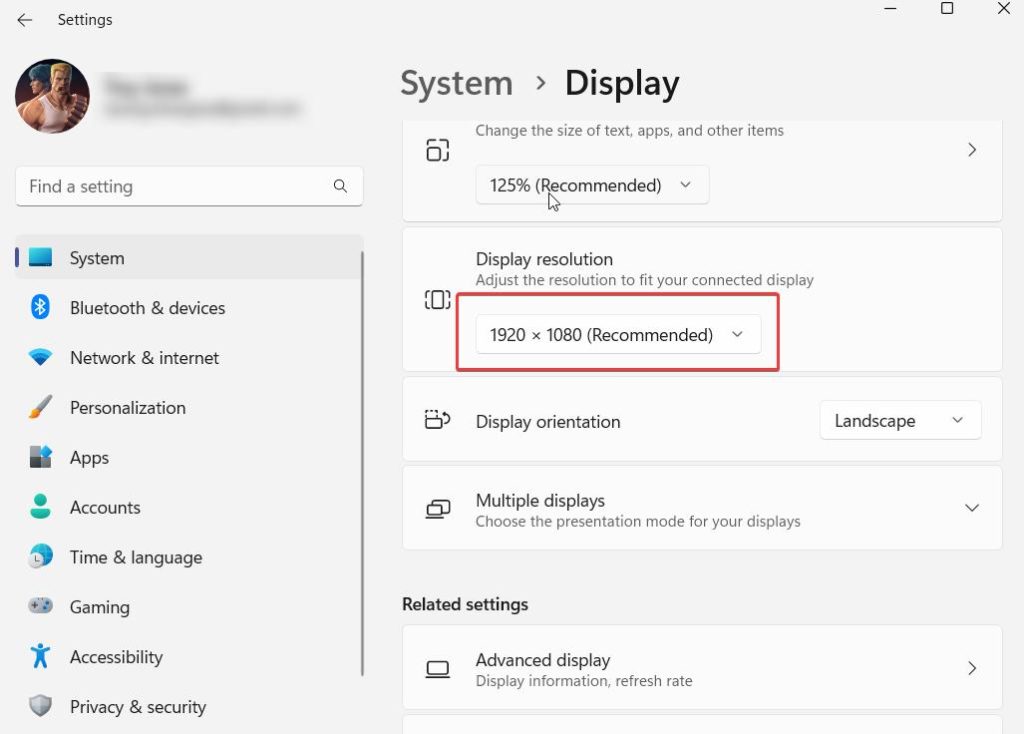
- Click on Display resolution. Click on the dropdown and select an apt resolution based on your monitor size.
Solution – 3: Using Settings To Adjust the Size of Text
If it’s just the textual content that’s causing the scaling issues, you can navigate to your Windows settings to increase or decrease the text size. To do that –
- Open Settings by pressing Windows + I key combination.
- From the left, click on Accessibility.
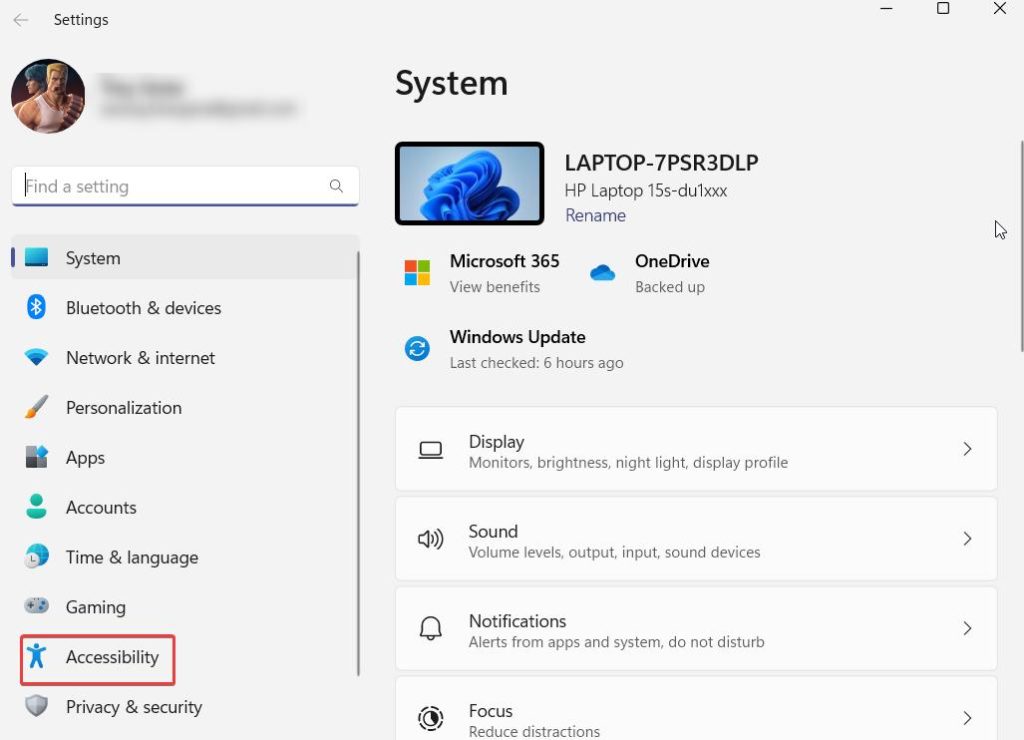
- From the right, click on Text size.

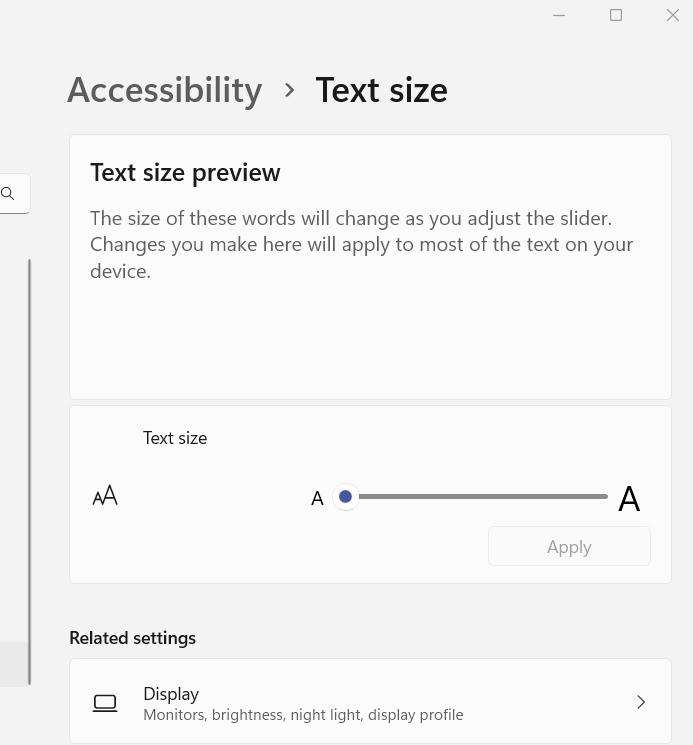
- Move the slider to change the size of the text.
Solution – 4: Update Graphics Drivers
Outdated graphics drivers are a doorway to a variety of bugs and issues. Here you can check if you are dealing with an outdated graphics driver. One way is to do that manually. An easier way is to use an automatic driver updater tool that will help you identify and update outdated drivers in a few clicks and replace the faulty ones with latest and most compatible versions without human assistance. One such tool is Advanced Driver Updater. To update graphics driver using this tool –
- Download, run, and install Advanced Driver Updater form the button down below.
- Click on Start Scan Now to scan for outdated drivers.
- Locate your graphics card driver and click on the checkbox that you can see to the left to it.

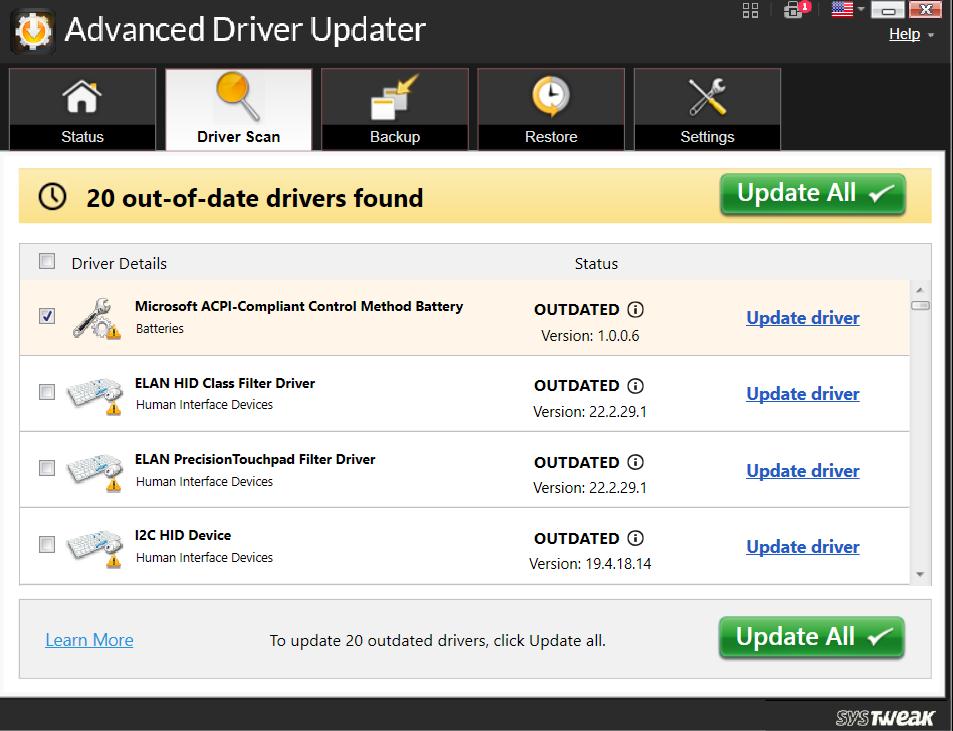
- Click on the Update driver button at the right.
- Alternatively, you can batch-update drivers by clicking on the checkbox on the left of Driver Details and selecting the drivers you want to update. Next, click on the Update All
What Else Does Advanced Driver Updater Offer?
- Schedule driver scans as and when you need
- Backup drivers before updating.
- Roll back the driver to a previous state if something goes wrong.
- Exclude drivers that you don’t want to scan or update.
To know more about this tool, check our honest review of Advanced Driver Updater where we have discussed all its aspects – pricing, pros and cons, how it works, etc
Solution – 5: Change System Display Settings
In case you are still stuck with the display issue on your Windows 11 PC, you can try tweaking your system’s display settings and see if that resolves the issue –
- Open Settings by right-clicking on the Windows icon and selecting Settings.
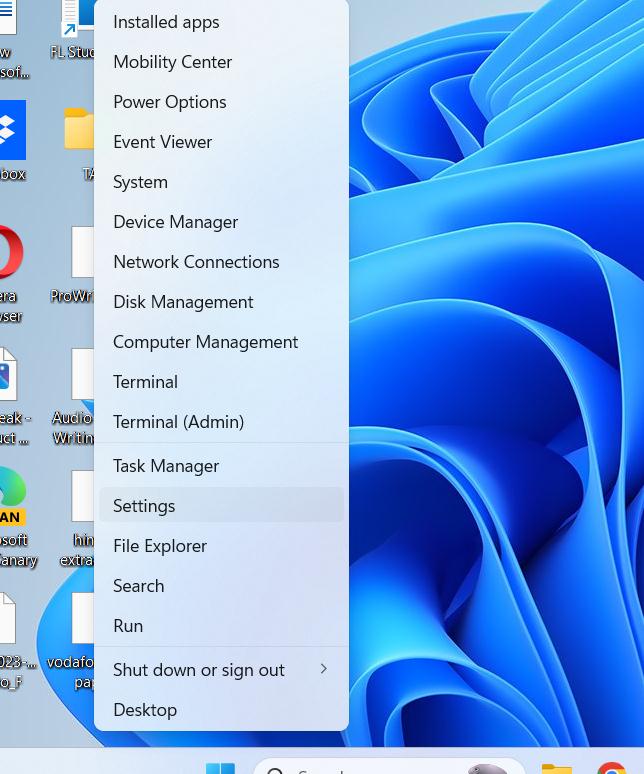
- Click on System from the left.
- On the right, click on Display.
- Click on Scale under Scale & layout.
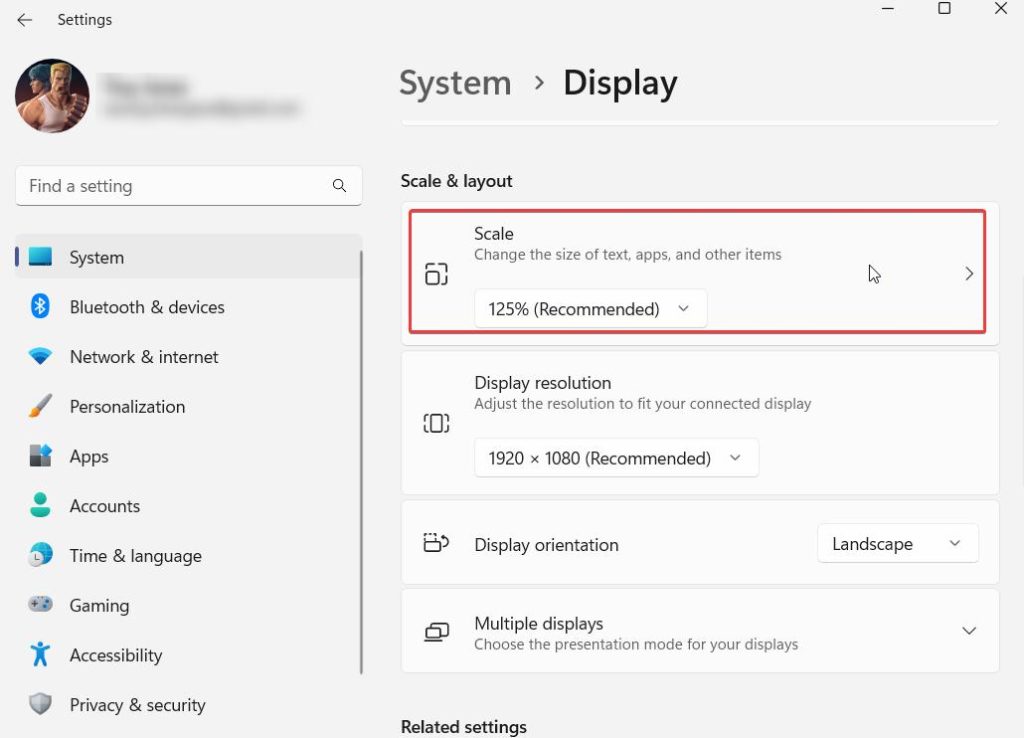
- Scale the value to 125% in the dropdown.
Solution – 6: Update Windows
Last but not least if you haven’t updated your Windows in a while maybe now is the time to do that. Windows Update brings a series of patches for resolving software vulnerabilities which could be the reason why you are facing display scaling issues on your Windows 11 PC. Here are the steps to update Windows –
- Open Settings using one of the ways mentioned above.
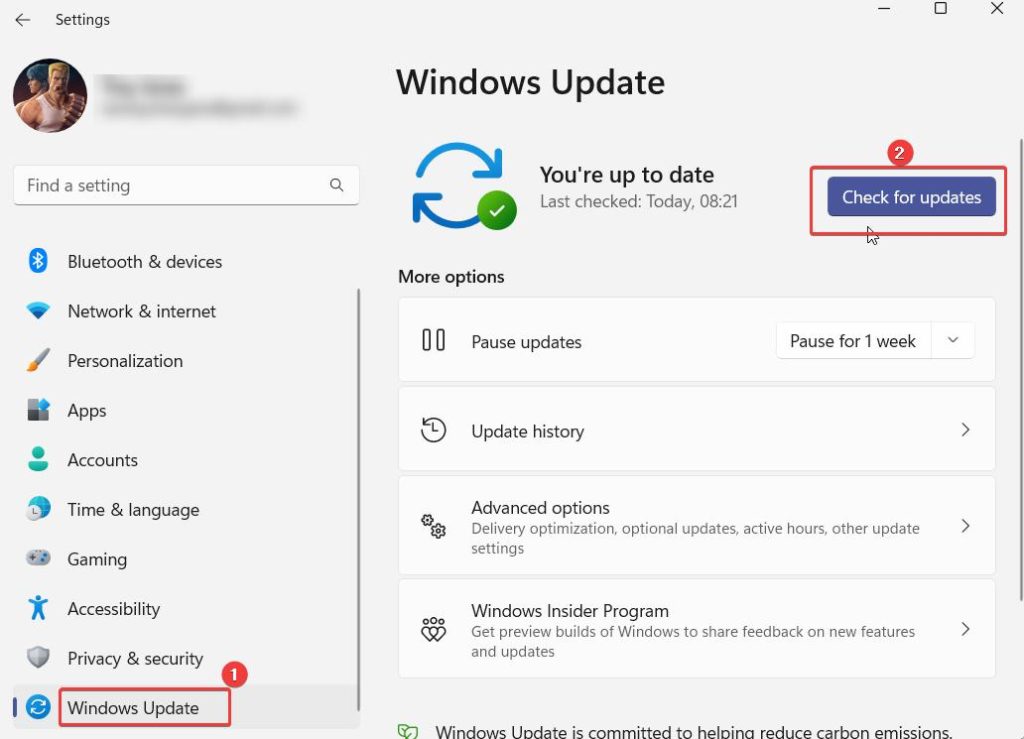
- From the left, scroll down and click on Windows Update.
- Click on Check for updates and fetch any pending updates.
Is Your Display Crystal Clear Now
Whether you are watching a movie, playing games, or working with apps on multiple monitors, a scrappy resolution can completely destroy your experience. We hope that we have been able to preserve your experience. If yes, let us know in the comments section, which of the above fixes helped you fix the issue. For more such content, keep reading WeTheGeek.