
Internet is the need of the hour and for that Wi-Fi is used by countless users across the globe. Talking of Wi-Fi, the errors related to it can surface in many forms. The “Wi-Fi certificate error” being one of them. When this error occurs, you may not be able to connect to the internet or a particular website on the internet.
In this post, we will look at some of the most effective ways you can deal with the “Wi-Fi certificate issue on Windows 11/10 –
How to Resolve Wi-Fi Certificate Error On Windows 11 / 10
1. Set Windows Time Service To Automatic
The role of Windows Time Service is that it maintains and syncs the date and time on a network. However, it can at times lead to the Wi-Fi certificate error on Windows 10 as well. One way to resolve the issue is to set this Windows time service to automatic.
1. In the Windows search bar, type Services and click on Open from the right-hand side
2. When the Services window opens locate Windows Time
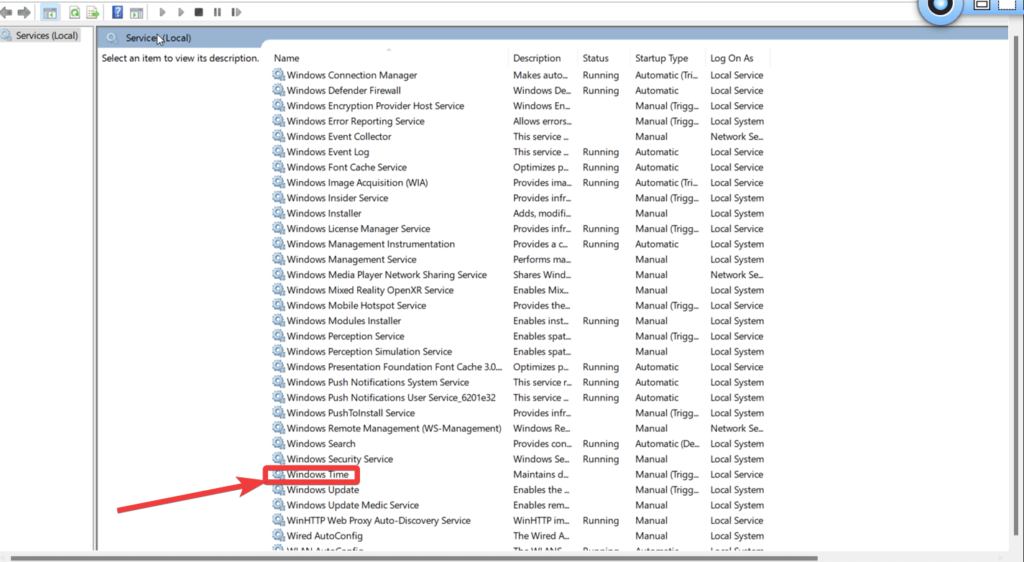
3. Right-click on it and then click on Restart
4. Now, first, check if the problem has been resolved and that the error is not surfacing. If it still persists, again right-click on Windows Time service and then open Properties
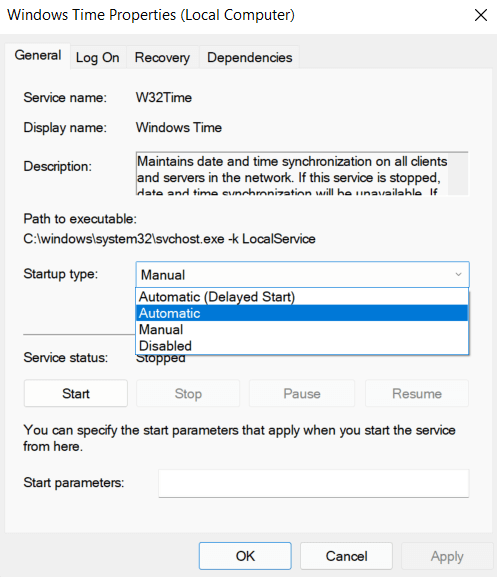
5. Click on the dropdown next to Startup type and then click on Automatic
6. Press OK
2. Check Time and Time Zone
The aforementioned issue with your Wi-Fi can occur if there is a mismatch between your system time and your region’s time. Although we did try to take the automatic route in the previous step, if still, the error persists, you may have to take the manual approach –
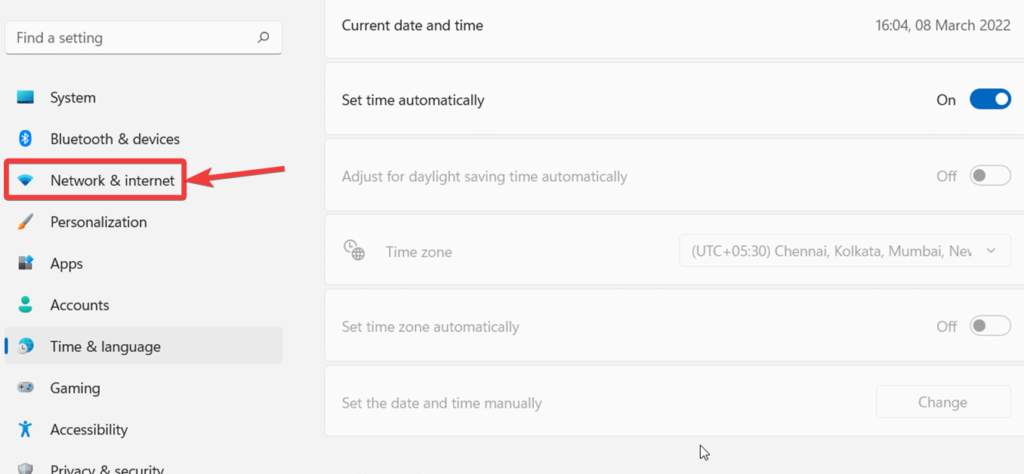
1. Open Settings by pressing the Windows + I key combination
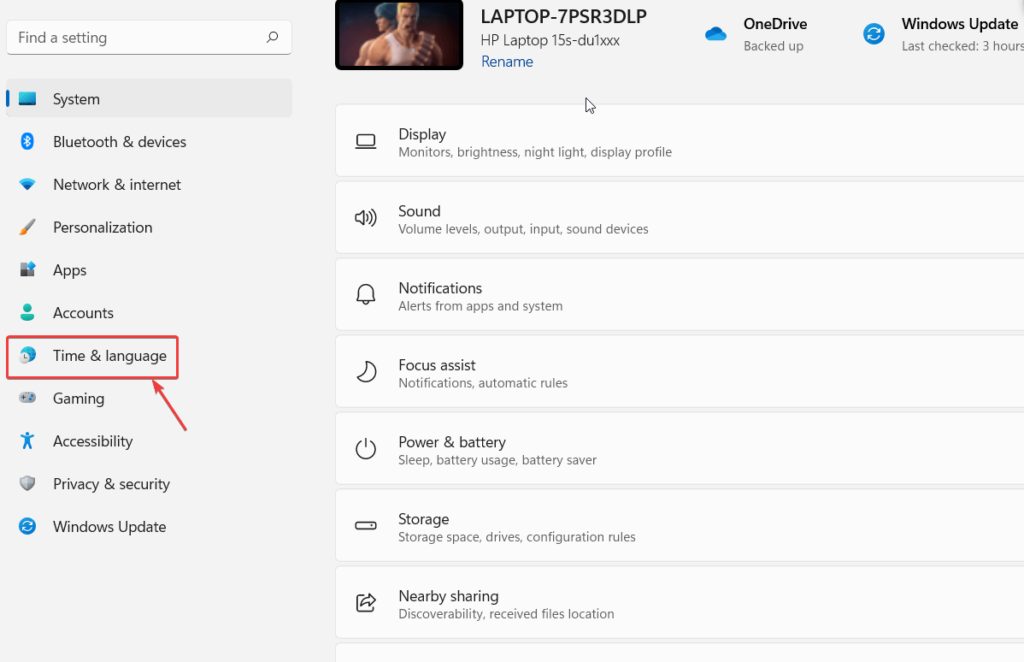
2. Click on Time & Language from the left-hand side
3. Click on Date & time, toggle off the Set time automatically switch
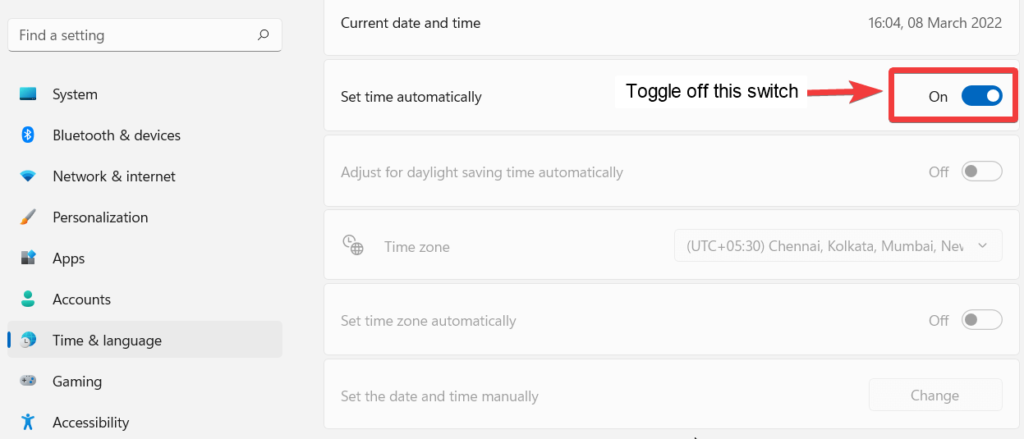
4. Set date & time manually
5. Restart your computer
Check if you are now able to connect to the Wi-Fi without any difficulties and especially without the “Wi-Fi certificate” error.
3. Update Your Network Drivers
The Wi-Fi certificate error can occur on your Windows 11/10 computer if you have outdated drivers. You can either update Windows drivers manually or you can take an easier and more effective route and that is to update drivers with the help of a driver updater tool. A tool like Advanced Driver Updater doesn’t just help you find and update outdated network drivers but it even gives you the option to backup drivers before updating them or even lets you schedule drivers at your desired time.
How To Update Drivers With The Help of Advanced Driver Updater?
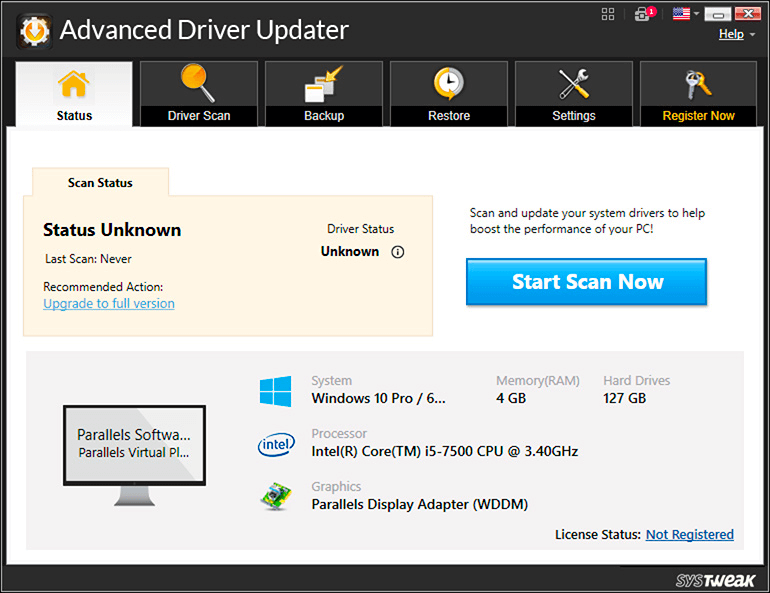
1. Download, run and install Advanced Driver Updater

2. Click on the Start Scan Now button
3. Locate outdated network driver and click on the checkbox next to it
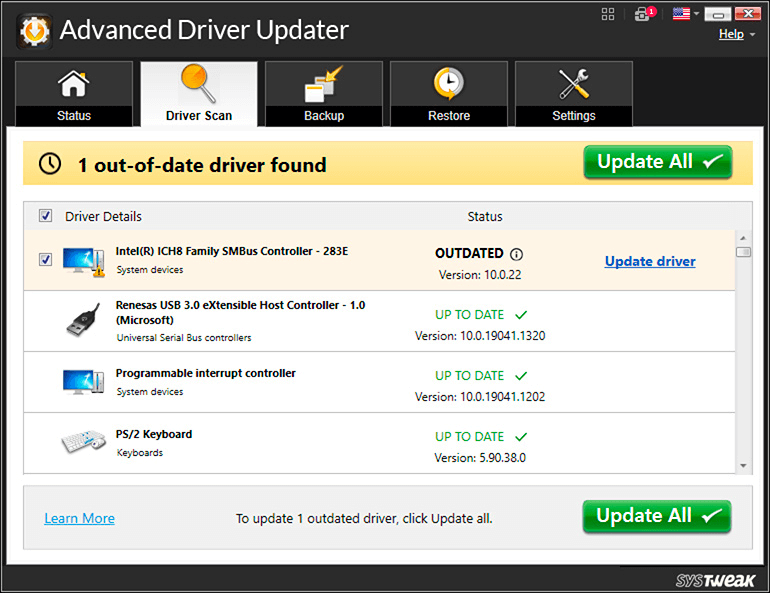
4. Click on the Update driver button
4. Reset Your Network Settings To Defaults
As has been reported by many users, resetting the Network Settings to default can help you fix the WiFi certificate issues on your Windows 11/10 computer. Here are the steps to do that –
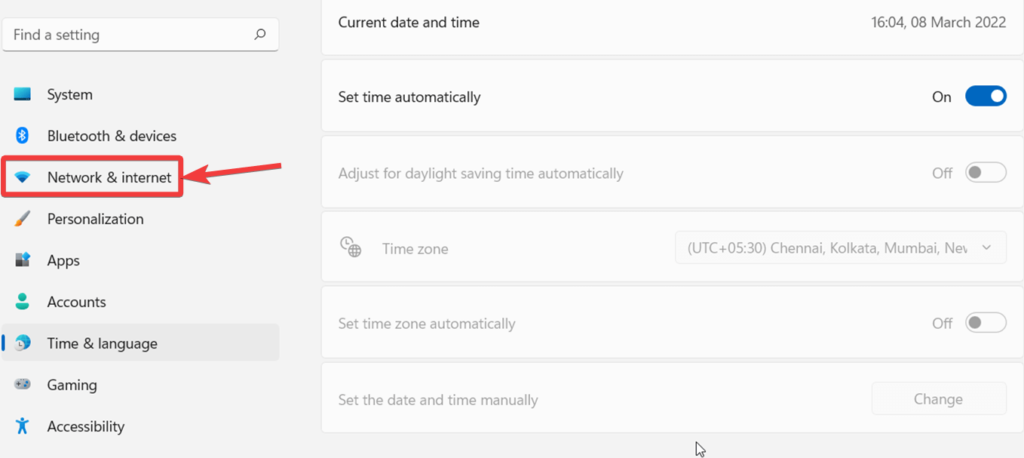
1. Open Settings by pressing the Windows + I key combination
2. From the left-hand side, click on Network & Internet
3. From the right-hand side, at the bottom, click on Advanced Network Settings
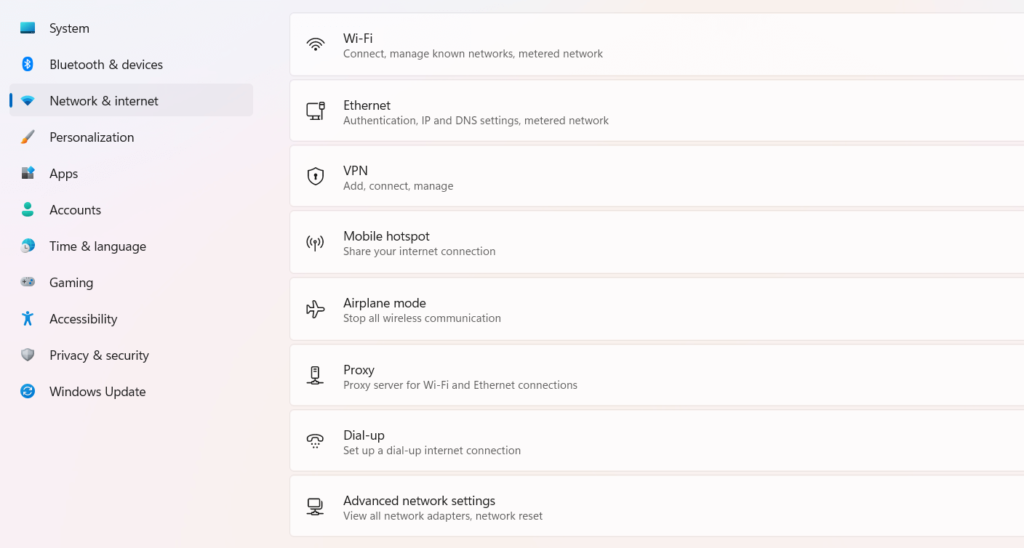
4. Under More Settings, Click on Network Reset
5. Click on Reset now
5. Enable Hyper-V
Some users have reportedly been getting the Wi-Fi certificate error after they updated Windows and have issues with servers. In case, the error at hand occurs because of issues with servers, you can try enabling the Hyper-V feature. Here are the steps to do that –
1. In the Windows search bar, type Windows Features, and under Turn Windows features on or off click on Open
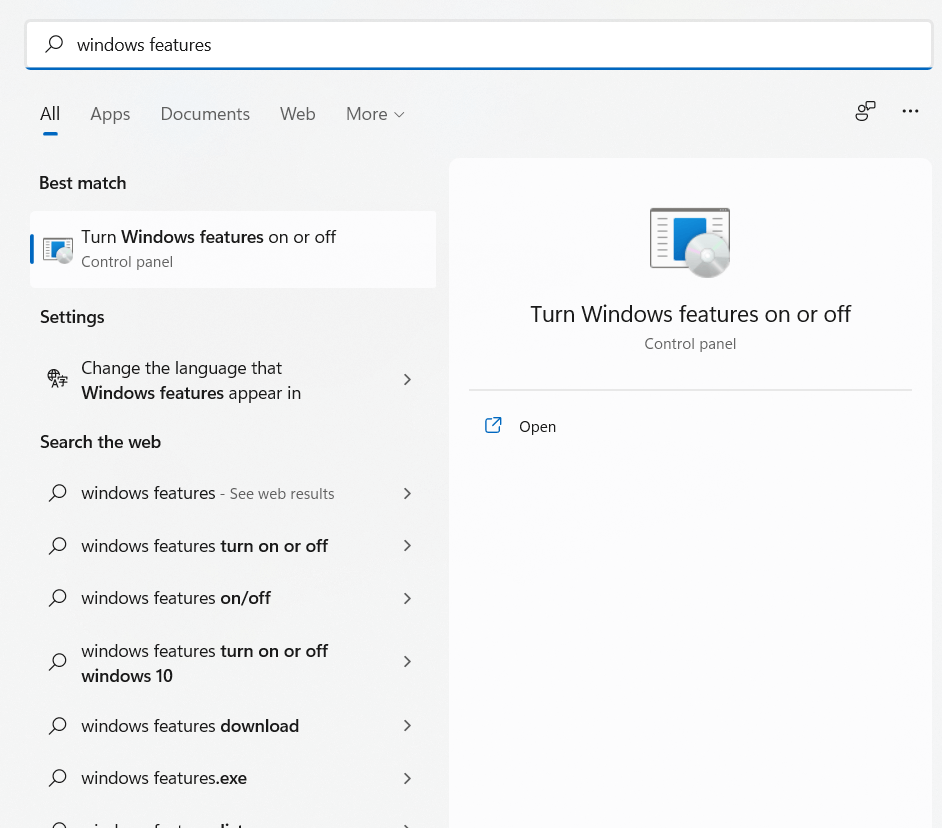
2. Click on the checkbox next to Hyper-V
3. Click on OK and restart your computer
Wrapping Up
Do let us know if you have overcome the “Wi-Fi certificate” error and are now able to connect to your Wi-Fi. We’d also like to know in the comments, which of the above solutions helped you fix the issue. For more such tech-related content, keep reading WeTheGeek.