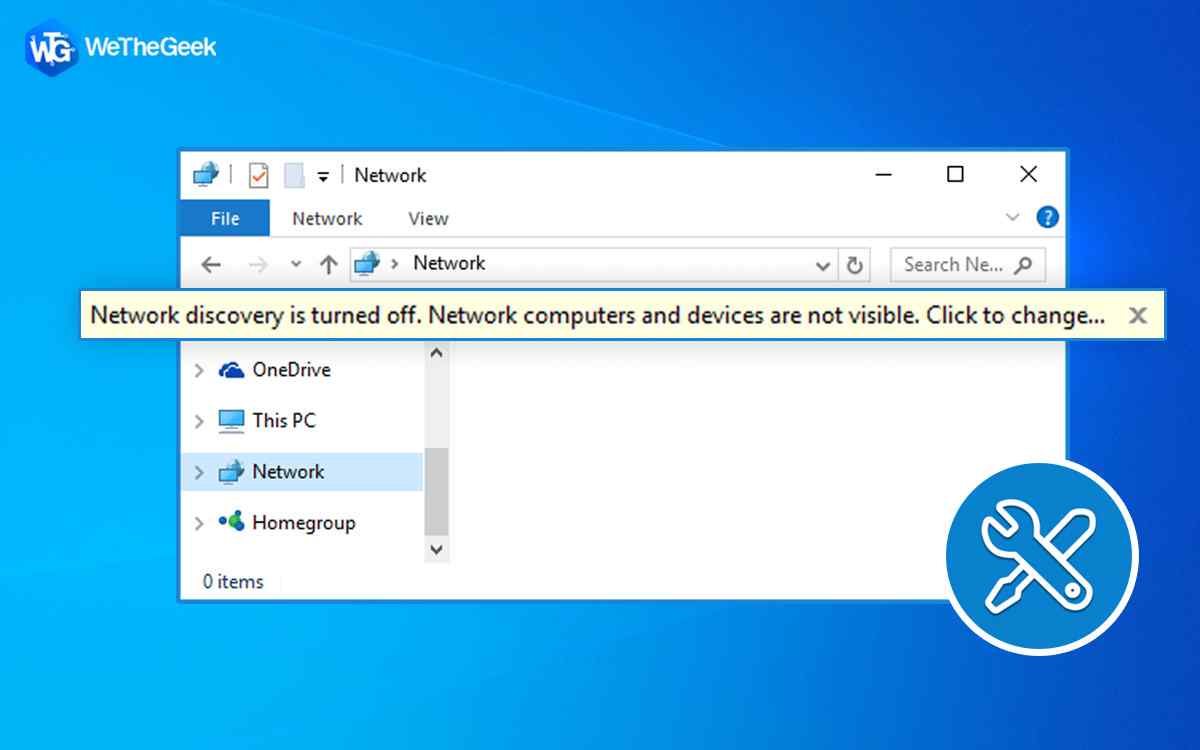
The network sharing feature allows you to share files and devices with other devices on the same network, such as printers. To utilize it, however, network discovery must be enabled. Unfortunately, the network discovery setting is turned off by default for some users. That is, despite repeated attempts, they are unable to switch on network discovery in Windows 10.
The error ‘Network Discovery is turned off’ appears every time they start using network sharing or click on the Network icon in Windows 10. The computers and devices on the network are not visible. So, if you’re having trouble with network discovery, you’ve come to the perfect place. Here are eight solutions to the problem.
Expert Recommended Methods to Fix Network Discovery Is Turned off on Windows 10
Method 1. Restarting the PC

The first and basic troubleshooting step that has worked like a charm for many is to restart your computer. When you restart your computer your RAM clears off as well as any anomalies that might have occurred in your previous session.
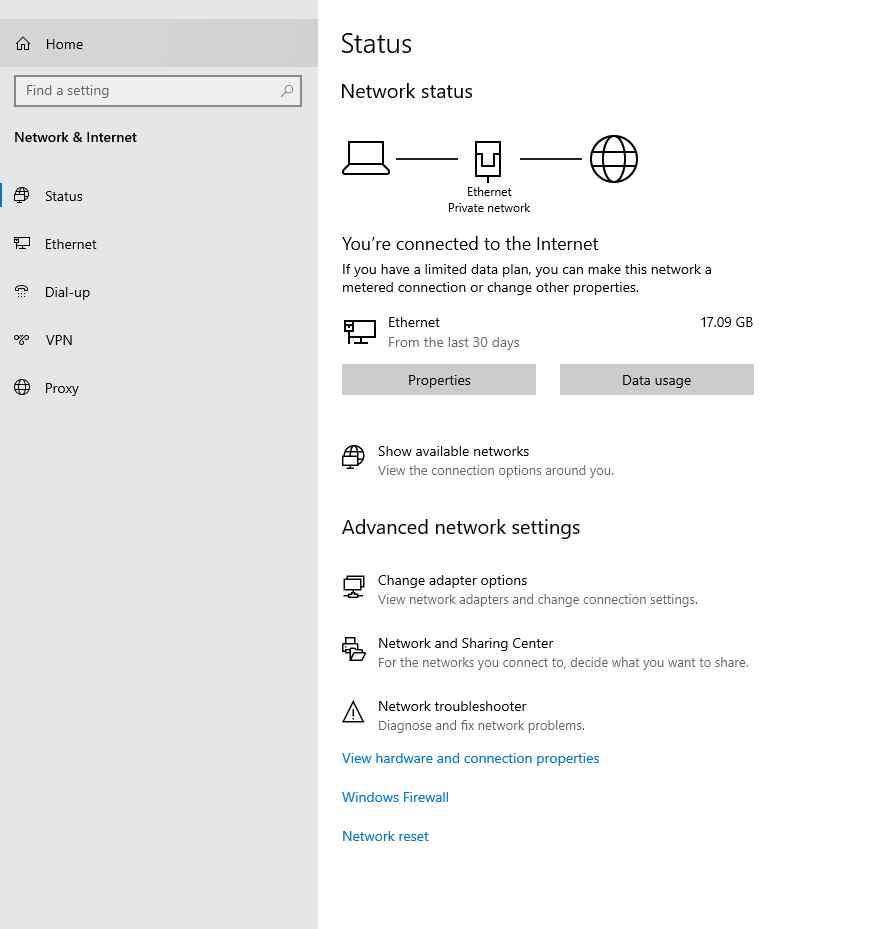
Method 2: Sharing Modes
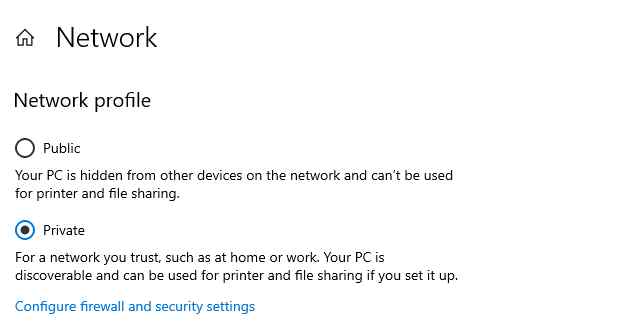
Public and private network profiles are available in Windows. You must take care of two issues that are related to them. First, only enable network sharing for private profiles, and then double-check that the current network is set to private profile.
When you use a public profile, private sharing is sometimes enabled. This is problematic. So, here’s what you’re going to have to do.
Step 1: In the taskbar, click the Wi-Fi icon to see the connected and available Wi-Fi networks.
Step 2: Select Properties from the menu when you click on the connected network.
Step 3: Under Network profile, double-check the selected profile. Choose Private if you’re on a secure network.
Step 4: To return to Network settings, click the back icon at the top of the screen.
Step 5: On the left sidebar, select Status, then on the right, select Sharing options.
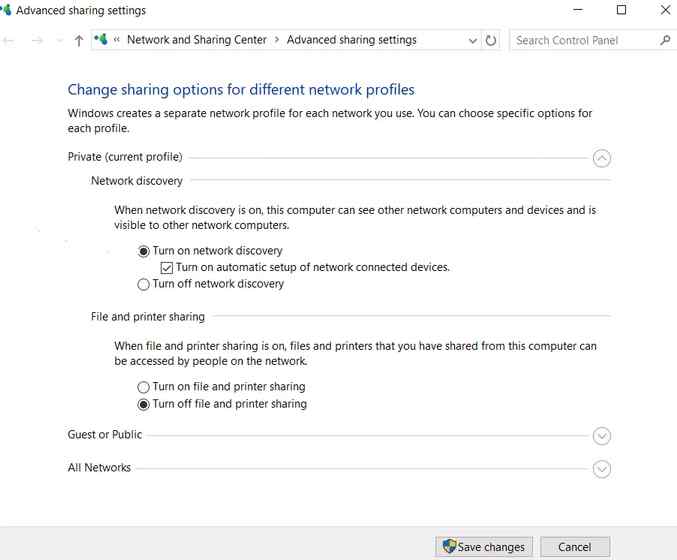
Step 6: You’ll be redirected to the Advanced sharing settings page. If you chose a Private profile in step 3, go to the Private profile settings page. Turn on network discovery and Turn on the automatic configuration of network-connected devices by checking the boxes next to them. Enable these two settings if you chose a Public profile.
Step 7: Select Save Changes from the drop-down menu. After that, you may see if the problem has been resolved.
Method 3: Dependency Services
The dependency services issue, which is connected to network discovery, might also cause issues. DNS Client, Function Discovery Resource Publication, SSDP Discovery, and UPnP Device Host are the services. Check to see if they’re up and running by carrying out these steps to do so:
Step 1: In the taskbar, type Services in the Windows search box. Select the first option.
Step 2: Locate DNS Client on the Services panel. Select Properties from the context menu by right-clicking on it.
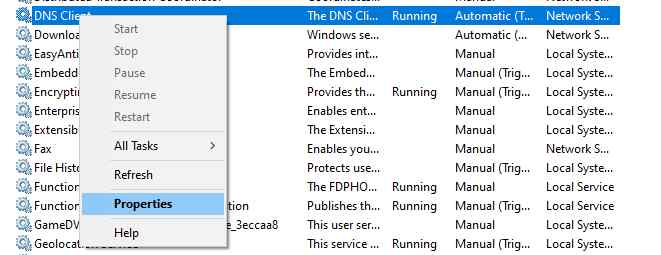
Step 3: First, check that the Service status is set to Running in the Properties window. Click the Start button if it’s showing something else. After that, look at the Startup type. The default setting should be Automatic.
Step 4: Repeat steps 2 and 3 for the other services, which include Function Discovery Resource Publication, SSDP Discovery, and UPnP Device Host.
Step 5: Reboot your computer.
Method 4: Firewall Settings
Because your PC’s Windows Firewall is obstructing network discovery, it may not operate. Here’s how to get things fixed.
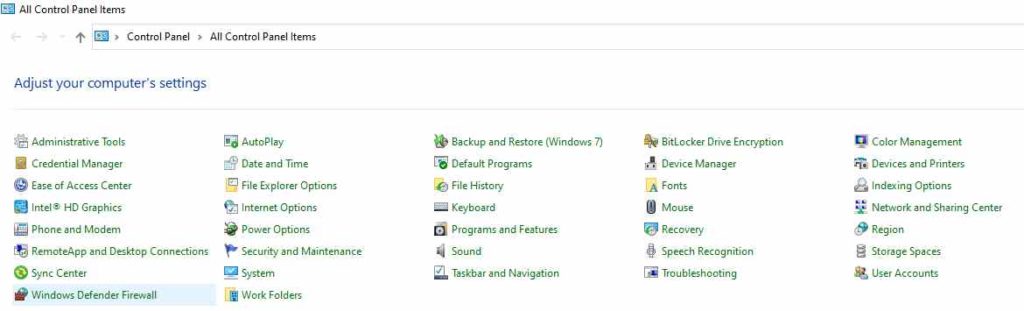
Step 1: Go to your computer’s Control Panel. To locate it, use the Windows search function.
Step 2: Select Windows Defender Firewall from the drop-down menu.
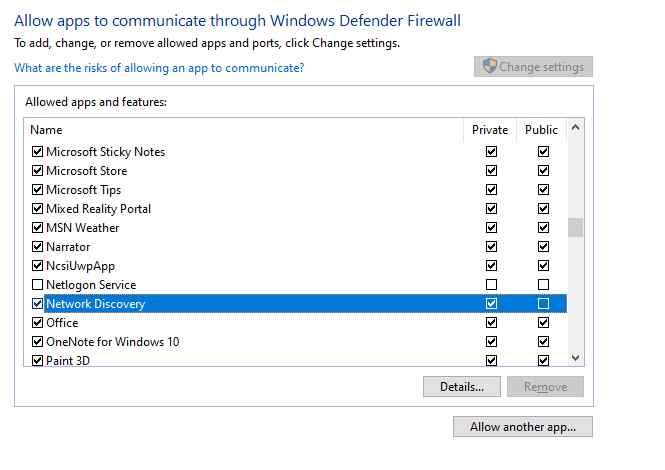
Step 3: Select Allow an app or feature through Windows Defender Firewall from the drop-down menu.
Step 4: Select Change Settings from the drop-down menu. Then seek Network Discovery farther down the page. For your network profile, enable it (private or public). To save your changes, click Ok.
Step 5: Re-run procedure 1 to check that network discovery is enabled for the correct profile and in the proper order.
Method 5: Run Troubleshooter
Microsoft includes a built-in troubleshooter that has been found to resolve a variety of difficulties. You should also execute it to resolve this issue. To do so, take the following steps:
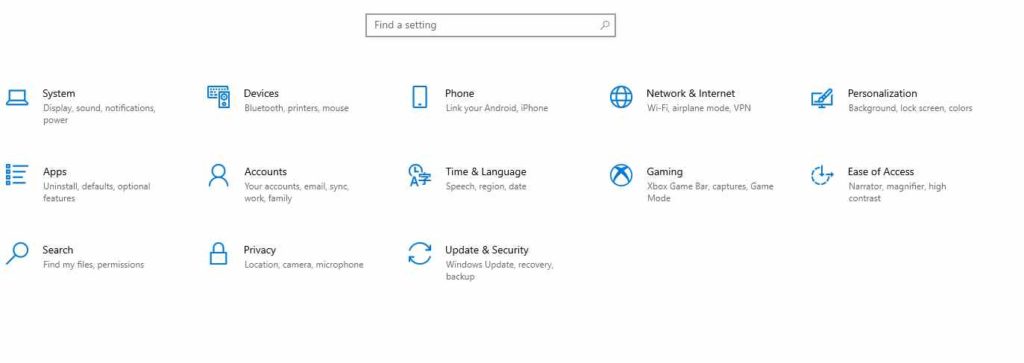
Step 1: Go to Update & Security in Windows Settings.
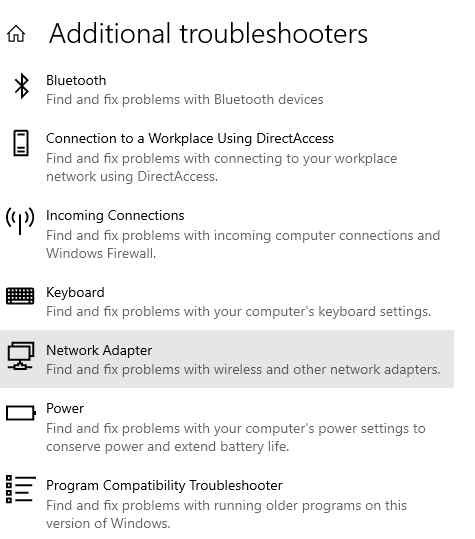
Step 2: In the left sidebar, select Troubleshoot. Click Network Adapter on the right side and then the Run the Troubleshooter button. To finish the process, follow the on-screen directions. Then go to Shared Folders and run the troubleshooter there as well.
Method 6: Turn Off The Antivirus And The Firewall
Often, interruptions are caused by your antivirus, which leads to the issue of network discovery not turning on. First, see whether it can be updated. Whether the problem persists, turn it off for a while to see if it’s the source of the problem. If you’re using a third-party firewall app, try turning it off to see what’s causing the problem. After you’ve disabled it, restart your computer to see if the problem has gone away.
Bonus: Use Systweak Antivirus


Systweak Antivirus guards your computer against all types of dangerous attacks in real-time. It also includes the StopAllAds browser plugin, which filters annoying adverts and protects the computer by blocking the download or access of malware and other types of harmful software. Systweak Antivirus protects your computer from exploits 24 hours a day, 365 days a year. It improves the current performance of the computer by serving as a one-stop-shop for all security requirements.
Method 7: Change The Network Adapter
Network-related features such as network sharing may also be affected by an obsolete or damaged network adaptor. As a result, you should keep it up to date. To do so, take the following steps:
Step 1: Select Device Manager from the Start Menu icon by right-clicking on it.
Step 2: Next to Network Adapters, click the small down arrow. Select Update driver from the menu by right-clicking on your network adapter. To finish the process, select Automatic on the pop-up window and follow the on-screen instructions.
Method 8: Network Settings Must Be Reset
Finally, if nothing else works, try resetting your network settings. Resetting your network will not remove any data on your computer, but it will restore all network-related settings to their default settings. Follow these procedures to reset your network:
Step 1: Go to Network & Internet in Settings.
Step 2: Select Status from the left-hand menu. Scroll down to Network Reset and click it. On the following screen, confirm.
Step 3: Reboot your computer.
The Final Word On 8 Ways to Fix Network Discovery Is Turned off on Windows 10
The above-listed expert-recommended methods are the best ways to resolve Network Discovery is turned off Windows 10 error. If this option has been disabling due to settings then you can turn it on easily. If it is due to malware, then Systweak Antivirus is the best option to remove the malware and fix the issue.
Follow us on social media – Facebook, Instagram and YouTube. For any queries or suggestions, please let us know in the comments section below. We would love to get back to you with a solution. We regularly post tips and tricks, along with answers to common issues related to technology.
FAQs –
Q.1. What does it mean when network discovery is turned off?
Network discovery is a configuration that determines whether your computer can see other computers and gadgets on the network, as well as whether other computers can see your computer.
Q.2. How do I turn network Discovery back on?
The first and most important method to turn Network Discovery back on is to restart your computer. If this does not work then you can try the different methods listed above.
Q.3.What is network discovery used for?
When computers and devices are on the same network, the process of network discovery allows them to find each other. When system administrators wish to map and monitor their network infrastructure, this is the first step they take.
Q.4. How to enable network discovery in Windows Defender Firewall?
Network Discovery in Windows Defender Firewall can be enabled by the following steps:
Step 1: Select System and Security, then Windows Firewall from the Control Panel.
Step 2: Select Allow an app or feature through Windows Firewall in the left pane.
Step 3: Change the parameters by selecting them. If an administrator password or confirmation is requested, enter the password or provide confirmation.
Step 4: After that, select Network discovery and then OK.