
Stuck with the “Unhandled Exception has occurred in your application” error on Windows? Does this alert keep popping up again even when you hit the “Quit” button? Well, you can easily troubleshoot this issue by making a few quick changes to your device’s settings.
In this post, we have listed a variety of solutions that you can use to resolve this issue.
Let’s get started.
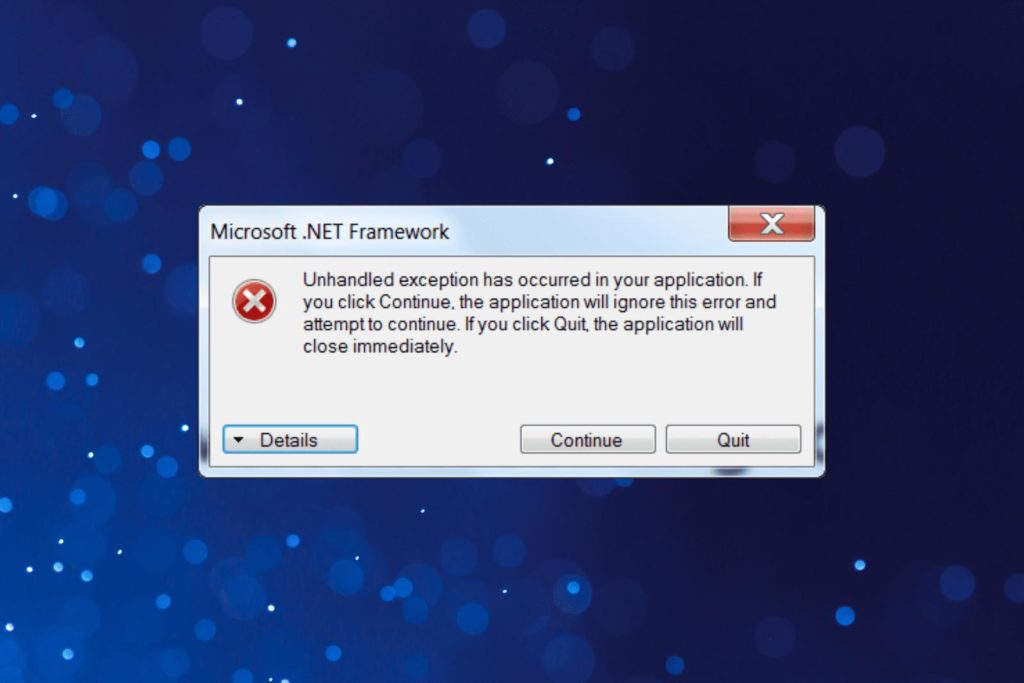
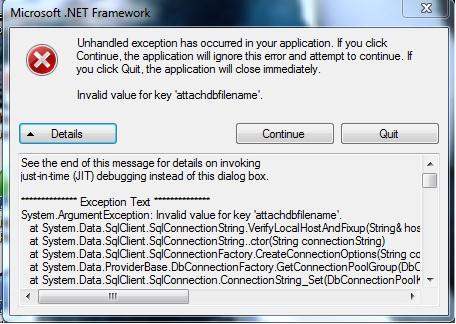
What is the Unhandled Exception Error on Windows?
The “Unhandled Exception Has Occurred” error is a type of error message that can appear on Windows operating systems when a program or application encounters an unexpected problem or error that it is unable to handle. This type of error message usually indicates that there was a critical issue with the application, which caused it to crash or stop working properly. Another possible cause that may trigger this error on your device is when the Microsoft .NET framework is damaged or corrupt.
When an unhandled exception occurs, it means that the application did not have a specific error-handling mechanism in place to deal with the error that occurred. This can happen for a variety of reasons, such as a programming mistake, a conflict with other software, or a problem with the computer’s hardware or operating system.
When you see an “Unhandled Exception error”, the first thing you should do is to try and restart the application to see if the error was just a temporary glitch. If the error continues to occur, you can use the below-listed solutions at your rescue.
How to Fix the “Unhandled Exception Has Occurred” Error on Windows 11?
Solution 1: Run the .NET Framework Repair Tool
Here comes one of the most effective solutions to fix the unhandled exception error that has occurred error on windows.
Step 1: Launch any preferred web browser and visit Microsoft’s official website.
Step 2: Now, download the .NET framework repair tool on your device.
Step 3: Once the tool is downloaded on your Windows PC, run the repair tool and follow the on-screen instructions to complete the setup.
Step 4: The tool will now start detecting the underlying issues. You will now see a new “Recommended Changes” window on the screen.
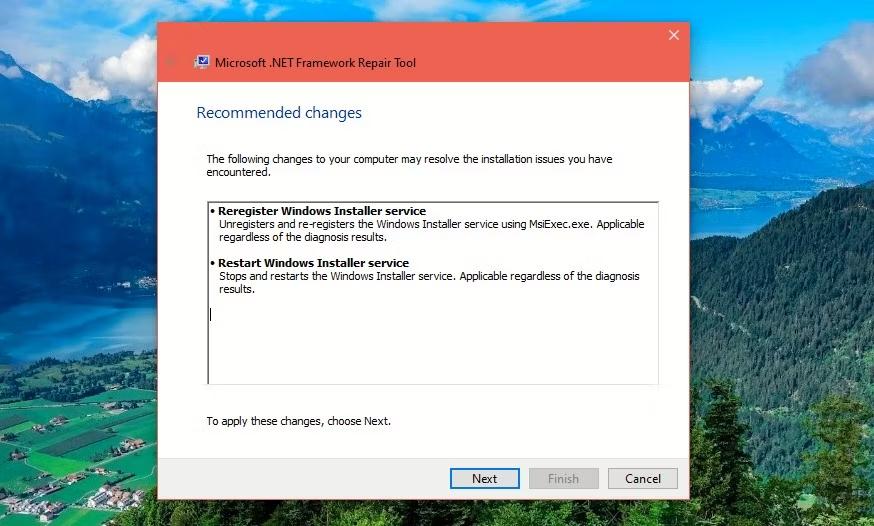
Step 5: Review these changes and hit on the Next button to approve them.
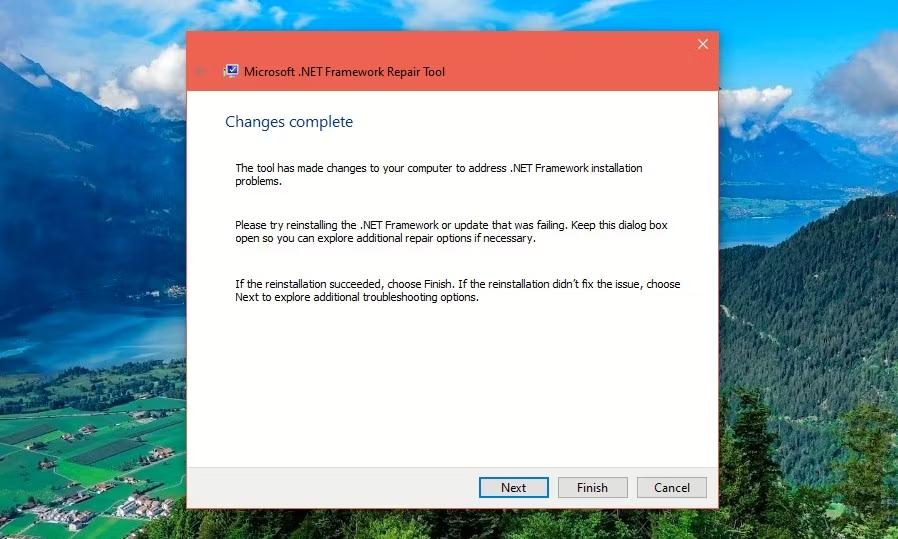
Step 6: Once the changes are done, hit on the “Finish” button to complete the repair process.
Step 7: Exit all windows and reboot your device to check if the issue persists.
Also read: How To Repair The .NET Framework On Windows PC
Solution 2: Enable the .NET Framework
To enable the .NET Framework on Windows, you can follow these steps:
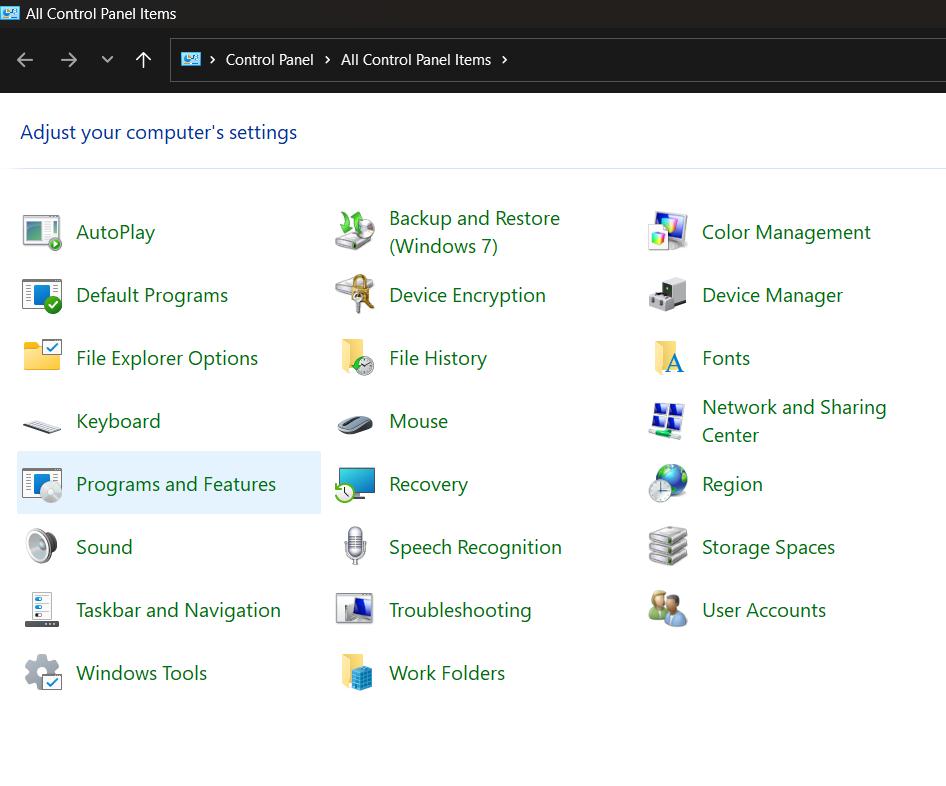
Step 1: Open the Control Panel by typing “Control Panel” in the search bar on your Windows taskbar.
Step 2: In the Control Panel, select “Programs and Features”.
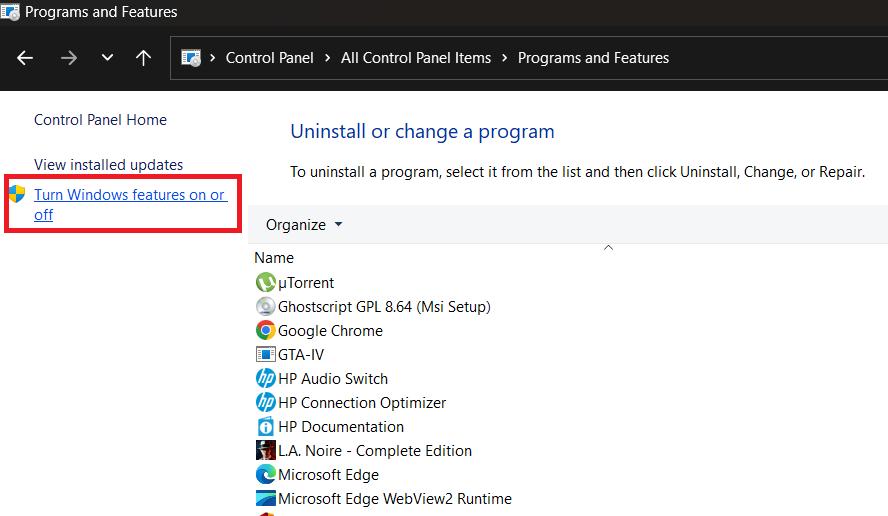
Step 3: On the left-hand side of the window, click on “Turn Windows features on or off.”
Step 4: In the “Windows Features” window, look for “.NET Framework” in the list of available features.
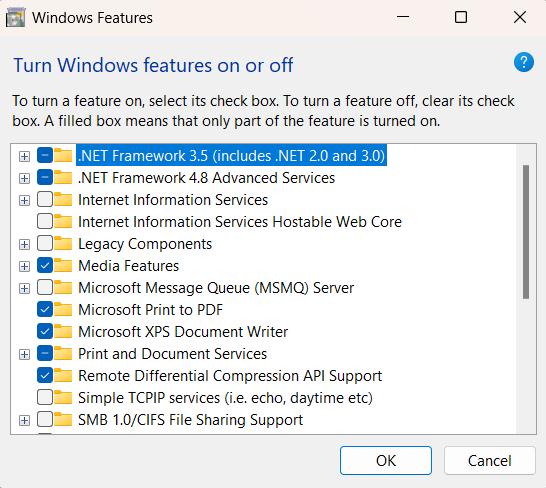
Step 5: Check the box next to “.NET Framework” to enable it.
Step 6: Click on “OK” and wait for Windows to complete the installation of the .NET Framework.
Step 7: Once the installation is complete, you may need to restart your computer to ensure the changes take effect.
Also read: How To Fix Optional Features Not Installing on Windows 11
Solution 3: Run the SFC Tool
The SFC (System File Checker) tool is a Windows utility that allows users to scan and repair any corrupted or damaged system files. The SFC tool checks for corrupted or damaged system files, and if any are found, it automatically replaces them with the correct version from the Windows installation media or from the Windows component store. To run the SFC tool on Windows, follow these quick steps:
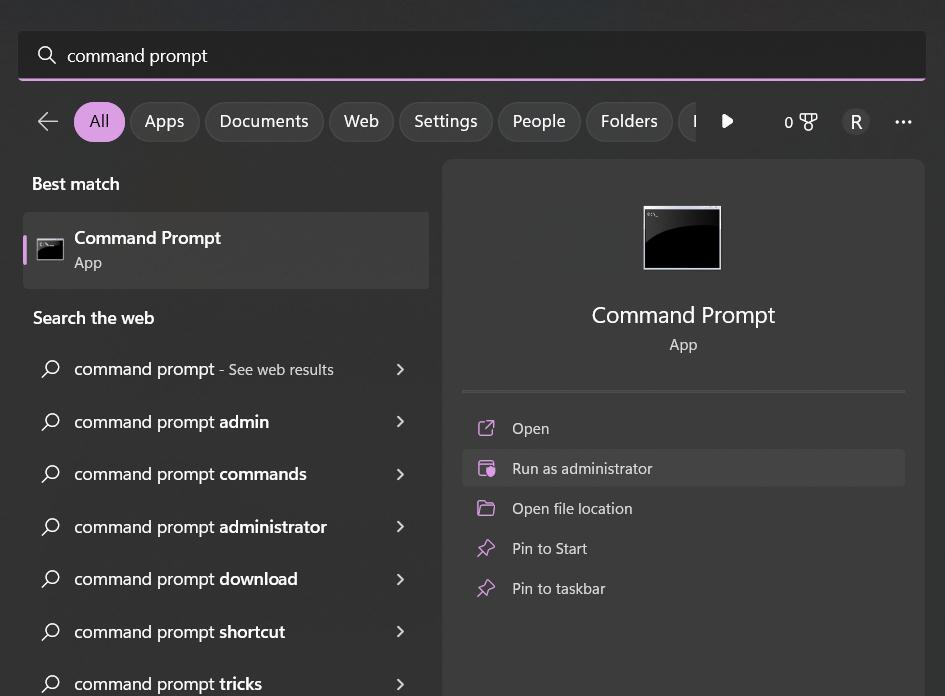
Step 1: Tap on the search icon placed on the Taskbar, type “Command Prompt” and select “Run as administrator”.
Step 2: In the Terminal window, execute the following command:
sfc/scannow
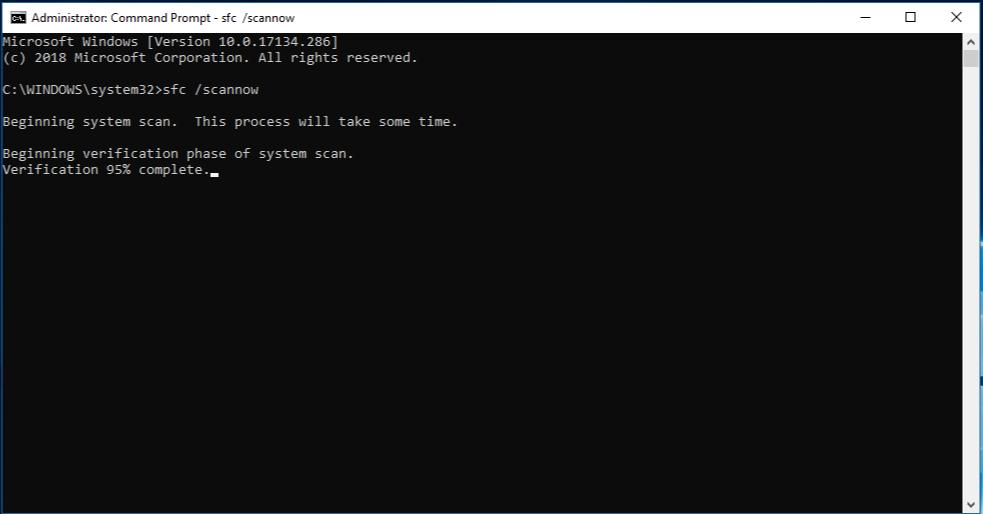
Step 3: Wait for a couple of minutes until the tool has completed its job. Once you’re done, reboot your device and check if you are still encountering the unhandled exception error.
Also read: SFC Scan Stops Working on Windows 10? Here’s the Fix!
Solution 4: Scan Your PC for Viruses for Malware
Follow these quick steps to perform a Quick Scan on your Windows PC.
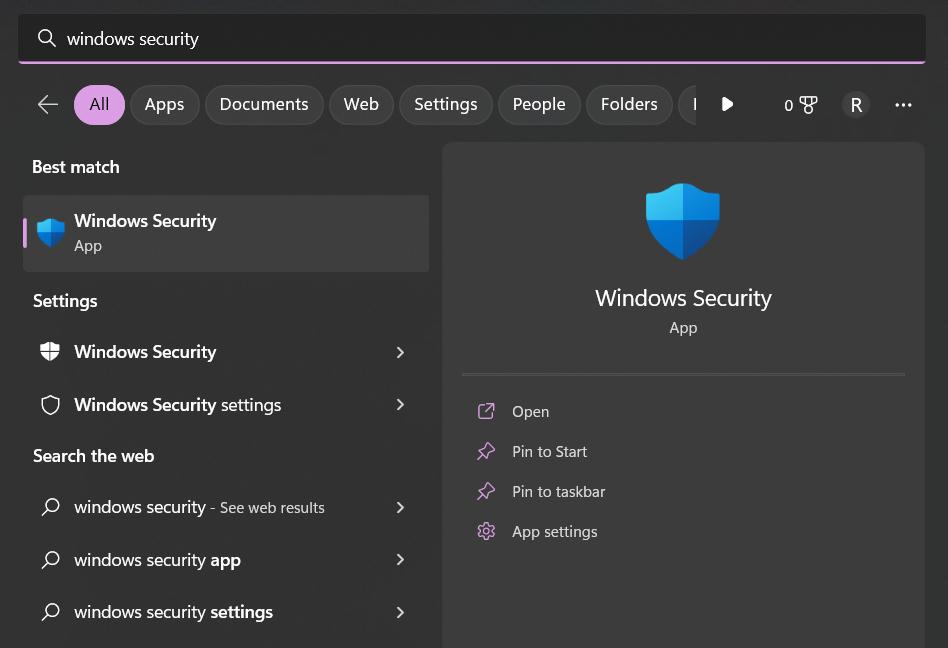
Step 1: Open the Windows Security app by clicking on the search icon placed on the Taskbar and typing “Windows Security“. Select the app from the search results.
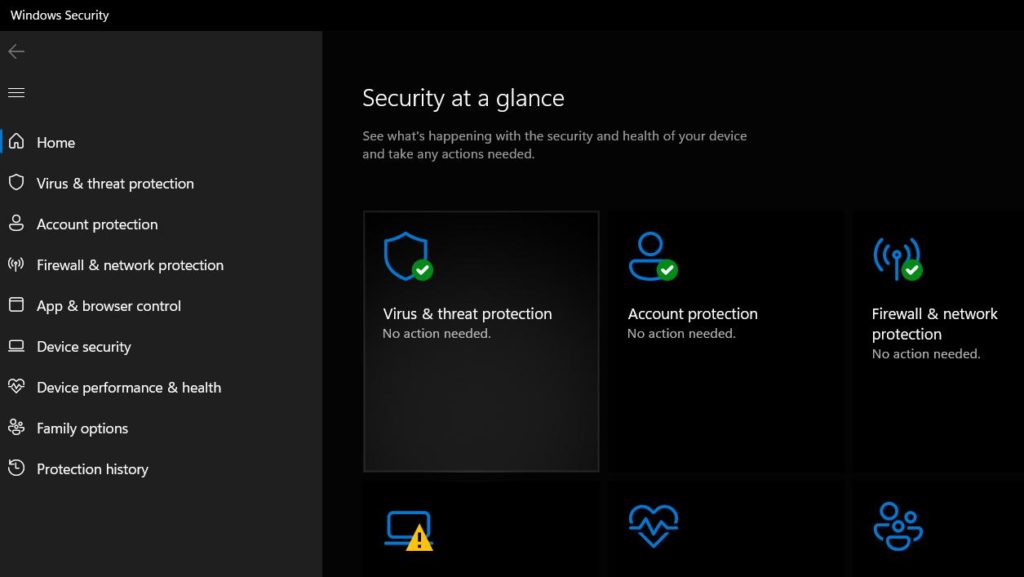
Step 2: Select the “Virus & threat protection” option.
Step 3: Under the “Current threats” section, click on the “Scan options” link.
Step 4: Select the type of scan you want to perform.
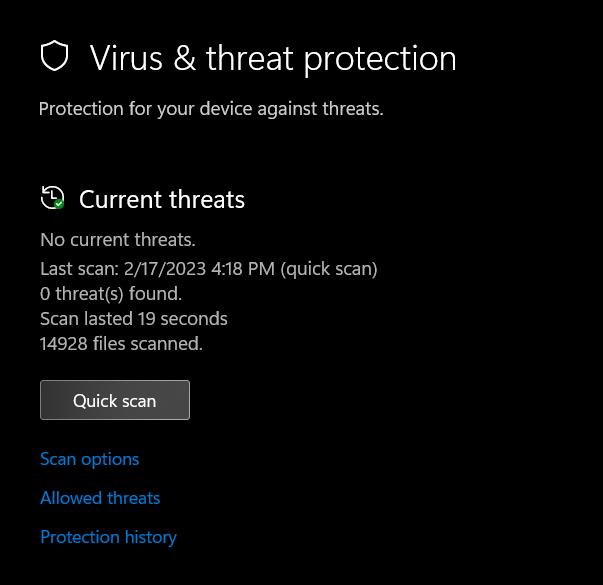
Step 5: Hit on the “Quick scan” button.
The scanning process will now begin and Windows will now scan your device for malware or viruses. When the scan is finished, the Windows Security app will display the results. If any threats are found, you will be given the option to remove them.
Conclusion
Here are a few solutions to fix the “Unhandled exception has occurred” error on Windows. By following the steps outlined in this article, you should be able to identify the cause of the error and take appropriate action to resolve it. You can use any of the above-listed workarounds to get rid of the error message and resume using your PC again without any interruptions.
Was this post helpful? Feel free to share your thoughts in the comments box!