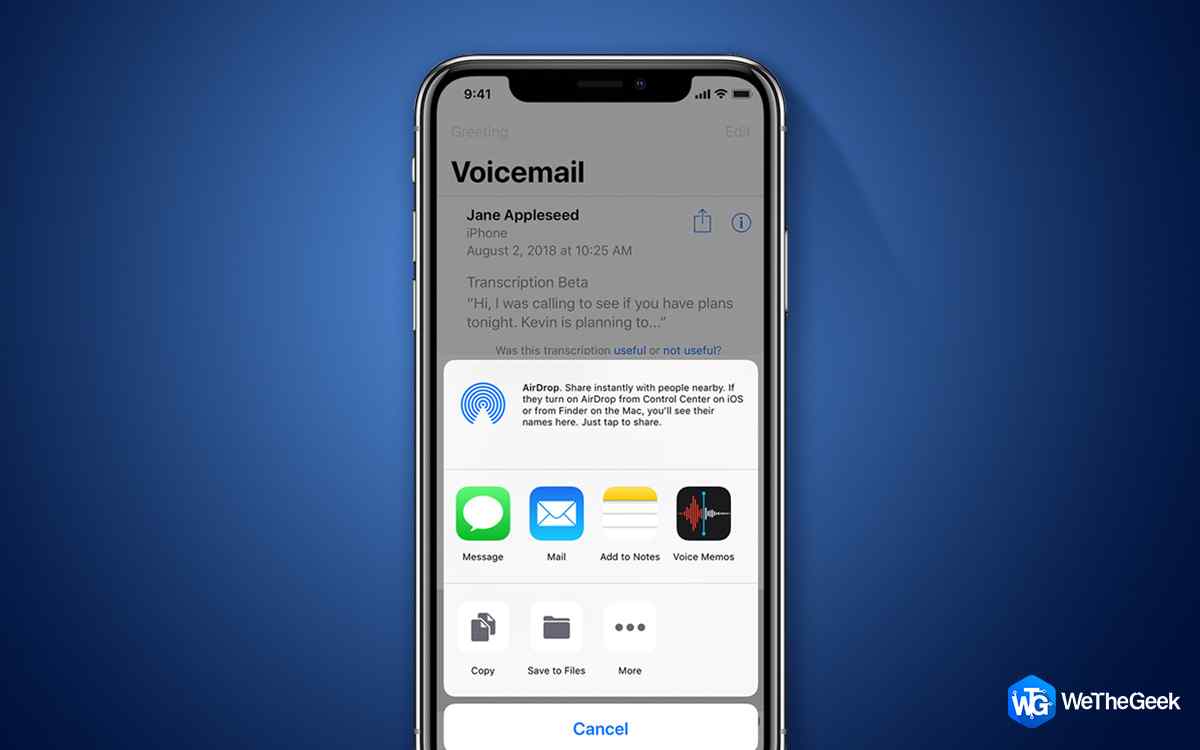
Storing personal information and data on iCloud, Google Drive, and other storage services is what we do when we need to secure our data. However, prioritizing the data which needs to be saved is difficult indeed. As to access data you need to have internet connection on your iOS devices. What if you want a local copy of messages, voicemails on your Mac?
Well, to save the data locally you can use PhoneView app. This makes managing and accessing your work and personal data easy.
So, read on to know the steps to extract voicemails & messages from iPhone or iPad using PhoneView.
Steps to Extract Voicemails & Messages from iPhone using PhoneView
Extracting voicemails and messages is as easy as transferring the photos from your iPhone to Mac. Moreover, it can be done in five minutes. Follow the steps to extract to voicemails & messages from iPhone using PhoneView.
Step 1: Firstly, you need to connect your iPhone to your Mac through USB.
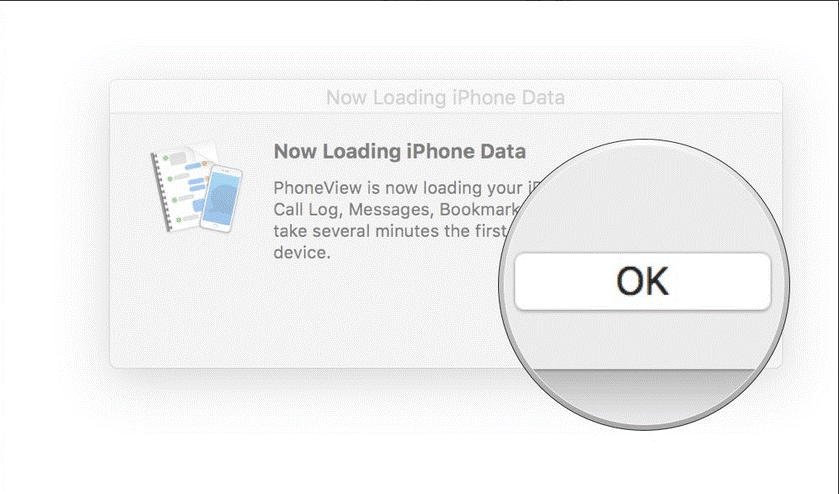
Step 2: Navigate PhoneView on your Mac and open it. You can locate PhoneView from the Launchpad or spotlight.

 How Do Passwords Work In iOS 12?Read this to know how passwords work in iOS 12 and how with the new features, it is easy to...
Step 3: Now, Hit OK.
Step 4: Select the kind of data you would like to copy on the machine.

Step 5: Choose the data you are looking forward to copying.
 How To Mirror an iPhone/iPad To A TVWhy watch videos or listening to music of your iPhone or iPad on a small screen, when you watch them...
Step 6: You need to click on Copy from iPhone.

Step 7: Hit your Save Settings to save the changes.

Step 8: That’s it, you are done with extracting voicemail & messages from iPhone to your Mac.
Benefits of exacting voicemail & messages from iPhone to your Mac
Apart from getting an opportunity of going through your messages one more time, you can easily back up the content for future reference. You can backup or save the messages and voicemails on call history, media files, Notes, phonebook, etc. if you are into business, you can use this way to correct your colleagues at the time of confusion about time, place and an argument. Extracting messages comes handy for proving your point with evidence.
If you want to get the detailed information of your data directly from Apple, so you can request for a copy of the data by visiting Apple’s privacy portal. Certainly, you are going to get additional information other than the voicemails and messages, but it might take up to seven business days to get the data into your email.
So, you have learned the steps to extract voicemails & messages from iPhone using PhoneView and requesting a copy of data from Apple’s privacy portal. In case, you get into any confusion while performing the above-mentioned steps, please let us know in the comments box we will surely get back to you.