
A cluttered Mac desktop is a bane of any Mac user’s existence. And macOS Ventura seems to have taken note of this. Gone are the days when you faced the headache of finding that exact window you needed. With the help of the Stage Manager, you can organize your Windows much more efficiently. The Stage Manager is one of the best features of macOS Ventura. You can switch between documents and apps hassle-free. And, if you are wondering how to get your hands on this wonderful feature, you have come to the right place. Trust us, it won’t take more than a couple of minutes, and you and more so, your desktop will be all sorted in no time at all. Here are the steps –
How To Use Stage Manager on macOS Ventura
1. How To Turn On The Stage Manager on macOS Ventura
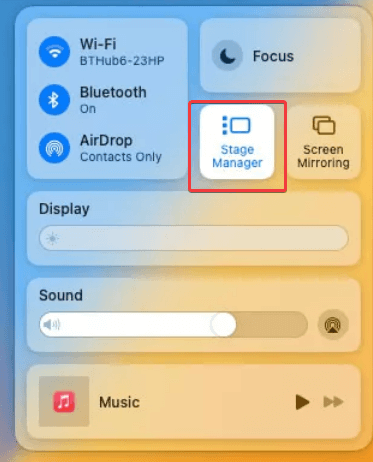
1. Click on the Control Center present on your Mac’s menu bar at the top-right corner. The double pills icon signifies it.
![]()
2. Click Stage Manager and confirm that it’s turned on. If it’s not, you may have to toggle it on.
3. Launch the apps that you want to use.
There you have it! macOS Ventura will automatically stack all your open Windows. You can now cycle through these Windows using the Command + Tab shortcut key combination and open the one that you need. Or, you can move your cursor to the left edge of your Mac’s screen, and drag the app that you want to use to the center.
2. How To Customize Stage Manager on macOS Ventura
1. Open the System Settings of your Mac.
2. Select Desktop & Dock from the left-hand side.
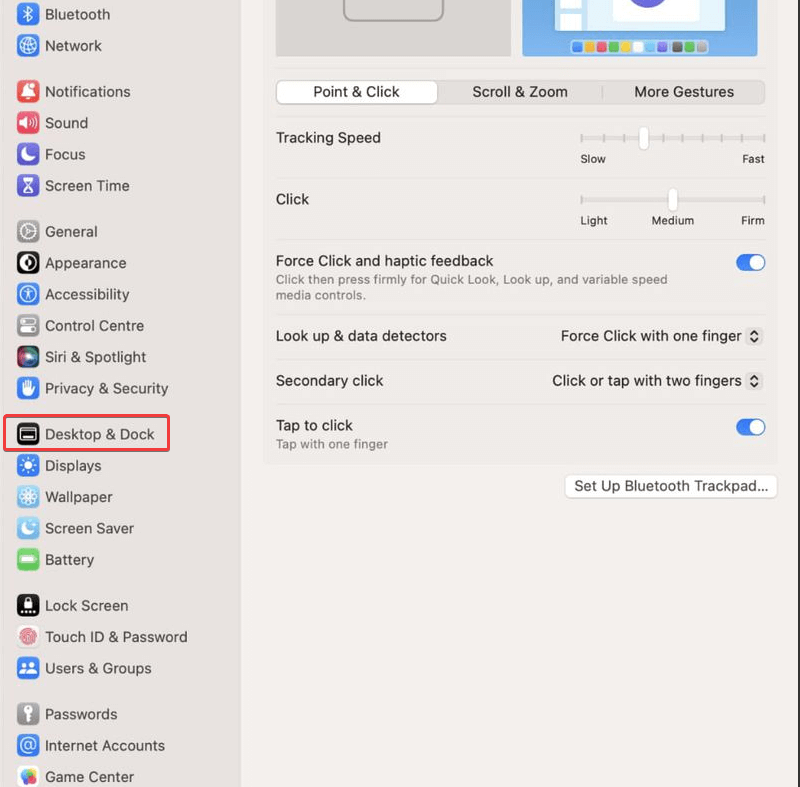
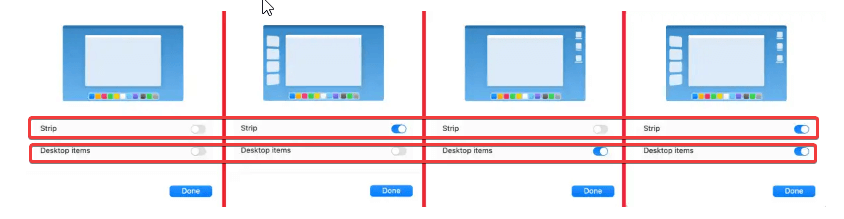
3. Select Stage Manager from the right-hand side. If it is not enabled, toggle the switch to the right to enable it. To customize it click on the Customize button. You can now customize the Stage Manager to hide/ unhide the Strip or Desktop Items.
3. How To Add The Stage Manager To Mac’s Menu Bar
Quite possibly, you are going to use the Stage MwillcOS Ventura very often. So, you should add Stage Manager to your Mac’s menu bar. Here are the steps for the same –
1. Go to System Settings.
2. Go to Control Center.
3. Select Stage Manager and set it to Show in the Menu Bar.
You will now be able to toggle Stage Manager on and off swiftly. You can even disable it from the menu bar if you want to stop using it. To do that, go back to Control Center > Stage Manager > Toggle off, or the Menu Bar button> Toggle off
4. How To Group/ Ungroup Apps In The Stage Manager
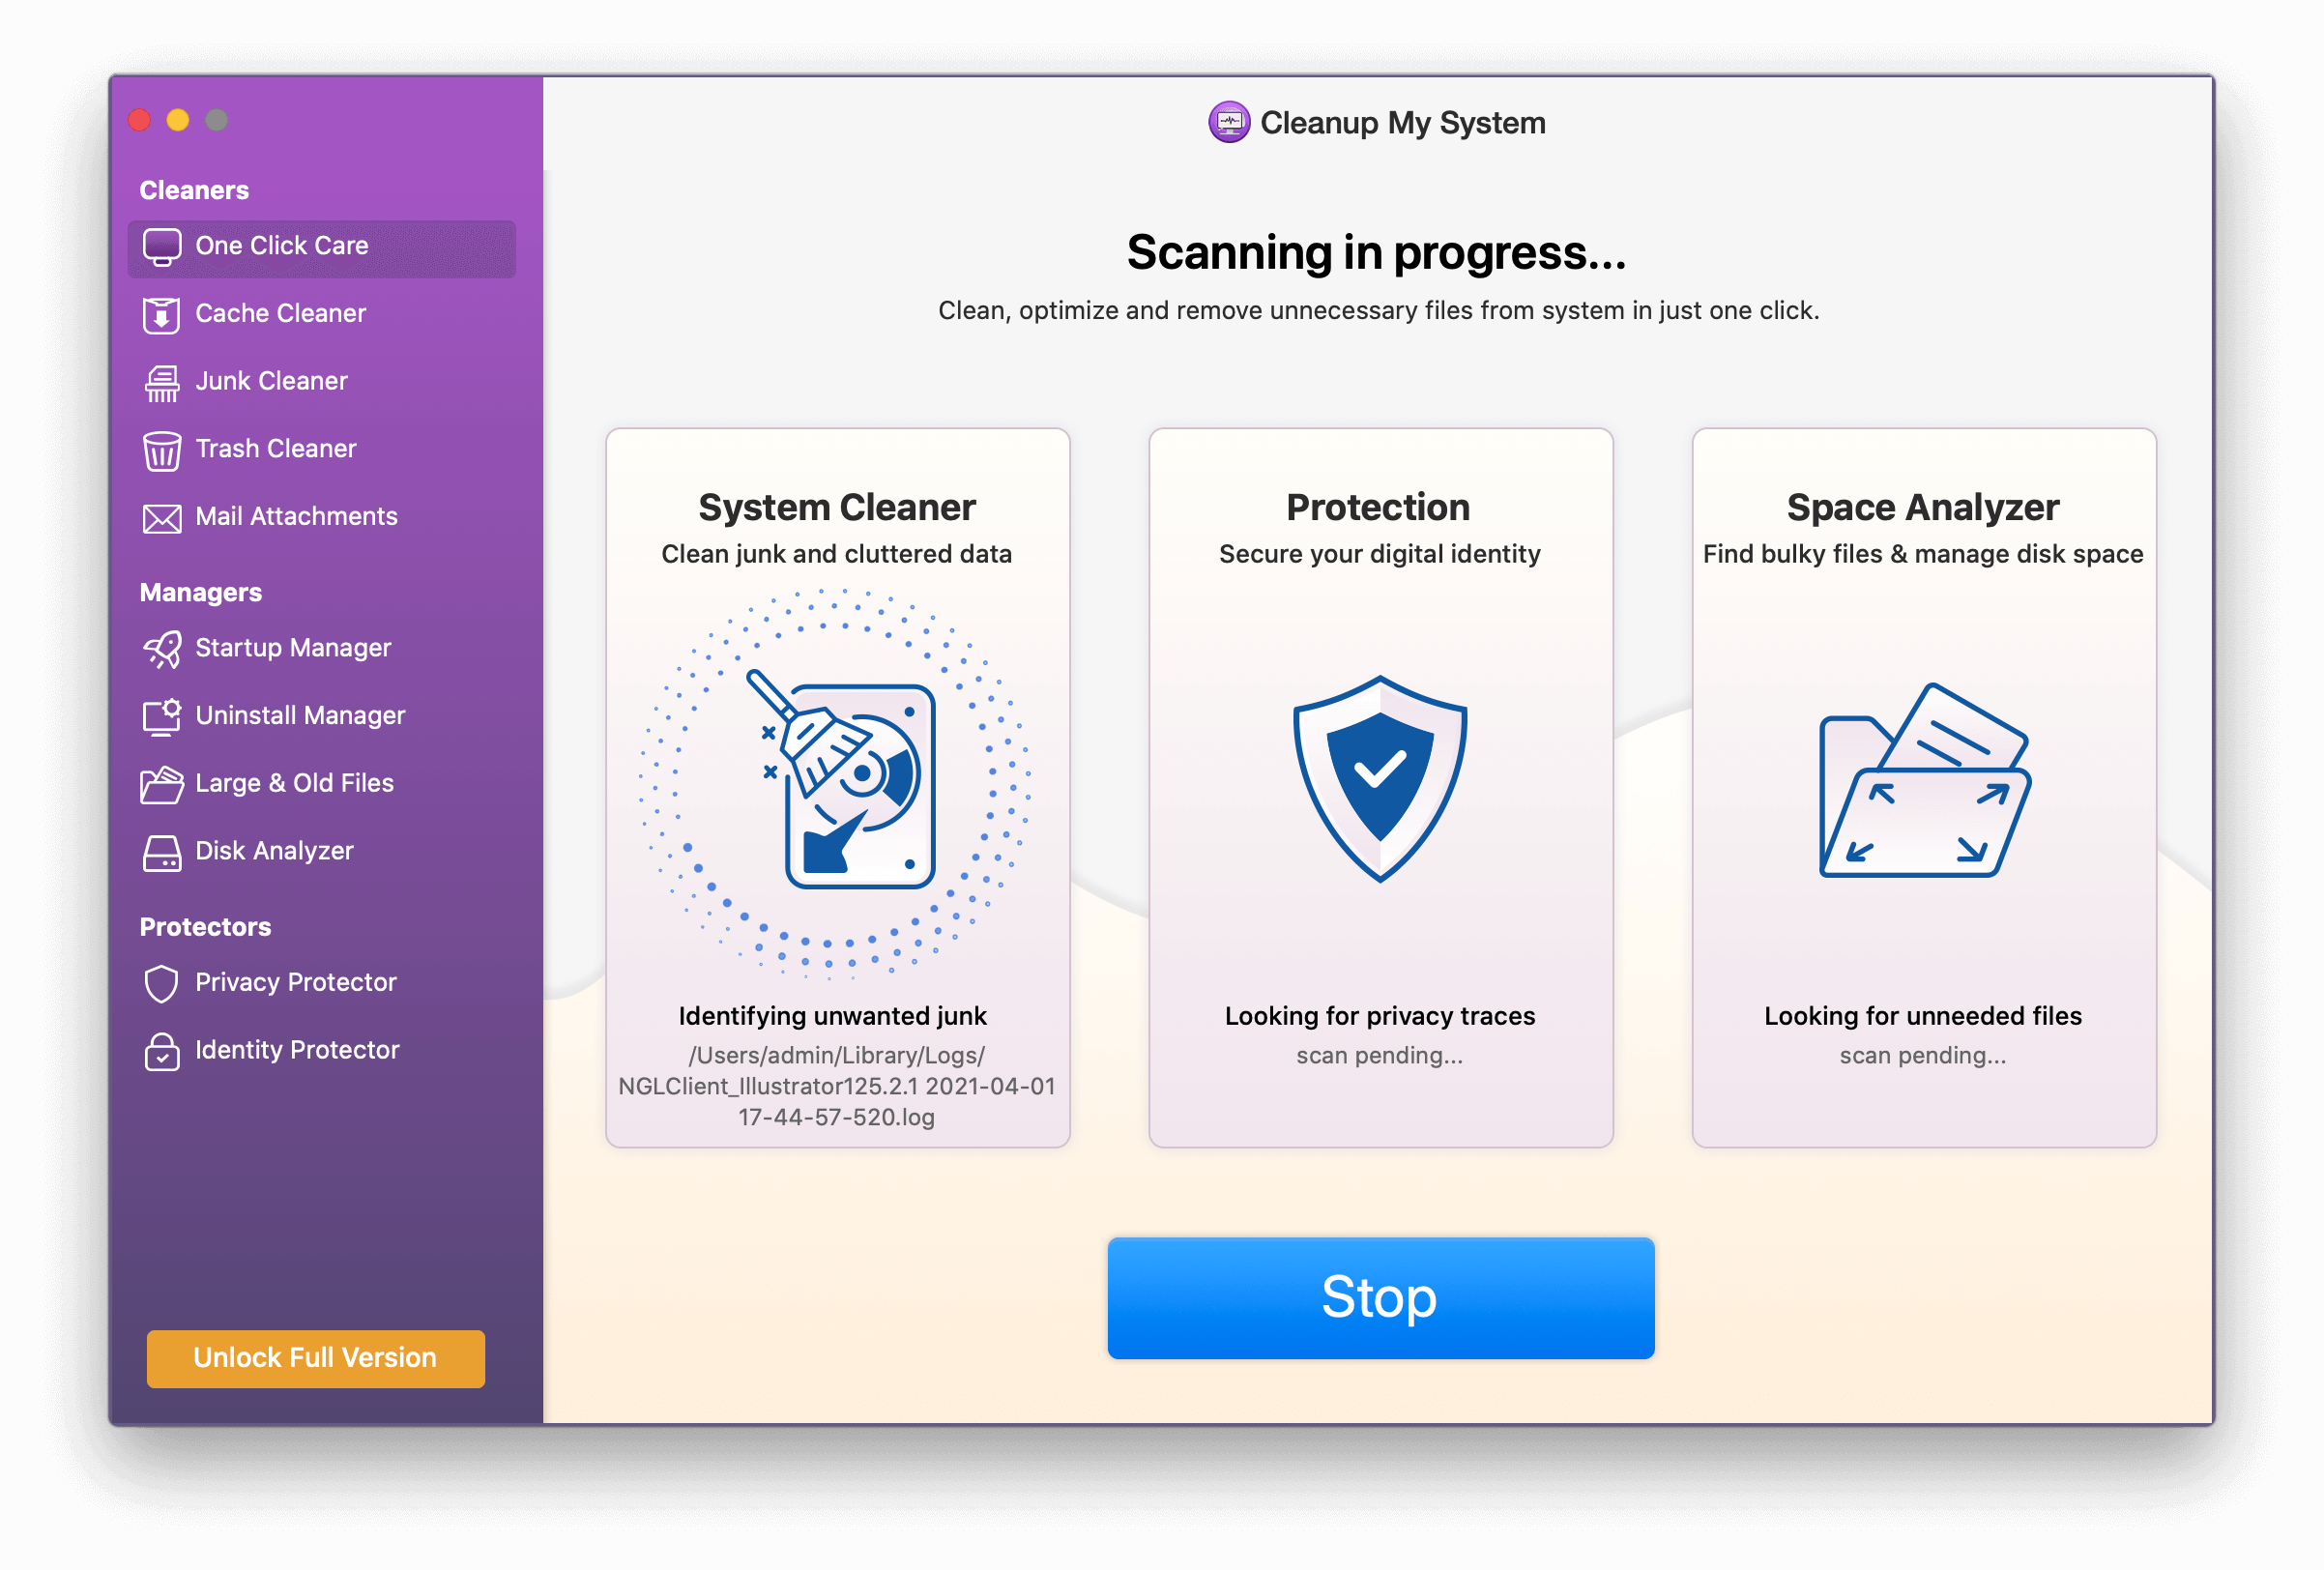
If you go by the default settings, the Stage Manager separates all the apps that are opened on your desktop. But what if you want to use two or more apps together? For instance, you might be surfing on Apple Safari while side by side erasing browsing traces and protecting online and offline privacy using Cleanup My System, which is one of the best Mac cleaners out there. Here you can group both the apps together (or group more apps if there are more than two apps). Before we get down to the steps on how to group and ungroup items using Stage Manager, let’s see how Cleanup My System can help you clean up unwanted junk from your Mac –
1. Download, run and install Cleanup My System on your Mac.

2. From the left-hand side, click on One Click Care.
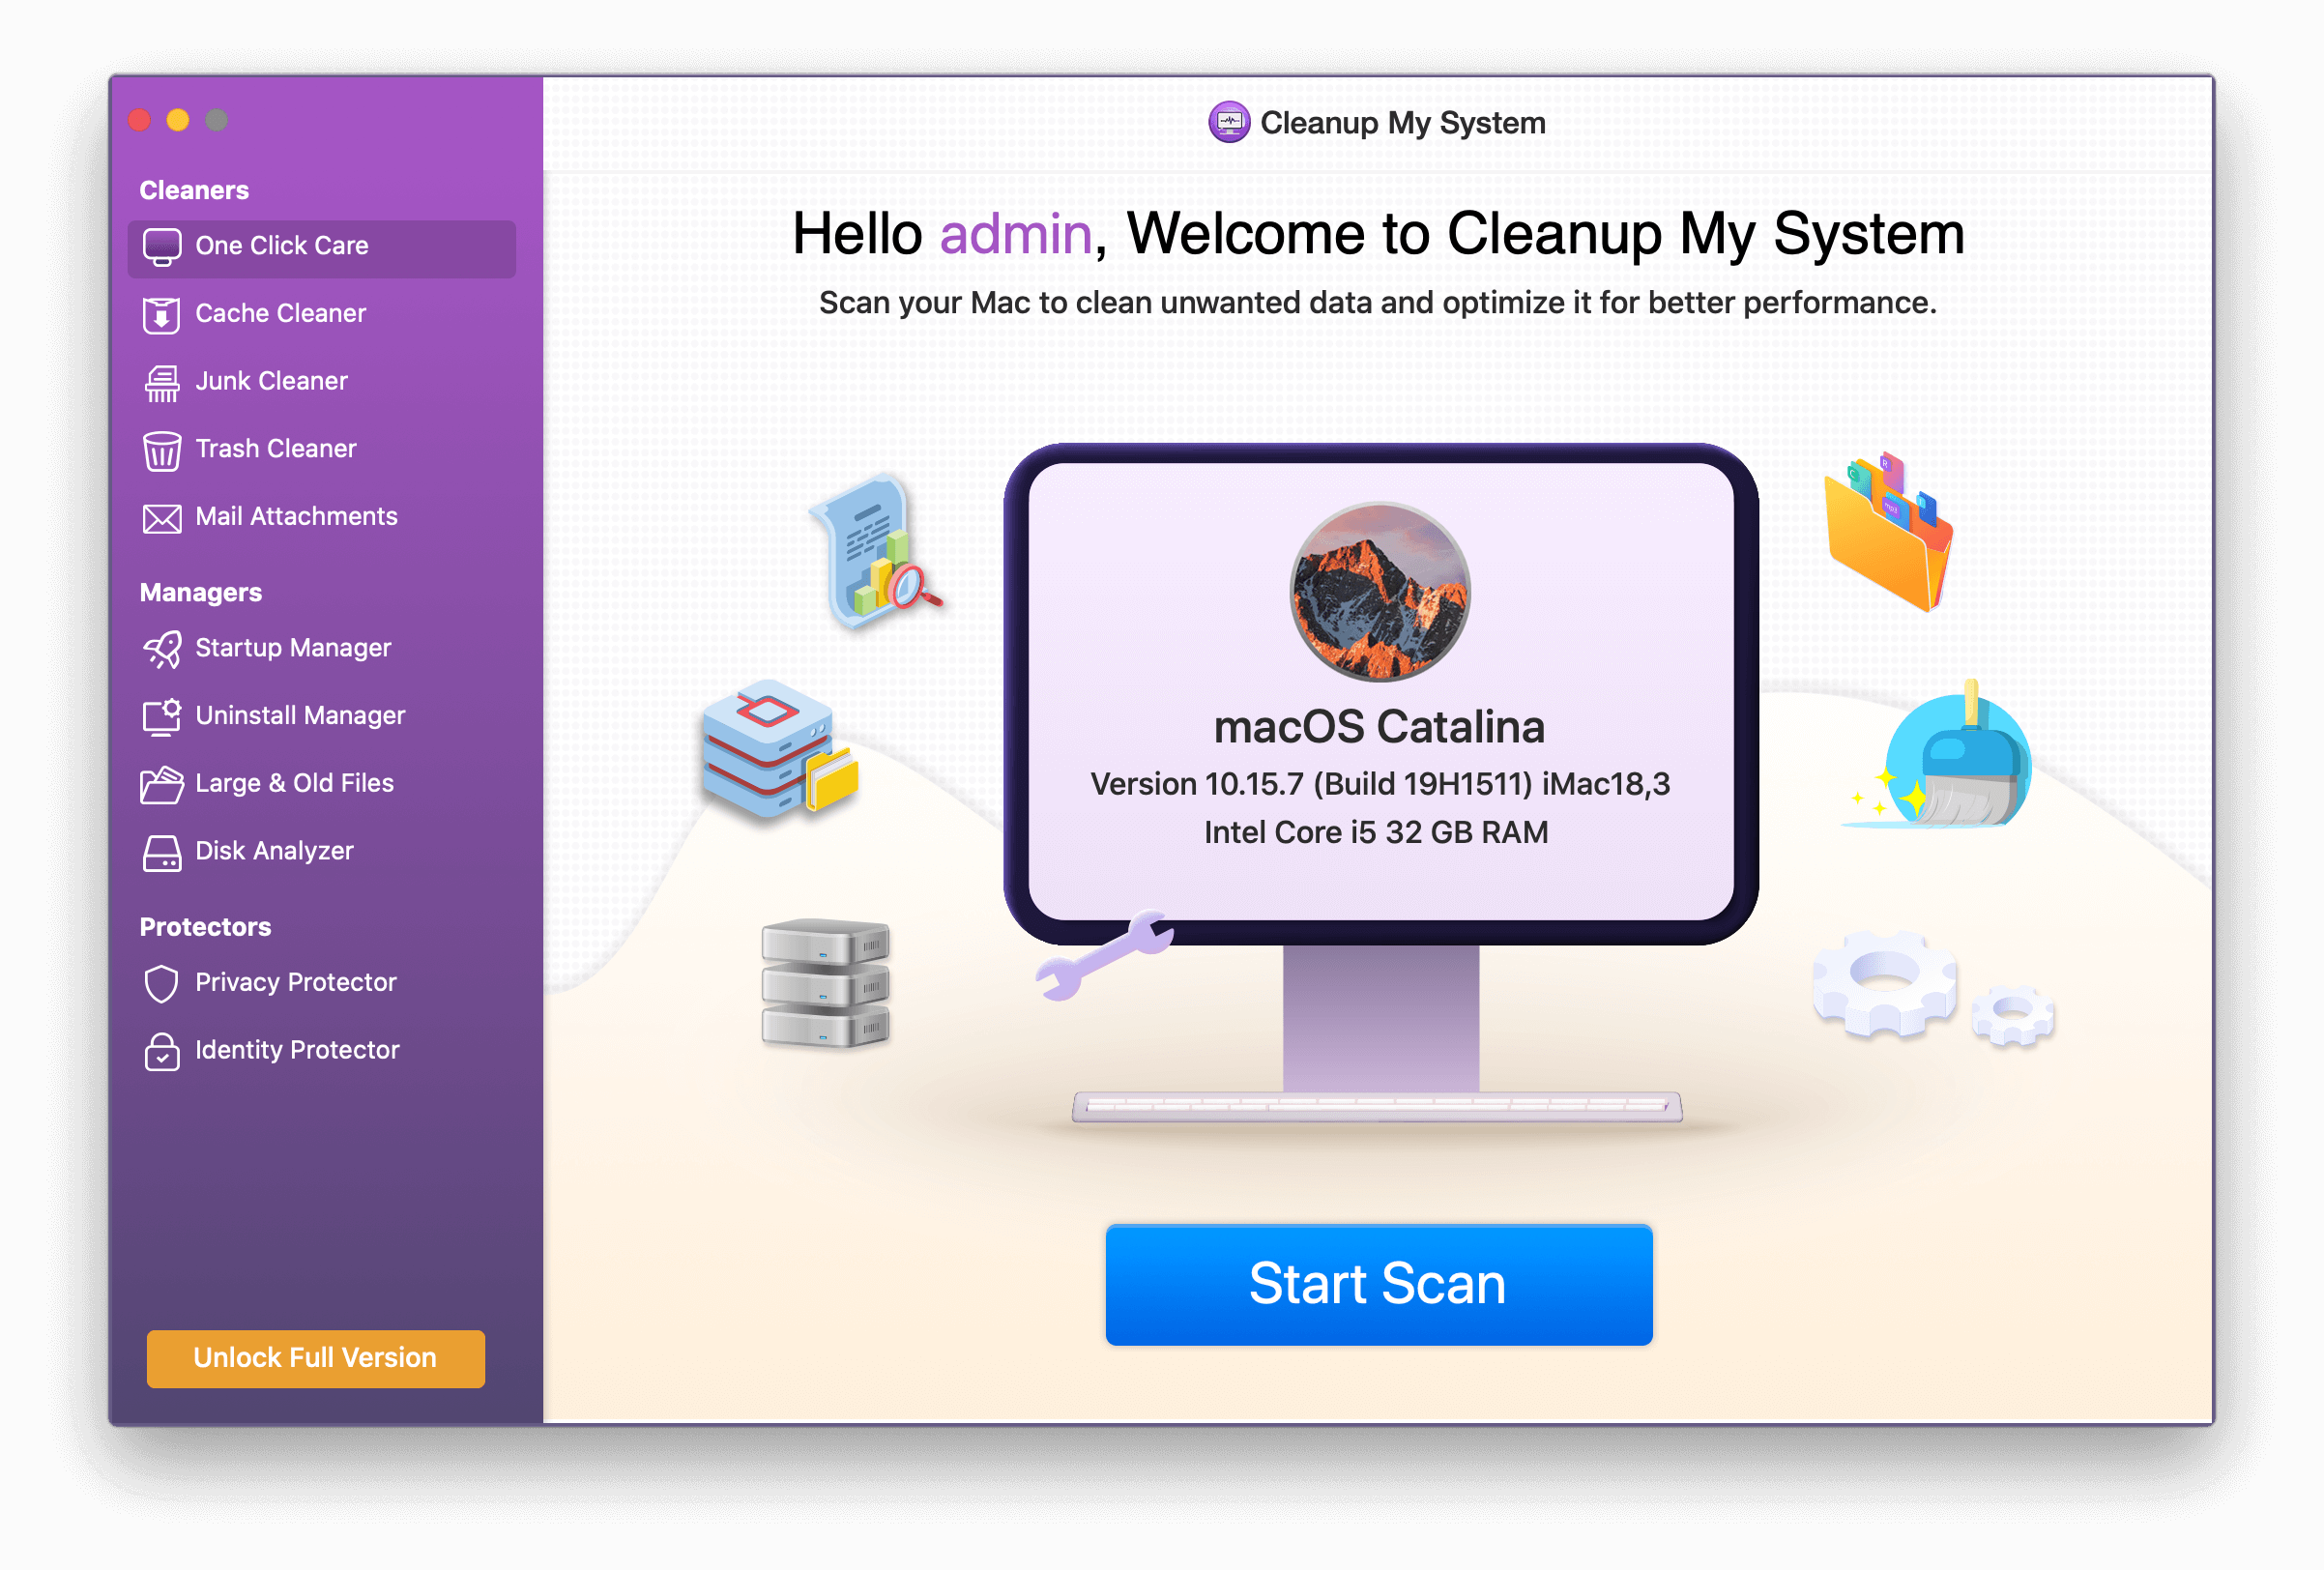
3. Click on the Start Scan button.
You will now be able to scan and optimize your Mac in one click and zero down on the exact issue affecting your Mac’s performance and security.
Now let’s check out the steps to group apps/ windows in macOS Ventura-
1. Open the Stage Manager, i.e., ensure that the feature is enabled.
2. Open any of the Windows that you want to group with others.
3. Select the second window and drag it from the Stage Manager onto your desktop.
If you have grouped multiple apps, you can cycle between them using the Command + ~ key combination.
5. How To Ungroup Apps On macOS Ventura
Ungrouping the already grouped apps or Windows is just as simple as grouping them. For this –
1. Open the group of windows or apps you want to ungroup or separate.
2. Select the app or window you want to separate and then drop it onto the Stage Manager strip on the left-hand side.
Wrapping Up
Stage Manager lets you efficiently organize opened Windows and keeps active ones in the center, whereas the other windows and apps are neatly stacked into a sorted sidebar. Do use this feature and let us know how your experience has been. For more such tech-related content, keep reading WeTheGeek.