
If things are managed properly, whether it is our home or office, it helps us to stay organized, it also saves our time. So why not manage our computer hard drives and external drives to maximize the comfort while meddling through files, saving our time in particular.
Now the question that must have aroused in your mind – what is disk management and how can it be done. In this article, we will discuss disk management and steps to manage the hard drive space on the computer.

Disk Management
Disk Management is a utility tool built into Windows Vista, Windows 7, Windows 8, and Windows 10 which can be used to manage or create, delete, format, shrink partitions and external drives.
How you can open disk management on your computer:
Disk Management can be accessed in three ways:
- Open command prompt and type diskmgmt.msc

- Press Windows and R together, a dialog box will appear, type diskmgmt.msc

- Start menu -> Control Panel -> Administrative Tools ->Computer Management-> Storage -> Disk Management.

- If you are using Windows 10, try the combination of Windows key and X and you will get dialog box, wherein you can access Disk management.

How to use Disk Management:-
Disk Management comprises of two sections –
The top section of disk management consists of a list of all the drives, whether external or internal drive, recognized by Windows.
The bottom section of disk management shows the graphical representation of all the physical drives present or connected to the system.
See Also:10 Best Driver Updater Software for Windows 2017
Disk Management is a utility tool to check the free space on hard drive. You can check the total storage of all the disks along with the free space remaining in GBs or MBs.
Tasks that can be done in Disk Management:
- Partition a Hard drive
- Format a drive
- Change a Drive’s Letter
- Shrink a Partition
- Delete a Partition
- Change a Drive’s File System
Steps for creating a new partition or new logical drive:
- Locate Disk Management by one of the methods mentioned above.
- To create a new partition, click on Unallocated space-> New Simple Volume.

- The following dialog box will prompt, Click on Next.

- Mention the size of the disk or use all the space available.

- Next dialog box prompted will ask to Assign Drive Letter, You can also select Between Mount in the following empty in NTFS Folder or Don’t assign a drive letter or path, and click on next.


- Default file system to be chosen is NTFS and if you want to format the drive then check the box to perform a quick format and click Next.

- The new partition will be created when you will click on Finish.
See Also: 10 Best Disk Management Software for Windows
How to Format a Hard Drive –
- To format a drive, click on partition.
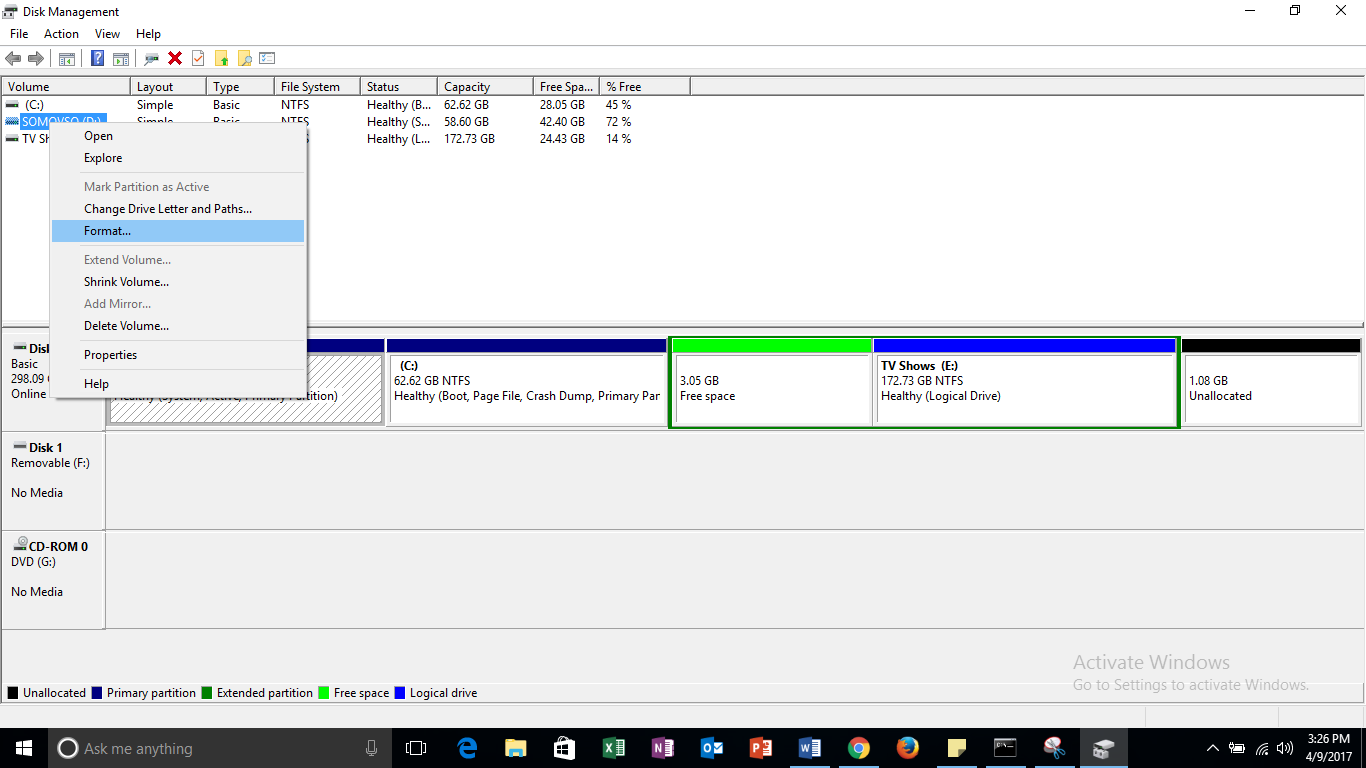
- A dialog box will open, click OK.

- Click OK to the warning showed to erase all the data.

- The Drive will be formatted. The action usually takes a few seconds.
See Also: Advanced System Protector: Your Last Resort Against Malware
Resizing a Disk – Extend Volume or Shrink Volume
You can shrink or extend the disk capacity by a few simple steps.

- Right Click on the drive whose capacity you want to extend or shrink.
- When you click on Extend Volume, a dialog box will appear, click Next.

- Next dialog box will allow you to extend the volume upto the available space.

- Click Finish to perform the action. The size of the disk will be increased.

Shrink Volume
You can also shrink the partitions in the similar way. Right click on any disk you want to Shrink
Click on Shrink Volume


- Click on Shrink and enter the amount of space to shrink in MB
Create Virtual Hard Disk
In Windows 8 and Windows 10, Disk Management can also be used to create and attach virtual disk files. According to the Wikipedia, Virtual Hard Disk (VHD) is a file format which represents a virtual hard disk drive (HDD). It may contain what is found on a physical HDD, such as disk partitions and a file system, which in turn can contain files and folders. It is typically used as the hard disk of a virtual machine.
See Also: How to Increase Virtual Memory in Windows 7
VHD can be created/opened by clicking on Action -> Create VHD/Attach VHD


Disk Management is a tool available in Windows XP, 7, Vista, 8, 10, which makes it easy to manage the hard disks. If you still have doubts or any tips on partitioning, comment in the comment section below.
hp connection error
Hey! we will discuss disk management and steps to manage the hard drive space on the computer.Srishti Sisodia
Hi, Yes, we can discuss disk management and I will try and help you answer your queries. For more tech updates, you can subscribe to our newsletter.