Dell Universal Dock D6000 helps link PC, laptop using a single cable that supports both Thunderbolt 3 (USB Type-C) or USB 3.0. Using this updated Dell driver, you can connect to PC via USB. When a laptop is connected to the docking station, you can access peripheral devices like mouse, external hard drive and others without any problem.
But if it is outdated, you might face problems. Therefore, it is necessary to update the Dell docking station driver.
In this post, we will explain how to update Dell drivers. We understand updating Dell drivers can be both easy and challenging; therefore, here we will explain various methods. You can use it according to your convenience.
If you are DIY types, the manual method is best. However, if you want to update Dell drivers and save time automatic method is your go-to.
So, without any delay, let’s try out these different methods to update Dell docking station, D6000 drivers.
- How to update Dell drivers and download them?
- Download Dell docking station driver manually
- Update Dell driver automatically (Recommended)
- How to use Smart Driver Care to update Dell d6000 drivers?
Note: Since we are downloading
How to update Dell drivers and download them?
Before we learn how to update Dell drivers an important note: since we are downloading the driver on Windows 10, the screenshots are from Windows 10. However, the fixes and Smart Driver Care both work on Windows 8 and Windows 7.
In addition to this, for optimum performance, we suggest updating BIOS and Chipset drivers.
Method 1: Downloading Dell docking station manually
By visiting the Dell download center, you can manually download Dell docking station devices. To do so, follow the steps below:
Note: Before heading to Dell Support Center, collect information about the Windows Operating system (version and bit) and device model of the docking station.
Once you have all this information, follow the step by step guide.
- Click here to visit Dell Support Center.
- Now enter the Dell docking station model number in the search bar.
 If you are unable to find the device, click Browse all products.
 - Once you have Dell docking station, details click Drivers & Downloads on the result page.
- Select the correct Windows system. If it is Windows 10 64 bit, then select and click the Download
- Once downloaded, install Dell d6000 driver by following on-screen
- To bring changes into effect, restart your PC.
- Now, using the docking station try to connect all external devices.
 If you are unable to find the device, click Browse all products.
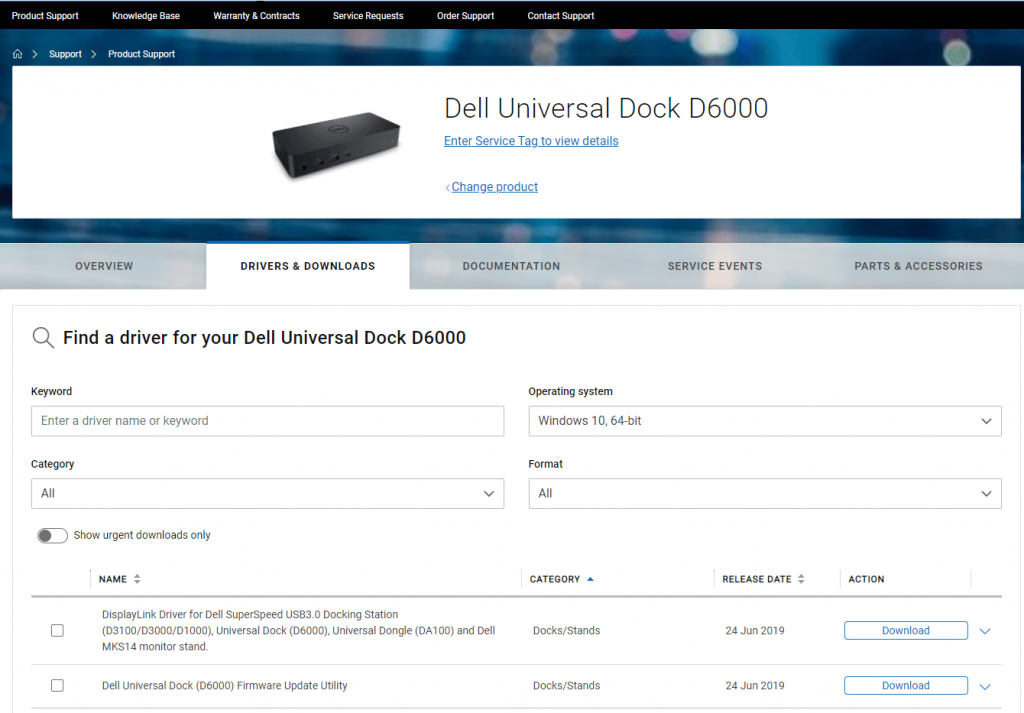

That’s it, using these simple steps you can update Dell drivers and can connect external devices to the docking station and link it with the PC.
Method 2: Updating Dell d6000 driver automatically (Recommended)
If the above-mentioned manual method is too much for you, and you want something simple, here it is, you can use Smart Driver Care, an automatic method to update Dell drivers.
Smart Driver Care is a powerful driver updating tool that helps detect and update Dell drivers and other outdated system drivers. Using it, you can easily update the Dell d6000 driver.
This driver updater tool automatically recognizes your system configuration, the model number of the device for which you want to update the driver, avoiding the risk of downloading incorrect drivers.
Using either the FREE or Pro version of Smart Driver Care, you can update Dell drivers easily. Moreover, using the Pro version, you can take a backup of the old drivers and restore them if anything goes wrong. You also get full support and a 60-day money-back guarantee.
How to use Smart Driver Care?
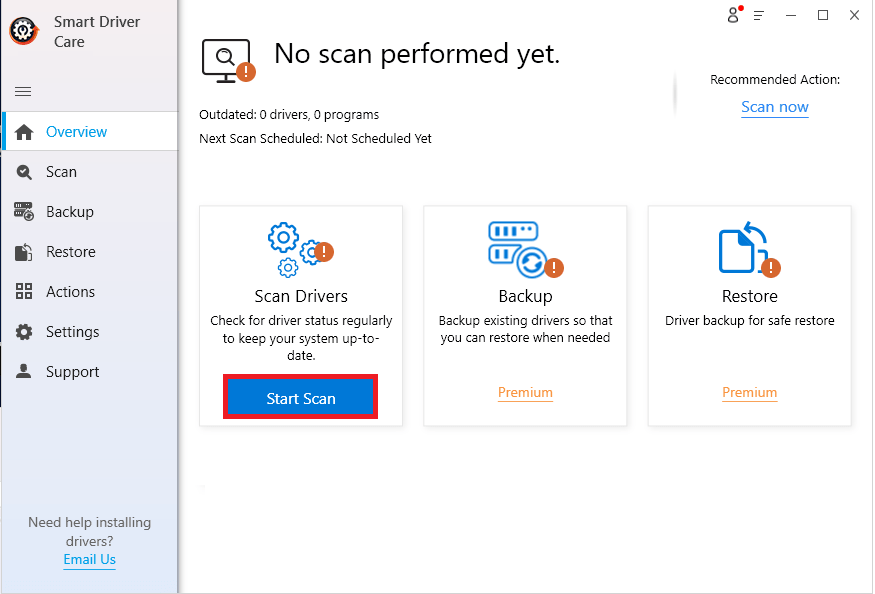
- Download and install Smart Driver Care.
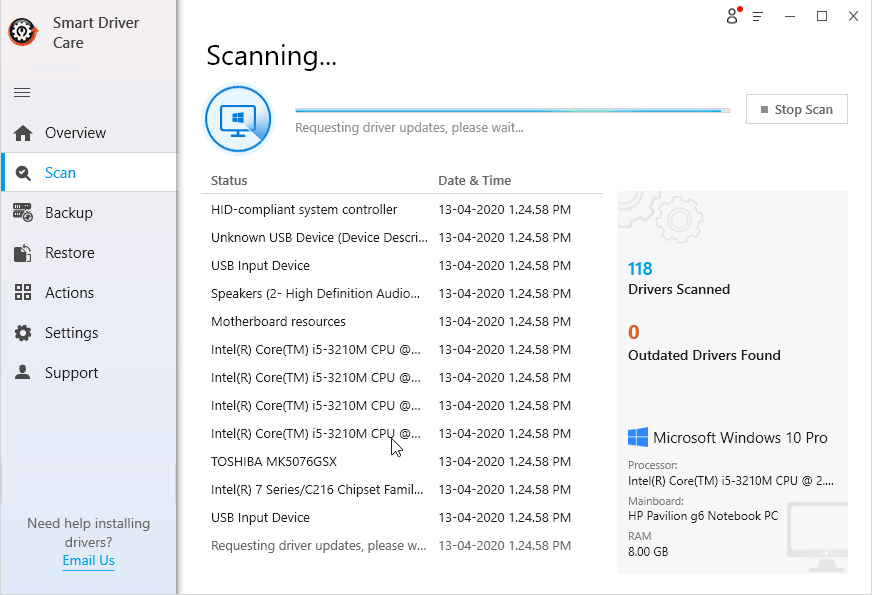
- Launch Smart Driver Care and click Start Scan, allowing the driver updater tool to scan the computer and identify outdated or incompatible drivers.
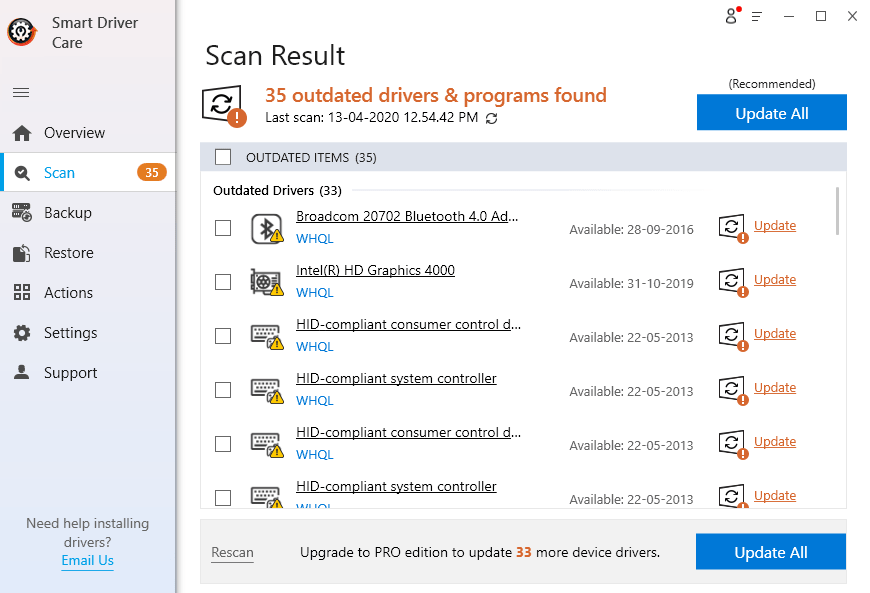
- Smart Driver Care will now scan your system for outdated drivers.
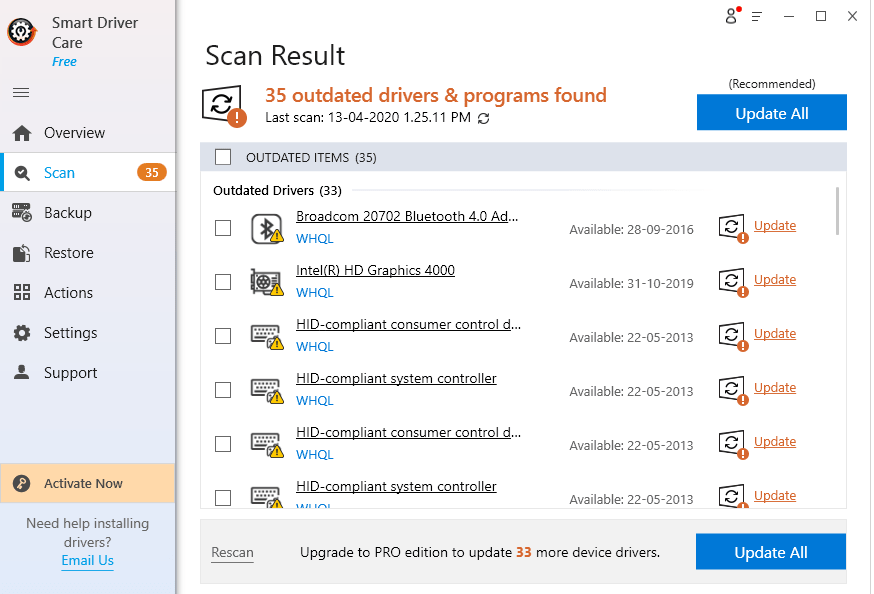
- Once the scan is completed, Smart Driver Care will list all outdated drivers.
- Click the Update button next to the Dell docking station device to automatically download the correct version (you can use the Free version for it.)


However, if you have the Pro version, you can click Update All to download and install all outdated drivers automatically.
- After updating the system drivers, restart your PC.
That’s it you will now have the updated Dell d6000 driver. However, if you face any problem or the problem persists, you can contact the Smart Driver Care support team at [email protected]. You can also visit the site for live support: https://www.smartdrivercare.com/.
Method 3: Updating Dell drivers through Device Manager
In addition to the above steps, you can also use Device Manager to download and install the latest version of Dell d6000 drivers. To do so, follow the steps below:
- Ensure docking station is connected to your PC or laptop
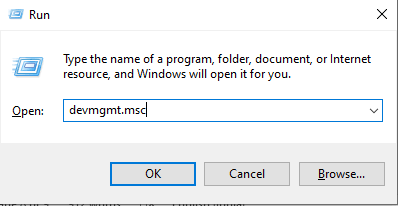
- Now press Windows + R keys to open Run Window
- Here, type msc and press Enter
- This will open the Device Manager window. Here look for a docking station device (sometimes it may display as an Unknown device)—Right-click and select “Update driver” from the context menu.
- Click Search automatically for updated driver software in the new window that opens.
- Follow on-screen instructions, and you are done.

That’s it, using these simple steps you can update Dell drivers and can have flawlessly working Dell d6000. docking station driver.
If you have any questions or suggestions, please do share with us. Your feedback is valuable to us.