
There are situations where most of us have to leave the system on, like when we download Windows updates or download a movie. Think of a situation when you are not at home and the system is left switched on! Well it would waste of electricity and resources to say the least. But, not anymore! We can set up an automatic shutdown timer to save electricity and this will also cool down your system till the next time you turn it on.
What Is Shutdown Timer?
Shutdown Timer is a feature that allows you to schedule the shutdown. This means that shutdown can be carried out at any scheduled time in future. This timer can be enabled in 4 different ways.
Ways To Schedule Automatic Shutdown Timer On Windows 10 & 7
So, here is the list of methods to set up an auto shutdown timer on Windows 10 and Windows 7.
Method 1: Set Up an Auto Shutdown Timer via Run
Step 1: Go to Start Menu and type ‘Run’ or press ‘Windows + R’.
Step 2: In Run, type ‘shutdown –s –t number’.
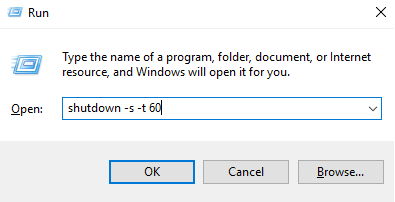
Note: Here number represents the value of time in seconds. For example, if you want your PC to automatically shut down in 10 minutes, the command to be entered is shutdown –s –t 600.
Step 3: Tap OK.
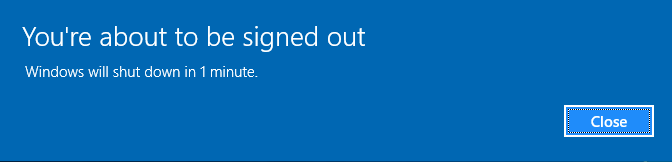
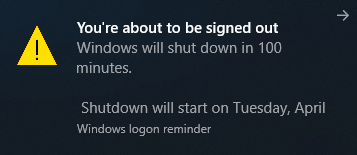
After finishing the above steps, Windows will prompt about the shutdown time, as shown in the screenshot.
Method 2: Set Up an Auto Shutdown Timer via Command Prompt
Step 1: Go to Start menu and type ‘CMD’.
Step 2: In Command Prompt (CMD), type ‘shutdown –s –t number’.
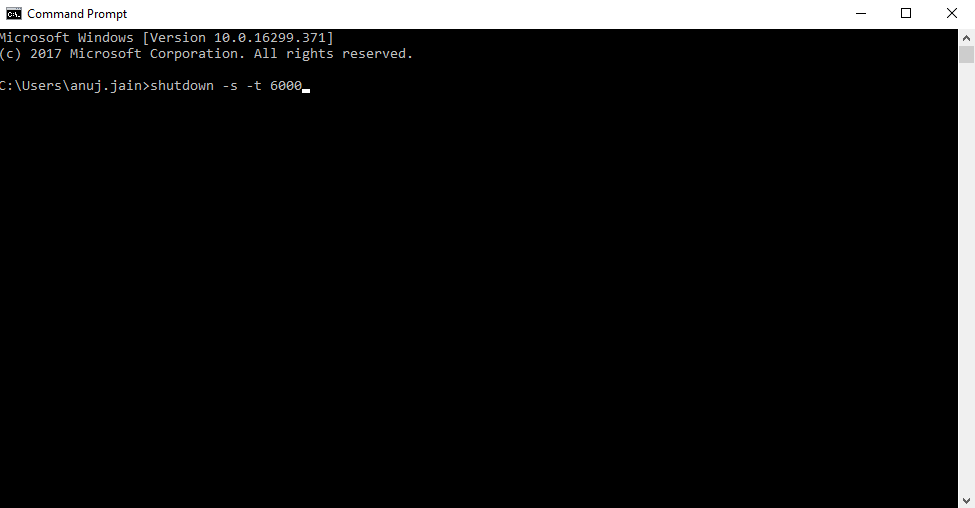
Step 3: Press Enter.
After finishing the above steps, Windows will prompt about the shutdown time, as shown in the screenshot.
Method 3: Set Up an Auto Shutdown Timer in Windows PowerShell
Step 1: In Start menu, type and search Windows PowerShell.
Step 2: Open Windows PowerShell.
Step 3: In PowerShell, type ‘shutdown –s –t number’.
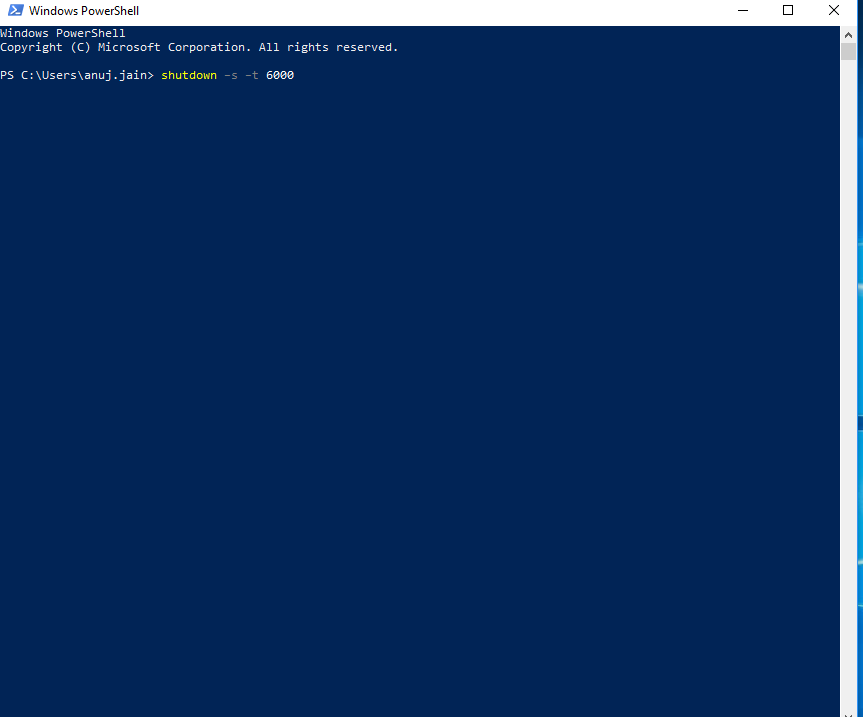
Step 4: Press Enter.
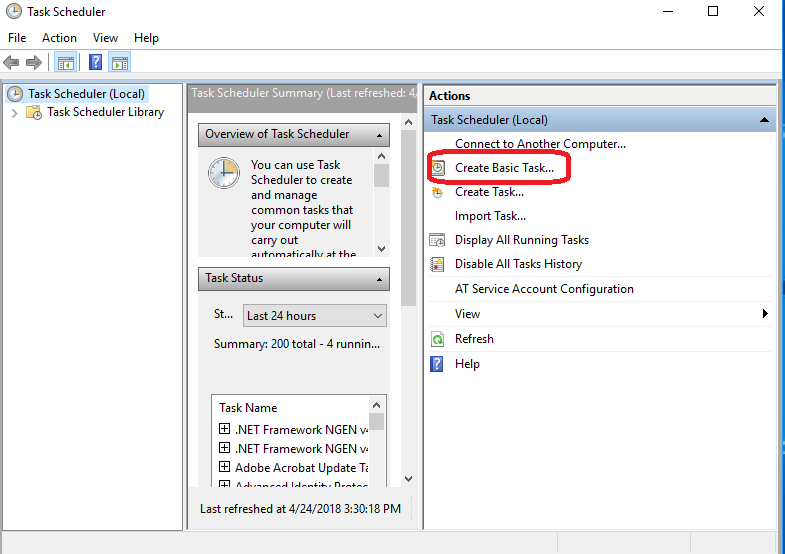
Method 4: Make a Basic Task Named Shutdown
Step 1: Go to Start menu, type and search Task Scheduler.
Step 2: Open Task Scheduler.
Step 3: Now on the right side, click on ‘Create Basic Task’.
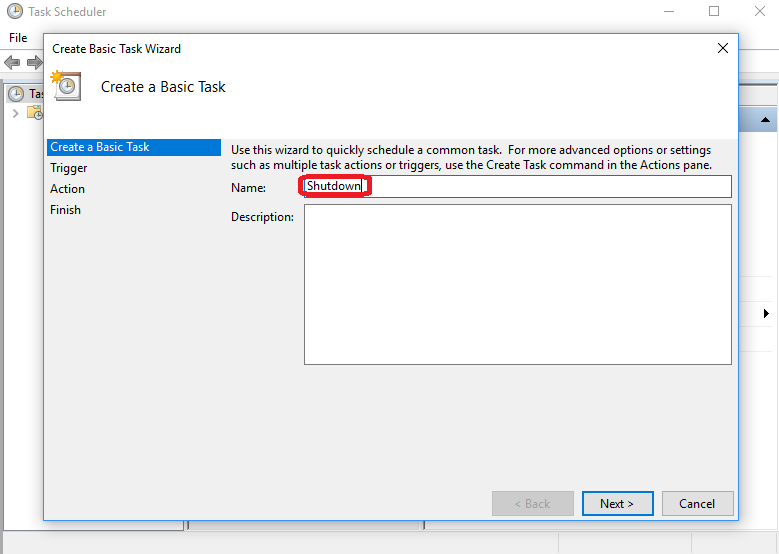
Step 4: In the task name box, type Shutdown and click Next.
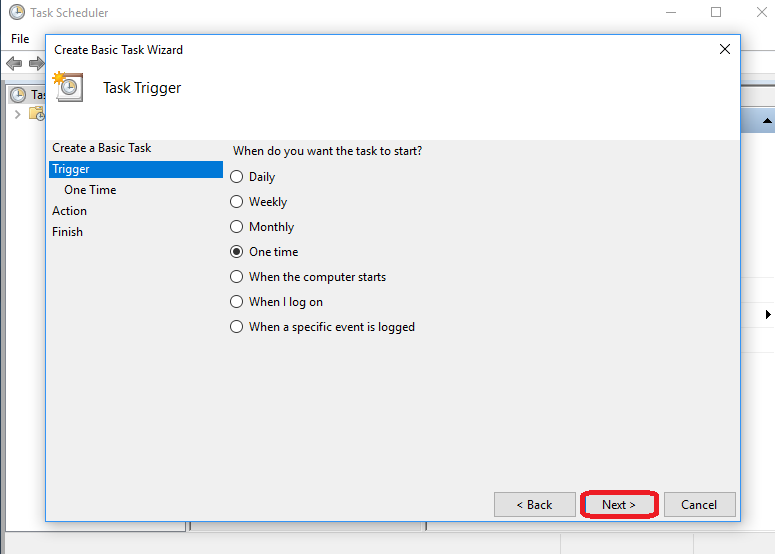
Step 5: Now select when you want the task to start, the list includes, Daily, Weekly, Monthly, One time, When the computer starts, When I log on, and When a specific event is logged and then press Next.
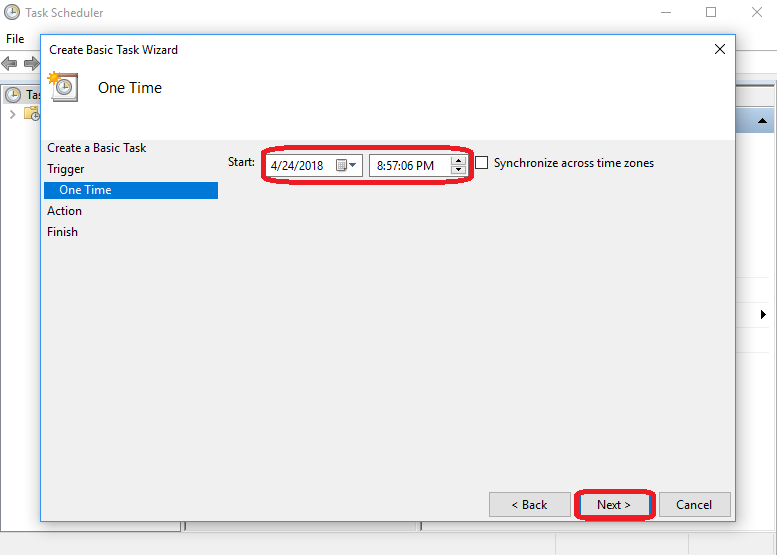
Step 6: Now, set the start date and time of the task and click Next.
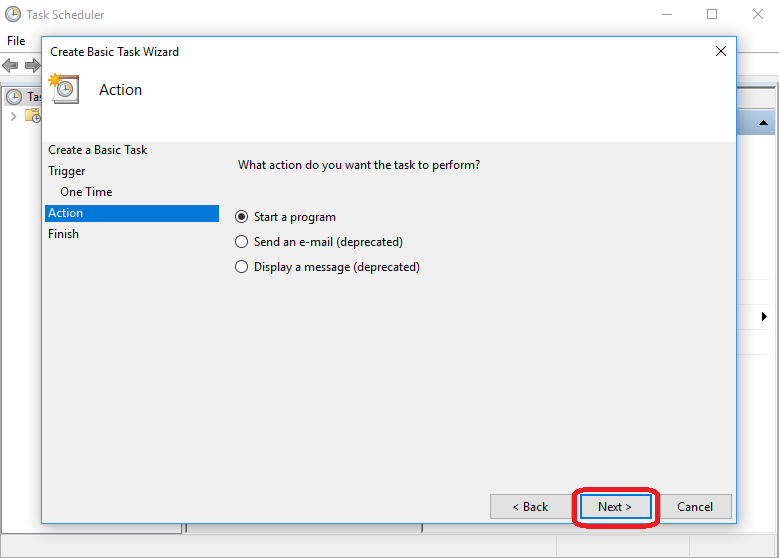
Step 7: After this, choose the action you want the task to perform and click Next.
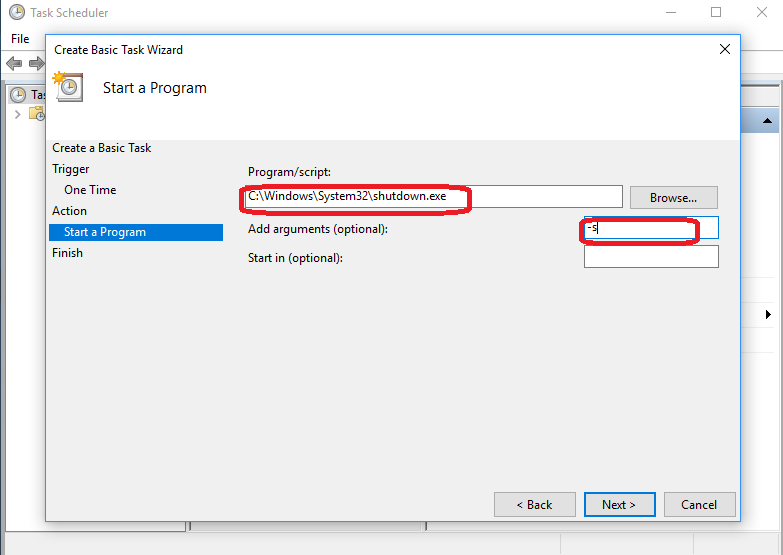
Step 8: Now a window will open, tap the browse button, go to Disk C/Windows/System32 and select the .exe file created as Shutdown, and click Open.
Step 9: Now in an argument box, type -s as the argument and hit Next.
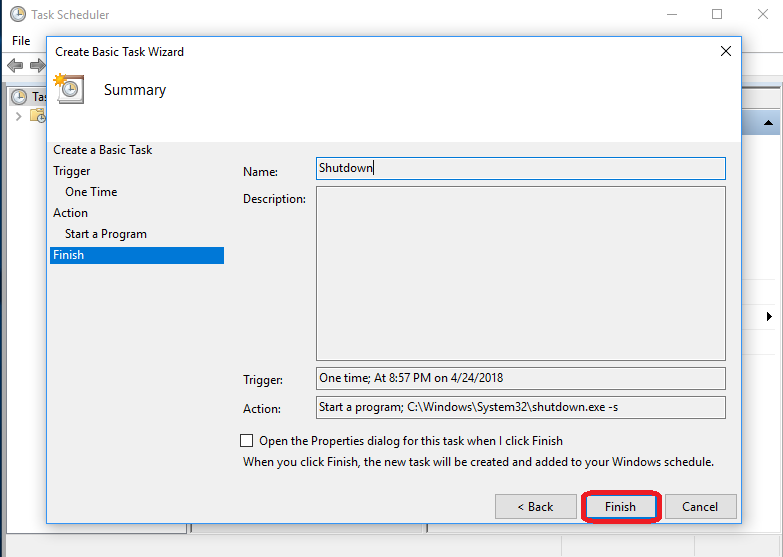
Step 10: After performing all the above steps, click Finish to create the task and implement it.
All the above given methods will allow you to enable shutdown timer on Windows 10 & Windows 7.
If you found this helpful, please let us know. You can also drop your feedback in the comment section below.
Sam
It was helpful thanks.Wesley Brenner
thank you so much!!! this was so helpful!