
Windows 11 typically recognizes new hardware immediately upon connection. It automatically installs the necessary drivers, allowing users to utilize the hardware without additional adjustments. While this functionality usually works seamlessly, there are instances where manual intervention is needed to initiate a scan for hardware changes. In situations where Windows fails to identify the connected device, initiating a scan for hardware changes becomes necessary. Here is how to manually scan for hardware changes on Windows.
Also Read: How To Fix Faulty Hardware Corrupted Pages On Windows 10 & 11?
How To Scan For Hardware Changes On Windows?
Method 1: Scan For Hardware Changes Via Device Manager
Initiating a hardware scan through Device Manager appears to be the most straightforward method. Follow these steps to use Device Manager for scanning hardware changes on Windows:
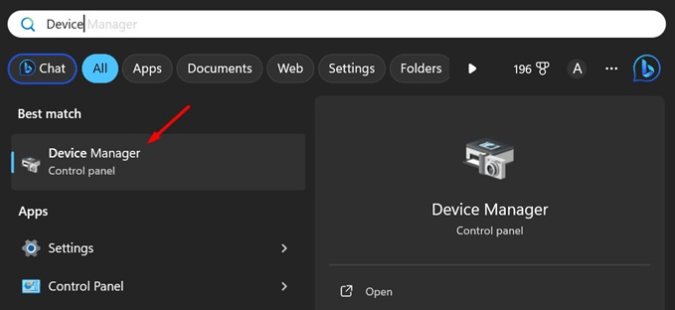
Step 1: Begin by typing “Device Manager” in the Windows 11 Search. Open the Device Manager from the list of best-match results.
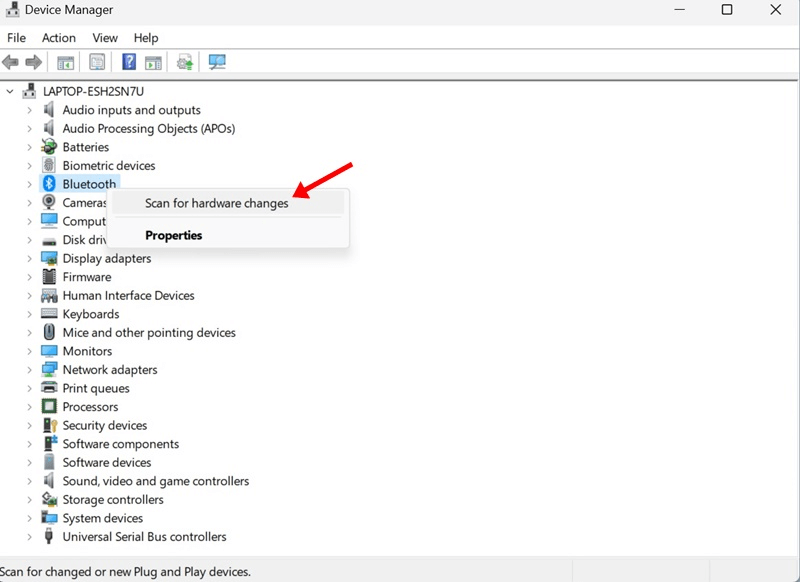
Step 2: Once the Device Manager is open, right-click on the specific Device Category and choose “Scan for hardware changes.”
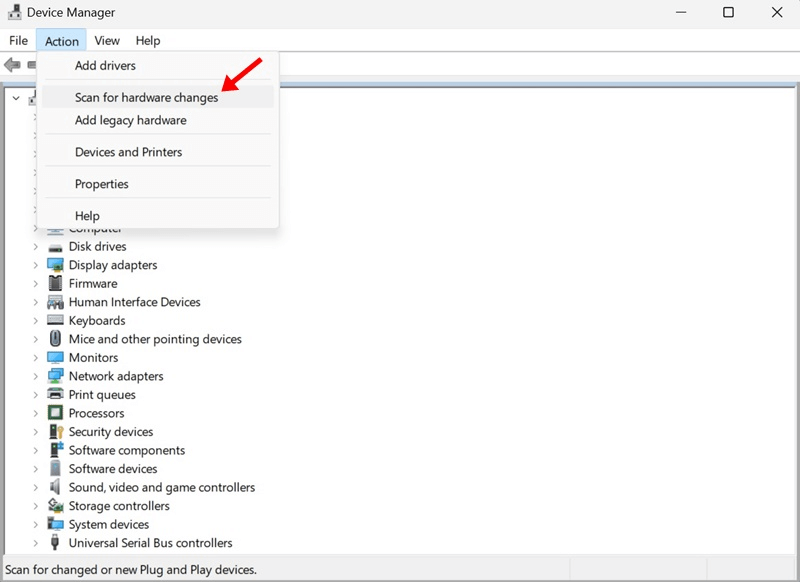
Step 3: If you’re uncertain about the Device Category, click on the Action menu and opt for “Scan for hardware changes.”

This is the process for conducting a hardware scan to detect changes through Device Manager.
Also Read: How To Find The Hardware ID Of A Driver In Windows
Method 2: Use The Computer Management Tool
Performing a hardware scan through the Computer Management tool is another option, as it incorporates the Device Manager. Follow these steps to scan for hardware changes using the Computer Management tool on Windows:
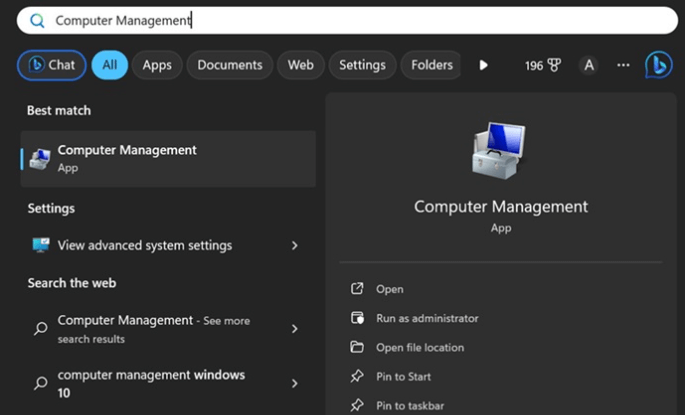
Step 1: Begin by typing “Computer Management” in the Windows 11 Search. Open the Computer Management tool from the list of best-match results.
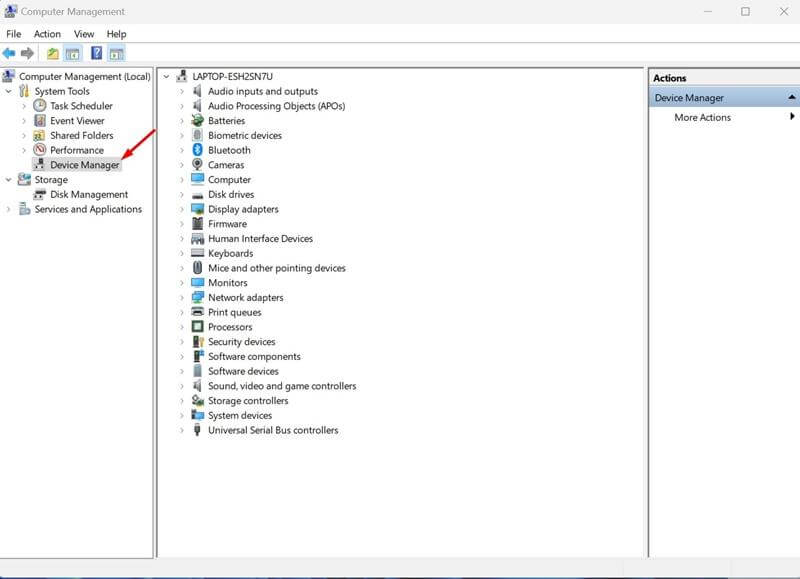
Step 2: Once the Computer Management is open, navigate to System Tools > Device Manager.
Step 3: Select the desired device category.
Step 4: On the right side, click on “Action,” and then choose “Scan for hardware changes.”
This is the process for conducting a hardware scan to detect changes using the Computer Management tool on Windows.
Also Read: ‘Application Has Been Blocked From Accessing Graphics Hardware’
Method 3: Use The Command Prompt To Scan For Hardware Changes
Performing a hardware scan through Command Prompt, a powerful command line utility, is an efficient way to detect hardware changes on Windows 11. Here’s a step-by-step guide:
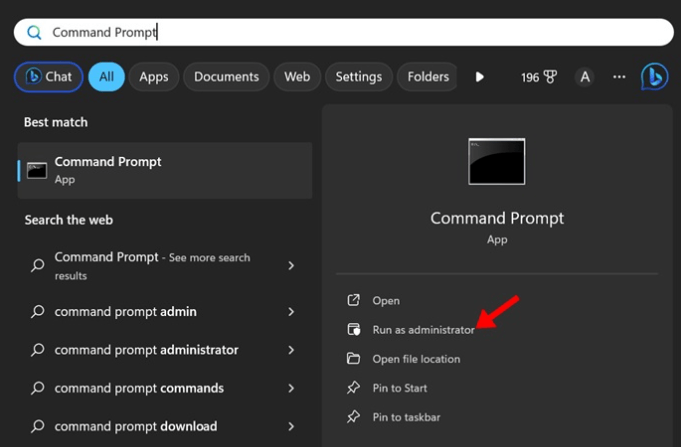
Step 1: Begin by typing “Command Prompt” in the Windows 11 Search. Right-click on Command Prompt and select “Run as administrator.”
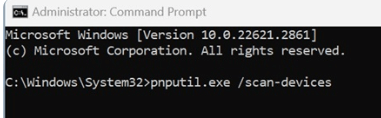
Step 2: Once the Command Prompt is open, execute the following command:
pnputil.exe /scan-devices
Step 3: Upon execution, you’ll see the message ‘Scanning for device hardware changes,’ indicating that Windows is actively scanning for hardware changes.

Once you encounter the ‘Scan Complete’ message, you can close the Command Prompt.
Also Read: How To Fix “The Request Failed Due to Fatal Device Hardware Error”
Method 4: Use A Desktop Shortcut
Facilitate a quick hardware scan by creating a desktop shortcut for users who find handling Device Manager, Computer Management, or Command Prompt less convenient. A desktop shortcut provides an easy way to initiate a scan for hardware changes without navigating through various tools. Here’s a simple guide on creating a desktop shortcut for the scan devices command.
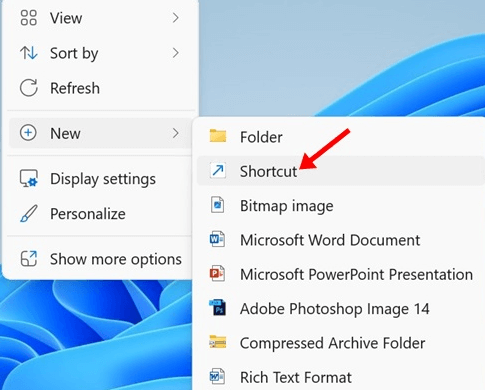
Step 1: Right-click on an empty area on your desktop screen and choose New > Shortcut.
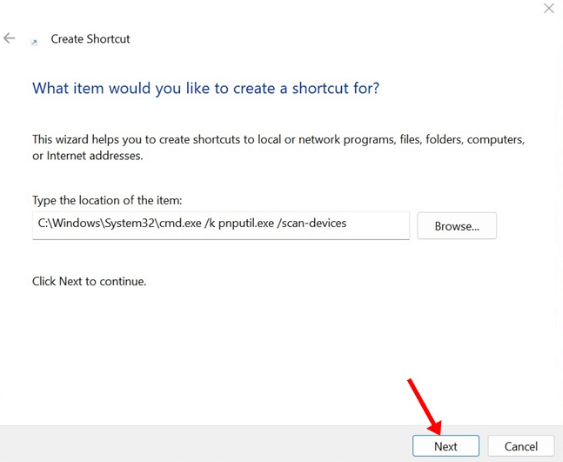
Step 2: Paste the given location into the “Type the location of the item” field and click Next.
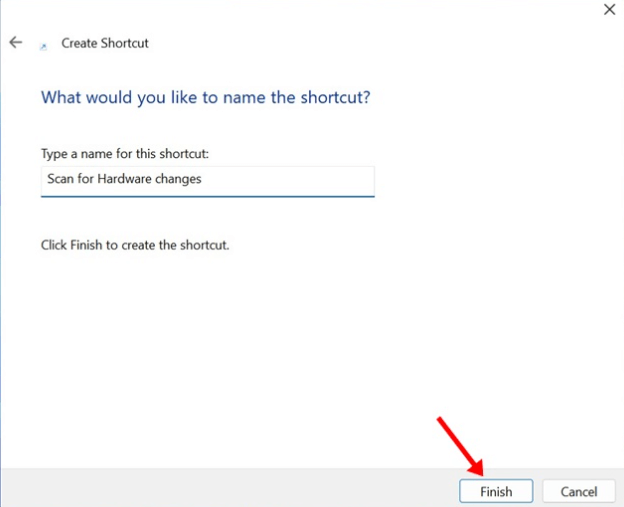
Step 3: In the “Name this shortcut” window, type “Scan for Hardware Changes” and click Finish.
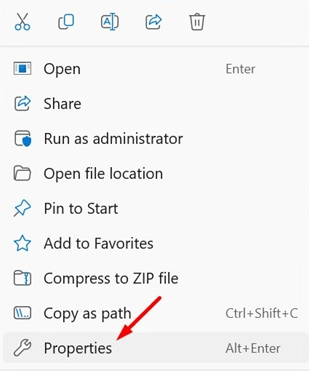
Step 4: Right-click on the desktop shortcut and select Properties.
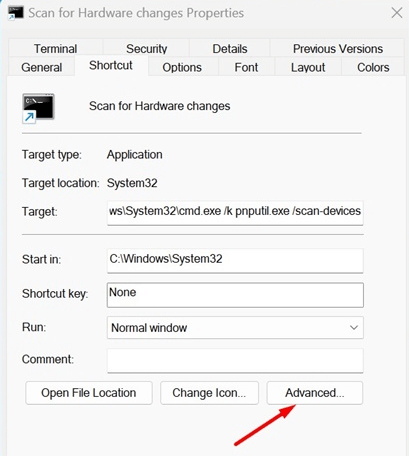
Step 5: Navigate to the Shortcut tab and click Advanced.
Step 6: In the Advanced Properties, check the “Run as administrator” option and click OK.
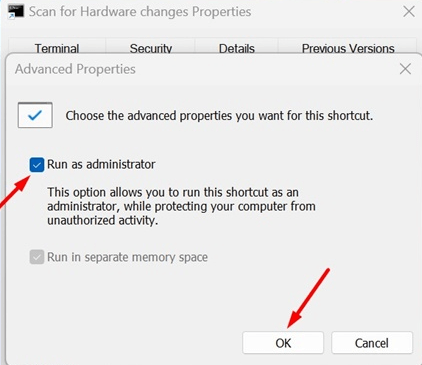
Step 7: Apply the changes by clicking OK.
Now, whenever you wish to scan for hardware changes, simply double-click on the desktop shortcut you’ve just created.
Also Read: 4 Ways to Fix “Windows Cannot Identify this Hardware” Code 9 Error
Bonus Tip: Use Advanced Driver Updater To Update Drivers
After you have successfully initiated the Scan for Hardware Changes, you might need to update your drivers to facilitate optimal performance. We recommend using the Advanced Driver Updater app to update all your drivers. Here are the steps:
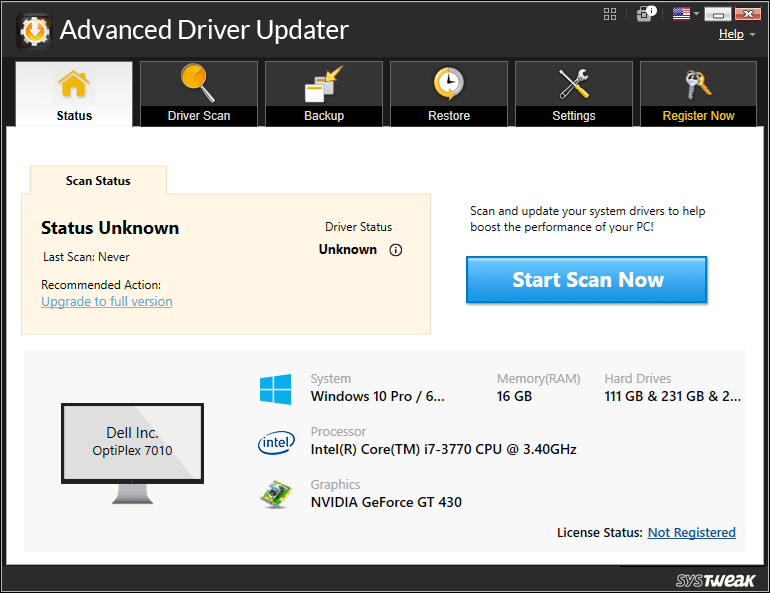
Step 1: Download and install Advanced Driver Updater.

Step 2: Launch the app and click on Start Scan Now button.
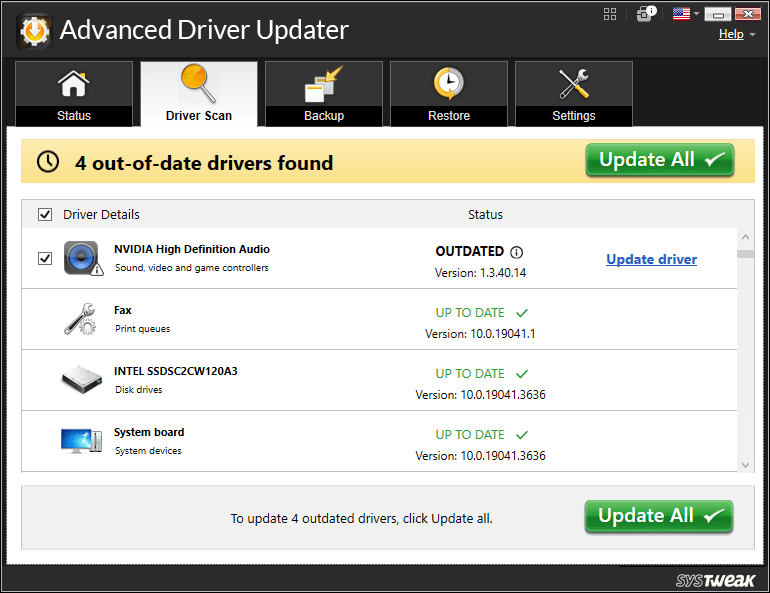
Step 3: After the scan is over, click on Update Driver next to the drivers that need to be updated.
Step 4: Reboot the PC after the update process.
The Final Word On How To Scan For Hardware Changes On Windows?
In conclusion, scanning for hardware changes on Windows is a crucial diagnostic step to address potential issues and maintain optimal device performance. Following the outlined methods, users can easily identify and resolve hardware-related problems, ensuring a smooth and efficient computing experience. Regularly checking for hardware changes contributes to system stability and helps users avoid potential complications. Follow us on social media – Facebook, Instagram and YouTube.