
Do you take backup of your photos and other precious data? People take tons of photos to create memories that they can cherish later. However, if you are not backing them up, risk of losing of your data is always persistent. Taking a backup of your Mac is the best way to make sure you will never end up losing your memories whether there is a technical glitch, hard-drive failure, corrupt files, virus infection or when your machine crashes.
You can use Apple’s native tool Time Machine which is an automatic and easiest way to back up your data. Best of all, you can exclude the files you’re not interested in taking a backup of. Time Machine comes handy when you want to restore your whole hard drive seamlessly.
In this post, we’re going to discuss how to restore your Mac with Time Machine to let the good times roll.
How to Take Backup of Your Mac With Time Machine
Follow the below steps to set up back up of your Mac with an inbuilt software ‘Time Machine’ that comes with OS X 10.5 Leopard and later version.
Step 1: Firstly, enter your password to access your Mac.
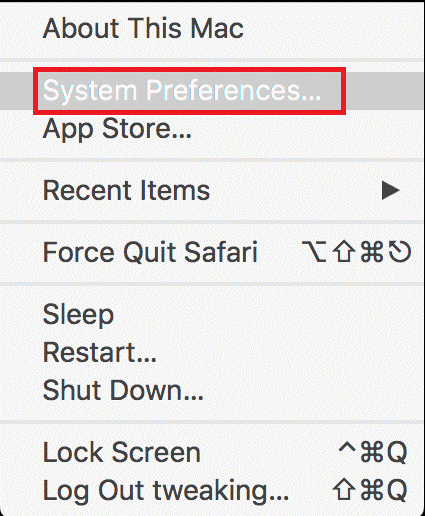
Step 2: Click on the Apple icon available at the top-left corner of your screen.
Step 3: Select the second option “System Preferences”.
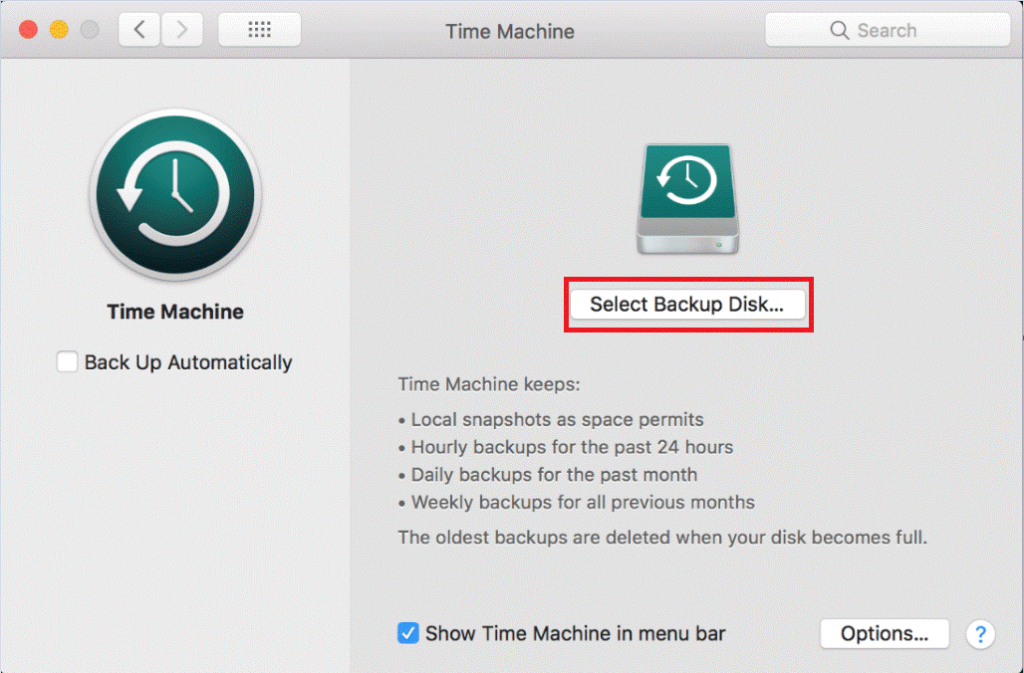
Step 4: In the System Preferences window, select “Time Machine” icon.

Step 5: Choose “Select Backup Disk” from the Time Machine window.
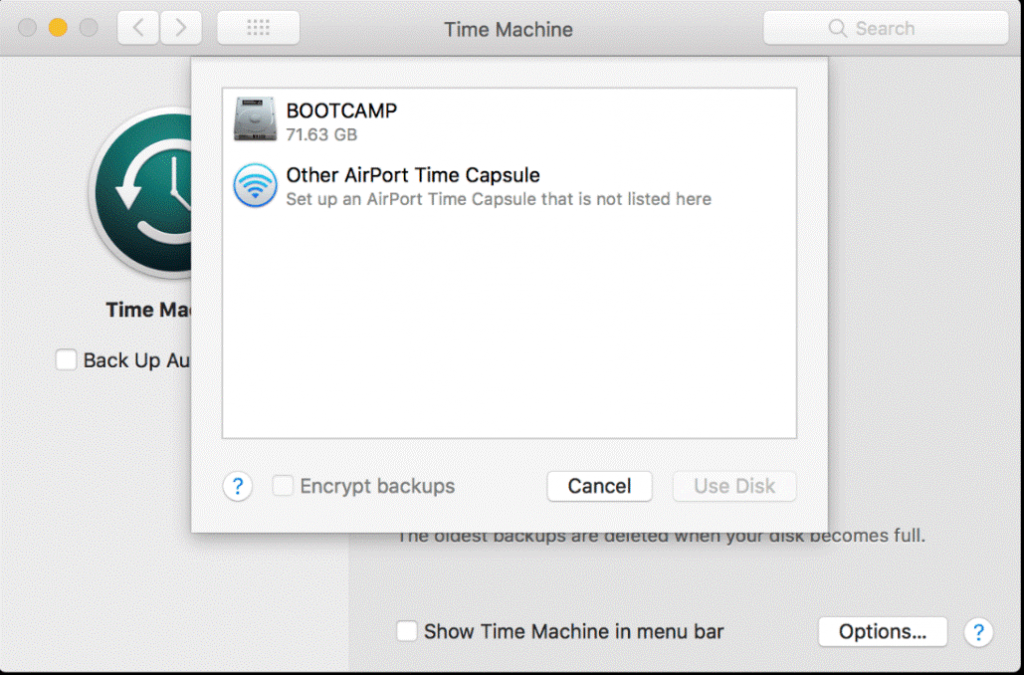
Step 6: Now, your machine will prompt you to select the preferred disk to take the backup of your saved data and click on “Use Disk”.
Step 7: Make sure you checkmark beside the “BackUp Automatically” box to make sure the data is automatically backed up to the disk.
How to Restore Data from Time Machine Back Up
If you want to have your file back at the place where it was earlier than click on restore so that Time Machine will copy the exact file back to its original location on the hard-drive.
Step 1: Click on Apple icon. You can locate the icon beside Finder at the top-left corner.
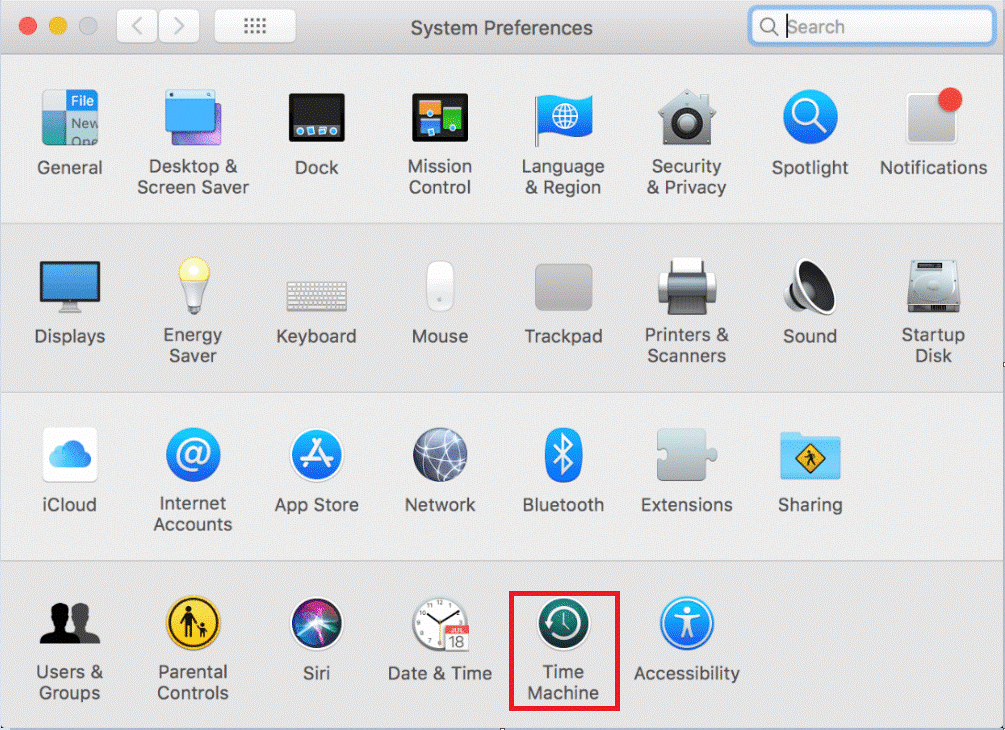
Step 2: Select “System Preferences” from the drop-down list.

Step 3: Click on “Time Machine” icon from the new window that appears on your screen after choosing System Preferences.

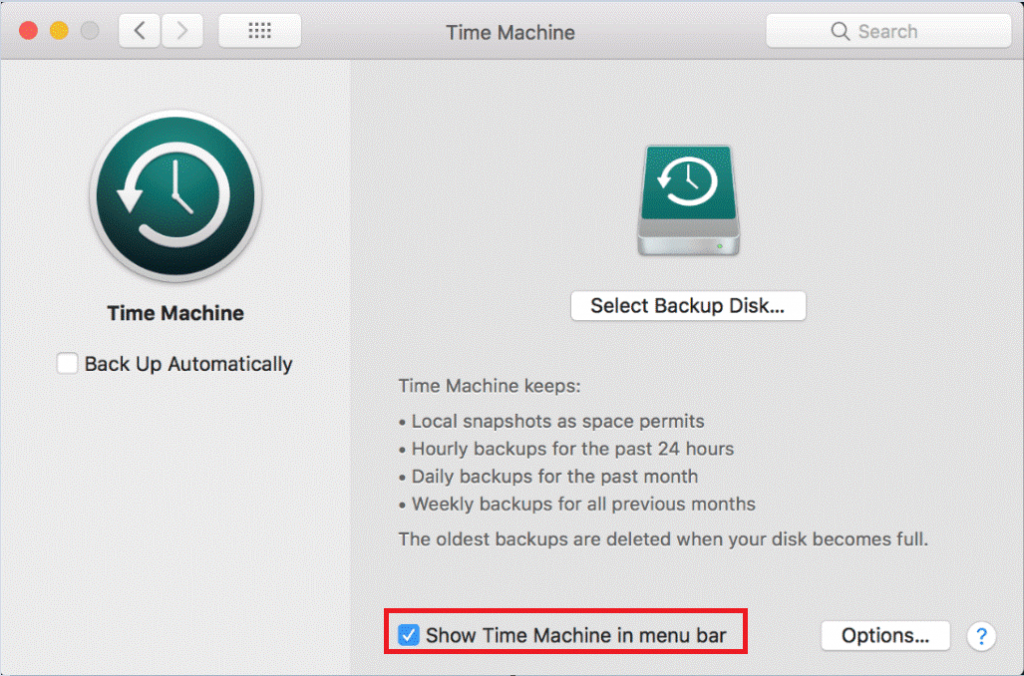
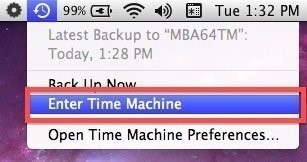
Step 4: In the Time Machine window, put a checkmark next to “Show Time Machine in menu bar” at the bottom of the same window.
Step 5: Click on “Enter Time Machine”.
Step 6: Locate the file that you would like to restore and then click on “Restore” button.
How to Take Backup Of Selective Files With Time Machine
If you’re using the inbuilt software (Time Machine) to take the backup of your data then it’s possible for you to exclude certain files from taking the back up. Follow the below instructions to exclude some of the files and folders from taking the backup from Time Machine.
Step 1: Click on the Apple icon and select “System Preferences”.
Step 2: Choose Time Machine from the System Preferences window.
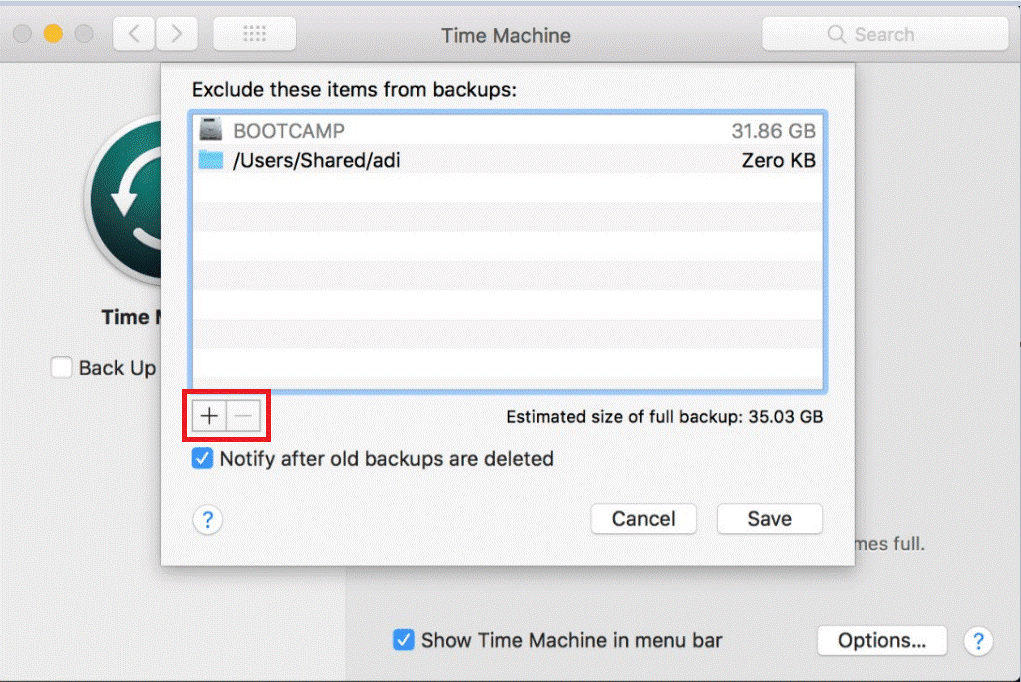
Step 3: Click on “Option” button that is located at the bottom- right corner of your Mac screen.

Step 4: Now, you will see a new screen “Exclude these items from backups:”. Click the +(Add) button and select the folder that you want to exclude from the backup.
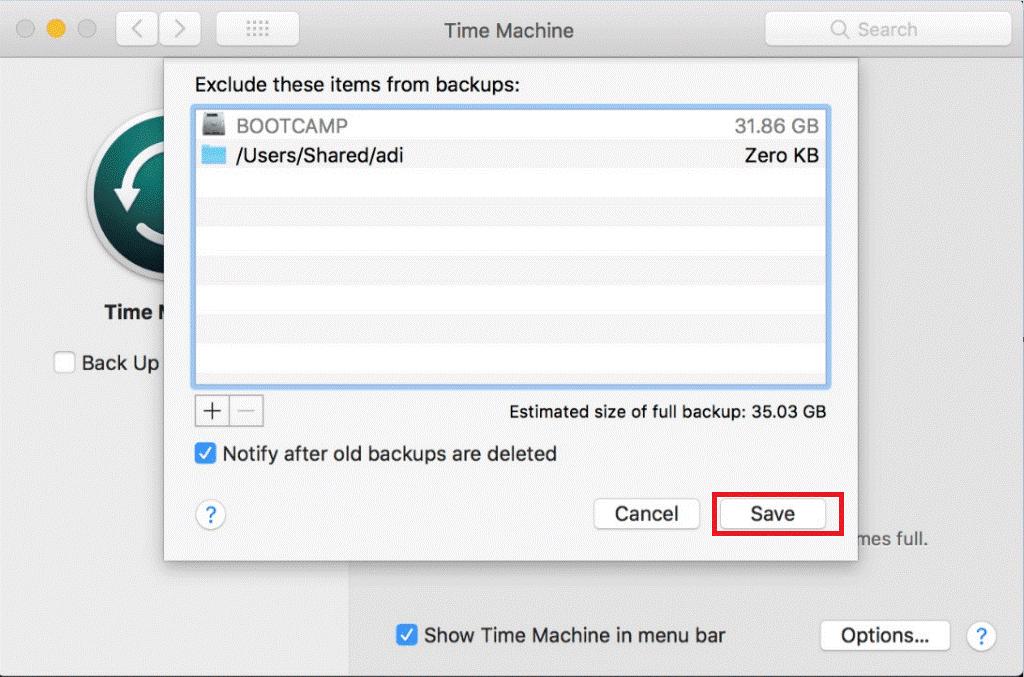
Step 5: Once you are done, click on the “Exclude” button that is available at the bottom of the interface.
Step 6: Click on “Save” to confirm the changes.
We hope that this article will help you to work with Time Machine. Moreover, using Time Machine is a good way to backup your vital data. Please do share your feedback in the comments section below.