
Question:
“How can I uninstall SoundFlower from my Mac? It is not working properly, and now when I want to remove it, the application doesn’t show up in the Applications folder, so does anyone have an idea as to how we can clear up SoundFlower along with its corresponding flies from my Mac?”
Answer:
There are two ways to uninstall SoundFlower completely from Mac. One is a manual way, and the other is an automatic one. For the latter, we will use CleanMyMac X – the best cleanup tool for Mac. Using this tool, you can optimize Mac and get rid of junk files and recover gigabytes of storage space.

Now, let’s understand all this in detail and more about SoundFlower.
What is SoundFlower?
SoundFlower is a 3rd party plug-in for macOS. It is specifically designed to pass audio content between several different applications. Once installed, it will be displayed as an option in the System Preferences > Sound pane. Therefore, uninstalling it the traditional way will require more than moving it to the Bin/Trash.
So, here we explain how that is done.
Additional Information:
Regular steps to Uninstall an App from Mac
1. Launch Finder
2. Click Applications folder present in the left bar
Alternatively, you use the Go menu and find the app to uninstall.
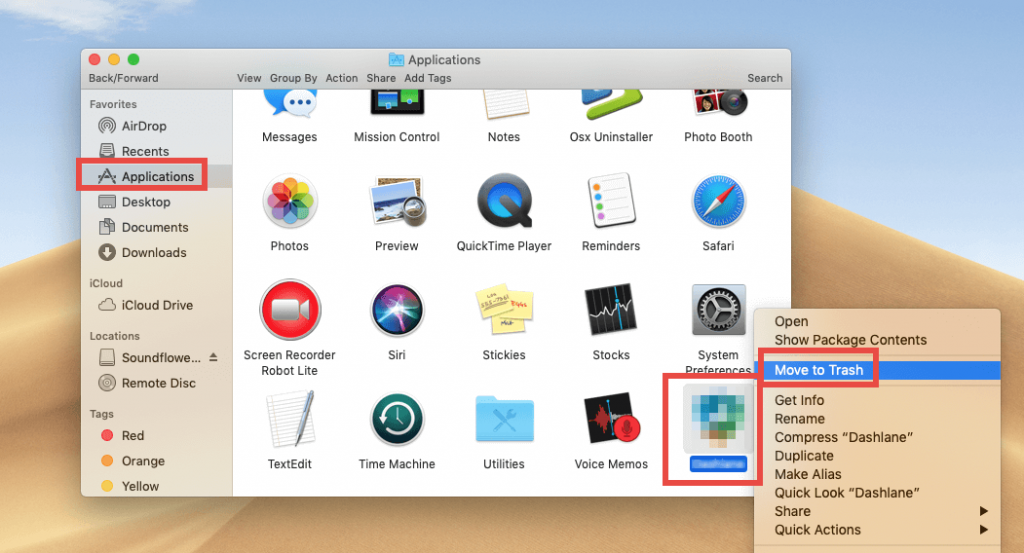
3. Once located, select it > right-click Move to Trash / Move to Bin.
4. After moving the app into Trash, you’ll need to Empty Trash/Empty Bin.
5. Open Trash > select the deleted app > right-click > Delete Immediately.
6. This step helps delete all the traces related to the application you just uninstalled from Mac.
Isn’t this simple? Right uninstalling an app this way is easy, but this leaves some corresponding files on the system. Hence to completely remove any app, we need an excellent uninstaller utility for Mac, and that is CleanMyMac X.
Using this intuitive and effective app, you can uninstall any app without leaving any leftovers.
To use it, follow the steps below:
How to Automatically Delete SoundFlower from Mac?
Note: Before following the steps explained below, we suggest you quit the SoundFlower app and all its associated processes. To do so, right-click the active app in the Dock or Menu Bar > Quit. Besides, you can also head to Activity Monitor, look for all the related processes, and the app and Force Quit them. Once all this is done, move the steps explained ahead.
- Download and install CleanMyMac X (free trial version available)
- Launch the app
- Head to Uninstaller, wait for the list to populate
- Once you have the results, select SoundFlower and all its related files.
- Hit Uninstall
This will completely remove SoundFlower from your Mac.
How to Delete SoundFlower Manually From Mac?
1. Using The Package Or Can Say Uninstaller File
When you installed SoundFlower, you might have noticed a file labeled Uninstall SoundFlower.scpt in the SoundFlower installation package. If not, let me tell you when you install SoundFlower, and the uninstallation file is also installed. To use it and completely remove SoundFlower follow the steps below:
1. Open the SoundFlower installation package file.
Note: After installation, if you have deleted the file, we suggest installing it again.
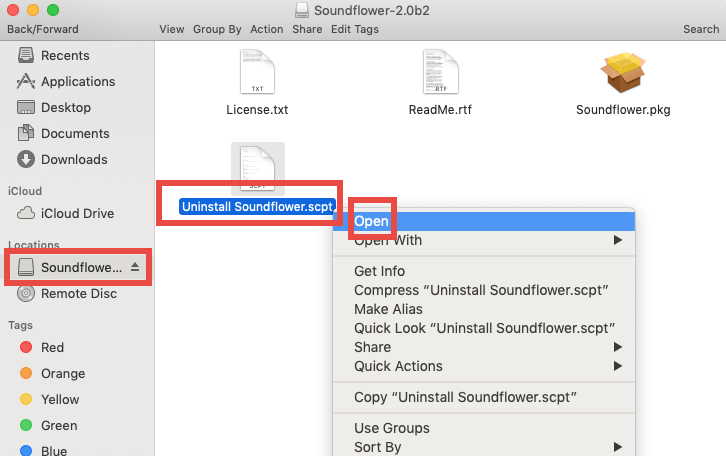
2. Once installed, double-click and run Uninstall SoundFlower.scpt file in the DMG file. Or Can head to the SoundFlower folder look for Uninstall SoundFlower.scpt > right-click > Open.
3. You will now see a new window here; click the Play icon as highlighted in the screenshot below.
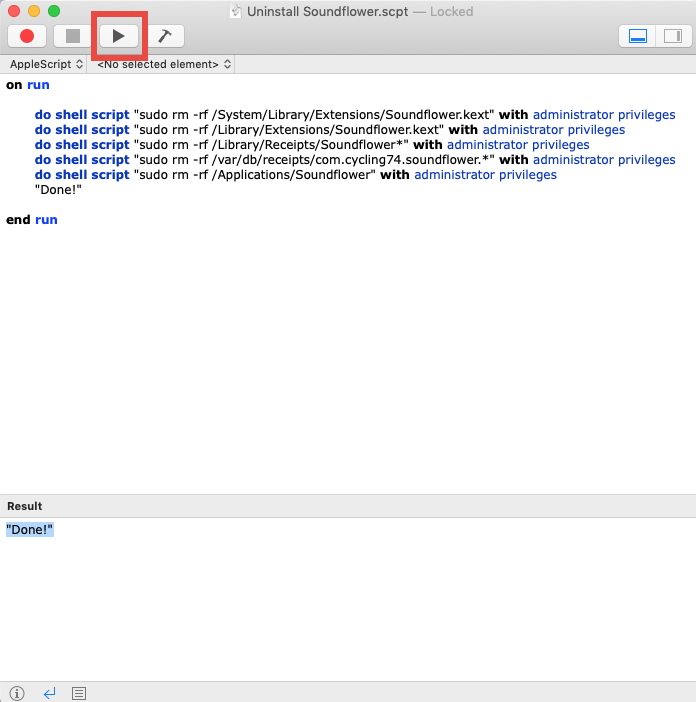
This will run the uninstallation script; once done, you will see Done. This means SoundFlower is gone forever from your Mac.
To apply all the changes, restart Mac, and then try to use the default sound settings.
2. Uninstalling SoundFlower Manually
- Quit SoundFlower. Right-click its icon present in the Dock > Quit
- Next, head to the Applications folder, look for SoundFlower > right-click > Move to the Trash.
- Afterward, head to Macintosh Hd > private > var > db > receipts
- Here you will see files related to SoundFlower. Select them and move to trash.
- Make sure you Empty trash after this and restart the system.
SoundFlower will now be completely deleted from Mac without leaving any leftovers. Isn’t the automatic way simpler than the manual one? Right, I know you agree with me. So, why wait and get yourself bothered by SoundFlower continuous pop-up removal now using CleanMyMac X. Not only this, you can clean malware infections, log files, crash reports, rogue extensions, disable unwanted login items and do a lot more. All this will help optimize your Mac and recover storage space. You can also shred files, making them unrecoverable.
We hope you find the article helpful and will use the steps explained. However, if you have some other trick that works perfectly without harming the system, do share. We’d love to hear from you either way. Do leave us a comment in the box below.
Mansi Vijay
Thanks for this detailed guide. I didn’t know Automatically Deleting SoundFlower from Mac was this easy!