
Games need perfection and NVIDIA delivers it. If you like to play computer games, you must be familiar with the graphics card available from NVIDIA. If you have a basic PC of 3.1 or higher GHz and want to play high-end games, you can deploy graphics card to fulfil your wish. If you already have an NVIDIA graphics card installed on your PC motherboard, there are a few settings that can enhance your gaming experience. Every graphics card entitles you to get into its control panel and make required changes that fits to your games’ need. It is important to regularly check for new updates and optimize NVIDIA control panel for gaming. Today, we’re going to suggest the top changes to make in your NVIDIA control panel:
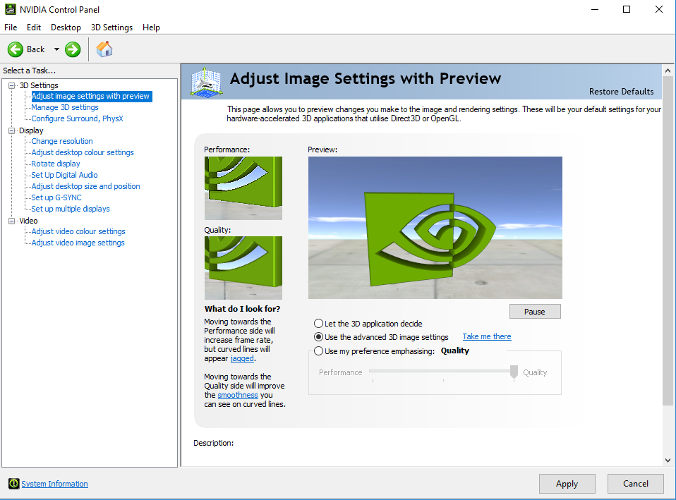
1. Adjust Image Settings with Preview:
Launch the NVIDIA control panel from either by right clicking on desktop or from the start menu. Under 3D Settings, which is located on the left-hand side, click the ‘Adjust image settings with preview’ option and choose “Use the advanced 3D image settings”. Once done, click on the Apply button at the bottom of the page to make the changes.
2. Manage 3D Settings:
This is the ocean of options that can enlighten your gaming experience with adequate changes. Click on Manage 3D settings from the left pane and click the Restore button located in the last. It should restore all the settings that have ever been changed. Now, click on the Antialiasing Mode and choose to turn it off. Later, go to CUDA – GPUs and select your NVIDIA GPU. Also, make sure you select all the other GPUs connected. In ‘OpenGL rendering CPU’, select your NVIDIA GPU and not the ‘Auto select’.
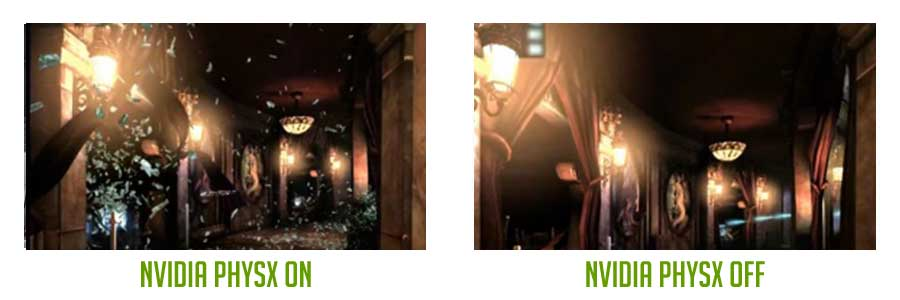
3. Configure Surround, PhysX:
This is the time to set your processor. For this, go to Configure Surround, PhysX option in the left-hand side pane and select your NVIDIA card under the processor located below PhysX settings. Once done, click on the Apply button to make the changes.
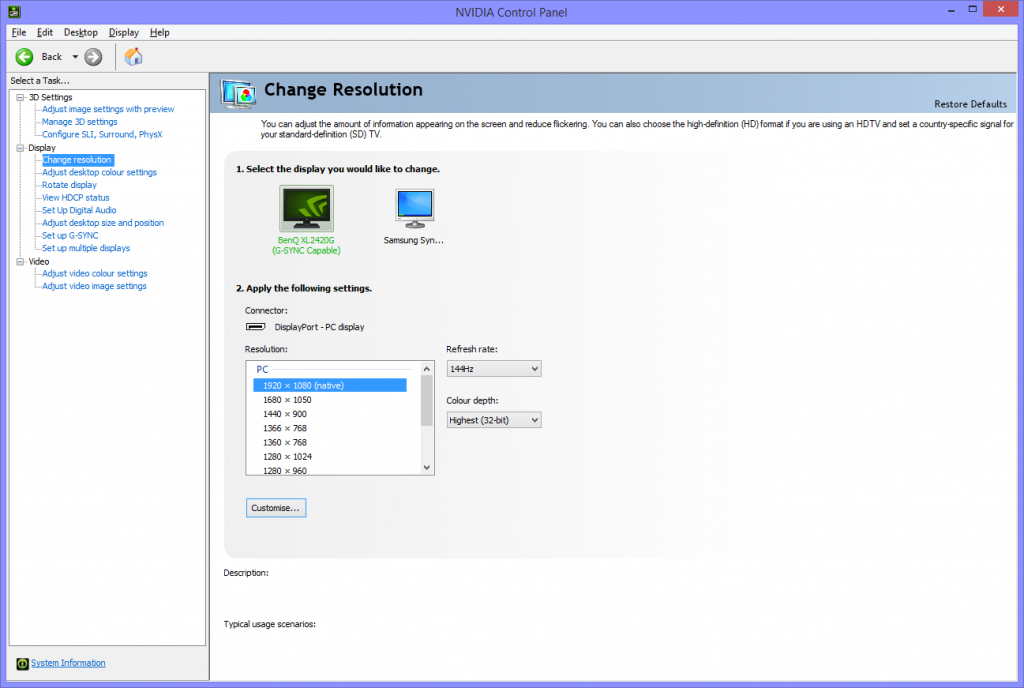
4. Change Resolution:
Now that you are done changing the 3D settings, it’s time to make some fundamental changes. Choose Change resolution option under the Display. There, choose the best resolution available on display and choose the best refresh rate of your monitor. It varies from machine to machine.
5. NVIDIA color settings:
This option is found under the same screen as change resolution under ‘Apply the following settings’. Here, instead of default settings, choose Use NVIDIA color settings. Make sure you choose the highest value options available under this setting Desktop color depth. Choose best Output color depth and RGB as your Output color format. Make sure to change Output dynamic range from Limited to Full.
Overall, when you optimize NVIDIA control panel for gaming, it certainly makes a huge difference to your gaming experience. Before you get your head around it, make sure that all the drivers are updated. If not, you can update drivers online by visiting the official website. Also, do not download or update drivers from any third-party website to avoid any glitch. If you know some tips and tricks to optimize NVIDIA control panel, do let us know in the comments below.
Watch this video: