Hardware drivers are required for any hardware devices connected to your Windows computer to function properly. Hardware drivers require low-level access to your Windows PC to function properly. Windows requires drivers to be formally signed since they have access to the kernel. This means that Microsoft tries to prevent unsigned drivers from being installed in Windows. However, there will be instances when you need to install unapproved, unsigned, or even ancient drivers that don’t have a digital signature. It’s feasible, but it’s not as straightforward as installing signed drivers.
Note: Driver signature verification is a security feature that should not be disabled. Install unsigned drivers only from reputable sources. Before beginning, make a complete backup of your computer and create a recovery disk.
How to Install Unsigned Drivers in Windows
Unsigned drivers can be installed in Windows in three different ways. Choose the one you’re most familiar with or the one that works best for you.
Method 1: Use The Advanced Boot Menu To Install Unsigned Drivers
The Windows Advanced Boot menu is the simplest way to install unsigned drivers. To do so, follow these steps:
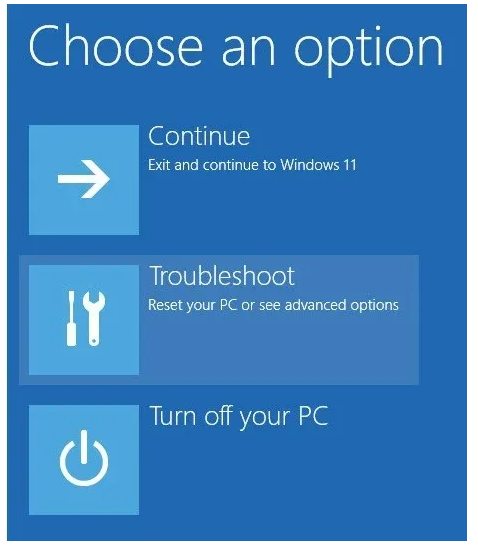
Step 1: Press Windows + X to open the system menu and then hover your mouse over Shutdown to reveal more options.
Step 2: Press the Shift key on your keyboard and then click on the Restart option. This will boot your computer to the Advanced Boot Menu.

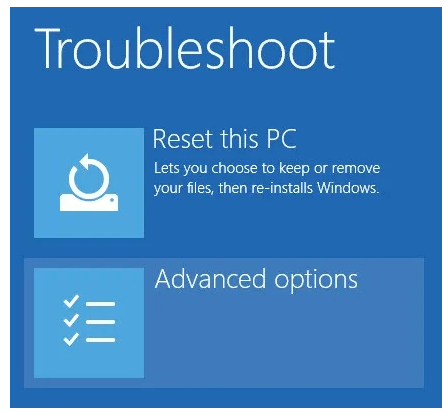
Step 3: In the Advanced Boot menu, select the “Troubleshoot” option.
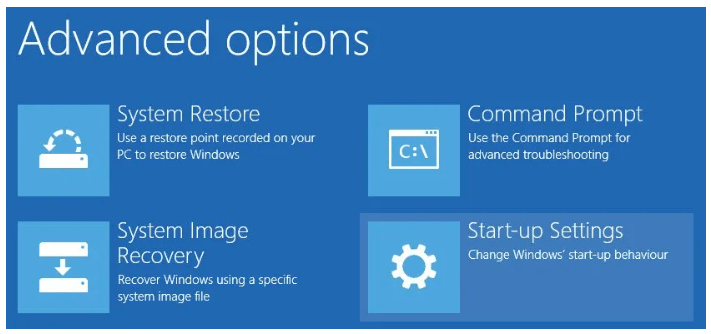
Step 4: Select “Advanced Options” from the Troubleshoot section.
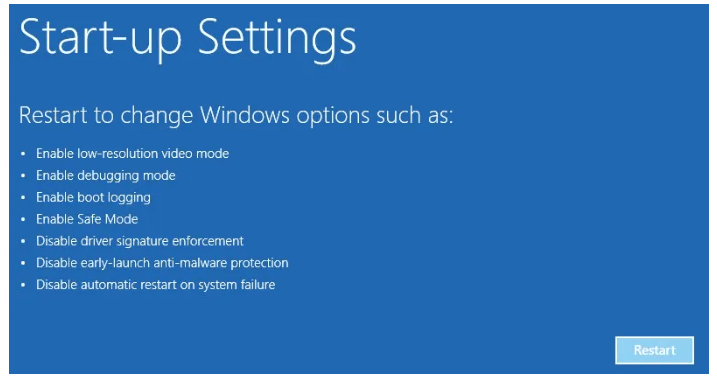
Step 5: Choose “Start-up Settings” from the menu. You may use the Startup Settings option to boot your Windows PC in several modes.
Step 6: To continue, click the “Restart” button.
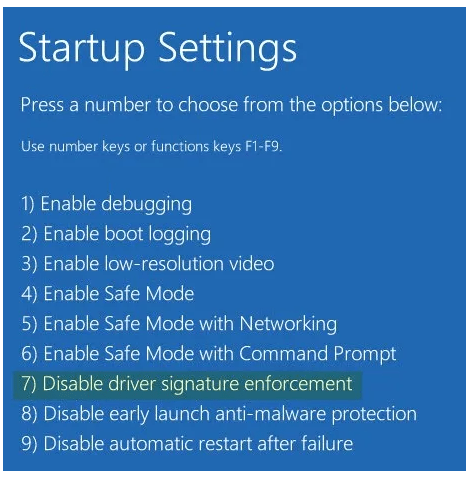
Step 7: Because we need to install unsigned drivers, pick the seventh option, “Disable driver signature enforcement,” by pressing F7 on your keyboard.
Step 8: Your computer will boot into Windows as soon as you pick it.
Step 9: After that, you can install unsigned drivers in Windows without any problems. After you’ve completed the installation, restart your computer, and the Driver Signature Enforcement feature will be enabled automatically.
Note: You’ll have to repeat the step if you want to install another unsigned driver in the future. If you only need to install an unsigned driver once or seldom, this method is great.
Method 2: Enable Test Mode To Install Unsigned Drivers
Enabling Test Mode is another technique to install unsigned drivers in Windows. The advantage of this method is that it will remain enabled until you manually turn it off, which is a great way to test alternative drivers. Here are the steps:
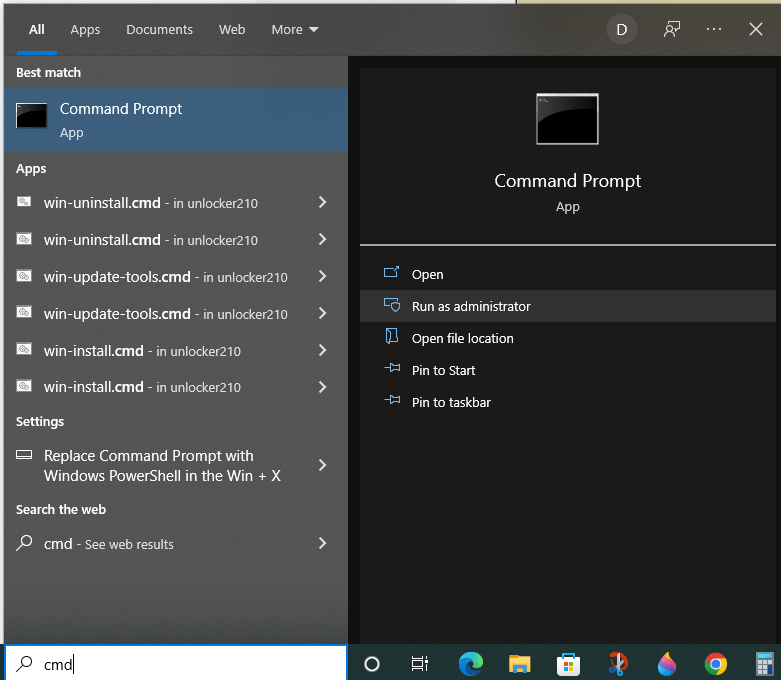
Step 1: Press Windows + S and search for “command prompt.” Under Command Prompt, choose “Run as administrator.”
Step 2: The above operation will grant admin access to the Command Prompt, which is essential to activate Test Mode. Copy and run the following command at the prompt:
bcdedit /set testsigning on
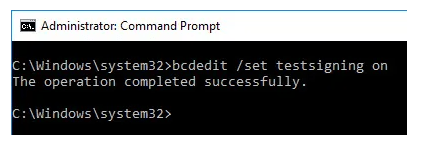
Step 3: The command has been successfully run, as you can see. Simply restart your computer, and you’ll be in Test Mode.
Step 4: You can install the unsigned drivers while in Test Mode. Additionally, you will see a watermark, similar to the one seen in the screenshot below, to indicate that your Windows PC is in Test Mode.

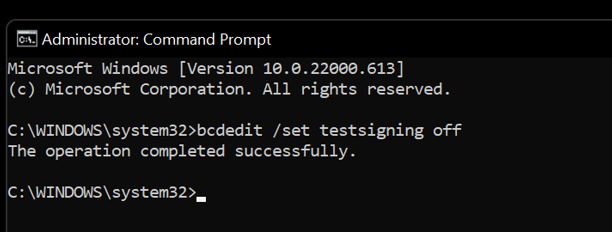
Step 5: It’s critical to turn off Test Mode once you’ve finished installing the driver. To do so, run the command below as an administrator and reboot your Computer:
bcdedit /set testsigning off
Method 3: Disable Integrity Checks to Install Unsigned Drivers
To install unsigned drivers in Windows, you can also disable the integrity checks.
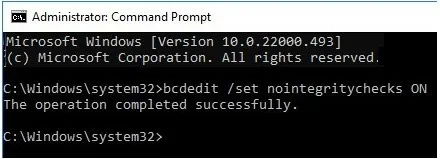
Step 1: Open the Command Prompt as administrator and run the command below:
bcdedit /set nointegritychecks off
Step 2: Simply restart your PC after running the command, and you’ll be able to install the unsigned driver on your Windows machine.
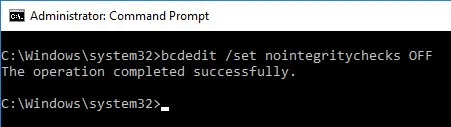
Step 3: It’s crucial to undo the adjustments you made, just like in Test Mode. Execute the following command as an admin in the command prompt to re-enable the integrity check:
bcdedit /set nointegritychecks on
Step 4: Restart the computer now, and you should be good to go.
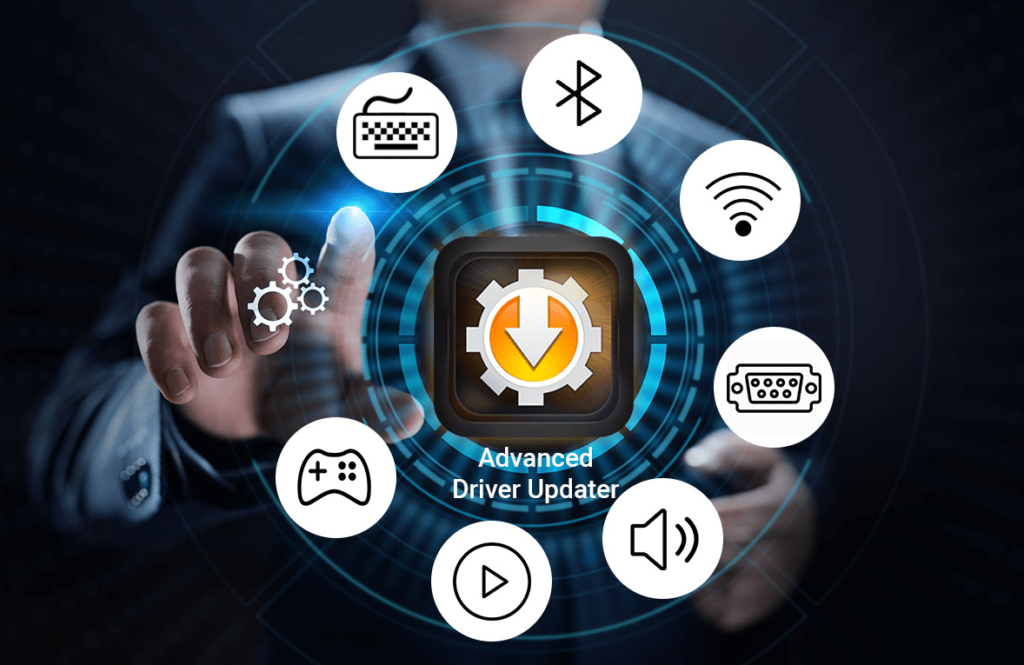
Bonus Tip: Use Advanced Driver Updater for Signed Drivers
I am sure you are aware of the fact that drivers help software and hardware communicate with each other. This means that you must keep all your drivers updated at all times to ensure optimal performance of your PC. Installing and Updating drivers can be achieved in three ways.
- Product Website. Every hardware manufacturer maintains an official website where the user can navigate to and search for the compatible driver.
- Device Manager. Microsoft provides a built-in utility known as Device Manager to scan and update your drivers but it limits the search to Microsoft Servers only.
- Advanced Driver Updater. The easiest and time-saving method is to use a third-party driver updater software that will scan, download and install the most compatible driver on your PC in no time. Also, it just requires a few mouse clicks to accomplish this and saves user’s time to search and install drivers manually.

Frequently Asked Questions
1. Is it safe to install an unsigned driver?
Installing unsigned drivers is generally safe if you trust the provider. Unsigned drivers are blocked by default in Windows for a couple of reasons: they can spread viruses and may not perform properly. If you’re downloading drivers from a random forum, or a questionable site with a lot of advertising and pop-ups, be cautious. That might be a problem.
2. What makes signed drivers unique?
Drivers that are signed have been verified to work with your computer. They’ve been tested and should operate fine with your particular Windows version. Unsigned drivers haven’t been tested to ensure compatibility with your version of Windows, or even Windows at all. It may work properly, cause problems, or not work at all. Furthermore, with unregistered drivers, you have no way of knowing when they’ve been updated, making it even more difficult to tell if they’re compatible with your PC.
3. How can I tell whether my computer has unsigned drivers?
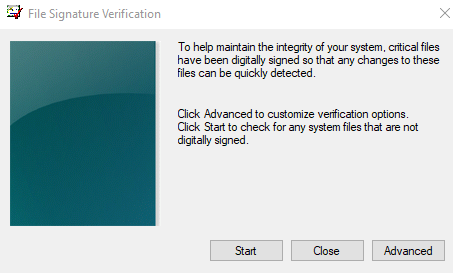
You can scan your PC with the built-in Signature Verification Tool to guarantee that all drivers are verified and unaltered. To access the Run tool, press Win + R. Then, press OK after typing sigverif.exe. Run the sigverif utility by following the directions. This is also a good technique to make sure that only the unsigned drivers you’ve approved are installed. This check may also reveal malicious drivers that have been installed behind the scenes.
The Final Word On How to Install Unsigned Drivers in Windows
Although you may be advised not to install unsigned drivers on your PC, there can be instances where you have really old hardware or something from not a reputable brand that you wish to check on a test machine. Those are times that you would require these methods to stop Windows from preventing you to install those unsigned drivers.
Follow us on social media – Facebook, Instagram, and YouTube. For any queries or suggestions, please let us know in the comments section below. We would love to get back to you with a solution. We regularly post tips and tricks, along with answers to common issues related to technology.