
If you have a common computer at your home which can be accessed by anyone then you should be a little more careful about your personal data.
There may be some files or folders which you do not want to share with everyone. You can get a third-party software to lock your folders but this may cost you. If the purpose is to only hide some files from other users on your computer, then you can simply do this by using an in-built feature of Windows which allows you to hide files and even folders. It is a better idea to put all the files you want to hide in a single folder and then to hide this folder. In this article, you will find that how can you hide and unhide files and folders in Windows when required.
For Windows 8 and 10:
Let us start with the latest versions of Windows.
- To hide a file or folder on Windows 8/10 open “This PC” from the start menu or desktop.
- Right click on the file or folder which you want to hide and go to “Properties” (the last option in menu).
- Once the properties window is open then click the General tab mark the “Hidden” check box.
- Click “OK” or apply button and you are done.
- The file or the folder is now hidden from Windows explorer.
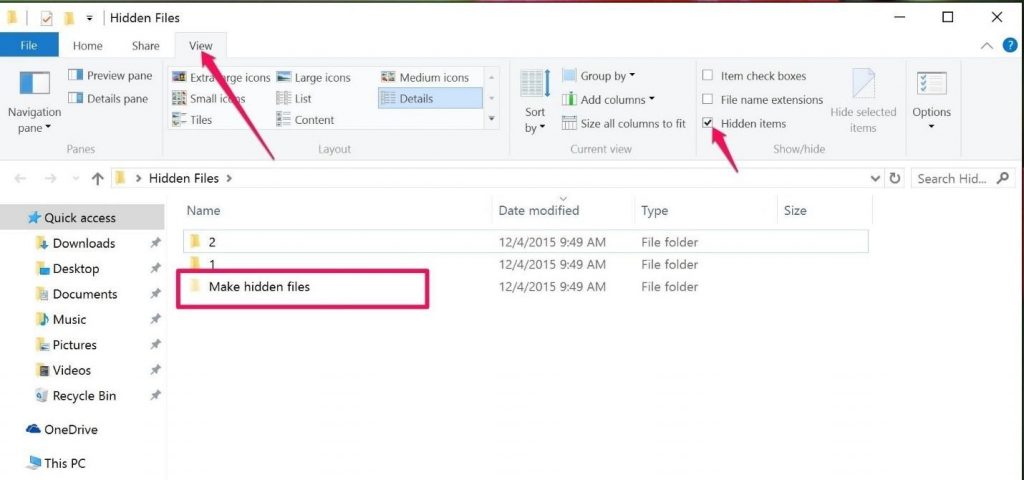
Whenever you want to view hidden files on Windows 8 or 10 you can follow these steps to do so.
- To view hidden files or folders click on the” View” tab which is present on the top ribbon of the window in “This PC”.
- Tick the “Hidden item” checkbox.
- After activating this option, all the hidden files will now be visible in the explorer (with a faded icons so that you can easily distinguish).

Note: When you choose to see hidden files then you will also see some system files or folders. These folders or files are hidden by default because they are associated with system functionality it is strongly recommended that you should not touch the folder which you do not recognize.
If you want to unhide these files or folders permanently then again go to properties and uncheck the “Hidden” button. This will make your files permanently visible.
For Windows 7
Procedure for hiding files is same as for Windows 8 and 10 but if you want to view your hidden files in Windows 7, then the procedure is a little different.
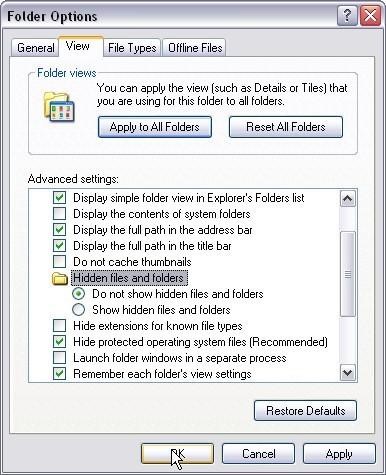
- Open “My computer” Click the organize button on the top-left side of the screen.
- Select the “Folder and search” option.
- Once the folder options window is open Navigate to the “View” tab.
- Click “Show hidden files, folder” and click on OK and Apply changes.
Now you will be able to see all the folders and files hidden in the system. If you want to unhide them permanently then you can do this by right clicking the file or folder and unchecking hidden option .
Now you need not be worried about your personal data on the computer. Even if your kids are using the same computer you can always hide your personal data from them!