
Thanks to technology, mobiles are not restricted to just messaging and calls. Now, you are able to do myriads of things such as recording, connecting with people on social media and plethora of other things. Among all, jotting down important notes is one the best habits to remember things that give you a benefit to recall things that you don’t remember such as ingredients and phone numbers. In fact, it is extremely handy for writing your creative thoughts and passwords. Best of all, it is possible to access Notes app on various accounts and devices at the same time.
In this post, we’re going to discuss how to handle Notes app on iPhone & iPad.
How to Start New Notes?
We use a system and get comfortable with the system to access anything which not only improves or productivity but also give us ease. Similarly, use your own way to start a new note.
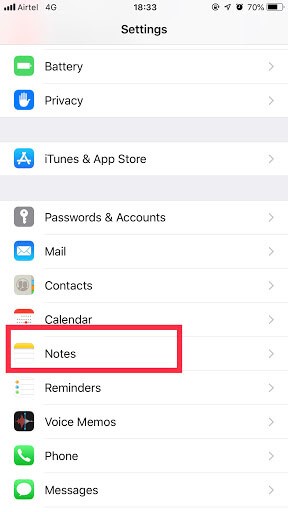
Step 1: Navigate “Settings” from your Home screen.

Step 2: Go to “Notes”.
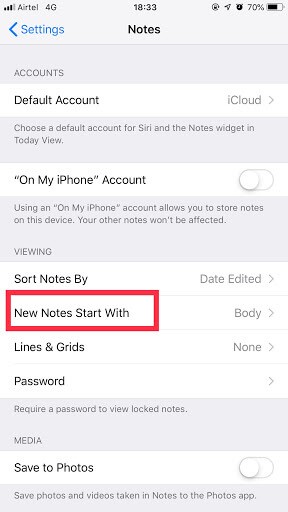
Step 3: Select “New Notes Start With”.
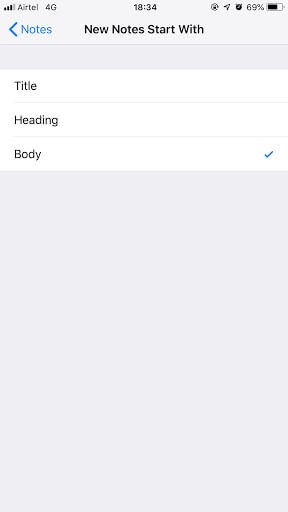
Step 4: Choose anything from “Body”, “Heading” or “Title”.
How to Allow Notes for Selected Accounts?
Majorly, people use notes over iPhone and iPad to jot down important dates, ingredients, addresses or other things. However, when you sync your Notes across your other devices then you get to access the same content on other devices as well. So, follow the steps to learn how to allow Notes for selected accounts.
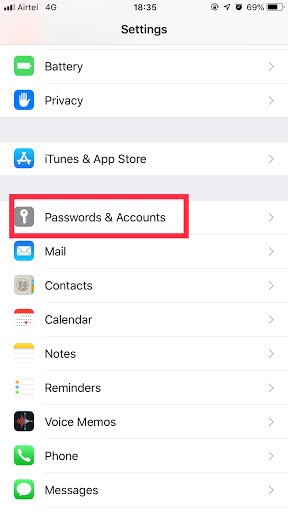
Step 1: Open “Settings”.

Step 2: Open “Password & Accounts”.
Step 3: Now, select the account where you want to allow Notes.
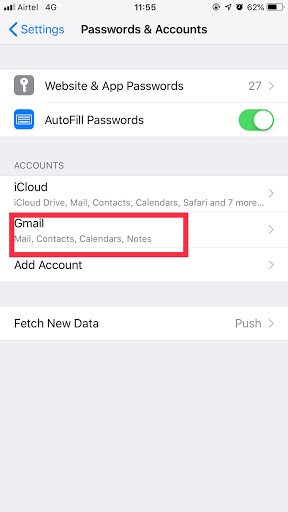
Step 4: Enable “Notes” from that specific account.

Note: You might not get Notes under every account.
 How to Set Password in Notes App on...Now no more worries about the notes, as you can lock them with a password.
Steps to Save Media Content in Notes
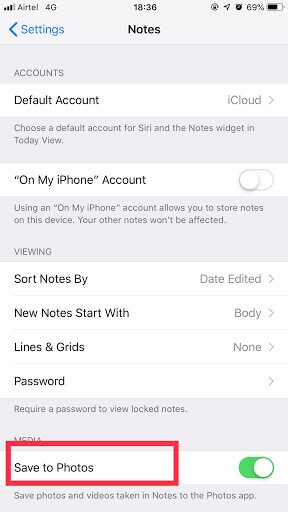
Notes allows you to automatically save your media content within the app. However, to do so, you would need to make a few changes in settings.
Step 1: Open “Settings” from your Home screen.
Step 2: Choose “Notes”.

Step 3: Now, toggle “Save to Photos” on.
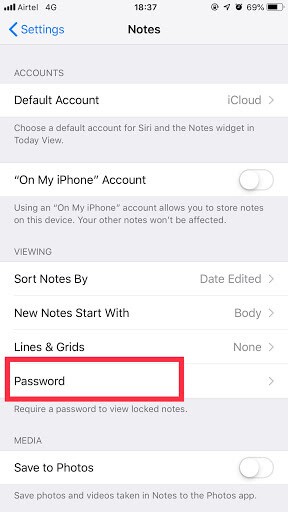
How to Password Protect Your Notes?
If you are one of those who likes to keep their private and financial credentials, save important dates on notes and don’t want to leave this information unlocked then you can password protect your Notes.
Step 1: Go to “Settings” and click on “Notes”.

Step 2: Choose “Password”.
Step 3: Now, you need to fill the available columns such as enter a “Password”, “Verify” your password and password “Hint”.

Step 4: If you want you can “Use Touch ID” by enabling and disabling it.
Step 5: Hit “Done” which is located at the top-right corner.
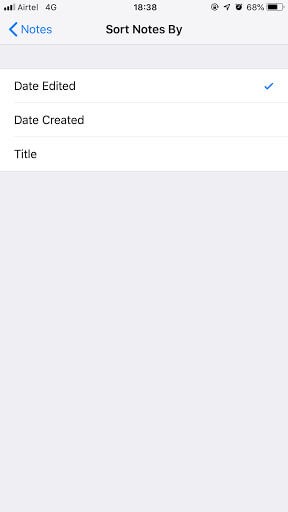
Steps To Sort Notes Date Edited, Data Created or Title
Step 1: Navigate to “Settings”.
Step 2: Select “Notes”.

Step 3: Choose “Sort Notes By”.
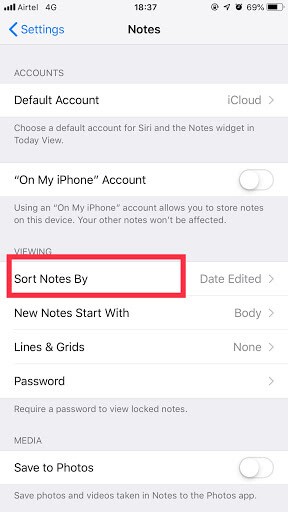
Step 4: You click on Title, Data Created, or Data edited according to your preference.
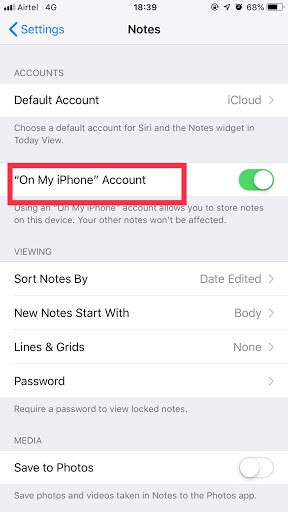
How to Enable/Disable “On My iPhone” Account?
Follow the below steps to enable/disable “On My iPhone” account.
Step 1: Go to Settings.
Step 2: Open Notes.

Step 3: Enable or disable “On My iPhone” account.
Now, you know how to handle Notes app on iPhone & iPad. You can customize Notes app according to your preference and make the most out it. For further dig up, you can drop a message in the comments below.