
With its sleek design, enhanced performance, and new features, Windows 11 promises to deliver a seamless user experience. However, like any new software release, it comes with its own set of challenges.
One such issue that users have encountered when attempting to install Windows 11 is the error message stating, “Windows cannot be installed on dynamic disk.” This frustrating roadblock can leave users feeling perplexed and uncertain about how to proceed. But fear not, as we’ve got you covered!

In this blog post, we will explore the root causes of the “Cannot install Windows on dynamic disk” error and provide you with effective solutions to overcome this hurdle. We’ll explore the differences between dynamic and basic disks, highlight the implications of converting your disk, and offer step-by-step instructions to resolve this issue.
Let’s dive in!
Also Read: How To Fix Disk Stuck at 100% in Windows Task Manager
How To Fix Dynamic Disk Errors on Windows 11?
Solution 1: Use the Disk Management Tool
To install Windows 11, you need to convert your dynamic disk to a basic disk. The Disk Management tool in Windows provides a straightforward method to perform this conversion. Here is what you need to do:
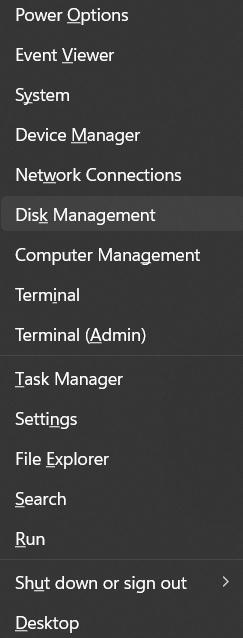
1. Press the Windows key + X and select “Disk Management” from the menu. Alternatively, you can right-click the Start button and choose “Disk Management” from the context menu.
2. In the Disk Management window, locate the dynamic disk you want to convert. It will be labeled as “Dynamic” in the “Status” column.
3. Right-click on each volume on the dynamic disk and select “Delete Volume.” Make sure you have backed up any data you need from these volumes before proceeding, as deleting a volume erases its contents.
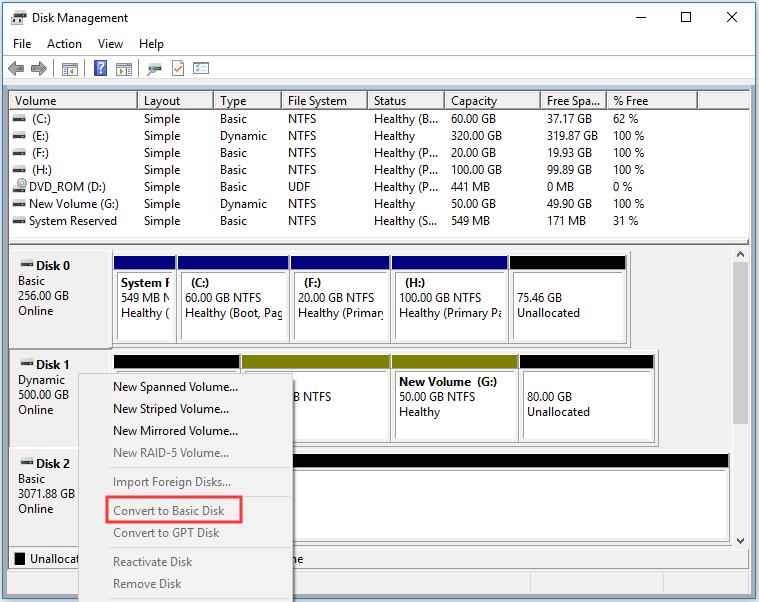
4. After deleting all volumes on the dynamic disk, right-click on the dynamic disk itself and select “Convert to Basic Disk.”
5. Follow the on-screen instructions to complete the conversion process. Note that this process will delete all data on the disk, so ensure you have a backup.
Also read: Disk Cleanup Not Working On Windows 11/10? Try These Fixes
Solution 2: Run the Diskpart Command
The DiskPart command is a command-line utility in Windows that allows you to manage disks, partitions, and volumes. It provides a set of commands that enable you to perform various disk-related operations. Here is how you can run the Diskpart command on Windows 11 to fix the “Windows cannot be installed on dynamic disk” issue.
1. Press the Windows key + X on your keyboard and select “Command Prompt (Admin)”.
2. In the command prompt window, type diskpart and press Enter. This will launch the DiskPart utility.
3. Type list disk and press Enter. This will display a list of disks connected to your computer.
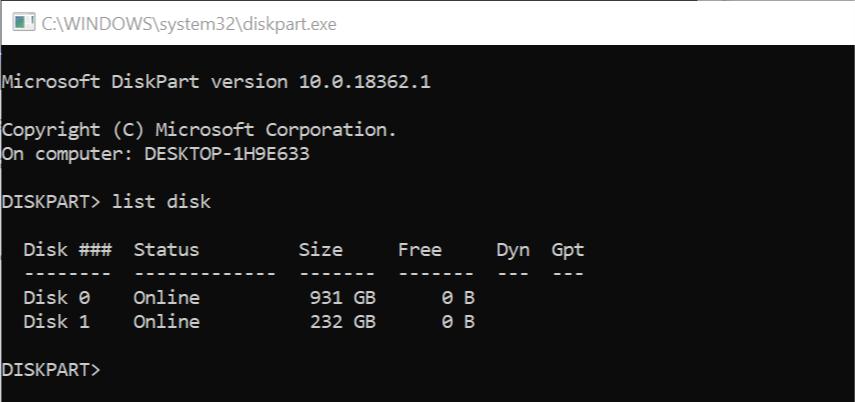
4. Identify the dynamic disk you want to convert by examining the disk’s size and other attributes.
5. Type select disk <disk number> and press Enter, replacing <disk number> with the actual number of the dynamic disk you wish to convert.
6. Type list volume and press Enter. This will show a list of volumes associated with the selected disk.
7. Type select volume <volume number> and press Enter for each volume listed, replacing <volume number> with the appropriate number.
8. Type delete volume and press Enter to remove each selected volume.
9. Type “convert basic” and press Enter. This command will initiate the conversion of the dynamic disk to a basic disk.
10. Once the conversion process is complete, type exit and press Enter to exit the DiskPart utility.
Solution 3: Use a Third Party Disk Conversion Tool
A third-party disk conversion tool may be used to convert a dynamic disk to a basic disk if the built-in tools Disk Management or DiskPart are insufficient for your needs or if you prefer a more user-friendly method. These tools frequently provide more sophisticated features and a graphical user interface that makes conversion simpler.
Find a trustworthy disk conversion tool and choose it. In order to convert dynamic to basic disks, look for reliable disk management software. EaseUS Partition Master, MiniTool Partition Wizard, and AOMEI Partition Assistant are just a few of the well-known choices that are available. To download and install the software on your computer, go to the tools’ official websites.

You can use the tool to change the dynamic disk into a basic disk once the installation process is finished.
Is it Safe to Convert a Dynamic Disk Into a Basic Disk?
Before converting a dynamic disk to a basic disk, it is crucial to back up all your important data. Converting the disk involves deleting all volumes, which will result in data loss. By having a backup, you can restore your data in case of any unexpected issues during the conversion process.
Converting a dynamic disk to a basic disk removes the dynamic disk’s features, such as spanned volumes, mirrored volumes, and striped volumes. Once the conversion is complete, you will have a basic disk with standard partitions. Make sure you are aware of the implications and limitations of a basic disk before proceeding.
Also, when performing the conversion, it is essential to use a reliable disk management tool or utility from a reputable source. Ensure that the software you choose is compatible with your version of Windows and has positive reviews or recommendations from trusted sources.
Also read: How To Fix The “Not Enough Disk Space For Windows 10 Update” Error
Conclusion
This wraps up our guide on how to fix the Windows that cannot be installed on Dynamic disk issue. We broadly looked at the DiskPart command and the built-in Disk Management tool as the two main ways to fix the issue in this blog post. Additionally, you have the option of using third-party tools to complete the task. We ensured compatibility with Windows 11 by offering detailed instructions for changing a dynamic disk into a basic disk.
We also emphasized the significance of backing up your data before making any changes to disk configurations and the necessity of comprehending the repercussions of changing a dynamic disk to a basic disk. By taking these safety measures, you can protect your data and make the transition go smoothly.
Please leave your feedback in the comments section if you found this post to be useful. Follow us on social media – Facebook, Instagram and YouTube.