
A stable internet connection is essential for our daily tasks and activities. Isn’t it? However, Mac users may sometimes encounter frustrating roadblocks, such as the dreaded “Self-Assigned IP Address” error. This error prevents your Mac from obtaining a valid IP address from the DHCP server, disrupting your ability to connect to the internet or local network.
Fortunately, there are solutions available to tackle this issue and restore your network connectivity. In this guide, we will walk you through step-by-step instructions to troubleshoot how to fix self assigned IP Address Mac issue. By following these simple yet effective methods, you’ll be able to regain control over your network connection and get back to your online activities seamlessly.
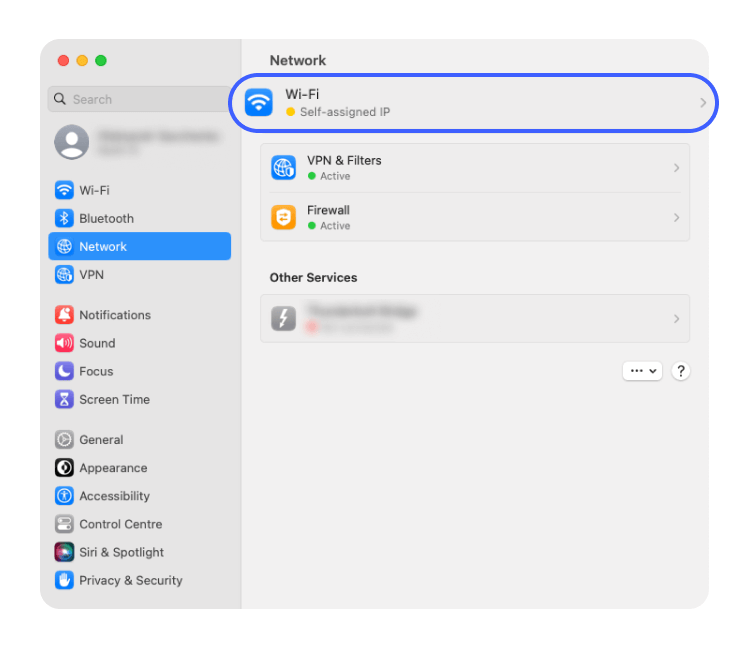
What is the Self Assigned IP Address Error on Mac?
Does my WiFi has the self assigned IP address? Wondering what it means? Well, here’s the deal. Normally, your Mac relies on a DHCP (Dynamic Host Configuration Protocol) server to assign it a unique IP address, allowing it to communicate with other devices and access the web. But sometimes, things go awry, and your Mac fails to obtain a valid IP address from the server. Instead, it takes matters into its own hands and assigns itself an IP address. Unfortunately, this makeshift self-assigned IP address causes all sorts of connectivity issues.
When you encounter the “Self-Assigned IP Address” error, you might find yourself unable to browse the internet, connect to your local network, or use certain applications that rely on network connectivity. It’s like your Mac is stuck in its own little disconnected bubble.
Now, you might be wondering what causes this error in the first place. Well, it could be due to misconfigured network settings, conflicts with existing network configurations, communication problems with the DHCP server, or even glitches in your Mac’s network interface.
Also Read: How to Hide IP Addresses in Safari on iPhone and Mac?
How to Fix the Self-Assigned IP Address Mac?
You can use any of the below-listed troubleshooting solutions to fix the self-assigned IP error on Mac.
Solution 1: Restart Your Mac and Router
Sometimes, network issues can be resolved with a simple restart. By restarting both your Mac and router, you can clear any temporary glitches that might be causing the “Self-Assigned IP Address” error. Follow these steps:
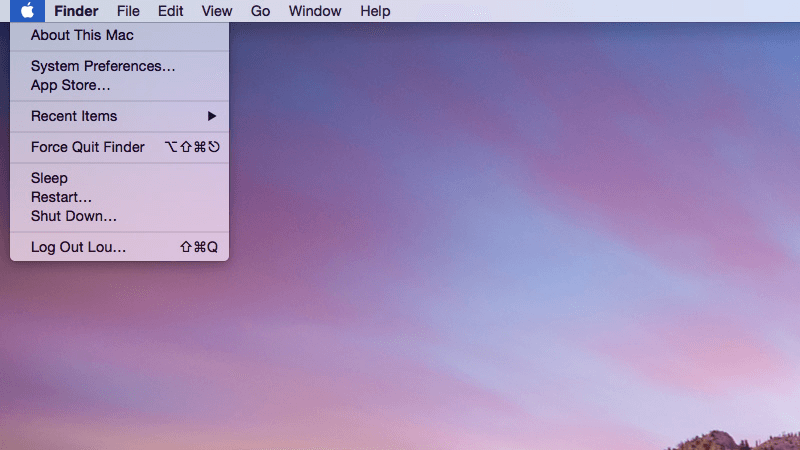
Step 1: Begin by shutting down your Mac. Go to the Apple menu and select “Shut Down”.
Step 2: Once your Mac is fully powered off, turn off your router by unplugging it from the power source.
Step 3: Wait for about 30 seconds.
Step 4: Plug your router back into the power source and wait for it to fully restart. This process usually takes a few minutes, so be patient.
Step 5: Once the router has restarted, turn on your Mac by pressing the power button.
Step 6: Allow your Mac to boot up and establish a connection with the router.
Check if the “Self Assigned IP Address Mac” error has been resolved and if your device is now able to connect to the network. Restarting your Mac and router can often resolve temporary network glitches and restore proper IP address assignment. If the error persists, don’t worry—there are more solutions to try. Let’s move on to the next one.
Also Read: How To Find Your Router IP Address On Any Device? (2023)
Solution 2: Renew DHCP Lease
Here comes the next solution. Renewing the DHCP lease can help your Mac obtain a new IP address from the DHCP server, potentially resolving the WiFi has the self assigned IP address error. Here’s how you can renew the DHCP lease:
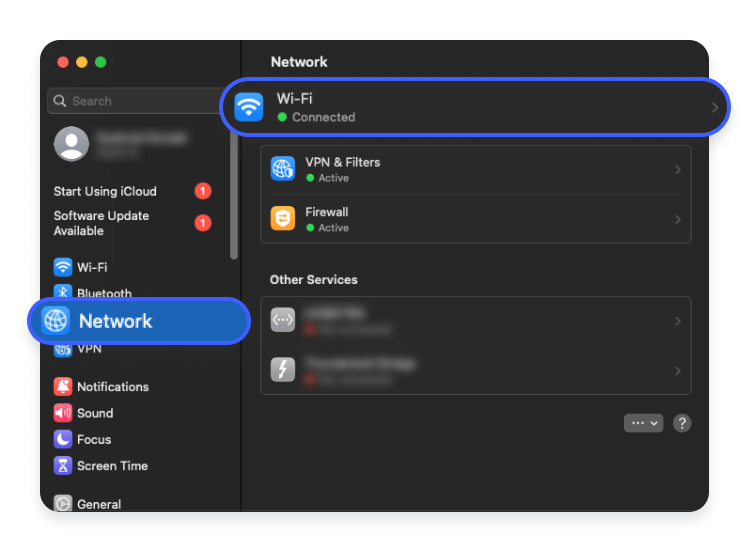
Step 1: Go to the Apple menu and select “System Preferences.”
Step 2: Click on “Network”. Select the network connection you are using (Ethernet or Wi-Fi).
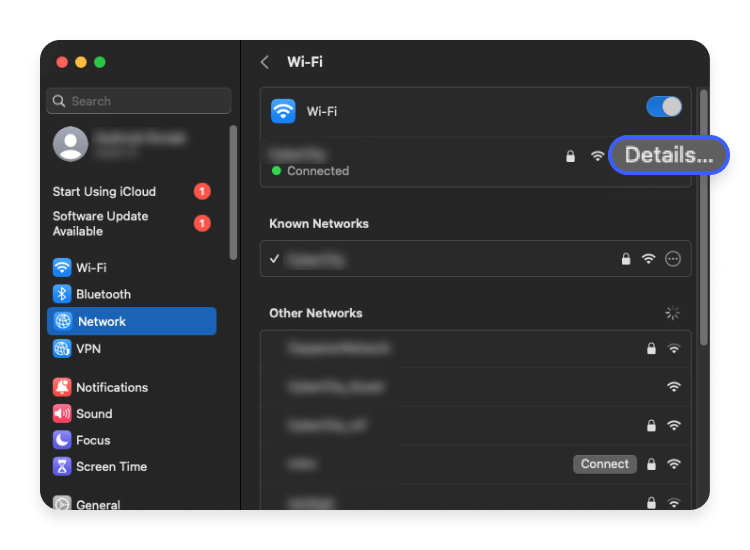
Step 3: Tap on the “Details” button.
Step 4: In the new window, navigate to the “TCP/IP” tab.
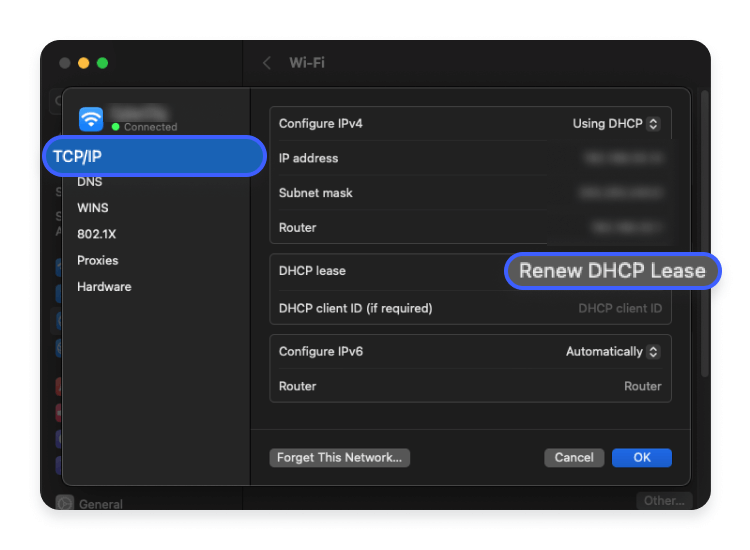
Step 5: Look for the “Renew DHCP Lease” button and click on it. This action will send a request to the DHCP server for a new IP address.
Step 6: Wait for a few moments while your Mac attempts to renew the DHCP lease.
Step 7: Once the process is complete, click “OK”.
Check if your Mac has successfully obtained a new IP address without the “Self-Assigned IP Address” error.
By renewing the DHCP lease, you’re giving your Mac a chance to establish a fresh connection with the DHCP server, which can often resolve IP address assignment issues.
Also Read: How to Customize Finder’s Toolbar on Your Mac
Solution 3: Check the Network Settings
Incorrect network settings, including IPv6 configuration, can contribute to the WiFi self assigned IP issue. Follow these steps to ensure your IPv6 settings are correct:
Step 1: Go to Apple menu > System Preferences > Network.
Step 2: Select your network connection (Ethernet or Wi-Fi).
Step 3: Click “Advanced” > “TCP/IP” tab.
Step 4: Confirm “Configure IPv6” is set to “Automatically” or “Using DHCP.”

Step 5: Click “OK” and restart your Mac.
Step 6: After the restart, return to Network settings and revert the IPv6 configuration to the original setting.
Step 8: Apply changes and restart your Mac again.
Checking and adjusting IPv6 settings can resolve conflicts causing the “Self-Assigned IP Address” error. If the issue persists, move on to the next solution.
Also Read Apple’s New Toolkit Simplifies Bringing Windows Games to Mac – Here’s How
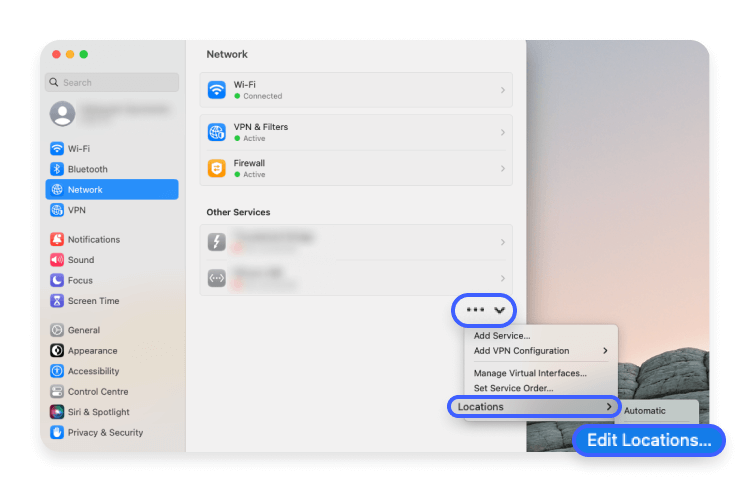
Solution 4: Create a New Network Location
Creating a new network location can help resolve network configuration issues that may be causing the “Self-Assigned IP Address” error on your Mac. Follow these steps to create a new network location:
Step 1: Go to the Apple menu and select “System Preferences.”
Step 2: Click on “Network”. From the left sidebar, select the network connection you are using (Ethernet or Wi-Fi).
Step 3: Click on the “Location” drop-down menu and select “Edit Locations.”
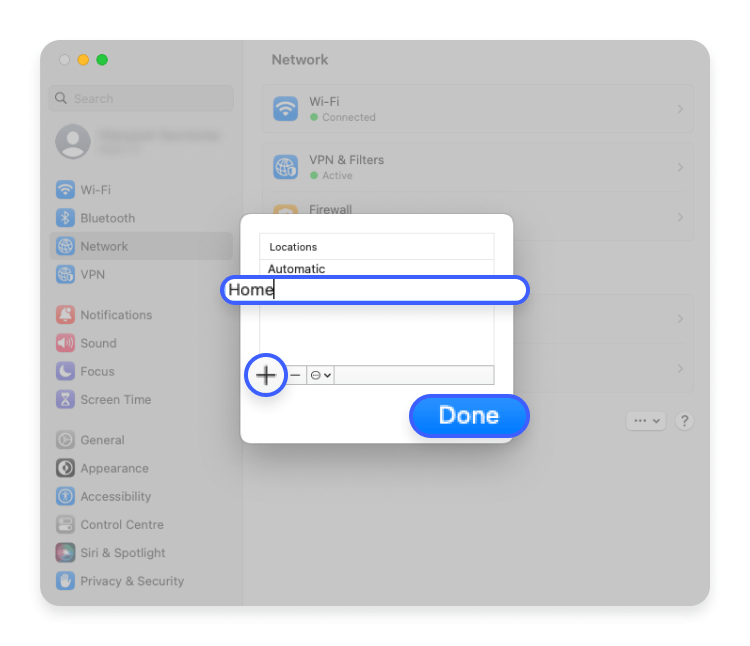
Step 4: Click the “+” button to create a new location. Give it a meaningful name for the new location.
Step 5: Select the new location you just created from the Location drop-down menu.
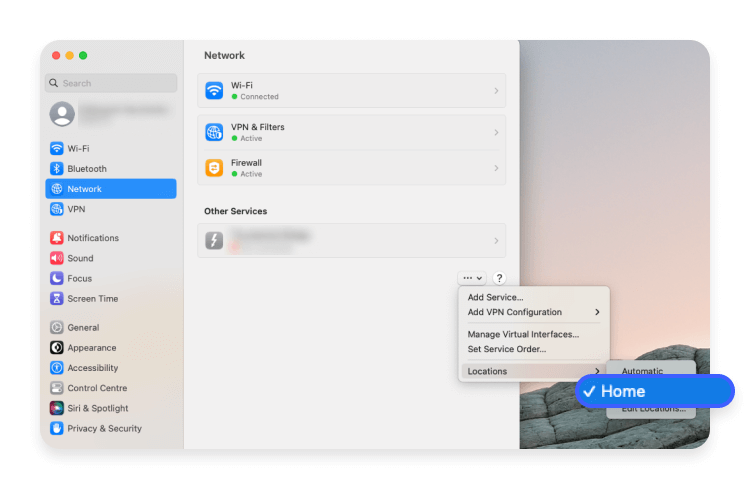
Step 6: Click on the “Apply” button to save the changes.
Step 7: Try connecting to the network again and check if the “Self-Assigned IP Address” error is resolved.
Creating a new network location allows your Mac to start fresh with network settings, potentially resolving any configuration issues that were causing the error.
Solution 5: Reset Application Layer Firewall
Resetting the Application Layer Firewall can resolve network connectivity issues that cause the “Self-Assigned IP Address” error on your Mac. Follow these steps:
Step 1: Go to Apple menu > System Preferences > Security & Privacy.
Step 2: Click on the Firewall tab.
Step 3: Unlock the settings by clicking the lock icon and entering your administrator password.
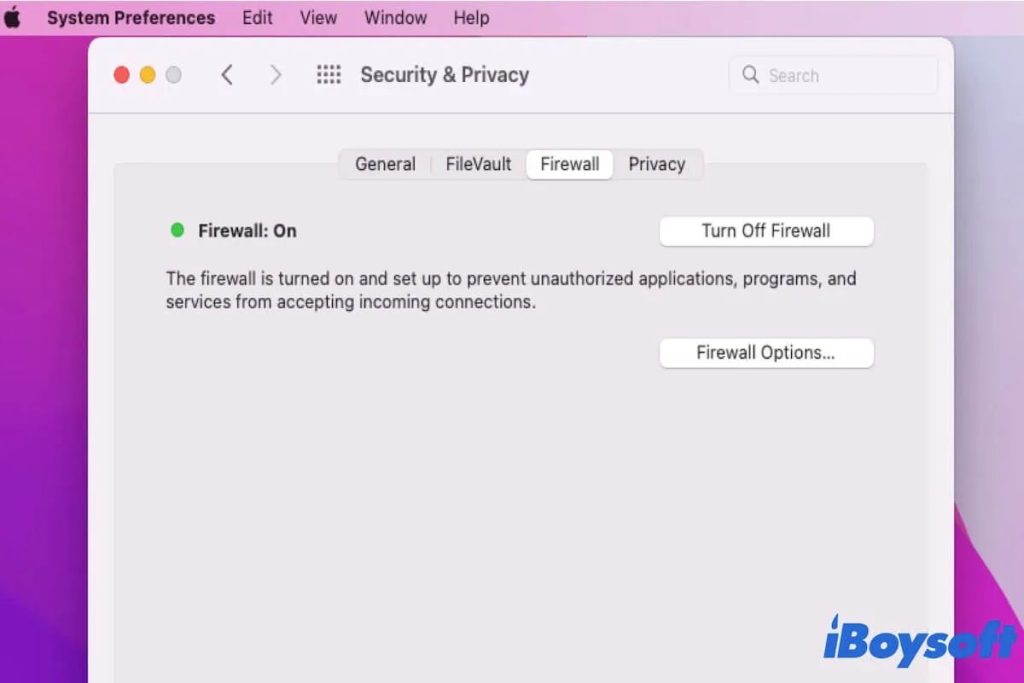
Step 4: Click on the “Firewall Options” button.
Step 5: In the new window, click “Reset” or “Restore Defaults” to reset the firewall settings.
Step 6: Close the Firewall Options window and restart your Mac.
Resetting the Application Layer Firewall can help eliminate problematic settings and potentially fix the “Self-Assigned IP Address” error. If the issue persists, move on to the next solution.
Also Read: 8 Best VLC Player Alternatives for Windows & Mac: Enhance Media Playback
Conclusion
With the right troubleshooting steps, you can regain control over your network connection. In this guide, we explored various solutions to tackle this issue.
By following these steps, you can increase your chances of overcoming the “Self-Assigned IP Address” error and restoring a stable network connection on your Mac. Remember, network issues can have diverse causes, so it’s essential to try multiple solutions until you find the one that works for you.
With these troubleshooting techniques in your arsenal, you can confidently address network connectivity problems and enjoy seamless browsing, connectivity, and application usage on your Mac. Stay connected and productive!