
Billions of people use the internet, but not all know the complicated architecture of the worldwide web. When this architecture gets disturbed, you are unable to access the internet. This ends up showing error messages like – DNS server is not responding, DNS server unavailable or DNS server not responding Wi-Fi.
To troubleshoot this problem that you are facing on your Windows 10, we bring this guide for you. Using the steps that we will explain, you will able to resolve the error message in no time.
Recommended Solution:
To fix various PC problems related to system drivers, or DNS server is not responding, DNS server unavailable or DNS server not responding Wi-Fi, we recommend using Smart Driver Care:
This driver updating tool helps repair DNS and other driver-related issues on your Windows machine. In 3 simple steps, you can use Smart Driver and fix all the problems:
- Download and install Smart Driver Care.
- Once installed, launch it and click Start Scan.
- Update driver individually by clicking Update next to each driver or click Update All.

How to resolve DNS Server Not Responding?
DNS (Domain Name System) helps translate website address into IP address allowing your browser to connect and show the page you like to access. If anything goes wrong with the DNS server, you are unable to access the website. In addition to this, if the DNS server stops responding, then you are unable to access the websites.
To resolve this problem, you need to clear DNS cache, update network driver, and correct DNS server address.
In this post, we will explain how to do all this and resolve the DNS server not responding problem.
You can use any of the 4 solutions to resolve the problem:
- Correct DNS server address
- Reset IP and Clear DNS cache
- Update network adapter
- Restart modem or router
1. Technique 1 – Correct DNS server address
If DNS server address is incorrect you might encounter any of these error messages:
DNS server is not responding, DNS server unavailable or DNS server not responding Wi-Fi. To correct DNS server address and resolve the problem, follow the steps below:
Step 1 – Press Windows + R key.
Step 2 – This will open Run window here type control and press OK.
Step 3 – In the Control Panel window, click Network and Sharing Center.
Step 4 – Now in the left pane look for Change adapter settings option and click it.
Step 5 – Under Network Connections window, you will find one of these options: Ethernet, Local Area Connection or Wi-Fi. Right-click > Properties.
Step 6 – Click Internet Protocol Version 4(TCP/IPv4) > Properties.
Step 7 – Select the radio button next to Obtain an IP address automatically and Obtain DNS server address automatically > Ok.
If you use Internet Protocol Version 6(TCP/IPv6), follow step 7 and select the radio button next to each option.
Once done, restart your system and try to access the webpage. You should not longer encounter either of these error messages: DNS server is not responding, DNS server unavailable or DNS server not responding Wi-Fi
2. Reset IP and Clear DNS cache
Step 1 – In the search box type cmd > right-click > Run as administrator. Click Yes, if you receive User Account Control nag.
Step 2 – In the command prompt window, enter the following commands. Make sure you press Enter after each command
ipconfig /flushdns
ipconfig /registerdns
ipconfig /release
ipconfig /renew
As you press enter after each command, the IP address will reset and the DNS cache will be cleared. Now restart your computer. You should no longer encounter DNS server not responding error message.
3. Update network adapter
An old, outdated or incompatible network adapter can also cause DNS server not responding error message. To resolve it, you can update the network driver manually. But if you are not confident enough to do it on your own or don’t have time, then you can do it automatically using Smart Driver Care.
Smart Driver Care is an intelligent tool that scans your system for incompatible, outdated or old drivers. Once the scanning is done, it shows you the available updates. You can update them one by one or all at once.
The benefit of using this driver updater is that you don’t need to know the device number, model number or details about your operating system. You can run the run and let it do the job.
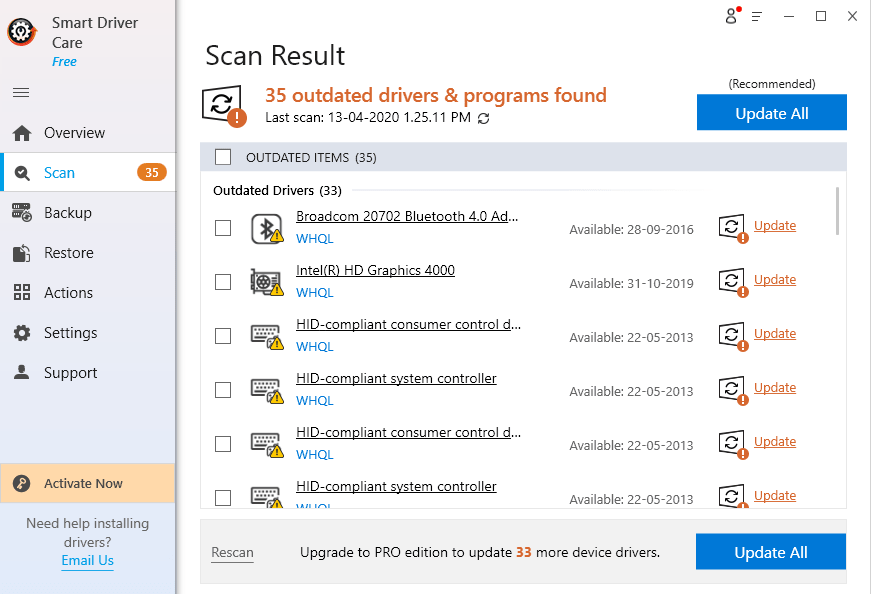
Smart Driver Care is available as both the Free and Paid versions. Using the paid version, you can update all outdated drivers at once and can even take a backup. While in the Free version, you need to update them individually. This tool even offers a 60-day money-back guarantee.
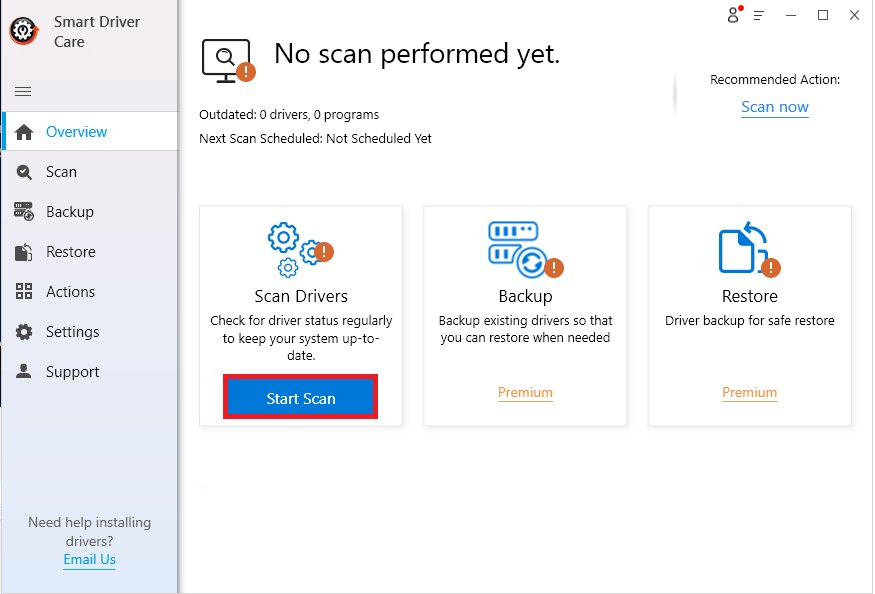
- Download and install Smart Driver Care.
- Click Start Scan, to identify outdated or incompatible drivers.

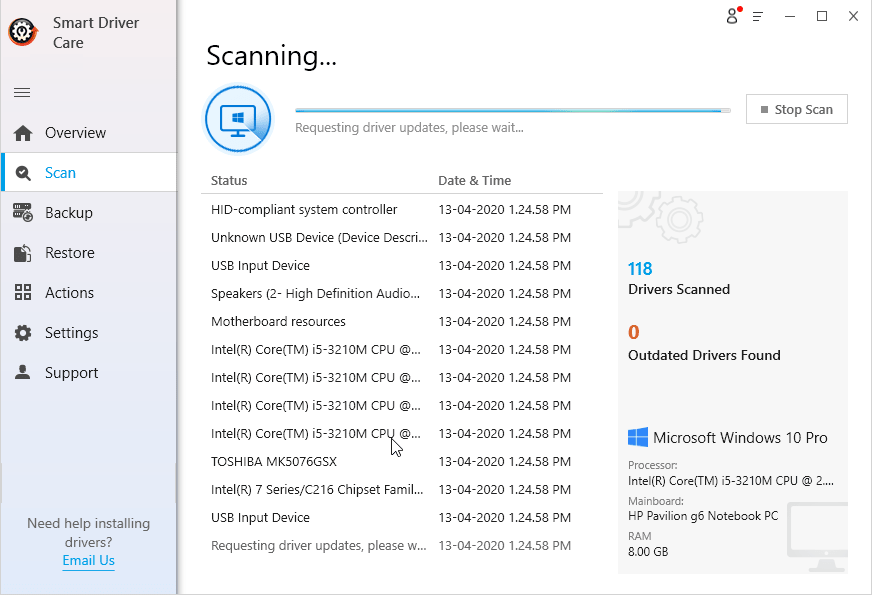
Driver updating tool will now scan the system for outdated drivers.
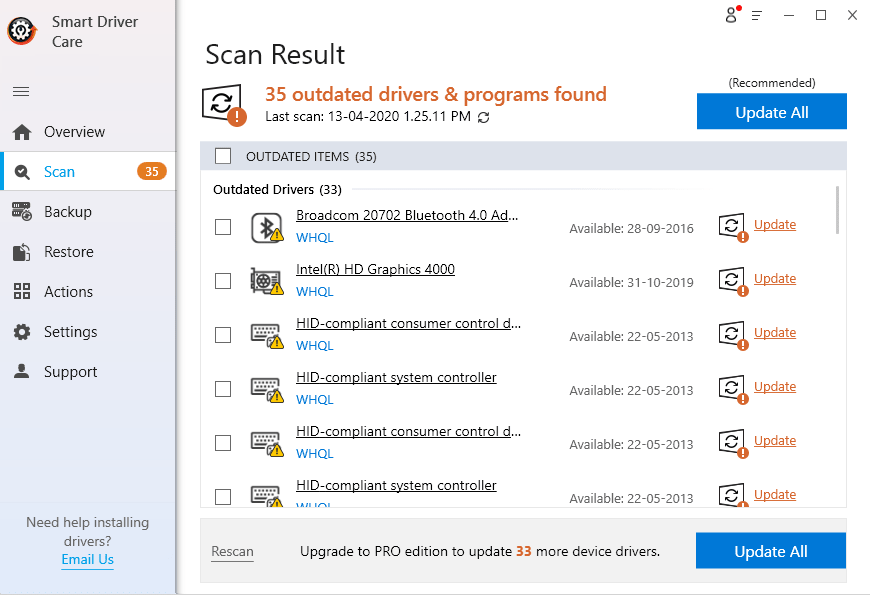
Upon scan completion, you will see outdated drivers.
Click the Update button next to the network adapter.
If you are using the Pro version, you can click Update All to download and install all outdated drivers automatically.
Restart your system.
Now check your system; the problem will soon be resolved.
4. Restart modem or router
If your modem or router have any technical issue, you might face DNS server not responding Wi-Fi. To resolve this, you will have to restart your modem or router.
Power Off your modem or router & now wait for a while and press the power button again.
Try to reaccess the website, you should not face any problem.
That’s all. We hope using these simple steps you can resolve DNS server is not responding, DNS server unavailable or DNS server not responding Wi-Fi error messages. Feel free to comment and let us know which method worked for you.