
When Windows 10 got its October update, Microsoft introduced a lot of features, the dark mode for file explorer, new screenshot tools, make text bigger. There were some improvements also such as Microsoft Edge improvement, Clipboard History & Cloud Sync and Start Menu Search Improvements.
With all of these new additions and fixes, a lot of new errors and issues were coming up. Not all the users were facing the same issues. The issues were bugging users and Microsoft was compelled to pull the October update before it disappoints any other Windows 10 users.
Some of the users complained that after October update, their system had sound or audio issues.
In this post, we will discuss Windows 10 sound issues. You can always rollback to the previous version, but this should be considered as your last resort. To help deal with audio issues in Windows 10, Microsoft has published videos, we will brief you on them as well.
Method 1: Back to Basics
The first thing to check, before going all Sherlock Holmes, is connections of speakers and headphones. Check whether the audio cable is not apt or connected to the wrong jack.
Also, check the volume level from Audio icon in system feat or volume of external speakers as well. The external speakers could be the reason of audio issues swell. So, check it thoroughly.
Method 2: Device Manager Could Help
You might be facing audio issues on Windows 10 as your drivers are either corrupted or not updated. Also, there are chances that your sound card is not working properly.
To deal with audio issues in Windows 10, follow these steps:
Step 1: Go to the Start button and type Device Manager.
Note: Alternative method to launch Device Manager:
Press Windows and R key together, to open the Run box. Type devmgmt.msc to open device manager.
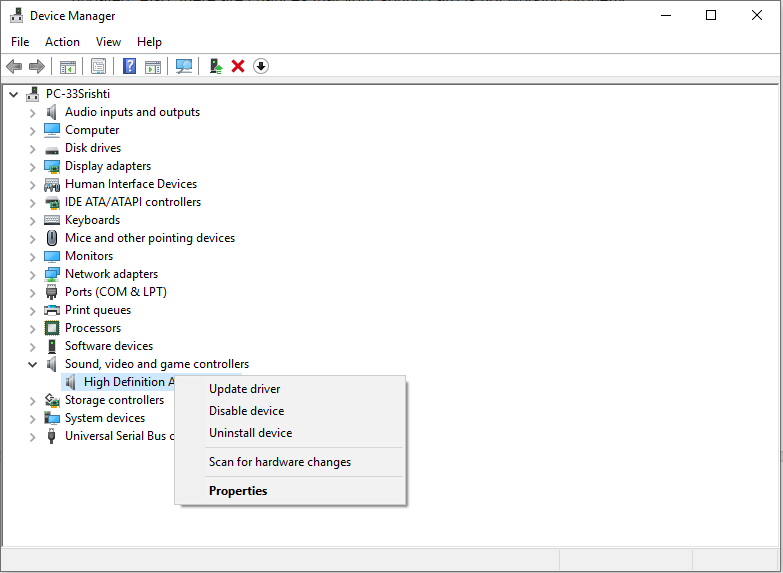
Step 2: Once Device Manager is launched, you can go through the list of devices and locate your sound card.
Step 3: Click on the sound card and open it, then click on the Driver tab.
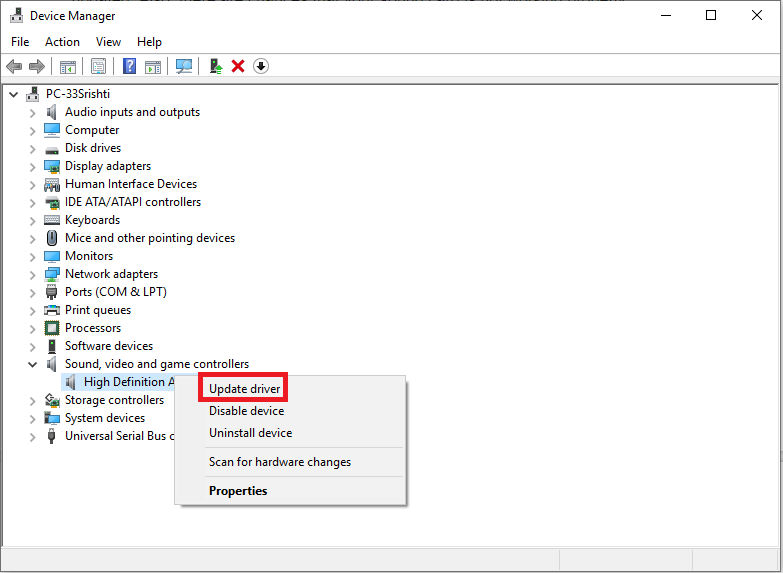
Step 4: Now select Update Driver option.
Step 5: Windows search for a driver update on the Internet, then update & install latest sound drivers.
Note: You can also search for suitable drivers at driver manufacturer’s website.
 Steps To Enable/Disable Automatic Repair On Windows 10If you are looking for the easiest and simplest way to activate or want to prevent your Windows 10's self-repair...
Alternative Method: Use Default Audio Driver
You can update the driver using a generic audio driver that comes with Windows. Follow these steps to do so:
Step 1: Locate Update driver.

Step 2: Check PC for driver software.
Step 3: You will get a list of available drivers on the computer.
Step 4: If you get High Definition Audio Device
Step 5: Click Next & install it.
Method 3: Run Troubleshooter
Troubleshooter is one of the best ways to sort any of the issues in Windows 10. You might be thinking will it really work? Yes, now with Windows 10, the troubleshooter now works efficiently.
In order to run audio Troubleshooter in Windows 10, follow these steps:
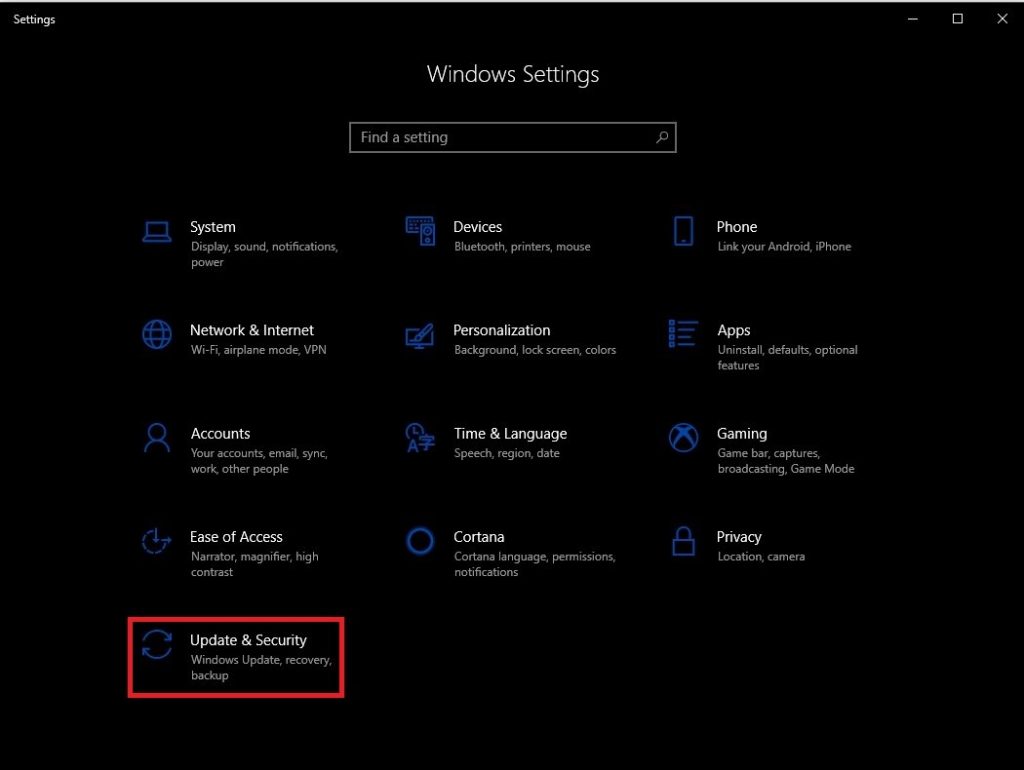
- Press Windows and I key together to open Settings.
- Now navigate to Update & Security.

- Click Troubleshoot.
- Now choose Playing Audio.
Upon following these steps, the Troubleshooter will fix any sound issues which are facing on its own.
Method 4: Set Default Playback Device
If you are using HDMI or USB and facing the audio issue, then you need to set external devices as default. Sometimes, audio enhancements could interlude hardware drivers, therefore it’s important to disable the enhancement until a next driver update comes on your PC.
To set the default device option to fix audio issues in Windows 10, follow these steps:
- Go to Start menu and type Sound.
- Click Sound and then from the window, click on the Playback tab.
- Now look for suitable Audio device and set it as default.
Method 5: Choose the Correct Audio Playback
You can select correct audio playback in Windows 10 by following these steps:
Step 1: Go to Start menu and type Sound.
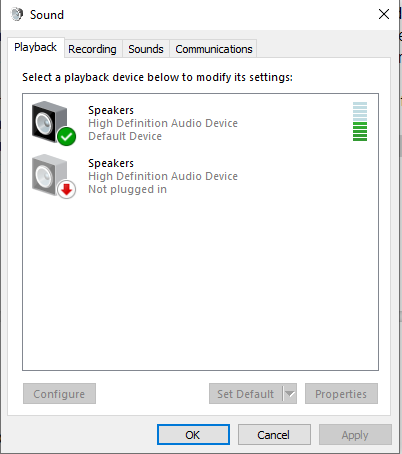
Step 2: Choose Sound and Navigate to the Playback tab.

Step 3: On Default Device, make a right click and choose Properties.
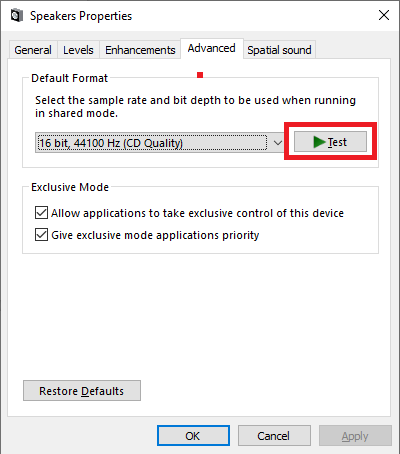
Step 4: From the Advanced tab, under the default format, Change the settings and click on the Test button.
 How To Stop Windows 10 From Crashing When...How to stop your computer from crashing when playing games. Disable programs in the background, update outdated drivers and most...
If this doesn’t work, change the setting again and click Test.
So, these are tips which will help you fix audio issues in Windows 10. In case you have any other solution to resolve the audio issue in Windows 10, then feel free to comment in the section below.